FITTING INSTRUCTIONS FOR
AH ASTRA HEADLAMP PROTECTOR
FD1249
12OCT04
COPYRIGHT
Reproduction in whole or part
prohibited without written approval
HOLDEN LTD
Division of HOLDEN Ltd ACN 006 893 232
Page 1 of 2
TOOLS REQUIRED:
Alcohol Wipes (supplied), Clean Shop Rag, Phillips Head
Screwdriver.
FITTING INSTRUCTIONS:
NOTE: It is recommended that the headlamps are
washed and allowed to dry before starting to fit the
headlamp protectors
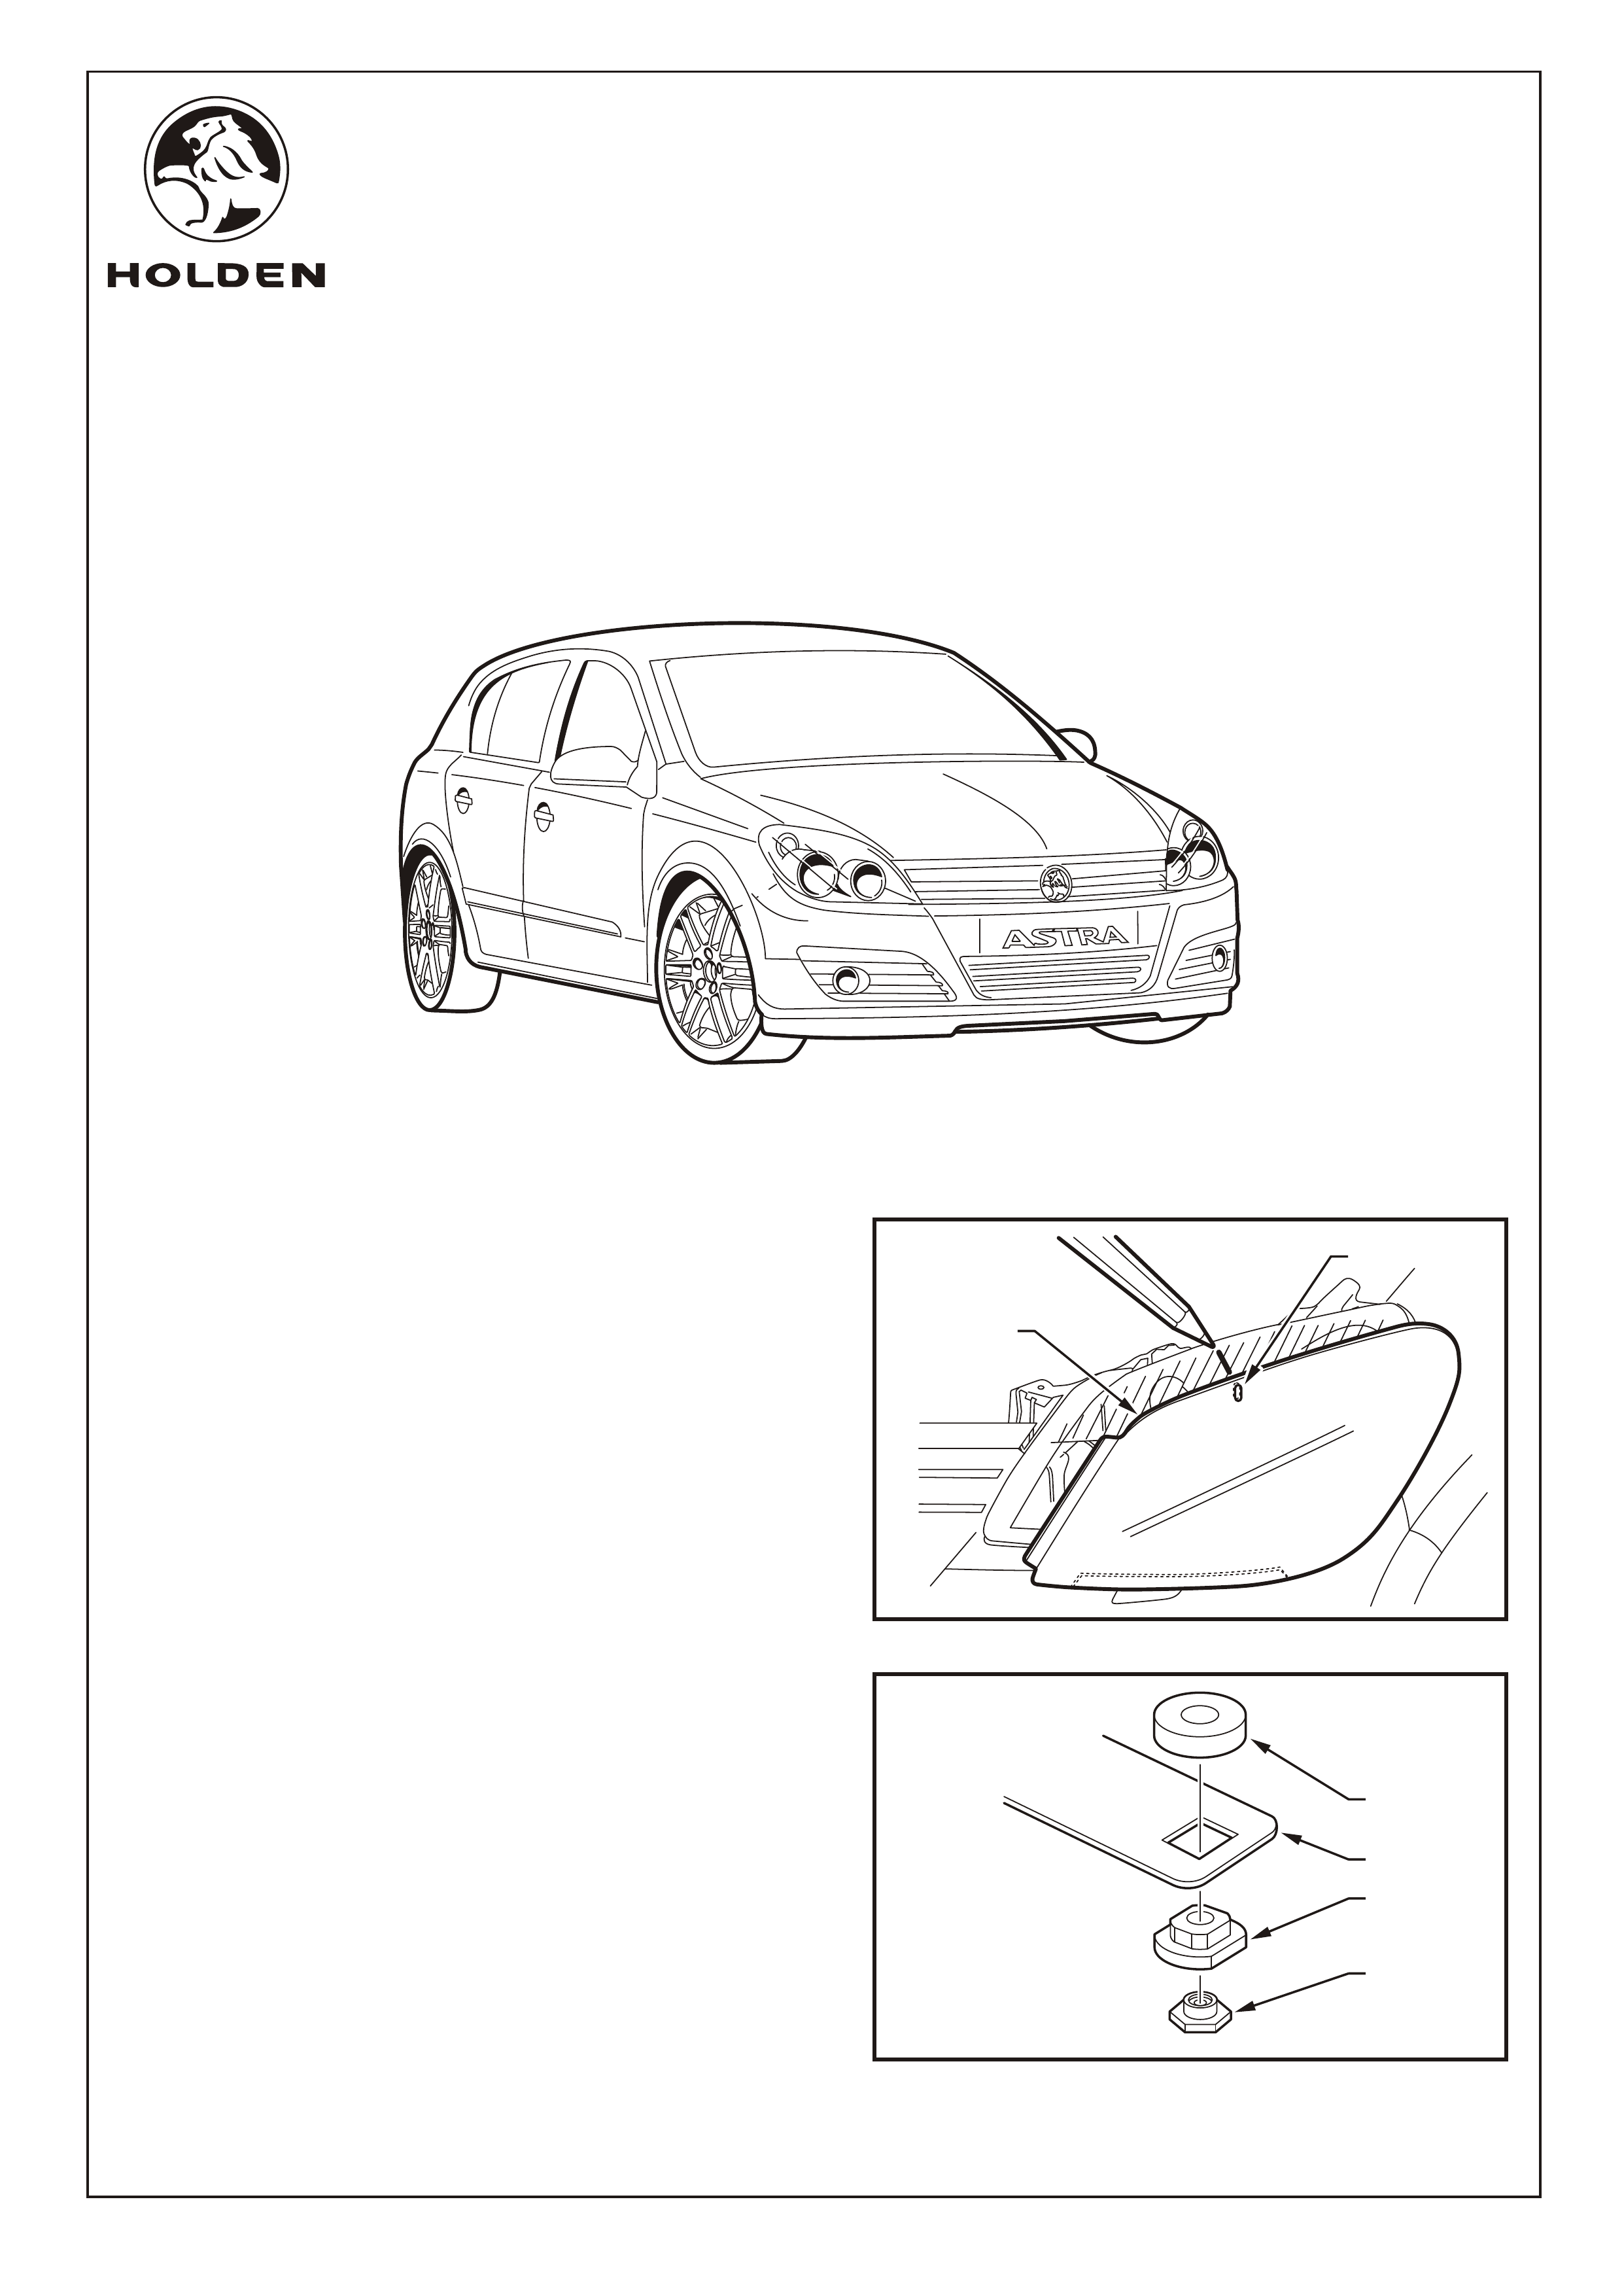
1. Open the bonnet.
2. Place the headlamp protector (1) onto the headlamp.
Use a pencil or felt-tipped maker to mark the position of
the top hole (2) and then remove headlamp protector.
Refer to Figure 1.
3. Into the metal clip (1), place the top fastener (2), the
lower fastener (3) and brass nut (4). Refer to Figure 2.
FIGURE 1
Part No. 92148338
2
FIGURE 2
1
1
3
4
2
FITTING INSTRUCTIONS FOR
AH ASTRA HEADLAMP PROTECTOR
FD1249
12OCT04
COPYRIGHT
Reproduction in whole or part
prohibited without written approval
HOLDEN LTD
Division of HOLDEN Ltd ACN 006 893 232
PARTS LIST
PART NUMBER DESCRIPTION QUANTITY
92148338 HEADLAMP PROTECTORS 2
METAL CLIP 2
SCREW 2
WASHER 2
BRASS NUT 2
PLASTIC FASTENER 2
ABRASIVE RESISTANT TAPE 2
ALCOHOL WIPE 1
FD1249 FITTING INSTRUCTIONS 1
FD796 PROOF OF WARRANTY CARD 1
Page 2 of 2
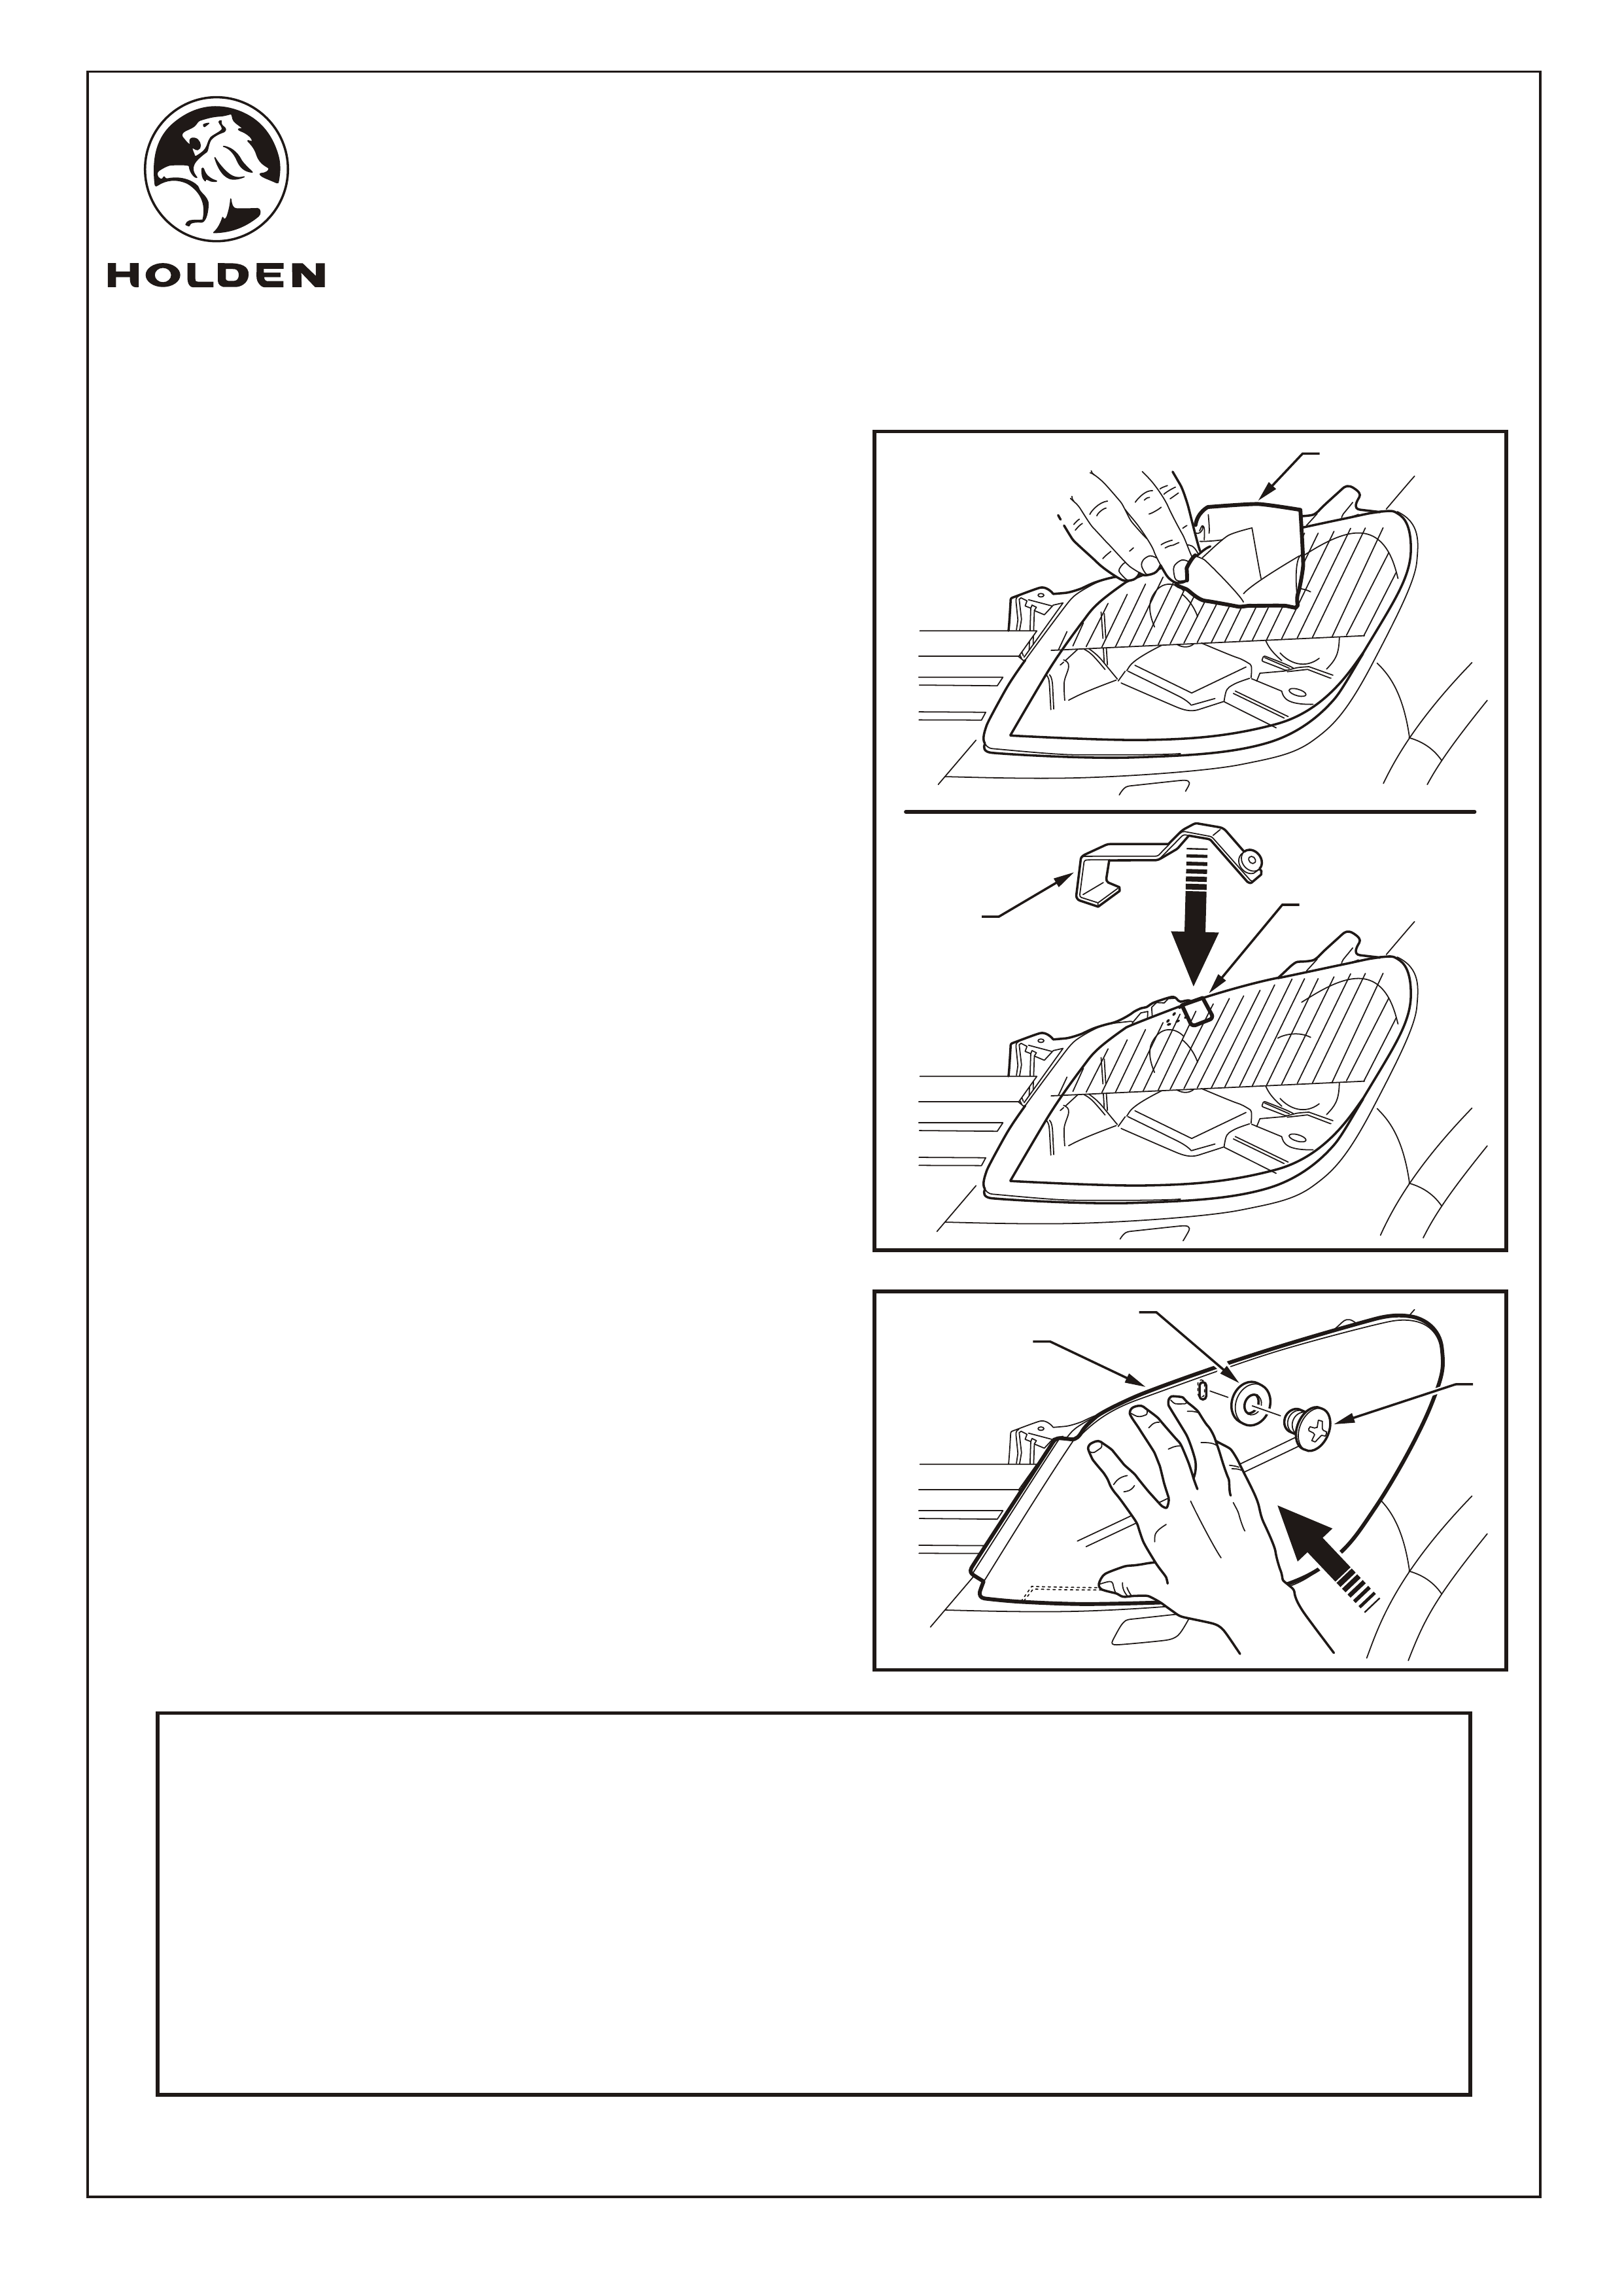
FIGURE 3
FITTING INSTRUCTIONS: - continued...
Refer to Figure 3 for the following:
11. Place the fitting instructions in the glovebox.
4. Trial fit the metal clip (1) on the headlamp and take note
where the clip contacts the headlamp lens.
5. Clean the contact area with the alcohol wipe provided
(2) and remove any residue with a dry clean cloth.
6. Attach abrasive resistant tape (3) on the headlamp lens
at the previously marked clip contact area.
7. Fit the metal clip (1) and ensure that the clip rests over
the abrasive resistant tape (3) and not the headlamp
lens.
Refer to Figure 4 for the following:
8. Fit the headlamp protector (1) by placing the side and
bottom tags of the headlamp protector onto the
headlamp lens.
9. Secure the headlamp protector (1) to metal clip (4) with a
screw (2) and washer (3).
10. Repeat the procedure for the other headlamp.
FIGURE 4
1
1
2
3
3
2