FITTING INSTRUCTIONS FOR
AH ASTRA WEATHERSHIELD
FD1251
28SEP04
COPYRIGHT
Reproduction in whole or part
prohibited without written approval
HOLDEN LTD
Division of HOLDEN Ltd ACN 006 893 232
Part No. 92148340 RHS
92148341 LHS
Page 1 of 4
TOOLS REQUIRED:
Alcohol Wipes (supplied), Clean Shop Rag.
FITTING INSTRUCTIONS:
NOTE: It is recommended that the vehicle is washed
and allowed to dry before commencing fitment of the
weathershield.
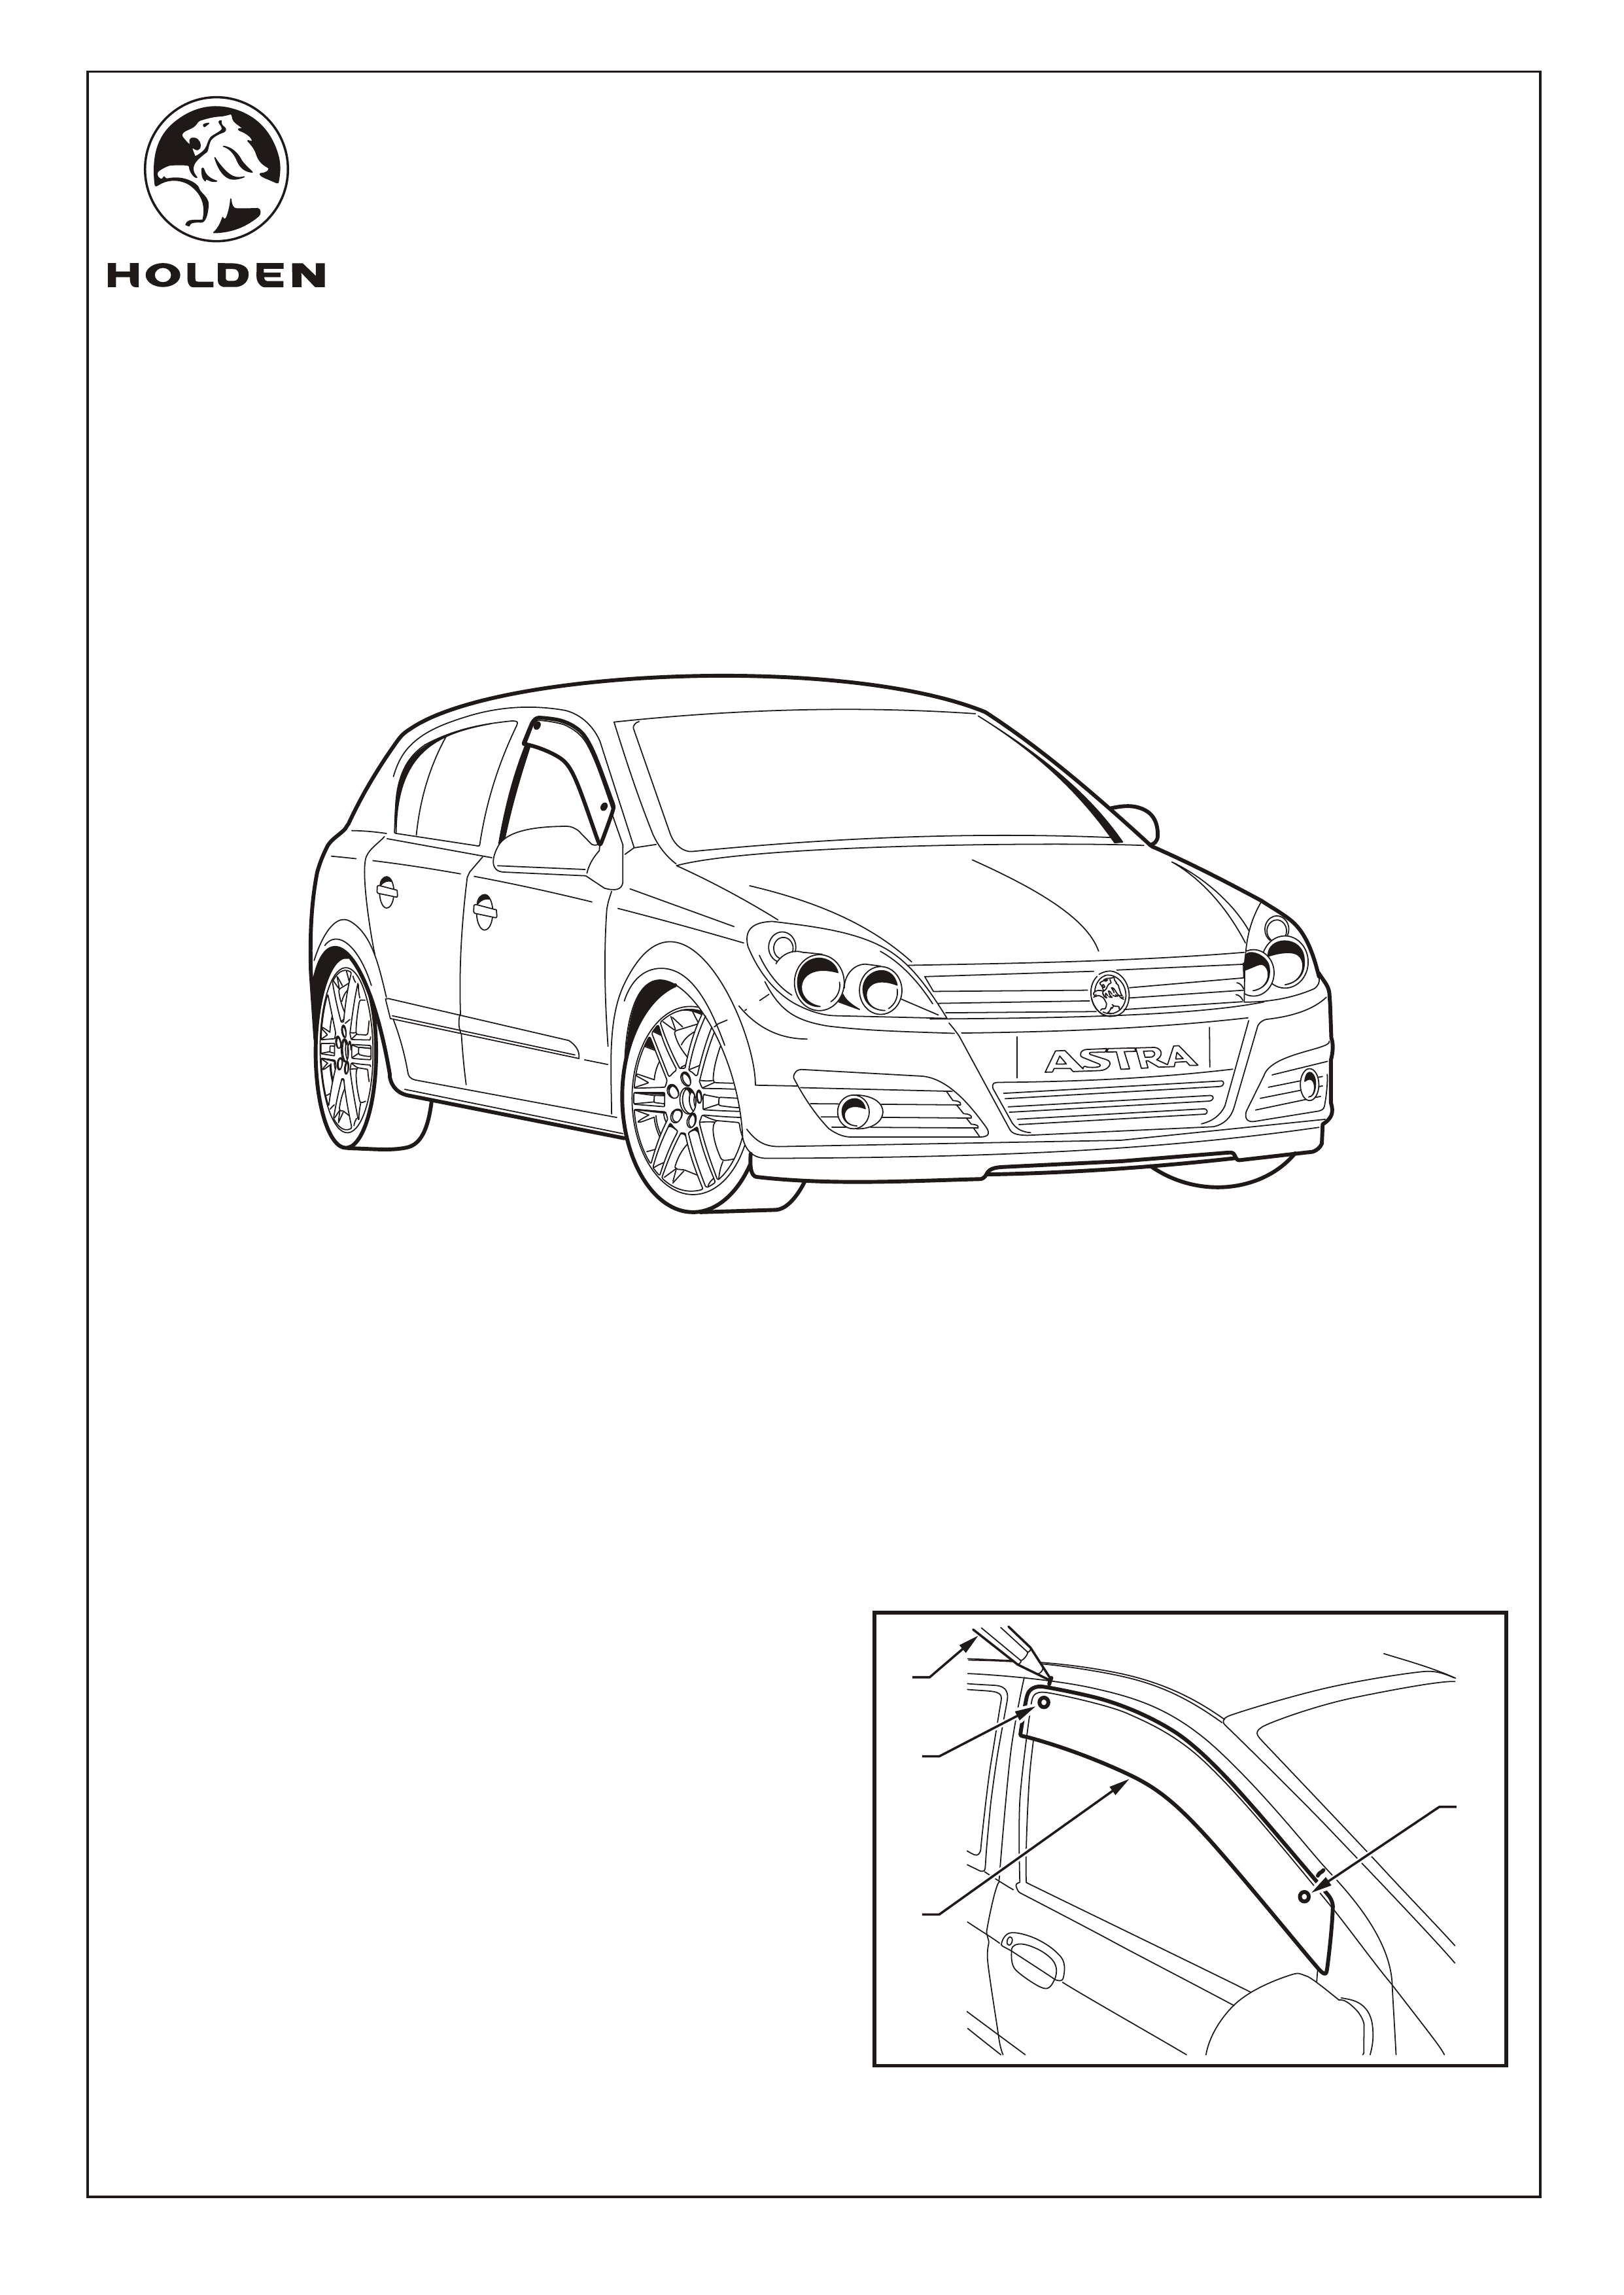
1. Trial fit the weathershield (1) onto the door. Mark the
positions of clip hole centres (2) onto the door edge and
rubber seal with felt-pen or pencil (3). Refer to Figure 1.
FIGURE 1
2
2
3
1

FITTING INSTRUCTIONS FOR
AH ASTRA WEATHERSHIELD
FD1251
28SEP04
COPYRIGHT
Reproduction in whole or part
prohibited without written approval
HOLDEN LTD
Division of HOLDEN Ltd ACN 006 893 232
FITTING INSTRUCTIONS: - continued...
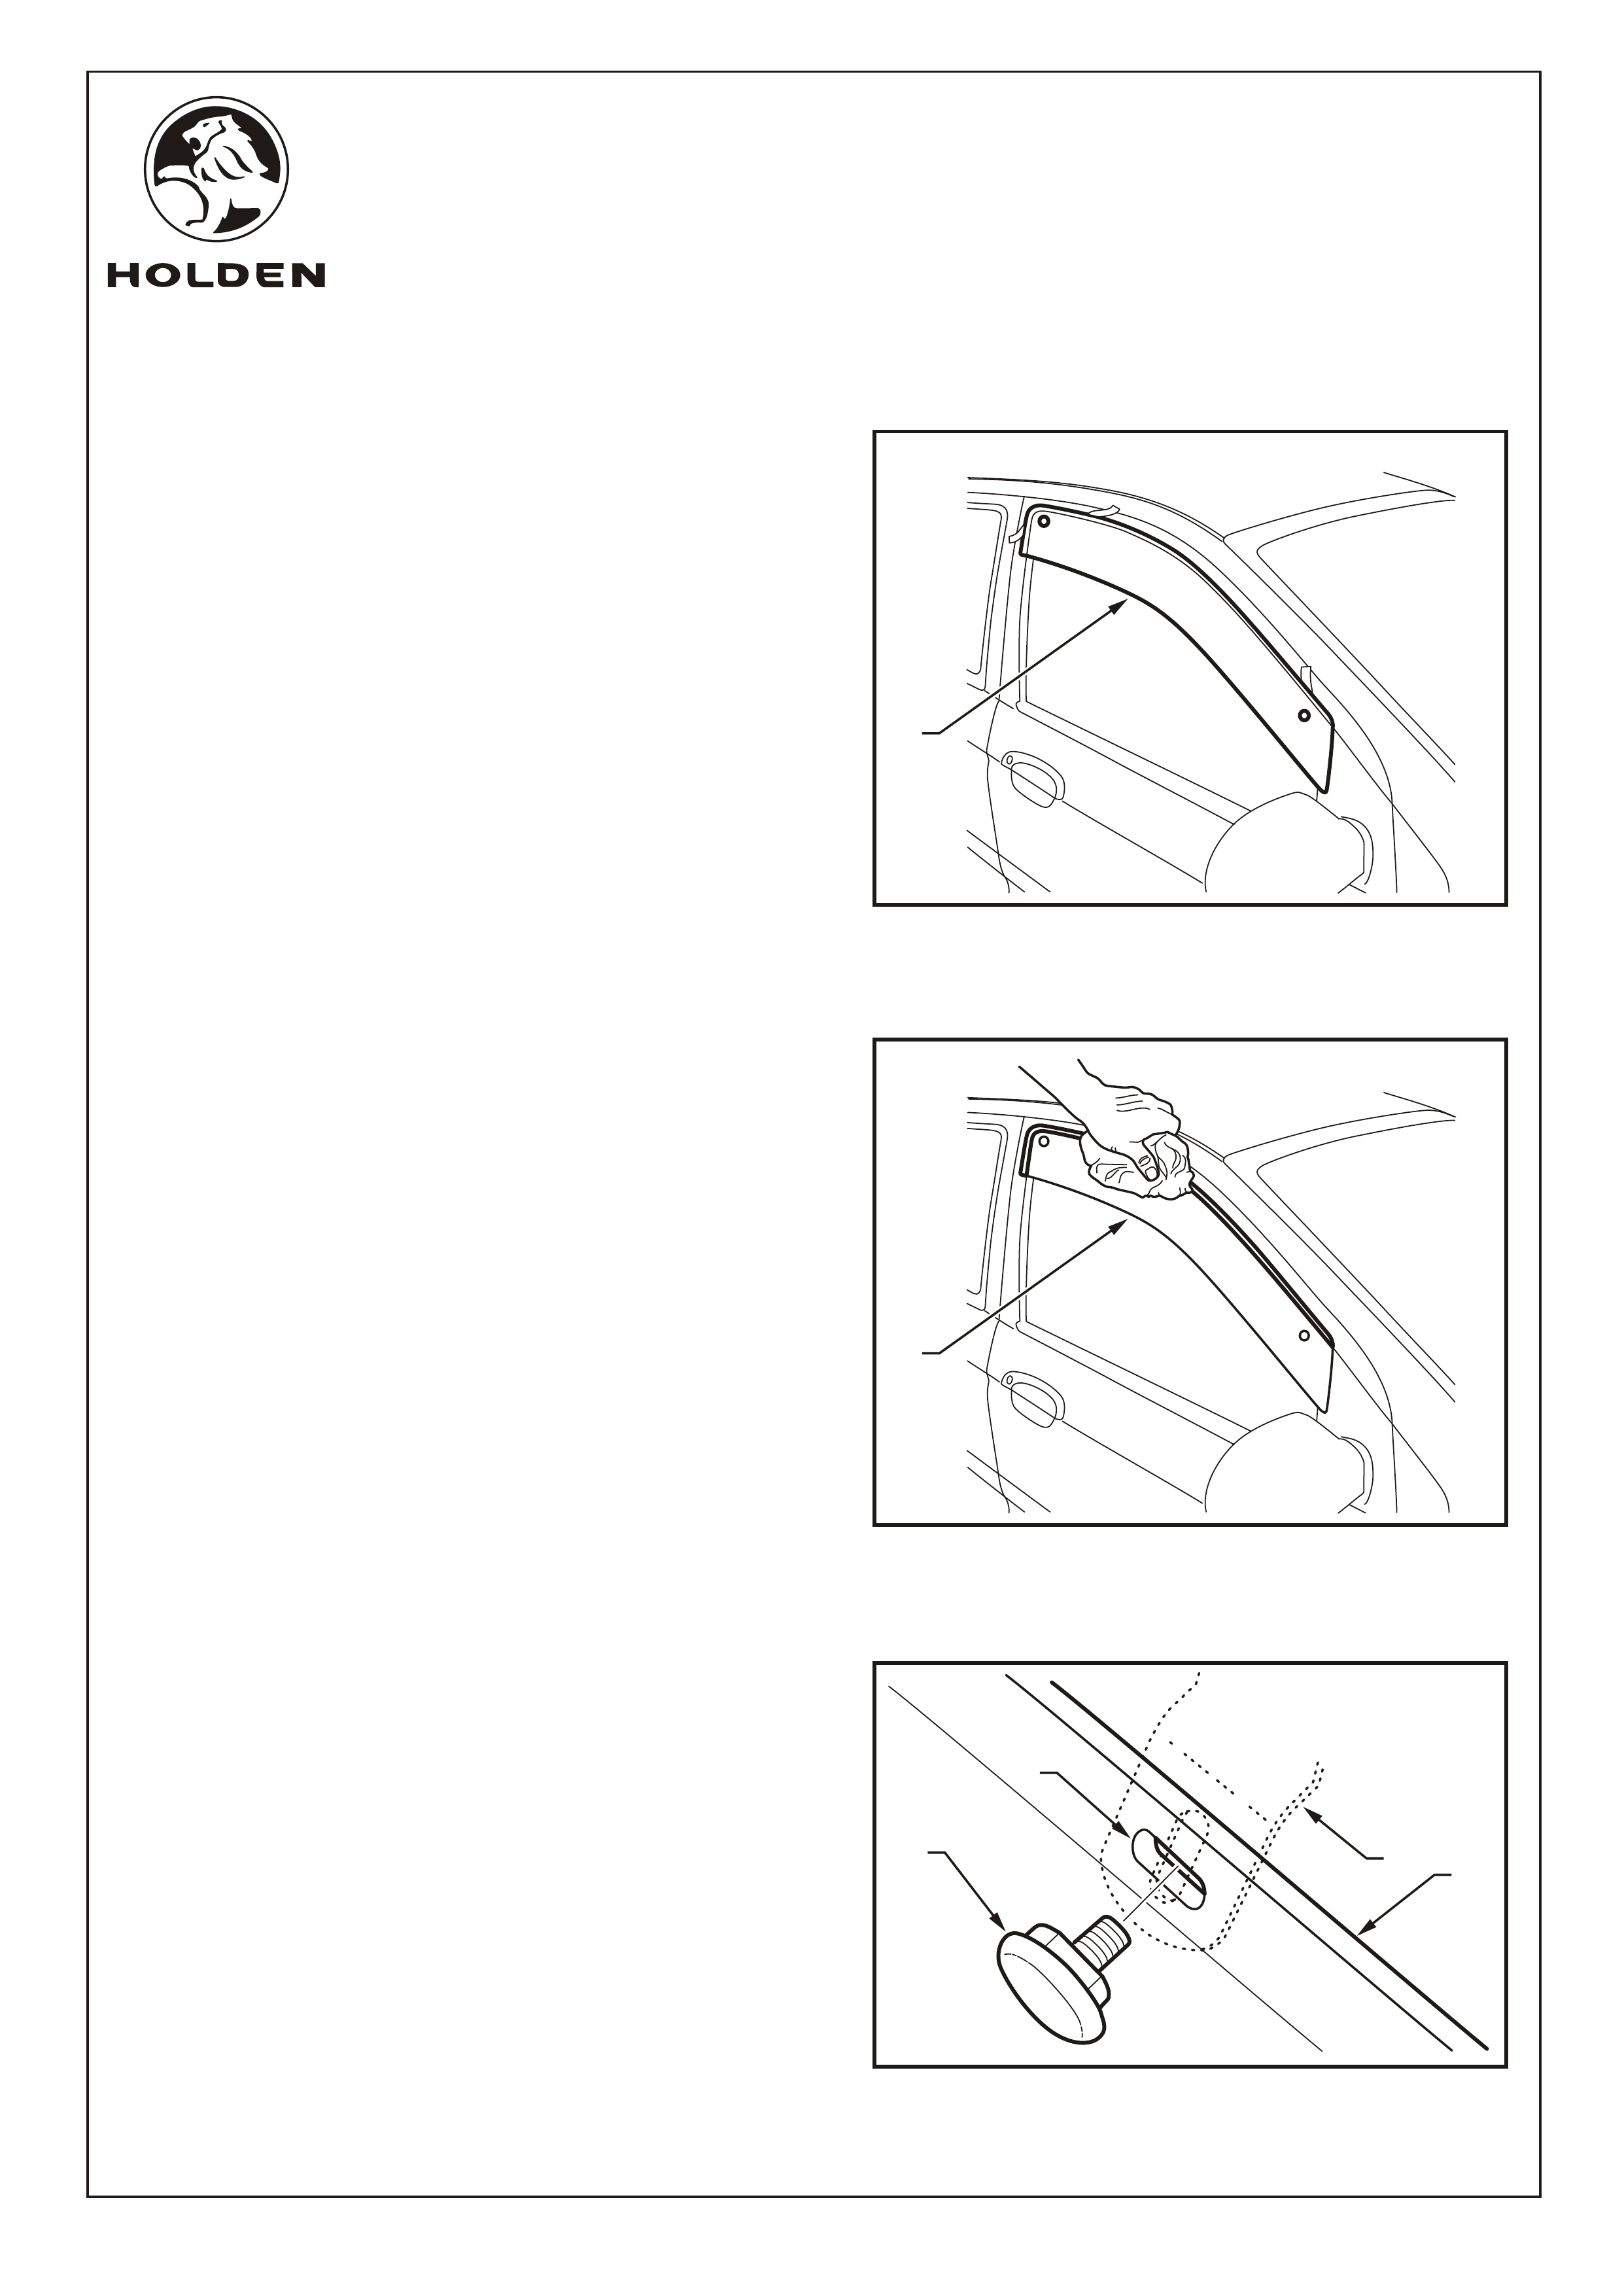
2. Note the areas on the door where adhesive tape
contacts the surface. Remove the weathershield and
clean these areas thoroughly with the alcohol wipe (1)
provided. Remove any residue with a dry clean cloth.
Refer to Figure 2.
3. Locate the metal clips (1) between the rubber window
seal (2) and the door frame (3) at the previously marked
positions. Refer to Figure 3.
4. Peel approximately 50mm of tape liner (1) from both
ends of the adhesive strip. Fold the tape liner at 45°.
Refer to Figure 4.
FIGURE 2
FIGURE 3
1
A-A
SECTION
A
A
|
|
1
2
3
Page 2 of 4
1
FIGURE 4
A
45°
1
1
1
VIEW A
FITTING INSTRUCTIONS FOR
AH ASTRA WEATHERSHIELD
FD1251
28SEP04
COPYRIGHT
Reproduction in whole or part
prohibited without written approval
HOLDEN LTD
Division of HOLDEN Ltd ACN 006 893 232
FITTING INSTRUCTIONS: - continued...
5. Place the weathershield (1) onto the door ensuring that
the lower and front edges are firmly seated and the
weathershield is correctly positioned from the outer door
frame edge. Refer to Figure 5.
6. Remove the tape backing from the tape sections along
the weathershield. Using a clean soft cloth, rub down
firmly around attachment area a minumum of four
times to ensure maximum adhesion of the tape. Refer
to Figure 6.
7. Attach the plastic screw fixing (1) into the slot (2) in
the weathershield (3). The screw fixing should also
locate through previously attached clips (4). Refer to
Figure 7.
FIGURE 5
FIGURE 6
Page 3 of 4
1
1
FIGURE 7
13
2
4
FITTING INSTRUCTIONS FOR
AH ASTRA WEATHERSHIELD
FD1251
28SEP04
COPYRIGHT
Reproduction in whole or part
prohibited without written approval
HOLDEN LTD
Division of HOLDEN Ltd ACN 006 893 232
Page 4 of 4
FITTING INSTRUCTIONS: - continued...
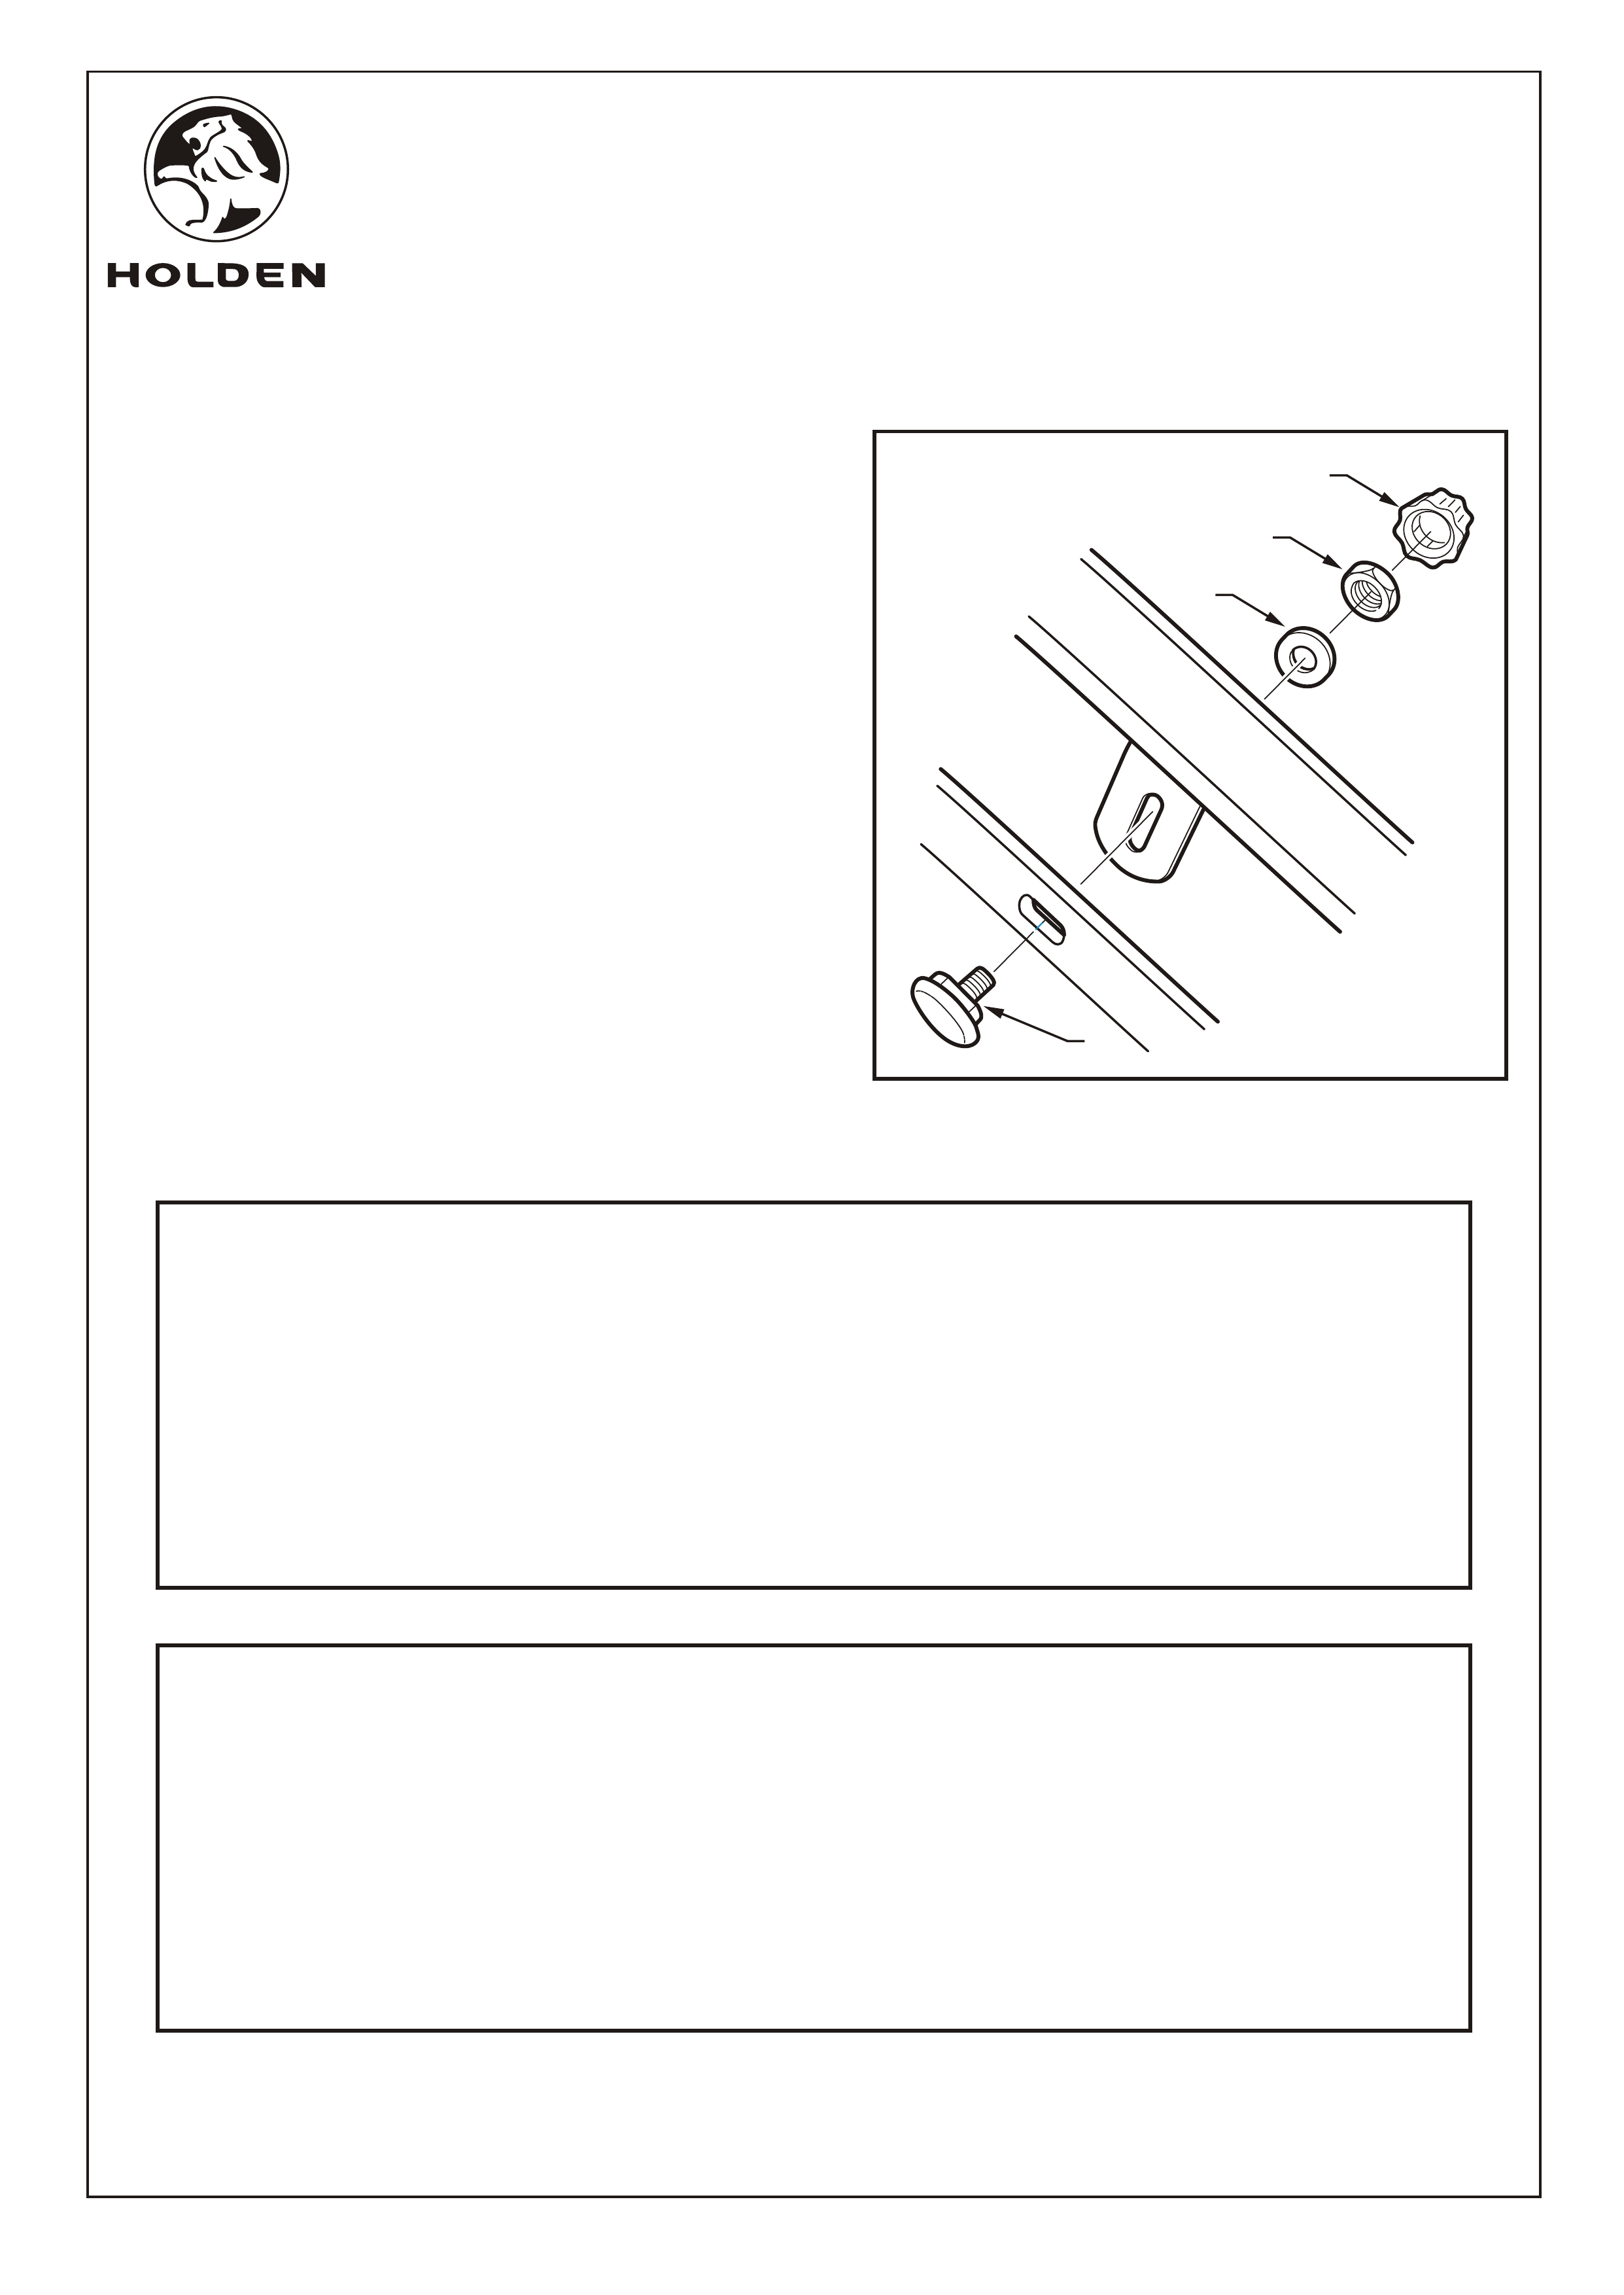
8. Place the washer (1) onto the plastic fixing screw (2).
Insert the hex nut (3) into the fitment tool (4). Using the
fitment tool, fasten the hex nut to the plastic fixing screw.
Refer to Figure 8.
10. Place the fitting installation and the fitment tool in the
glovebox for future use.
FIGURE 8
3
4
1
2
PARTS LIST
PART NUMBER DESCRIPTION QUANTITY
92148341 LHS WEATHERSHIELD 1
92145313 SMALL PARTS KIT 1
METAL CLIP 2
SCREW 2
NUT 2
WASHER 2
ALCOHOL WIPE 1
FITMENT TOOL 1
FD1251 FITTING INSTRUCTIONS 1
FD796 PROOF OF WARRANTY CARD 1
PARTS LIST
PART NUMBER DESCRIPTION QUANTITY
92145313 SMALL PARTS KIT 1
METAL CLIP 2
SCREW 2
NUT 2
WASHER 2
ALCOHOL WIPE 1
FITMENT TOOL 1
FD1251 FITTING INSTRUCTIONS 1
FD796 PROOF OF WARRANTY CARD 1
92148340 RHS WEATHERSHIELD 1