FITTING INSTRUCTIONS FOR
AH ASTRA
TRAILER HARNESS
FD1255
09NOV
COPYRIGHT
Reproduction in whole or part
prohibited without written approval
HOLDEN LTD
Division of HOLDEN Ltd ACN 006 893 232
Page 1 of 3
Part No. 92148256
TOOLS REQUIRED:
Torx Bit No.25, Trim Release Tool.
FITTING INSTRUCTIONS FOR
AH ASTRA
TRAILER HARNESS
FD1255
09NOV
COPYRIGHT
Reproduction in whole or part
prohibited without written approval
HOLDEN LTD
Division of HOLDEN Ltd ACN 006 893 232
Page 2 of 3
FITTING INSTRUCTIONS:
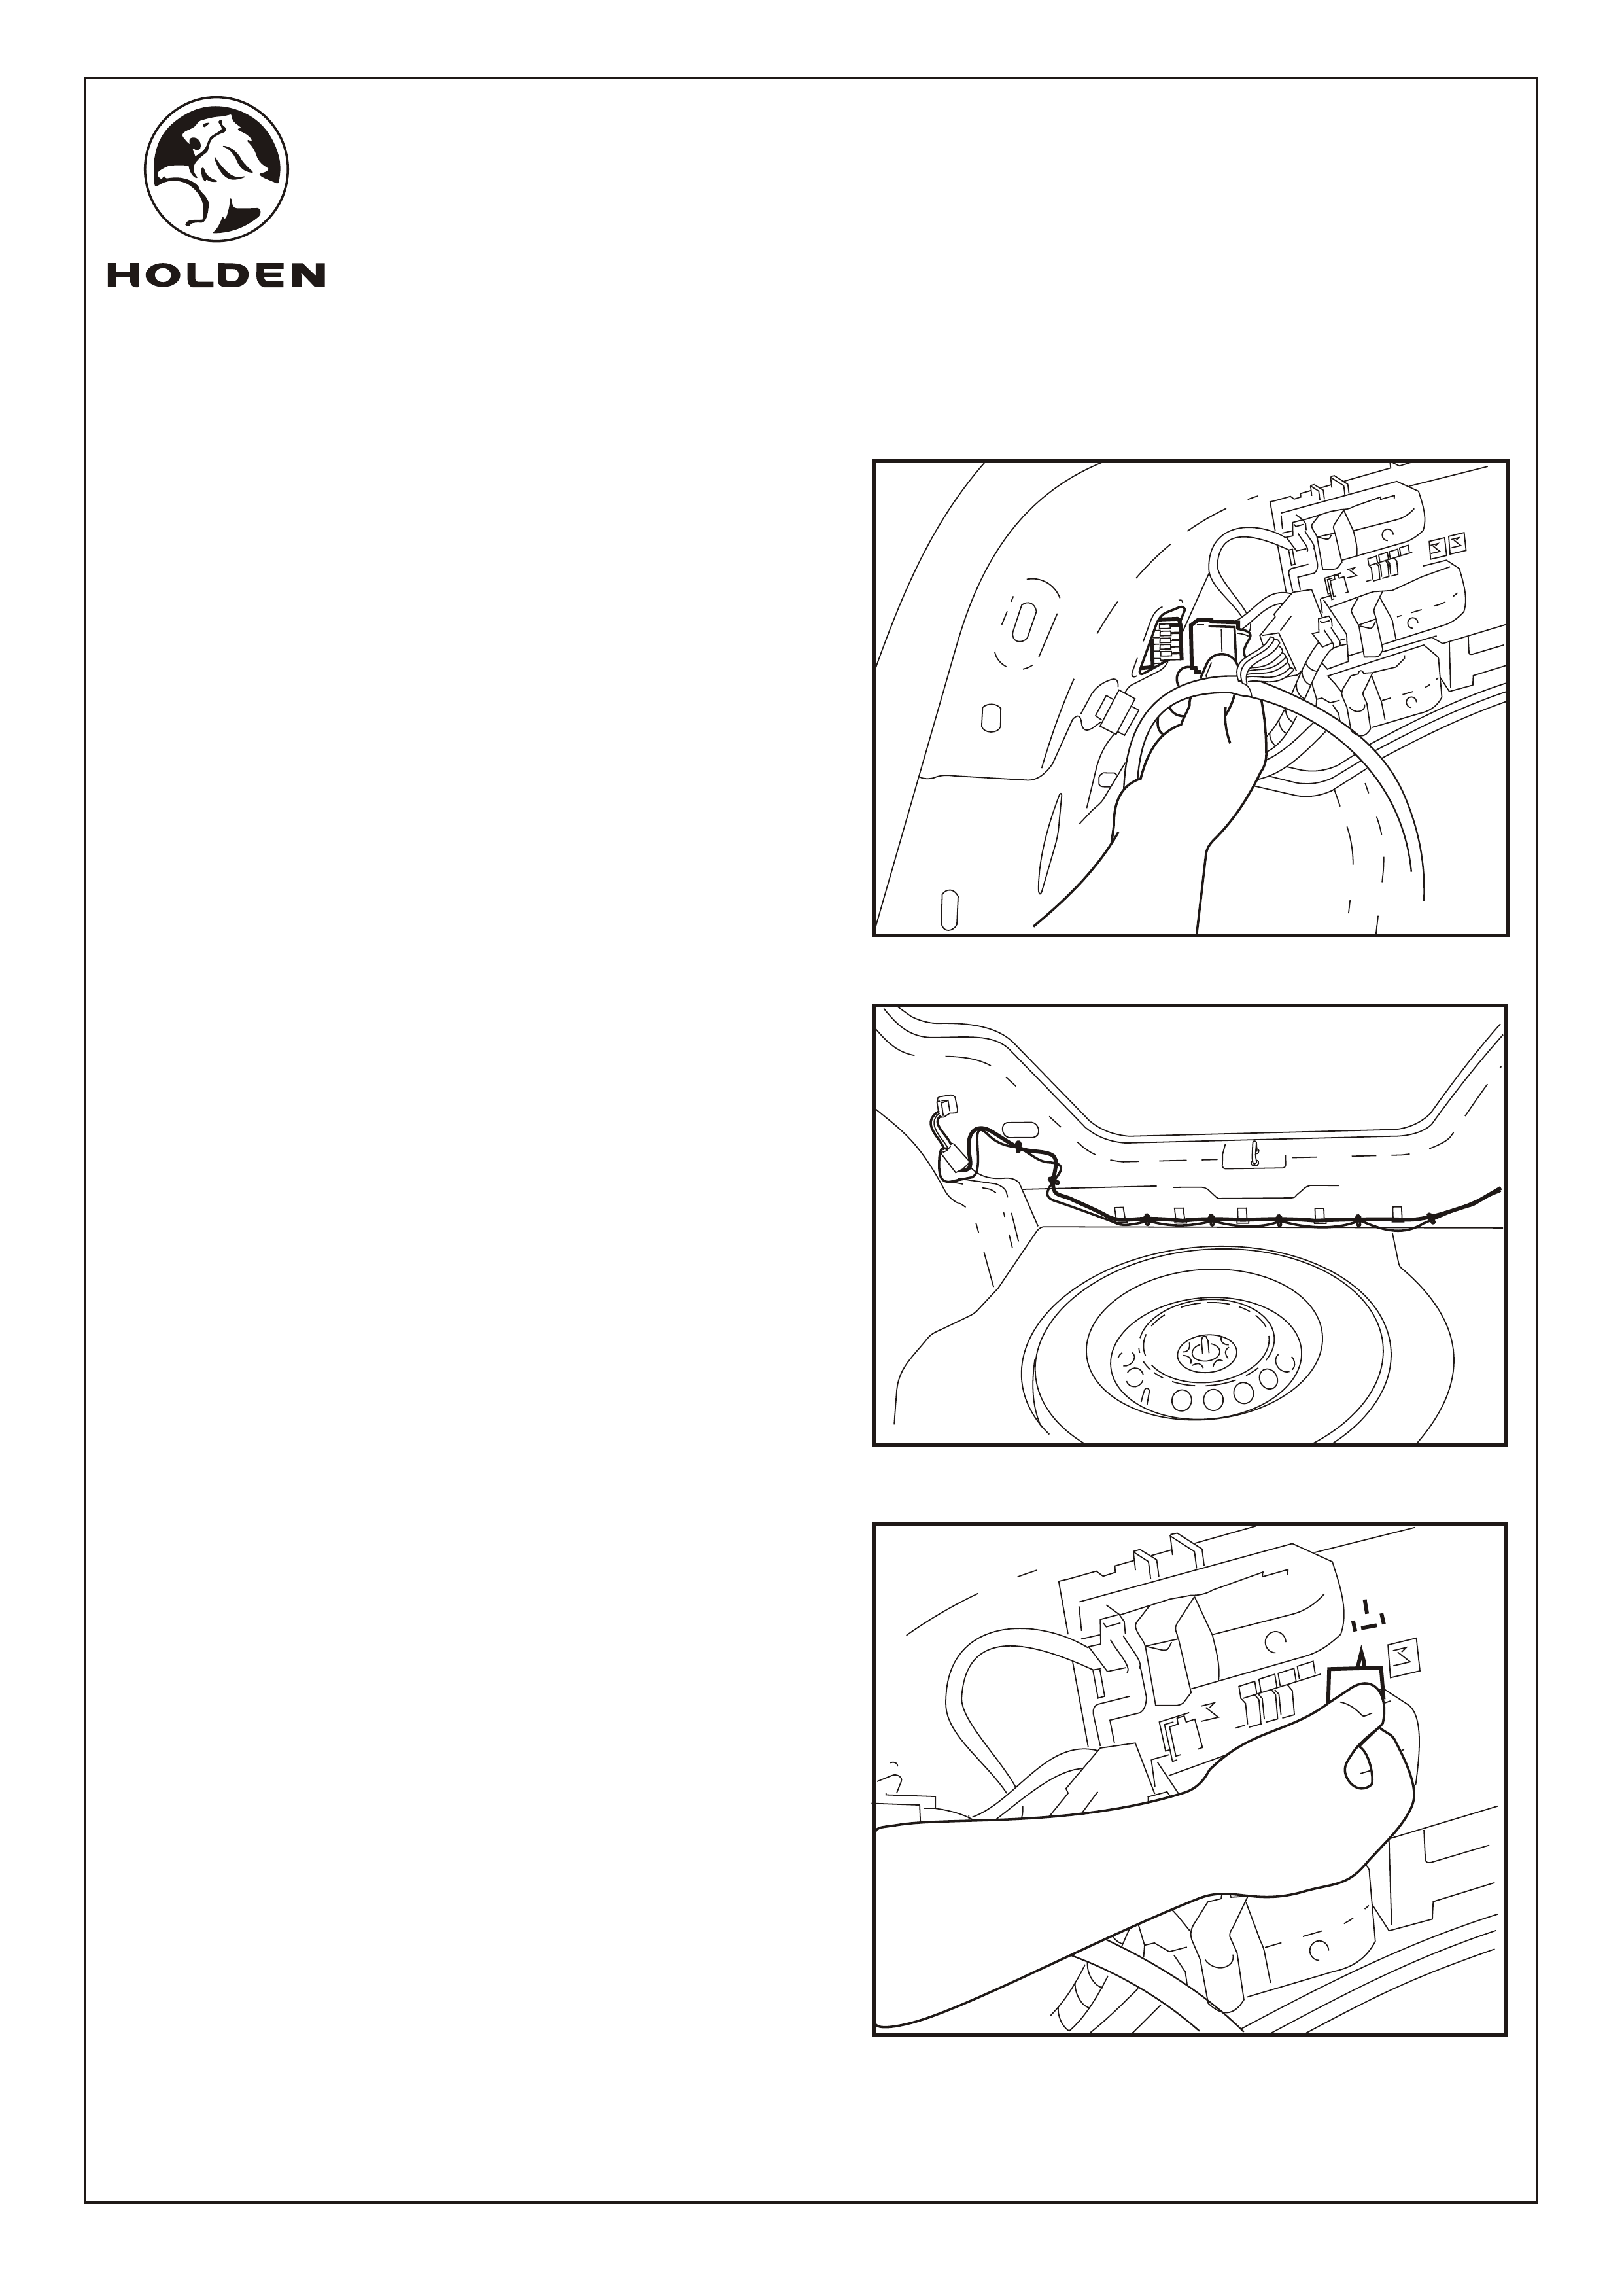
Refer to Figure 1 for the follow:
1. When fitting the trailer harness, follow steps 1 through 8
of the tow bar fitting instruction to access the required
areas of the vehicle for fitting the trailer harness.
2. Unravel the trailer harness patch lead and identify the
patch connections. Disconnect the LHS rear light cluster
connector and connect the trailer harness patch
connector to the light cluster and body harness
connector.
3. Run the harness to the RHS of the vehicle and repeat
the process described in step 2 on the RHS rear light
cluster.
4. Cable tie the patch harness wire to the vehicle body
harness in the positions where the body harness is fixed
to the vehicle body. Refer to Figure 2.
5. Connect the relay connection into the rear electrical
centre at position K1. Cable tie harness as required.
Refer to Figure 3.
FIGURE 3
FIGURE 1
FIGURE 2
FITTING INSTRUCTIONS FOR
AH ASTRA
TRAILER HARNESS
FD1255
09NOV
COPYRIGHT
Reproduction in whole or part
prohibited without written approval
HOLDEN LTD
Division of HOLDEN Ltd ACN 006 893 232
FITTING INSTRUCTIONS: - continued...
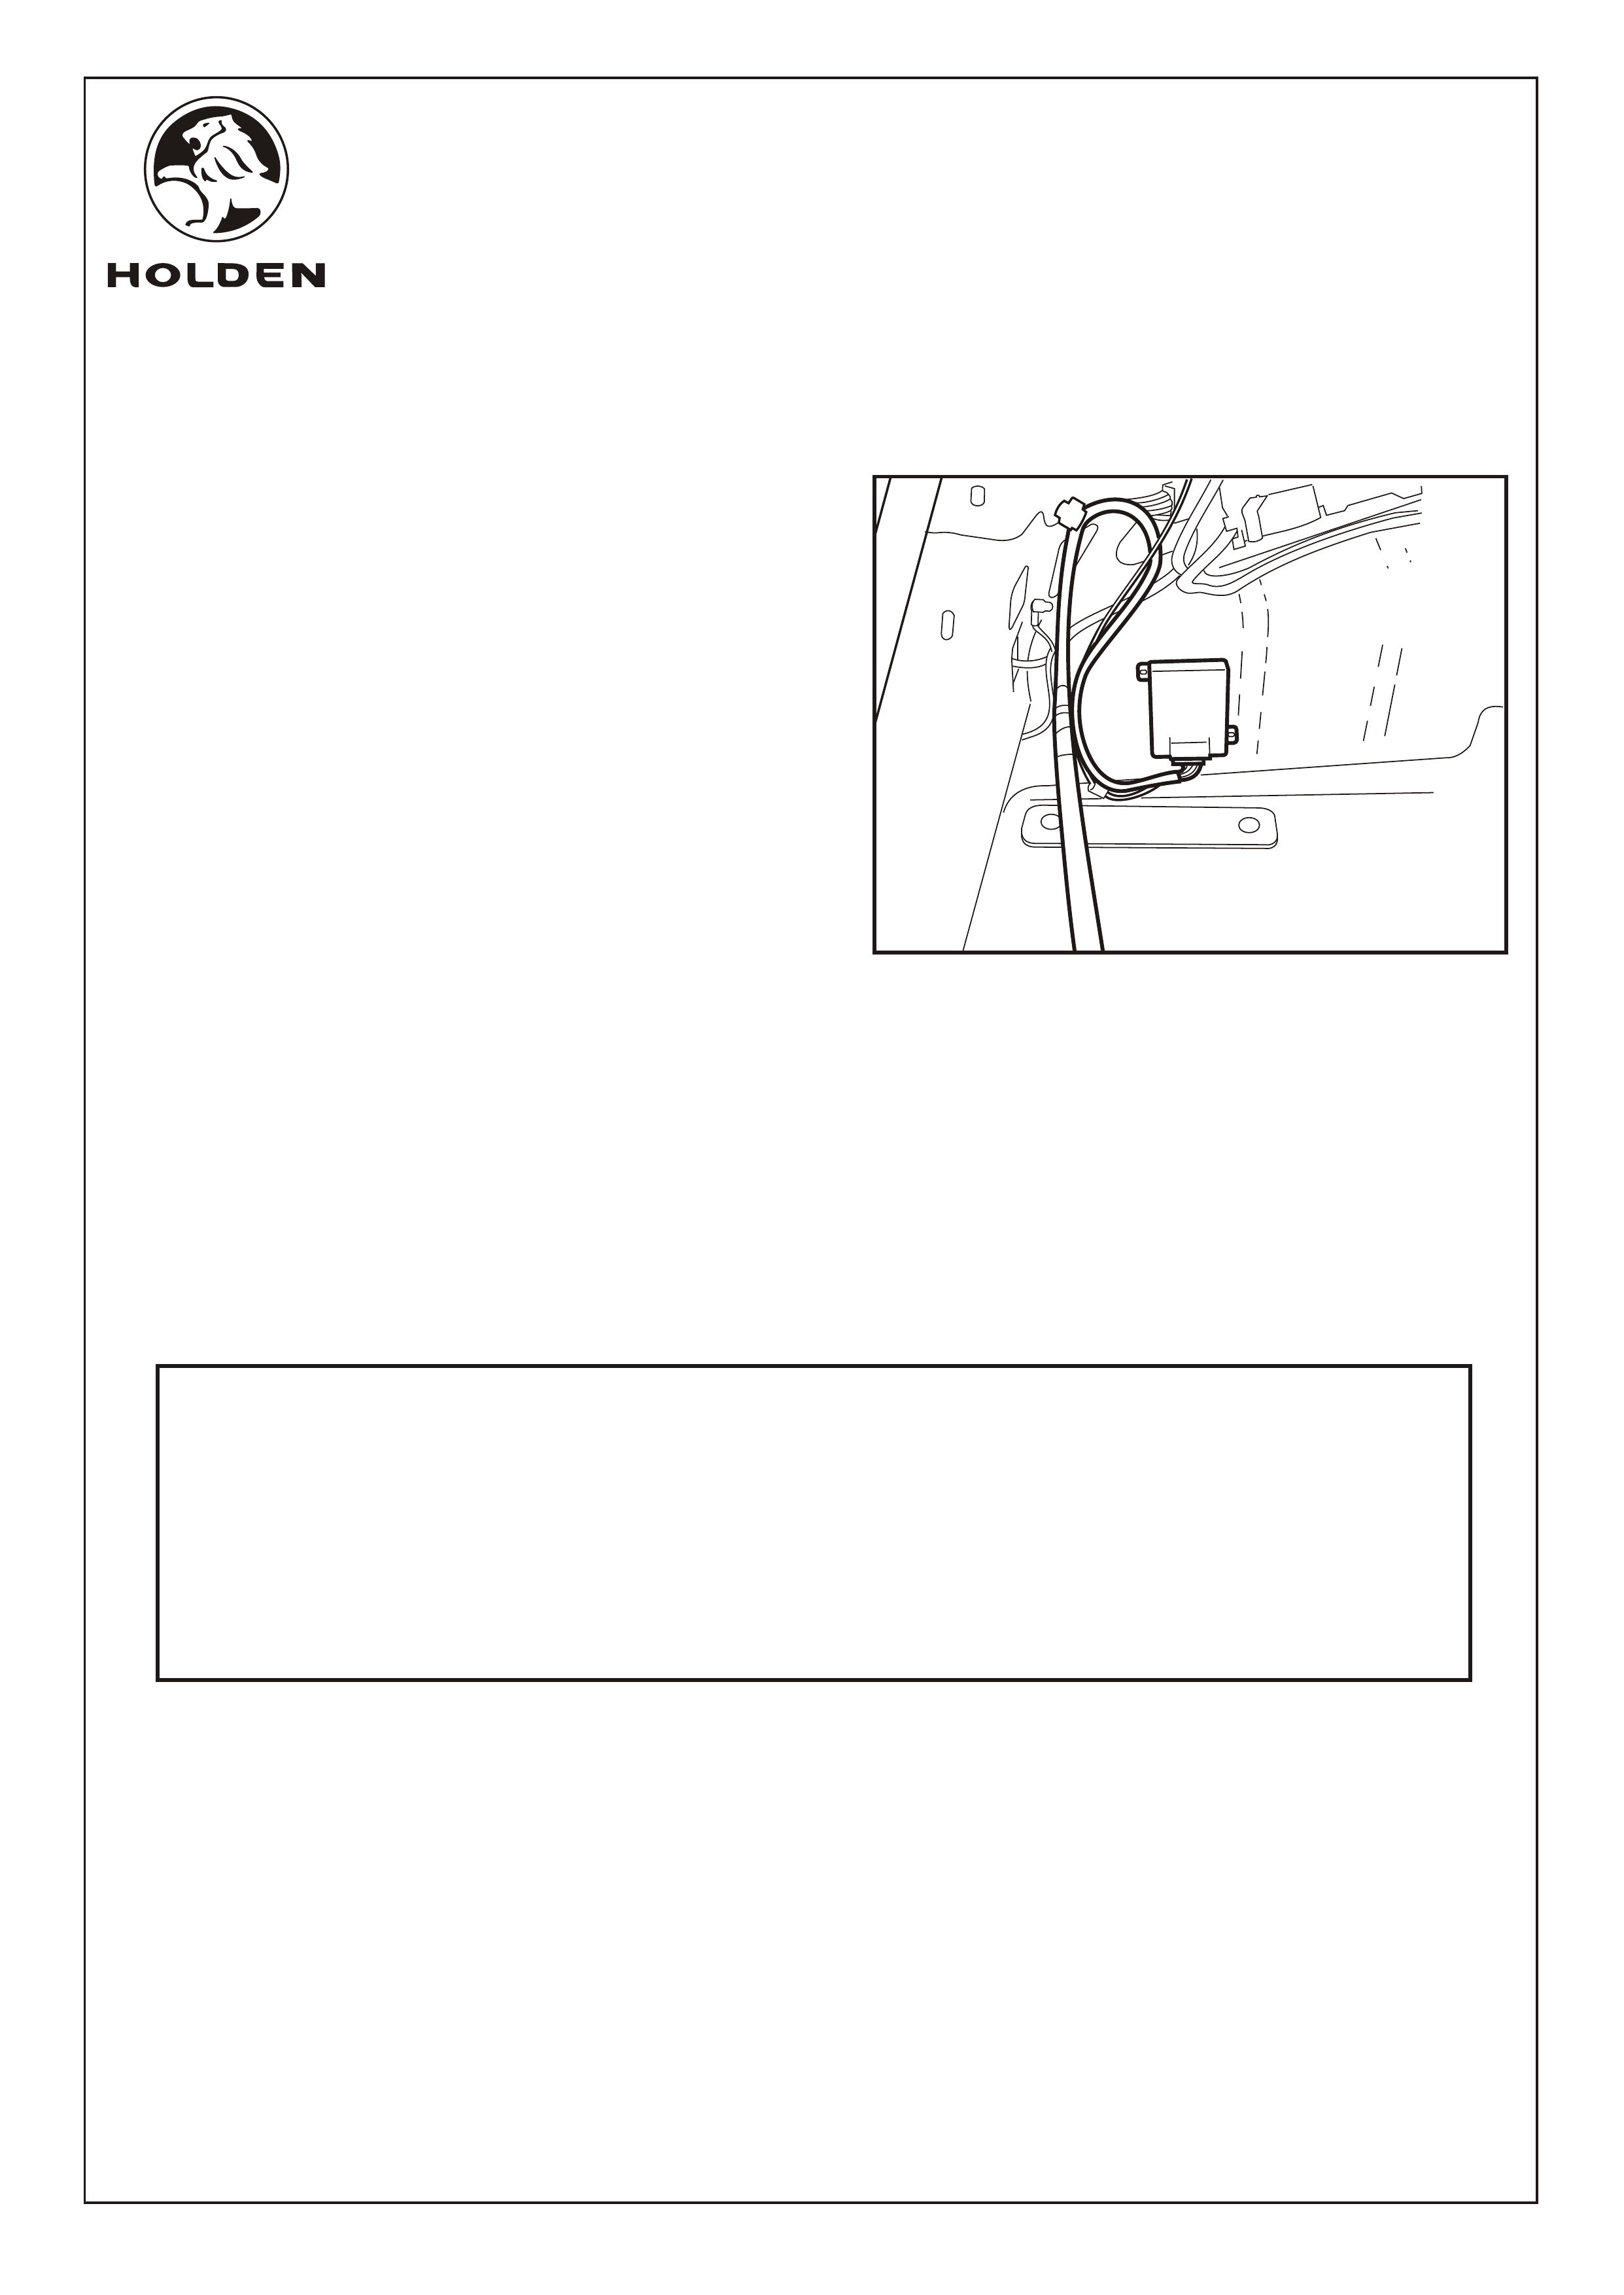
Refer to Figure 4 for the following:
6. Connect the trailer harness control unit to the trailer
harness; trial fit the box to the inner skin of the rear
wheel arch with the connector facing down.
7. Use the cleaning pad supplied to clean the area of the
wheel arch where the control box will be fitted and the
back face of the control box.
8. Remove the backing tape from the nylon hook side of
the Velcro patch and stick to the control box.
9. Remove the backing tape from the other side of the
Velcro patch and stick firmly in place on the vehicle
wheel arch.
10. Refit all parts removed in reverse order.
11. Place fitting instructions in the glovebox.
Page 3 of 3
FIGURE 4
PARTS LIST
PART NUMBER DESCRIPTION QUANTITY
92148256 TRAILER WIRING HARNESS 1
CLEANING PAD 1
VELCRO PAD 1
CABLE TIES 12
FD 1255 FITTING INSTRUCTIONS 1
FD796 PROOF OF WARRANTY CARD. 1