
10 CD Stacker Installation Guide
Eurovox Kit: 92117207 Page 1 of 2
2002 JACKAROO
KIT CONTENTS:
ITEM EUROVOX PART NUMBER
1. 10 DISC CD CHANGER 1050
2. CD MOUNTING BRACKET BMG12
3. CD LEAD 420-0119-0000
EXTRAS:
2 – 8g x 1½” SELF TAPPING SCREW 4 – M4 x 10mm CD SCREW ASSEMBLY
2 - M5 x 12mm RHMT, M5 FLAT WASHER, M5 NUT 1050 MAGAZINE
INSTALLATION PROCEDURES:
REMOVE RADIO
1. Remove centre console (4 screws).
2. Remove radio surround (3 screws and clips).
3. Remove 2 screws securing right hand dash panel.
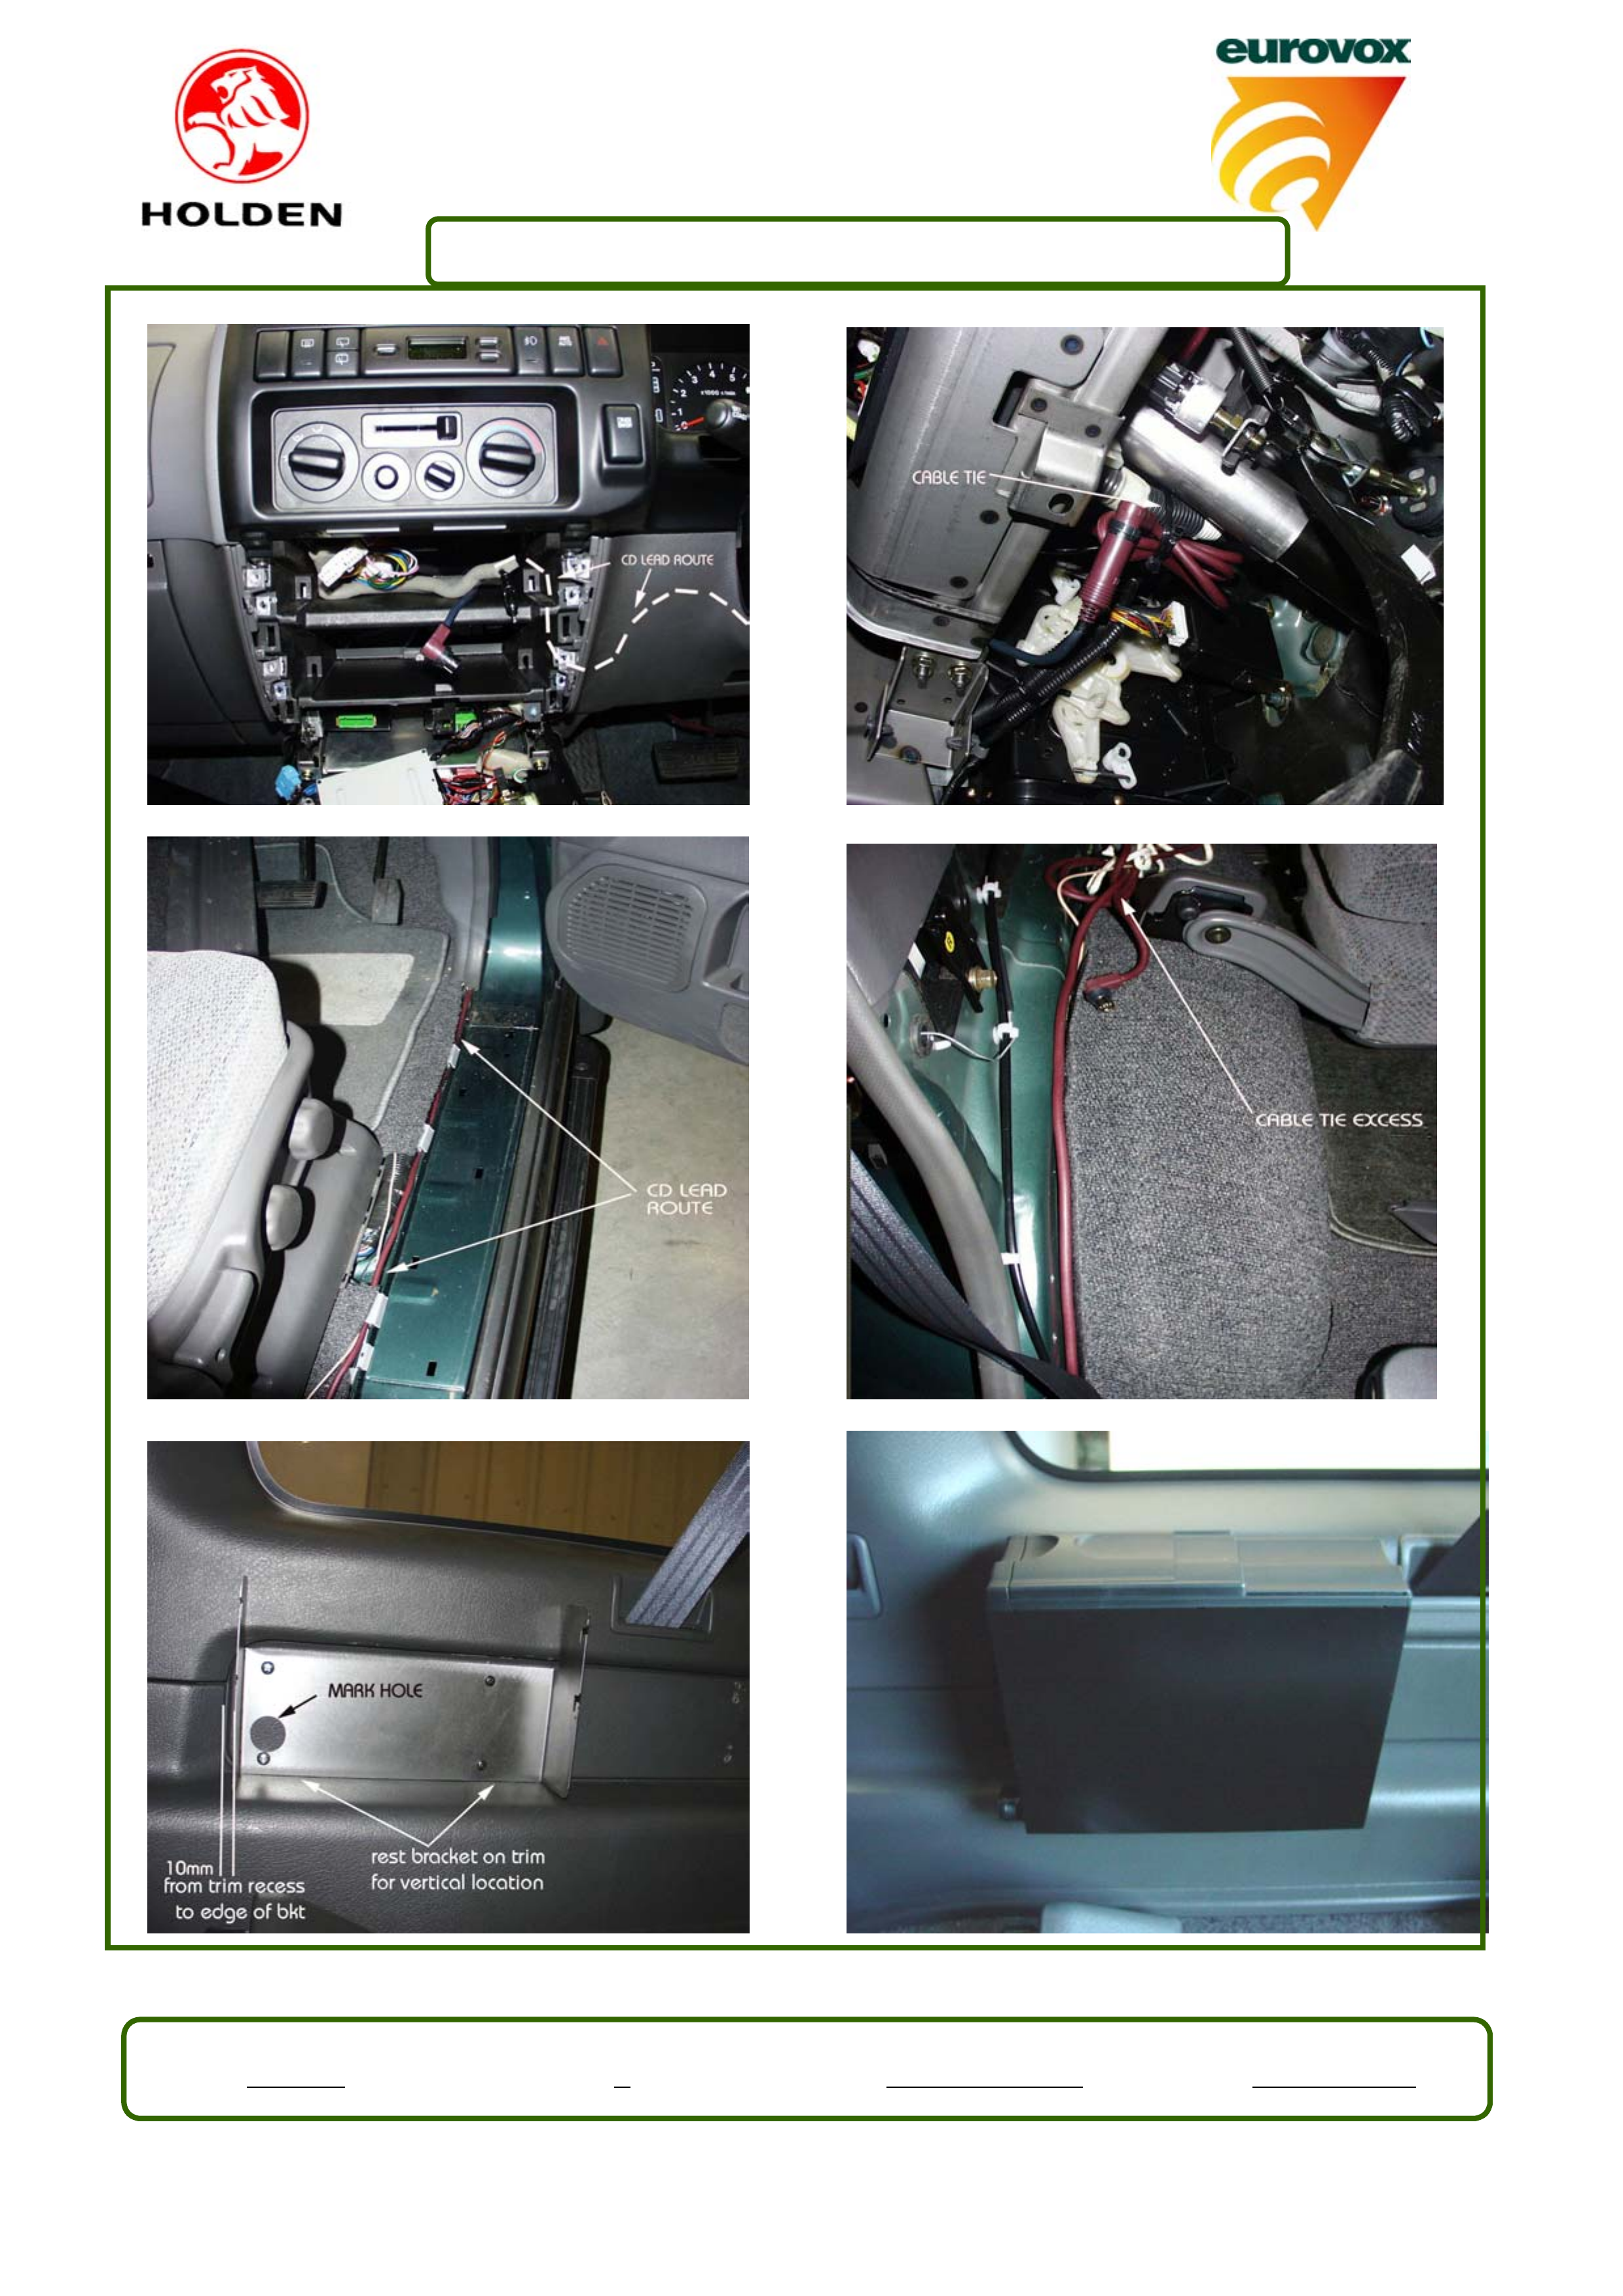
4. Remove 2 screws securing radio mounting brackets and lift unit forward [Fig 1].
5. Route CD to steering column and refit radio.
6. Refit surround and console.
7. Connect CD lead to radio CD extension and cable tie to bracket [Fig 2].
8. Remove drivers side kick trim, front and rear floor sill panels and rear luggage compartment side panel.
9. Route lead to driver’s side kick trim and continue along door sill to rear luggage compartment [Figs 3 & 4].
10. With luggage compartment side panel removed, place mounting bracket into position and mark 4 mounting
holes and large hole. Drill 4 X 6mm holes for mounting holes and 1 X 25mm hole [Fig 5].
11. Mount bracket to panel via nuts and bolts at front holes only.
12. Route CD lead through large hole of panel and refit panel. Drill 2 X 3mm holes at rear holes of mounting bracket
and screw self-tapping screws to secure bracket.
13. Connect CD lead to CD Changer and mount CD to bracket, using screws provided [Fig 6].
14. Refit all previously removed panels.
15. Test all functions.
Eurovox No. Issue No. Authorised Date
EIG185 1MARK SUMMERS 21/02/2002
2002 JACKAROO Page 2 of 2
FIGURE 1 FIGURE 2
FIGURE 3 FIGURE 4
FIGURE 5 FIGURE 6
Eurovox No. Issue No. Authorised Date
EIG185 1MARK SUMMERS 21/02/2002