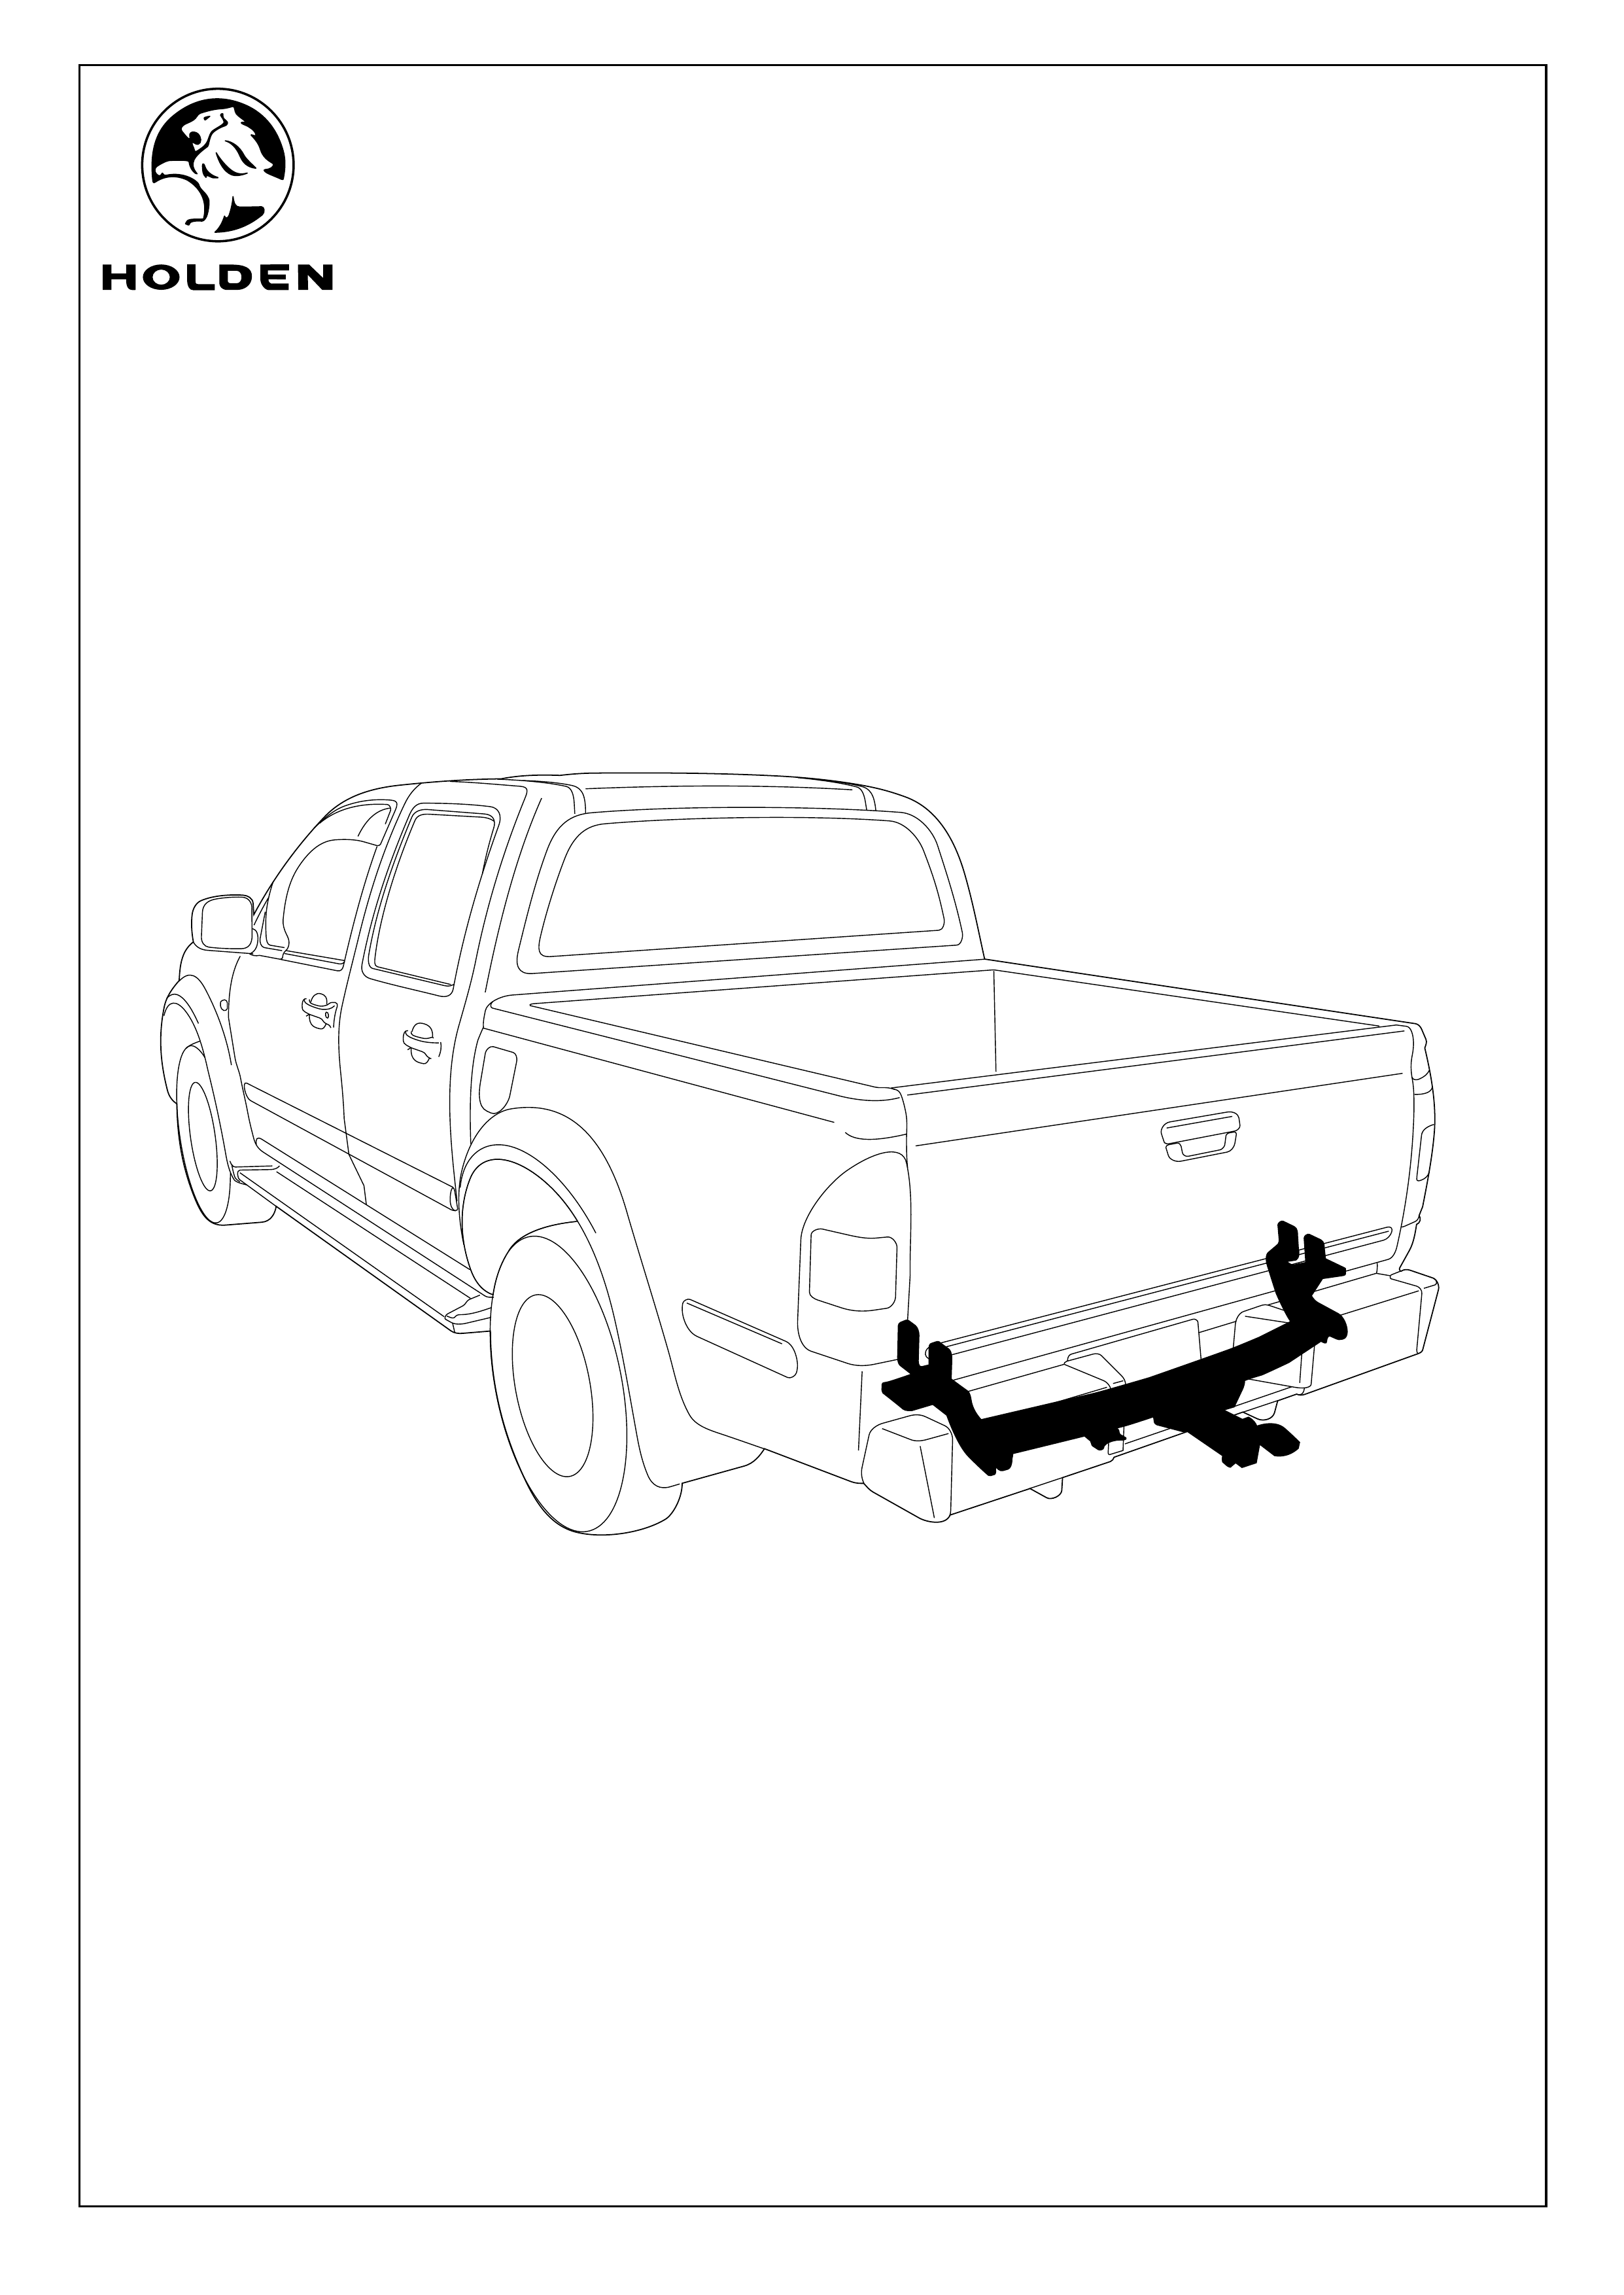
FITTING INSTRUCTIONS FOR
RA RODEO
4 x 2 / 4 x 4 2000kg TOW BAR KIT
(INCLUDING TRAILER HARNESS)
Part Number 92148821
Page 1 of 5
COPYRIGHT
Reproduction in whole or part
prohibited without written approval
FD1278
07SE04
HOLDEN LTD
Division of HOLDEN Ltd ACN 006 893 232
TOW BAR FITTING INSTRUCTIONS
Page 2 of 5
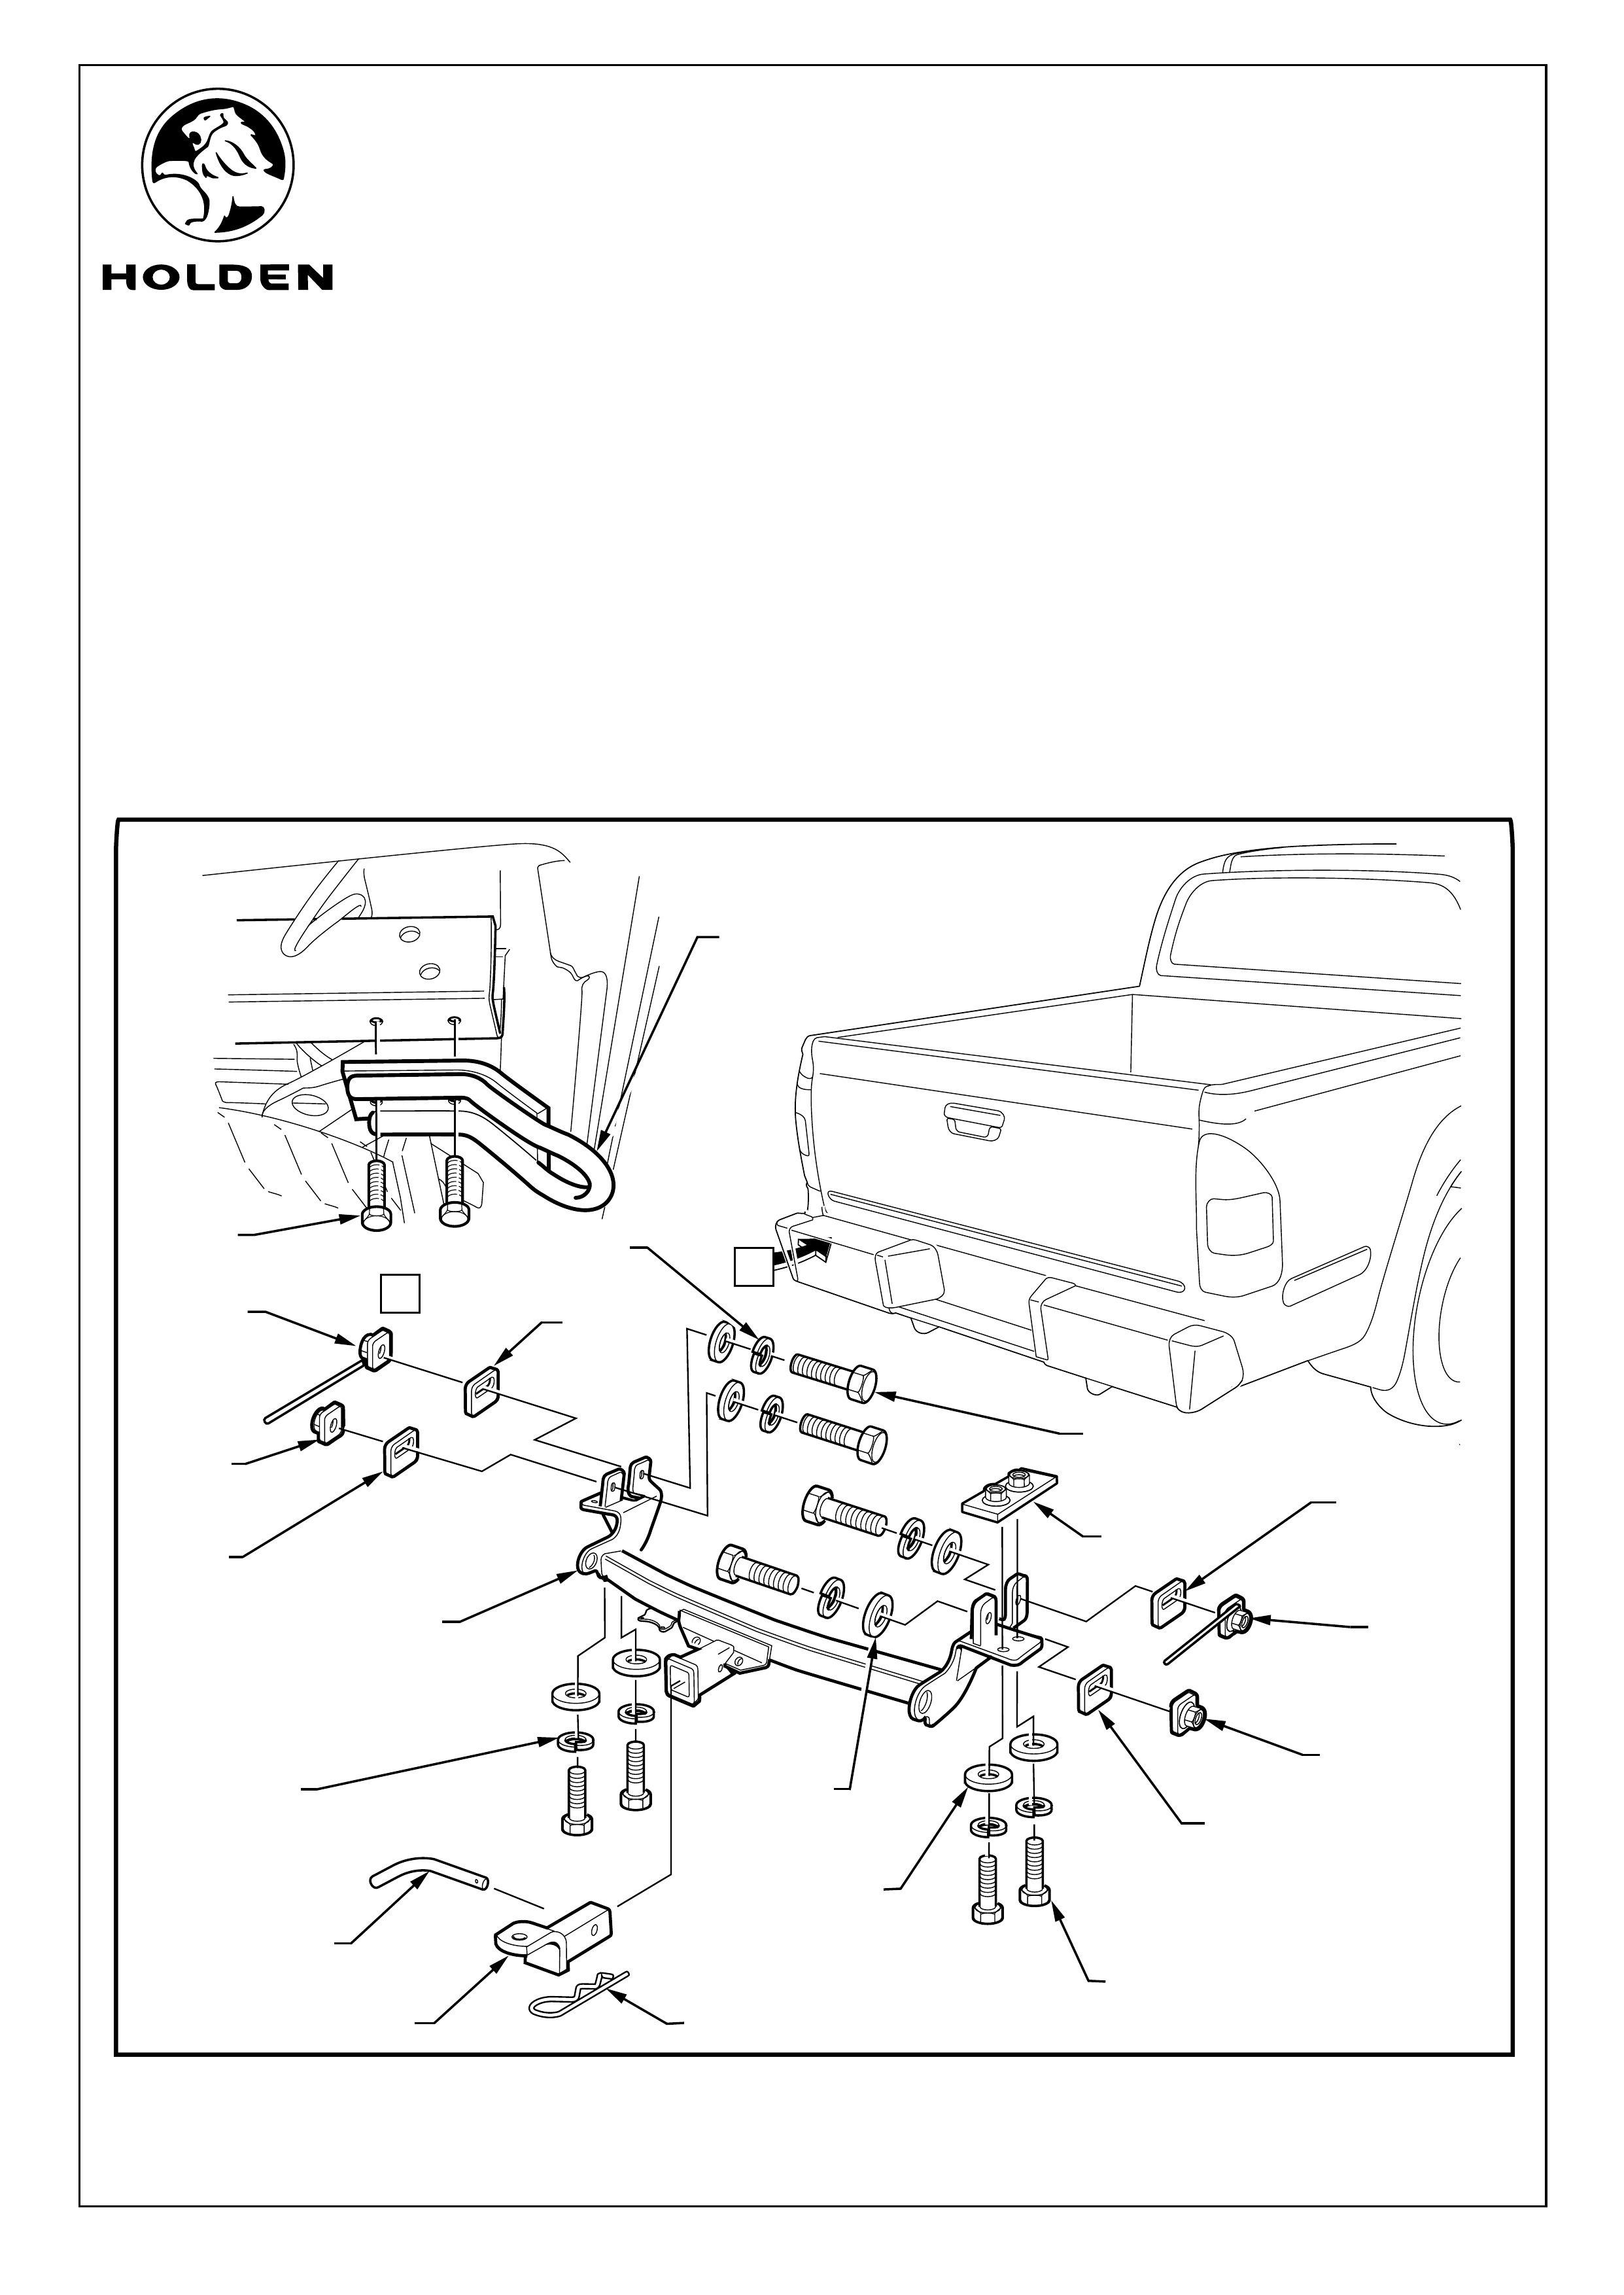
FITTING INSTRUCTIONS:
NOTE: It is recommended to use a 2-post hoist, to ease tow bar assembly installation.
1. Place vehicle in position on hoist. Refer to the owners manual for correct jacking positions. Raise the vehicle.
2. Remove the existing tow hook from the left-hand side rear chassis rail (if fitted). Refer to Figure 1, View A.
3. Remove the cable tie securing the harness from the mounting hole in the right hand chassis rail (if fitted) and re-
route and secure in a suitable location after tow bar is fitted.
4. With assistance fit the tow bar, using the bolts and washers provided. Refer to Figure 1 and following steps.
TOOLS REQUIRED:
Socket Wrench, Torque Wrench, 17mm Socket, 19mm Socket, 2-Post Hoist (Recommended).
FIGURE 1
M12 FLAT
WASHERS
(4 PLACES)
M10 THICK
FLAT
WASHERS
(4 PLACES)
M10 X 40
BOLTS
(4 PLACES)
M10 SPRING
WASHERS
(4 PLACES)
NUT PLATE
TOW BAR
TONGUE
SECURING
PIN
RETAINING CLIP
TONGUE
A
EXISTING
TOWHOOK
(REMOVE IF FITTED)
EXISTING
BOLTS
(REMOVE IF FITTED)
UPRIGHT
NUT PLATE
REAR
UPRIGHT
NUT PLATE
FORWARD
A
M12 SPRING
WASHERS
(4 PLACES)
UPRIGHT
NUT PLATE
REAR
UPRIGHT
NUT PLATE
FORWARD
M12 X 35
BOLTS
(4 PLACES)
CHASSIS
RAIL
SPACER
PLATE
(EXCLUDING
LONG CHASSIS
AND CT SPORT)
CHASSIS
RAIL
SPACER
PLATE
CHASSIS
RAIL
SPACER
PLATE
(EXCLUDING
LONG CHASSIS
AND LT SPORT)
CHASSIS
RAIL
SPACER
PLATE
COPYRIGHT
Reproduction in whole or part
prohibited without written approval
FD1278
07SE04
HOLDEN LTD
Division of HOLDEN Ltd ACN 006 893 232
Page 3 of 5
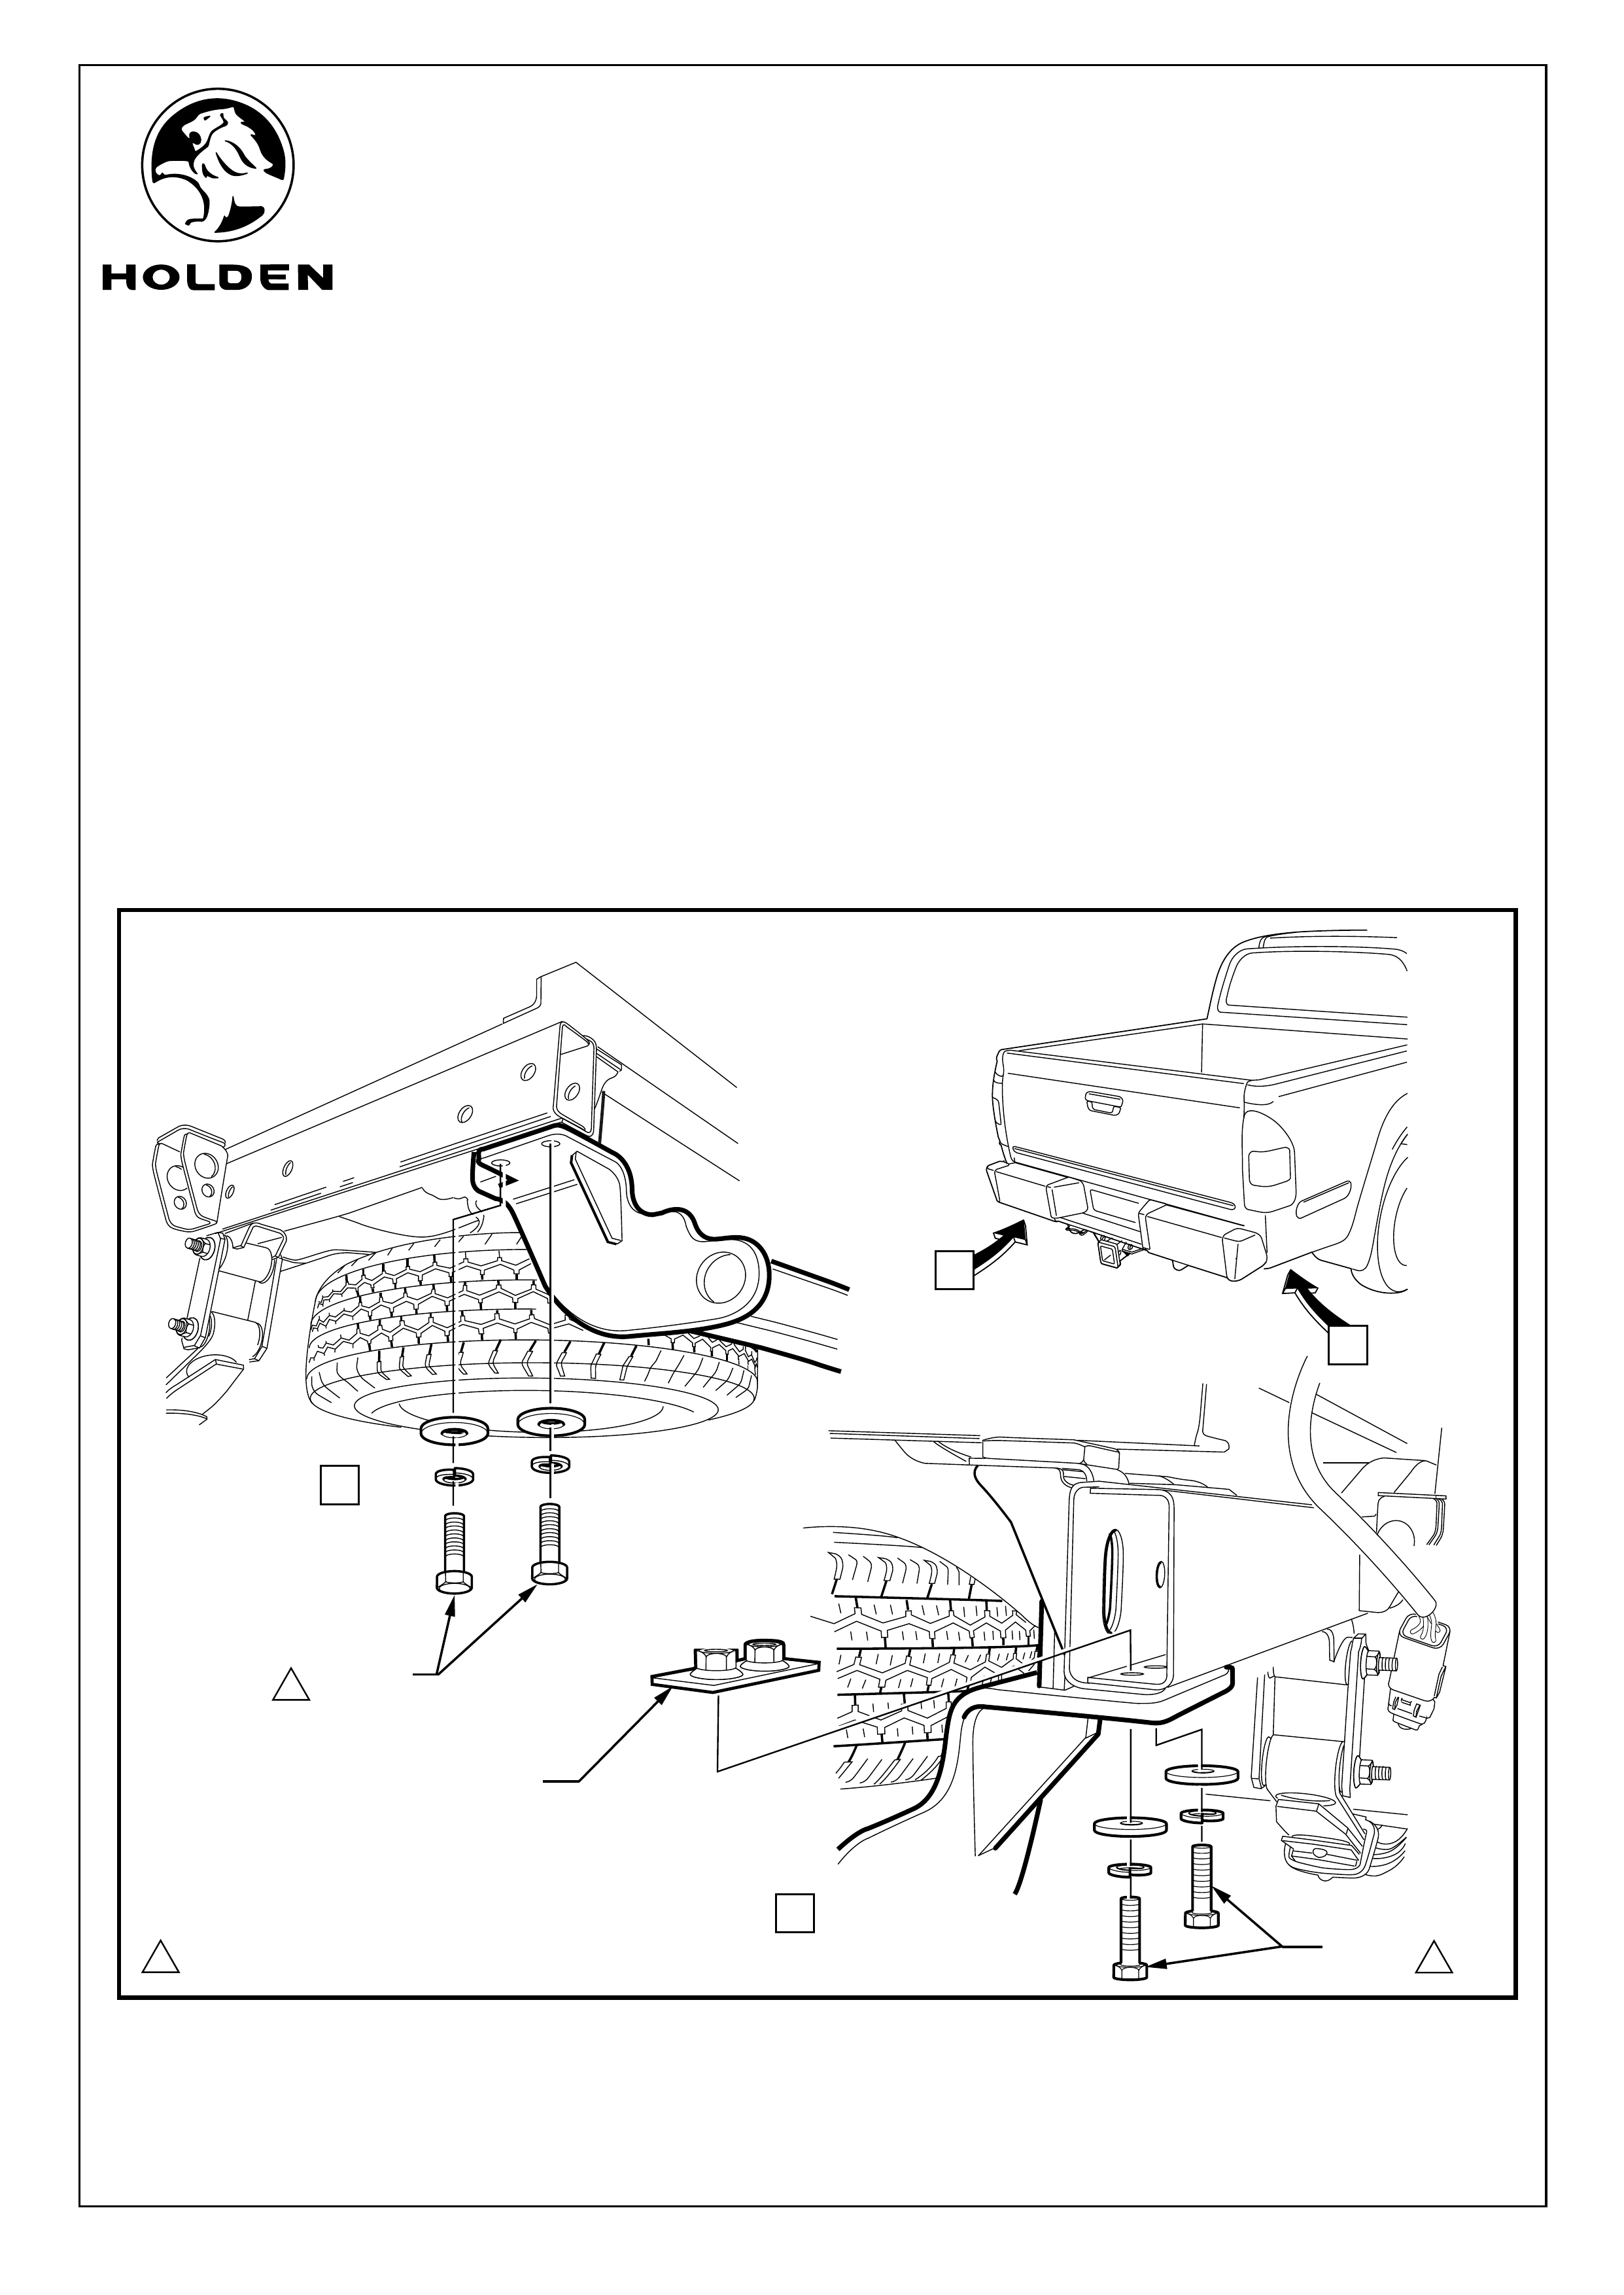
FIGURE 2
TOW BAR FITTING INSTRUCTIONS
FITTING INSTRUCTIONS:
5. Hold the tow bar in position and secure to the left hand side chassis rail from below using M10 X 40 bolts, spring
washers and thick flat washers (2 places). Refer to Figure 2, View A.
6. Position the nut plate inside the right hand chassis rail and secure from below using M10 X 40 bolts, spring washers
and thick flat washers. Refer to Figure 2, View B.
NOTE: Do not tighten bolts at this stage as some movement may be required to align the remaining mounting bolts.
NOTE: The rear step is not shown for clarity, it does not need to be removed to install the tow bar (if fitted).
7. Slide the chassis rail spacer plates between the chassis rail and the tow bar. Align the slots in the chassis rail spacer
plates with the holes in the tow bar and the chassis rail. Refer to Figures 1, 3 and 4.
NOTE: The rear chassis rail spacer plates are not fitted to the long chassis and LT sport models.
144Nm
B
M10 X 40
BOLTS 1
M10 NUT
PLATE
B
A
A
M10 X 40
BOLTS
1
COPYRIGHT
Reproduction in whole or part
prohibited without written approval
FD1278
07SE04
HOLDEN LTD
Division of HOLDEN Ltd ACN 006 893 232
Page 4 of 5
TOW BAR FITTING INSTRUCTIONS
244Nm
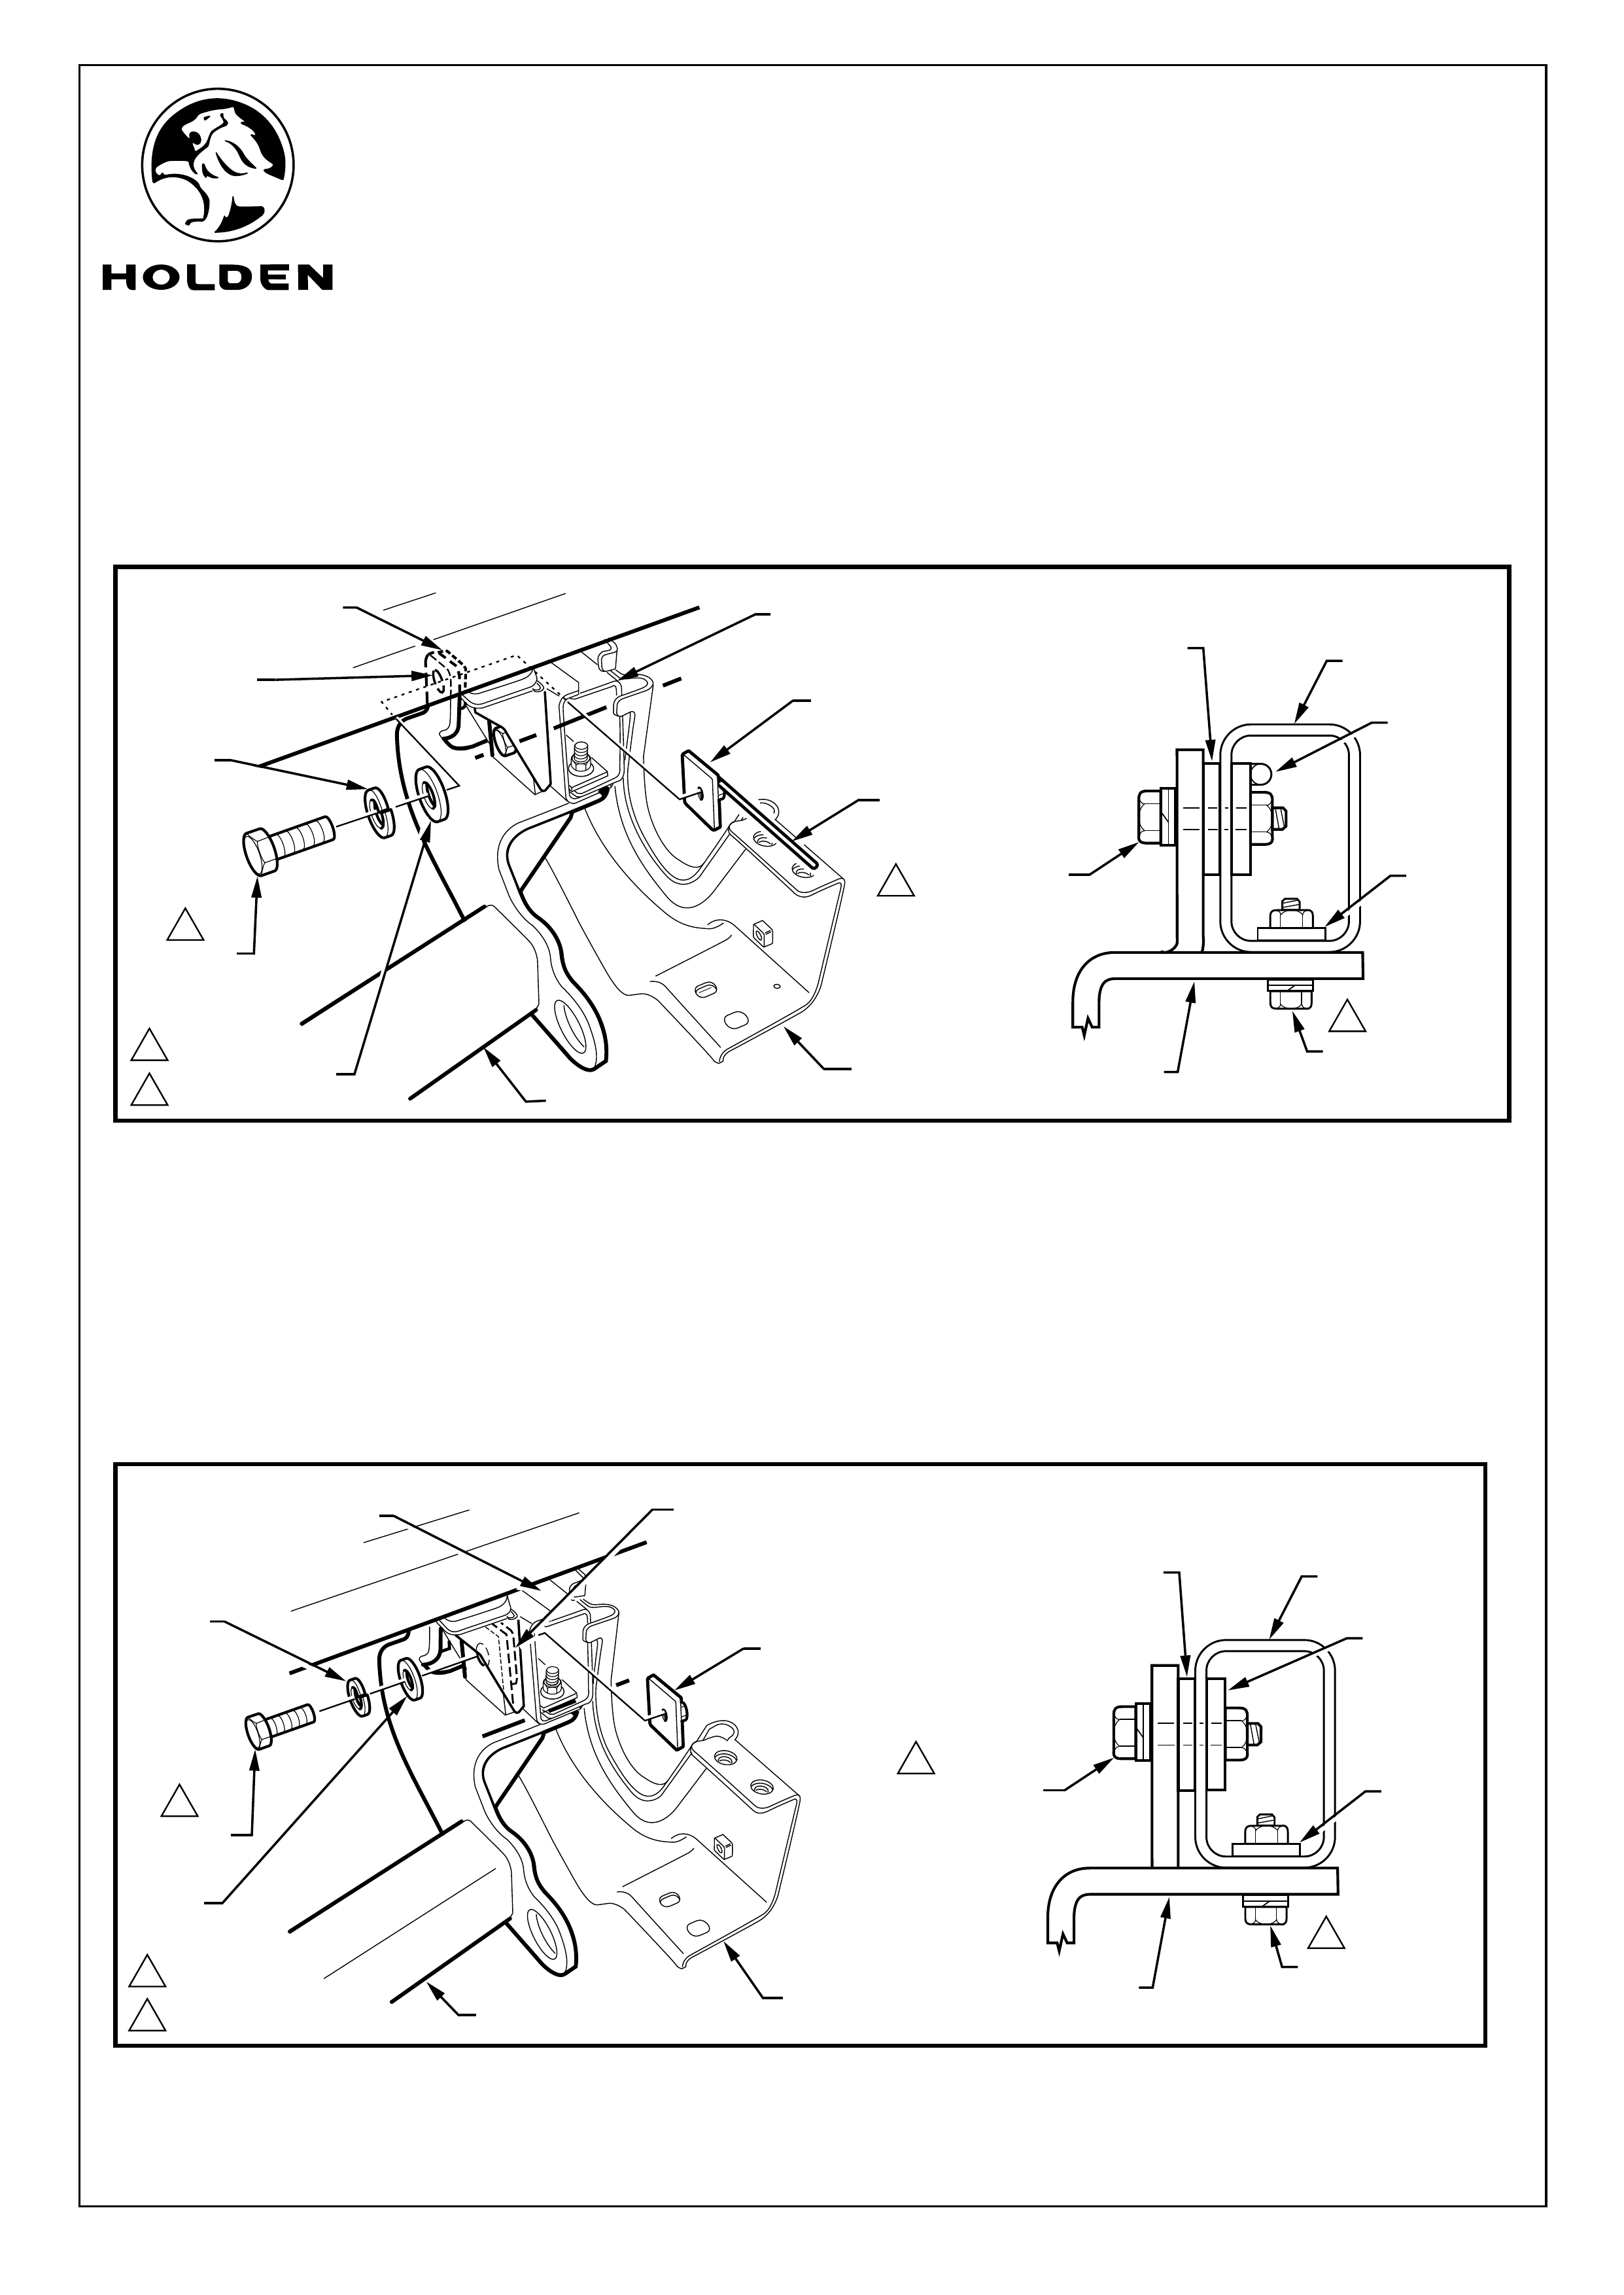
FIGURE 3
FIGURE 4
FORWARD
UPRIGHT
NUT PLATE
POSITIONING
WIRE
SPRING
WASHER
FLAT
WASHER
M12 X35
BOLTS
TOW BAR
STEP BRACKET
(IF FITTED)
RIGHT HAND
CHASSIS RAIL
REAR
UPRIGHT
NUT PLATE
FLAT
WASHER
SPRING
WASHER
M12 X35
BOLTS
TOW BAR
STEP
BRACKET
RIGHT HAND
CHASSIS RAIL
CHASSIS RAIL
SPACER PLATE
244Nm
1
1
FITTING INSTRUCTIONS:
8. Position the right-hand forward upright nut plate (using the wire welded to it) in the chassis rail behind the rear
mounting hole, fit the bolt, flat washer, spring washer and chassis rail spacer plate (ensure plate is correctly
positioned) but do not tighten. Refer to Figure 3.
9. Position the right-hand rear upright nut plate in the chassis rail behind the forward mounting hole, fit the bolt, flat
washer, spring washer and chassis rail spacer plate (ensure plate is correctly positioned) but do not tighten.
(NOTE: The rear chassis rail spacer plates are not fitted to the long chassis and LT Sport models).
Refer to Figure 4.
10. Repeat for the left hand side.
11. Tighten all bolts and torque to specification.
NOTE: The rear step is not shown for clarity, it does not need to be removed to install the tow bar (if fitted).
MOUNTING
HOLE
CHASSIS RAIL
SPACER PLATE
(NOT LONG CHASSIS &
LT SPORT VEHICLES)
TOW BAR
RIGHT HAND
CHASSIS RAIL
M10 X 40 BOLT,
FLAT WASHER &
SPRING WASHER
NUT
PLATE
M12 X 35 BOLT,
FLAT WASHER &
SPRING WASHER
CHASSIS RAIL
SPACER PLATE
FORWARD
UPRIGHT
NUT PLATE
TOW BAR
RIGHT HAND
CHASSIS RAIL
M10 X 40 BOLT,
FLAT WASHER &
SPRING WASHER
NUT
PLATE
M12 X 35 BOLT,
FLAT WASHER &
SPRING WASHER
REAR
NUT PLATE
CHASSIS RAIL
SPACER PLATE
(NOT LONG CHASSIS &
LT SPORT VEHICLES)
A
A
A
A-A
B-B
B
B
1
2
2
1
177Nm
177Nm
COPYRIGHT
Reproduction in whole or part
prohibited without written approval
FD1278
07SE04
HOLDEN LTD
Division of HOLDEN Ltd ACN 006 893 232
PARTS LIST
PART NUMBER DESCRIPTION QUANTITY
92148821 TOW BAR KIT 2000kg
92146702 TOW BAR ASSEMBLY 1
92145225 TOW BAR TONGUE 1
92146703 SMALL PARTS KIT 1
BOLTS M10 X 40 4
BOLTS M12 X 35 4
REAR UPRIGHT NUT PLATE M12 2
FORWARD UPRIGHT NUT PLATE M12 2
NUT PLATE M10 1
CHASSIS RAIL SPACER PLATE 4
SPRING WASHER M10 4
SPRING WASHER M12 4
THICK FLAT WASHER M10 4
FLAT WASHER M12 4
PIN - TONGUE 1
RETAINING CLIP - TONGUE 1
D-SHACKLES 2
ADR/USAGE LABEL 1
92148289 TRAILER HARNESS 1
FD1278 FITTING INSTRUCTIONS 1
FD796 PROOF OF WARRANTY CARD 1
Page 5 of 5
TOW BAR FITTING INSTRUCTIONS
FITTING INSTRUCTIONS: - continued.
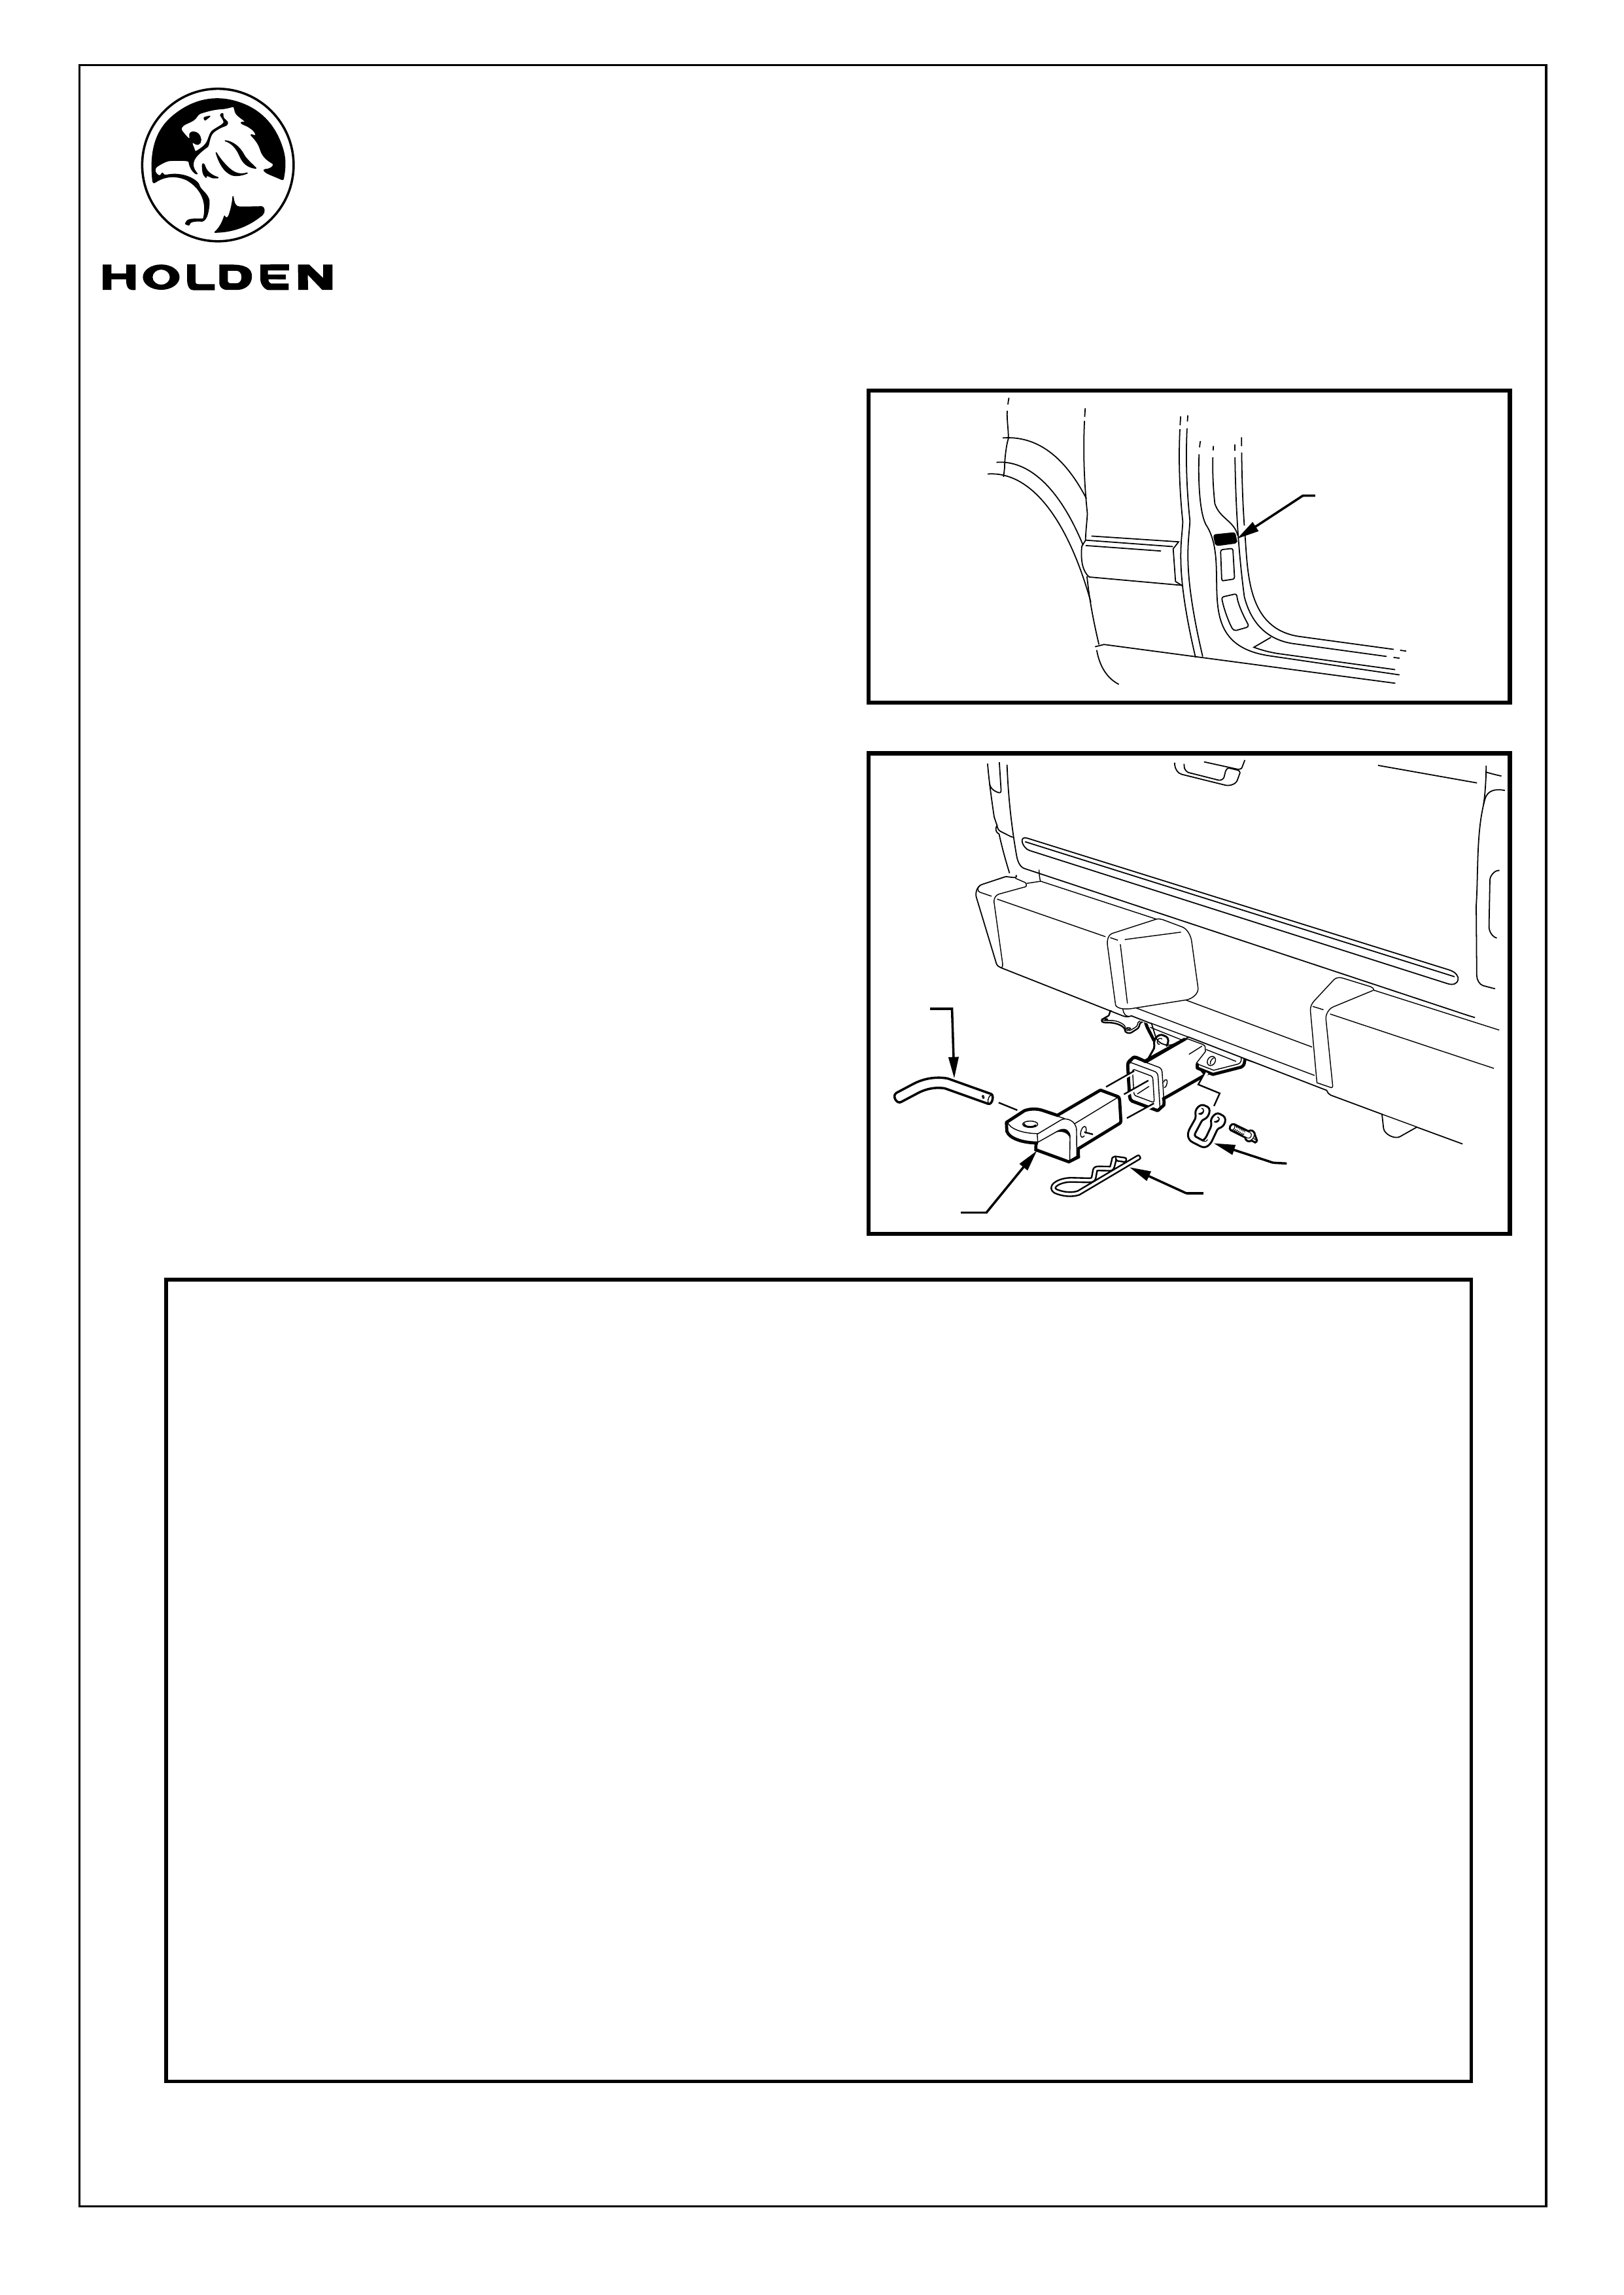
12. Fit ADR/usage label to the driver's side B-pillar as
shown. Refer to Figure 5.
Refer to Figure 6 for the following:
13. Fit the tow bar tongue, pin and retaining clip.
14. Fit the D-Shackles (2 places) to the tow bar assembly.
NOTE: When not towing, tighten the anti rattle bolt.
15. Place Fitting Instructions in vehicle glove box.
NOTE: Refer to separate instructions for fitting the trailer
harness.
FIGURE 5
LABEL
FIGURE 6
TOW BAR FITTING INSTRUCTIONS
TONGUE RETAINING CLIP
PIN
D-SHACKLE
COPYRIGHT
Reproduction in whole or part
prohibited without written approval
FD1278
07SE04
HOLDEN LTD
Division of HOLDEN Ltd ACN 006 893 232