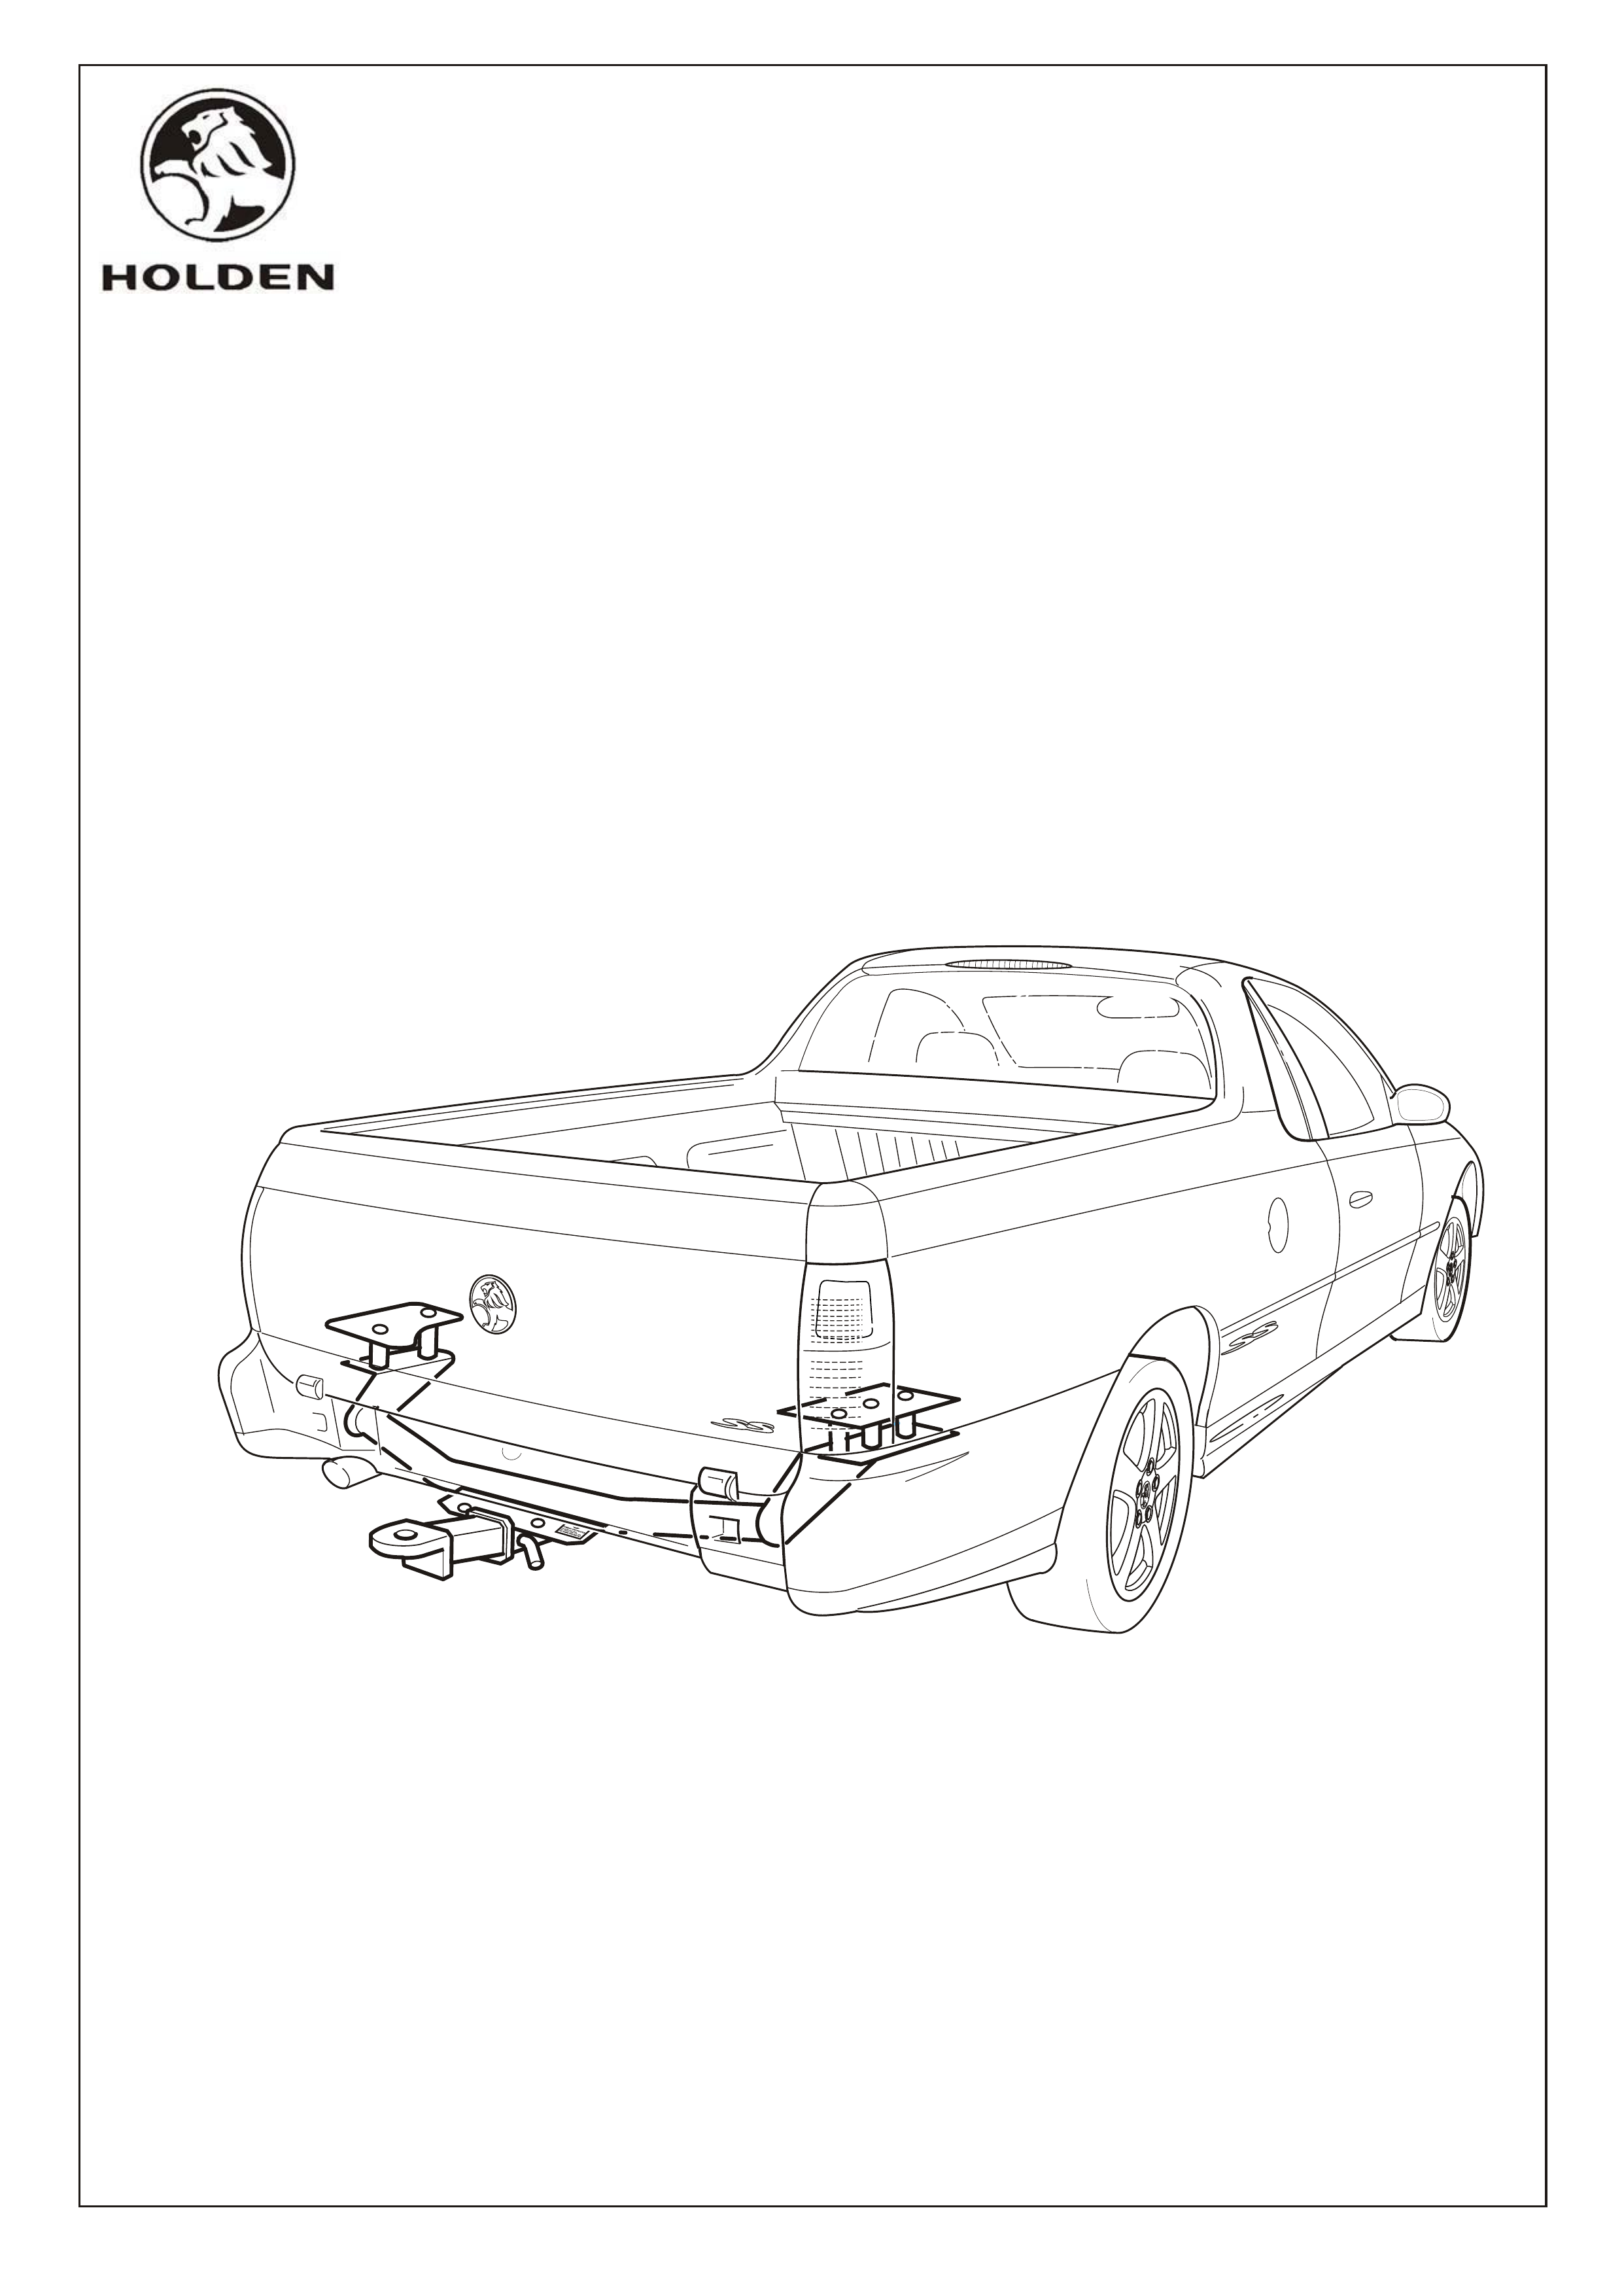
FITTING INSTRUCTIONS FOR
VU SERIES UTILITY TOW BAR PACKAGE
Part Number 92143003
1600kg AUTOMATIC
1200kg MANUAL
To be used with Supplementary Package
Part Number 92145292
COPYRIGHT
Page 1 of 5
HOLDEN SERVICE PARTS OPERATIONS
Reproduction in whole or part
prohibited without written approval
Division of HOLDEN Ltd ACN 006 893 232
FD1038-1
NOTE: Usage restricted to a maximum of 1200kg
capacity for vehicles fitted with manual transmissions
FD1038
27DE01
TOOLS REQUIRED:
TORX HEAD SCREW DRIVER (TORX BIT No. 20)
SCRAPER (FOR DEADENER REMOVAL)
HOT AIR GUN
DRILL
DRILL BIT, 13.0mm
METAL PRIMER
SILICONE OR BUTYL SEALER
SOCKET WRENCH
TORQUE WRENCH
SOCKETS: 10.0mm
16.0mm

COPYRIGHT
Page 2 of 5
HOLDEN SERVICE PARTS OPERATIONS
Reproduction in whole or part
prohibited without written approval
Division of HOLDEN Ltd ACN 006 893 232
TOW BAR INSTALLATION
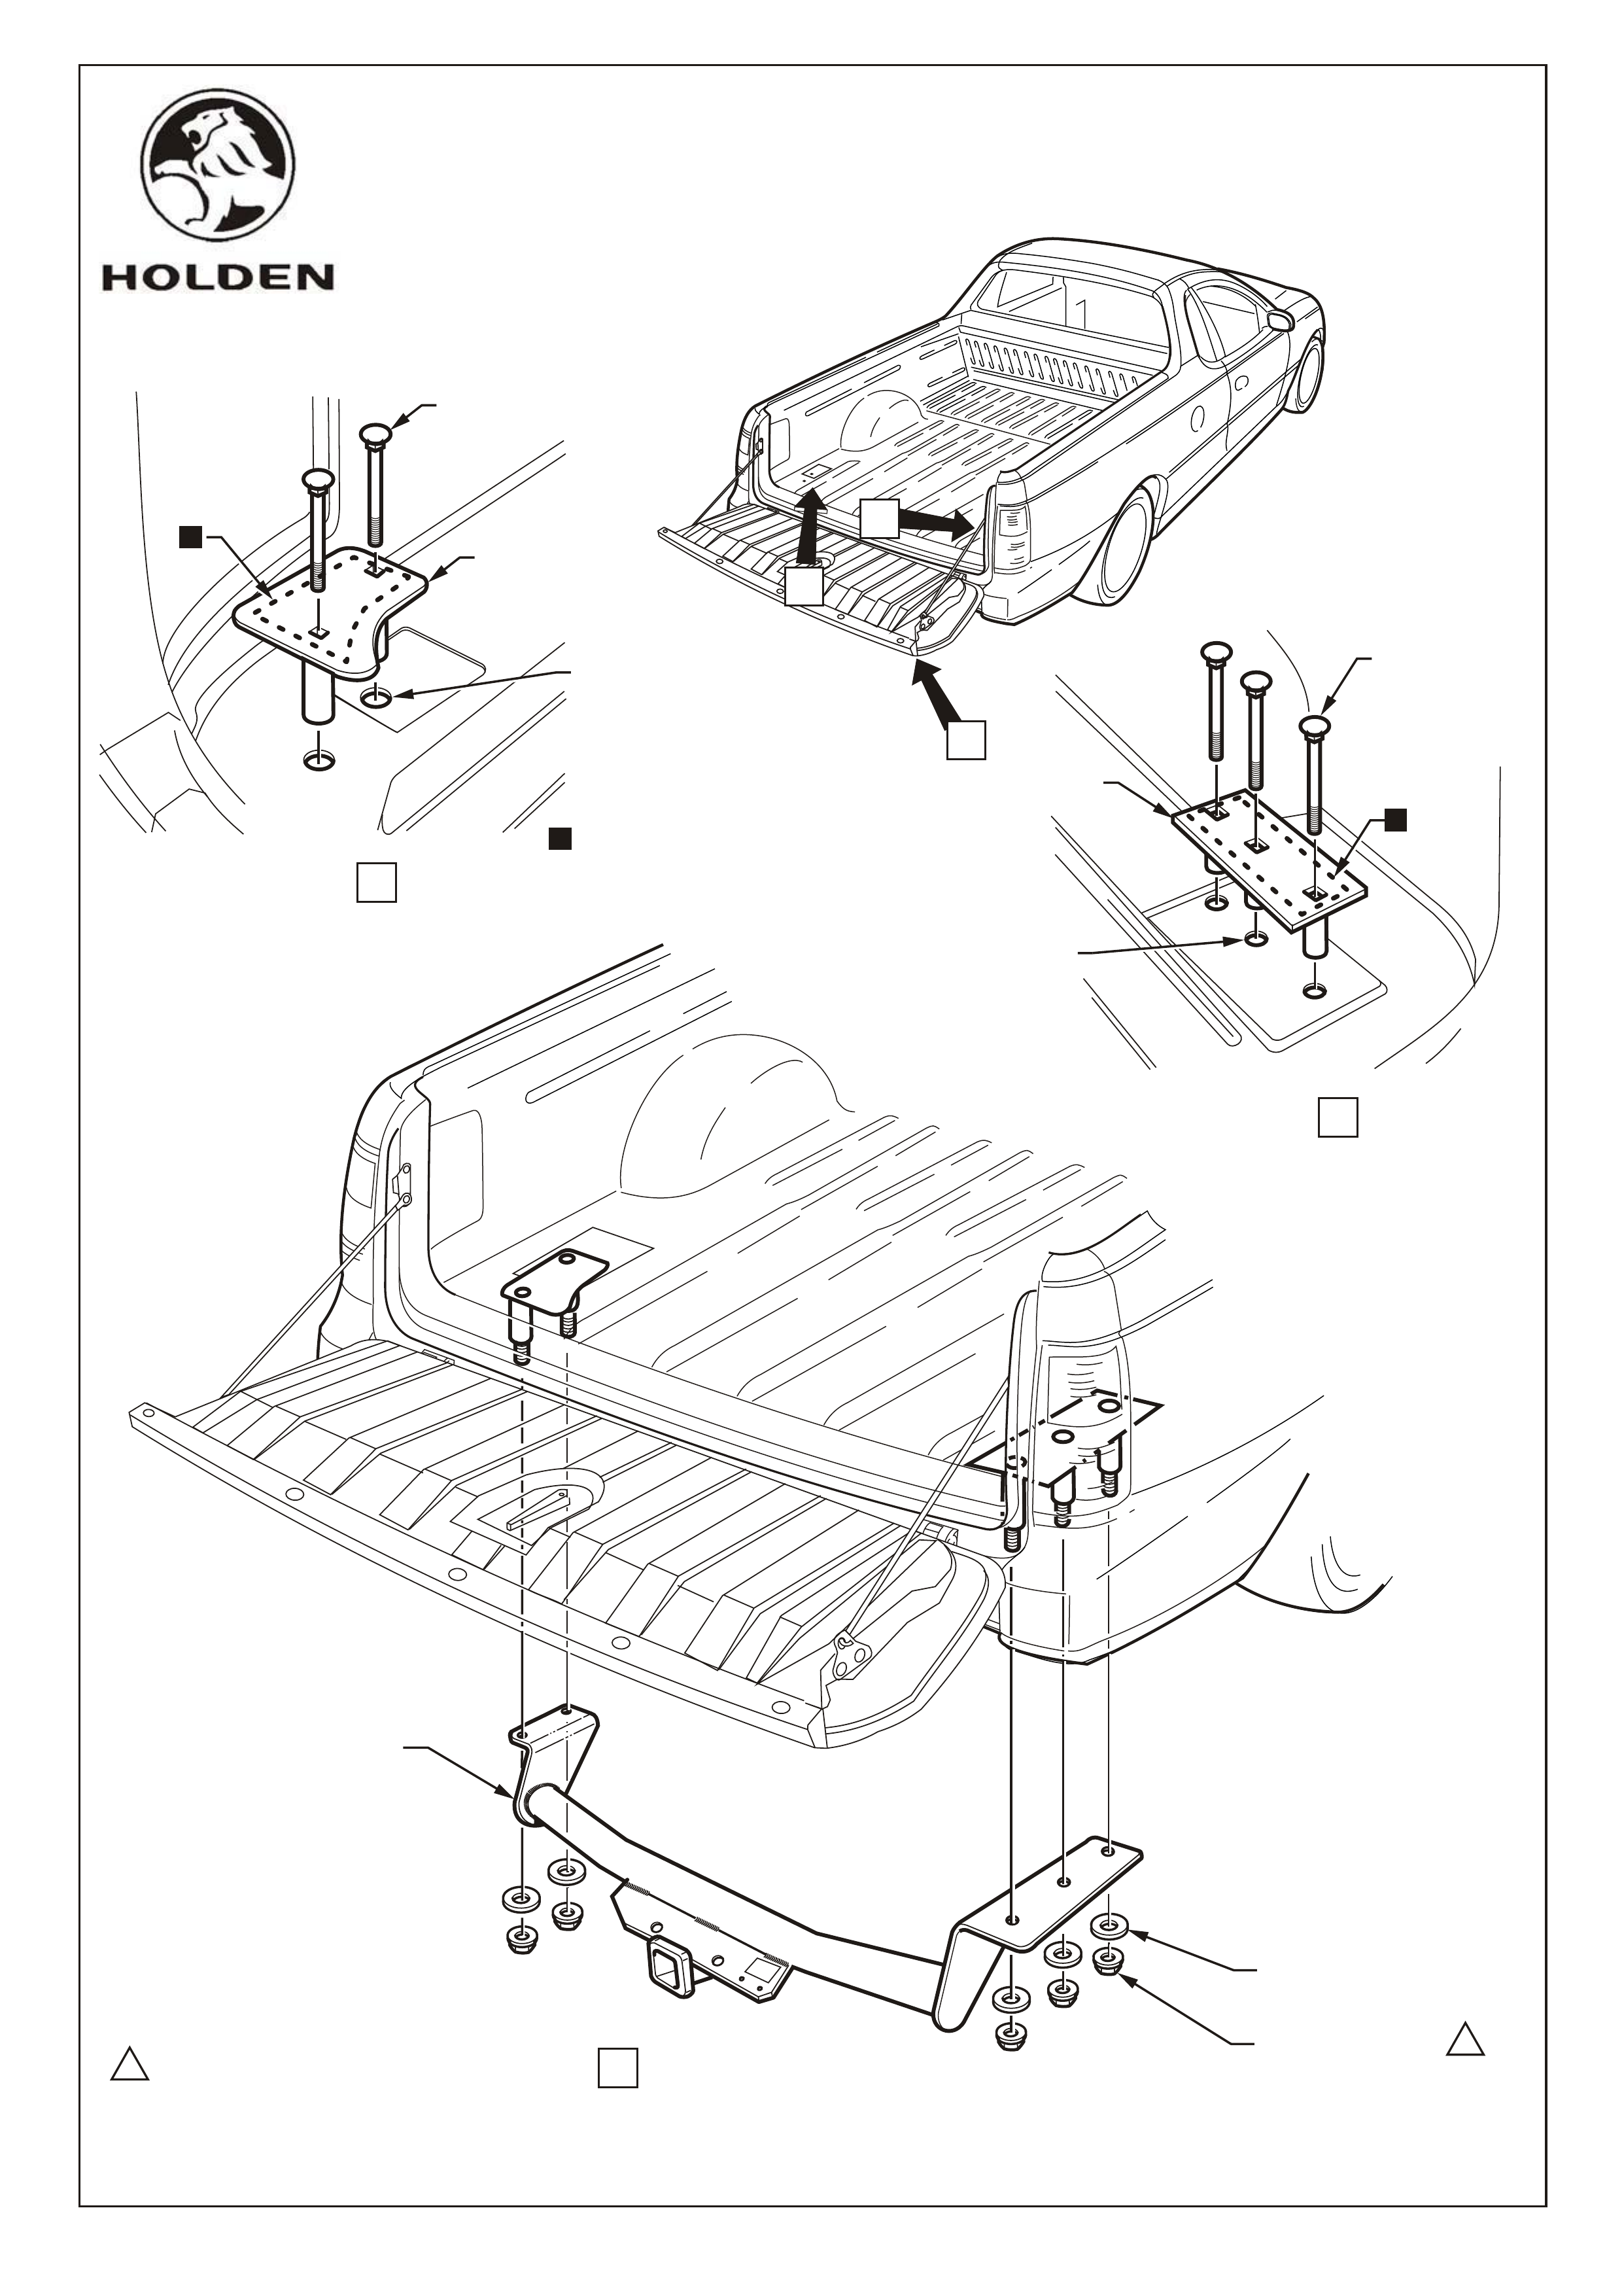
1. Using dimples on rear floor panel, 3 places right hand, 2 places left hand side, drill 18mm dia. holes
through the top of tonneau floor panel only. Refer view A and B, Page 3.
2. De-burr holes and vacuum up swarf. Paint with zinc oxide.
3. Apply a continuous bead of silicon or butyl sealer around the periphery of the reinforcement plates
mating surface to tonneau floor. Refer View A and B, Page 3.
4. Locate the reinforcement plate assemblies into position and install bolts, 3 places right hand, 2 places
left hand. Refer View A and B, Page 3.
5. Offer up tow bar to align with the bolts and fit flat washers and flanged nuts. Tighten to specified torque
of 35~40 Nm. Refer View C, Page 3.
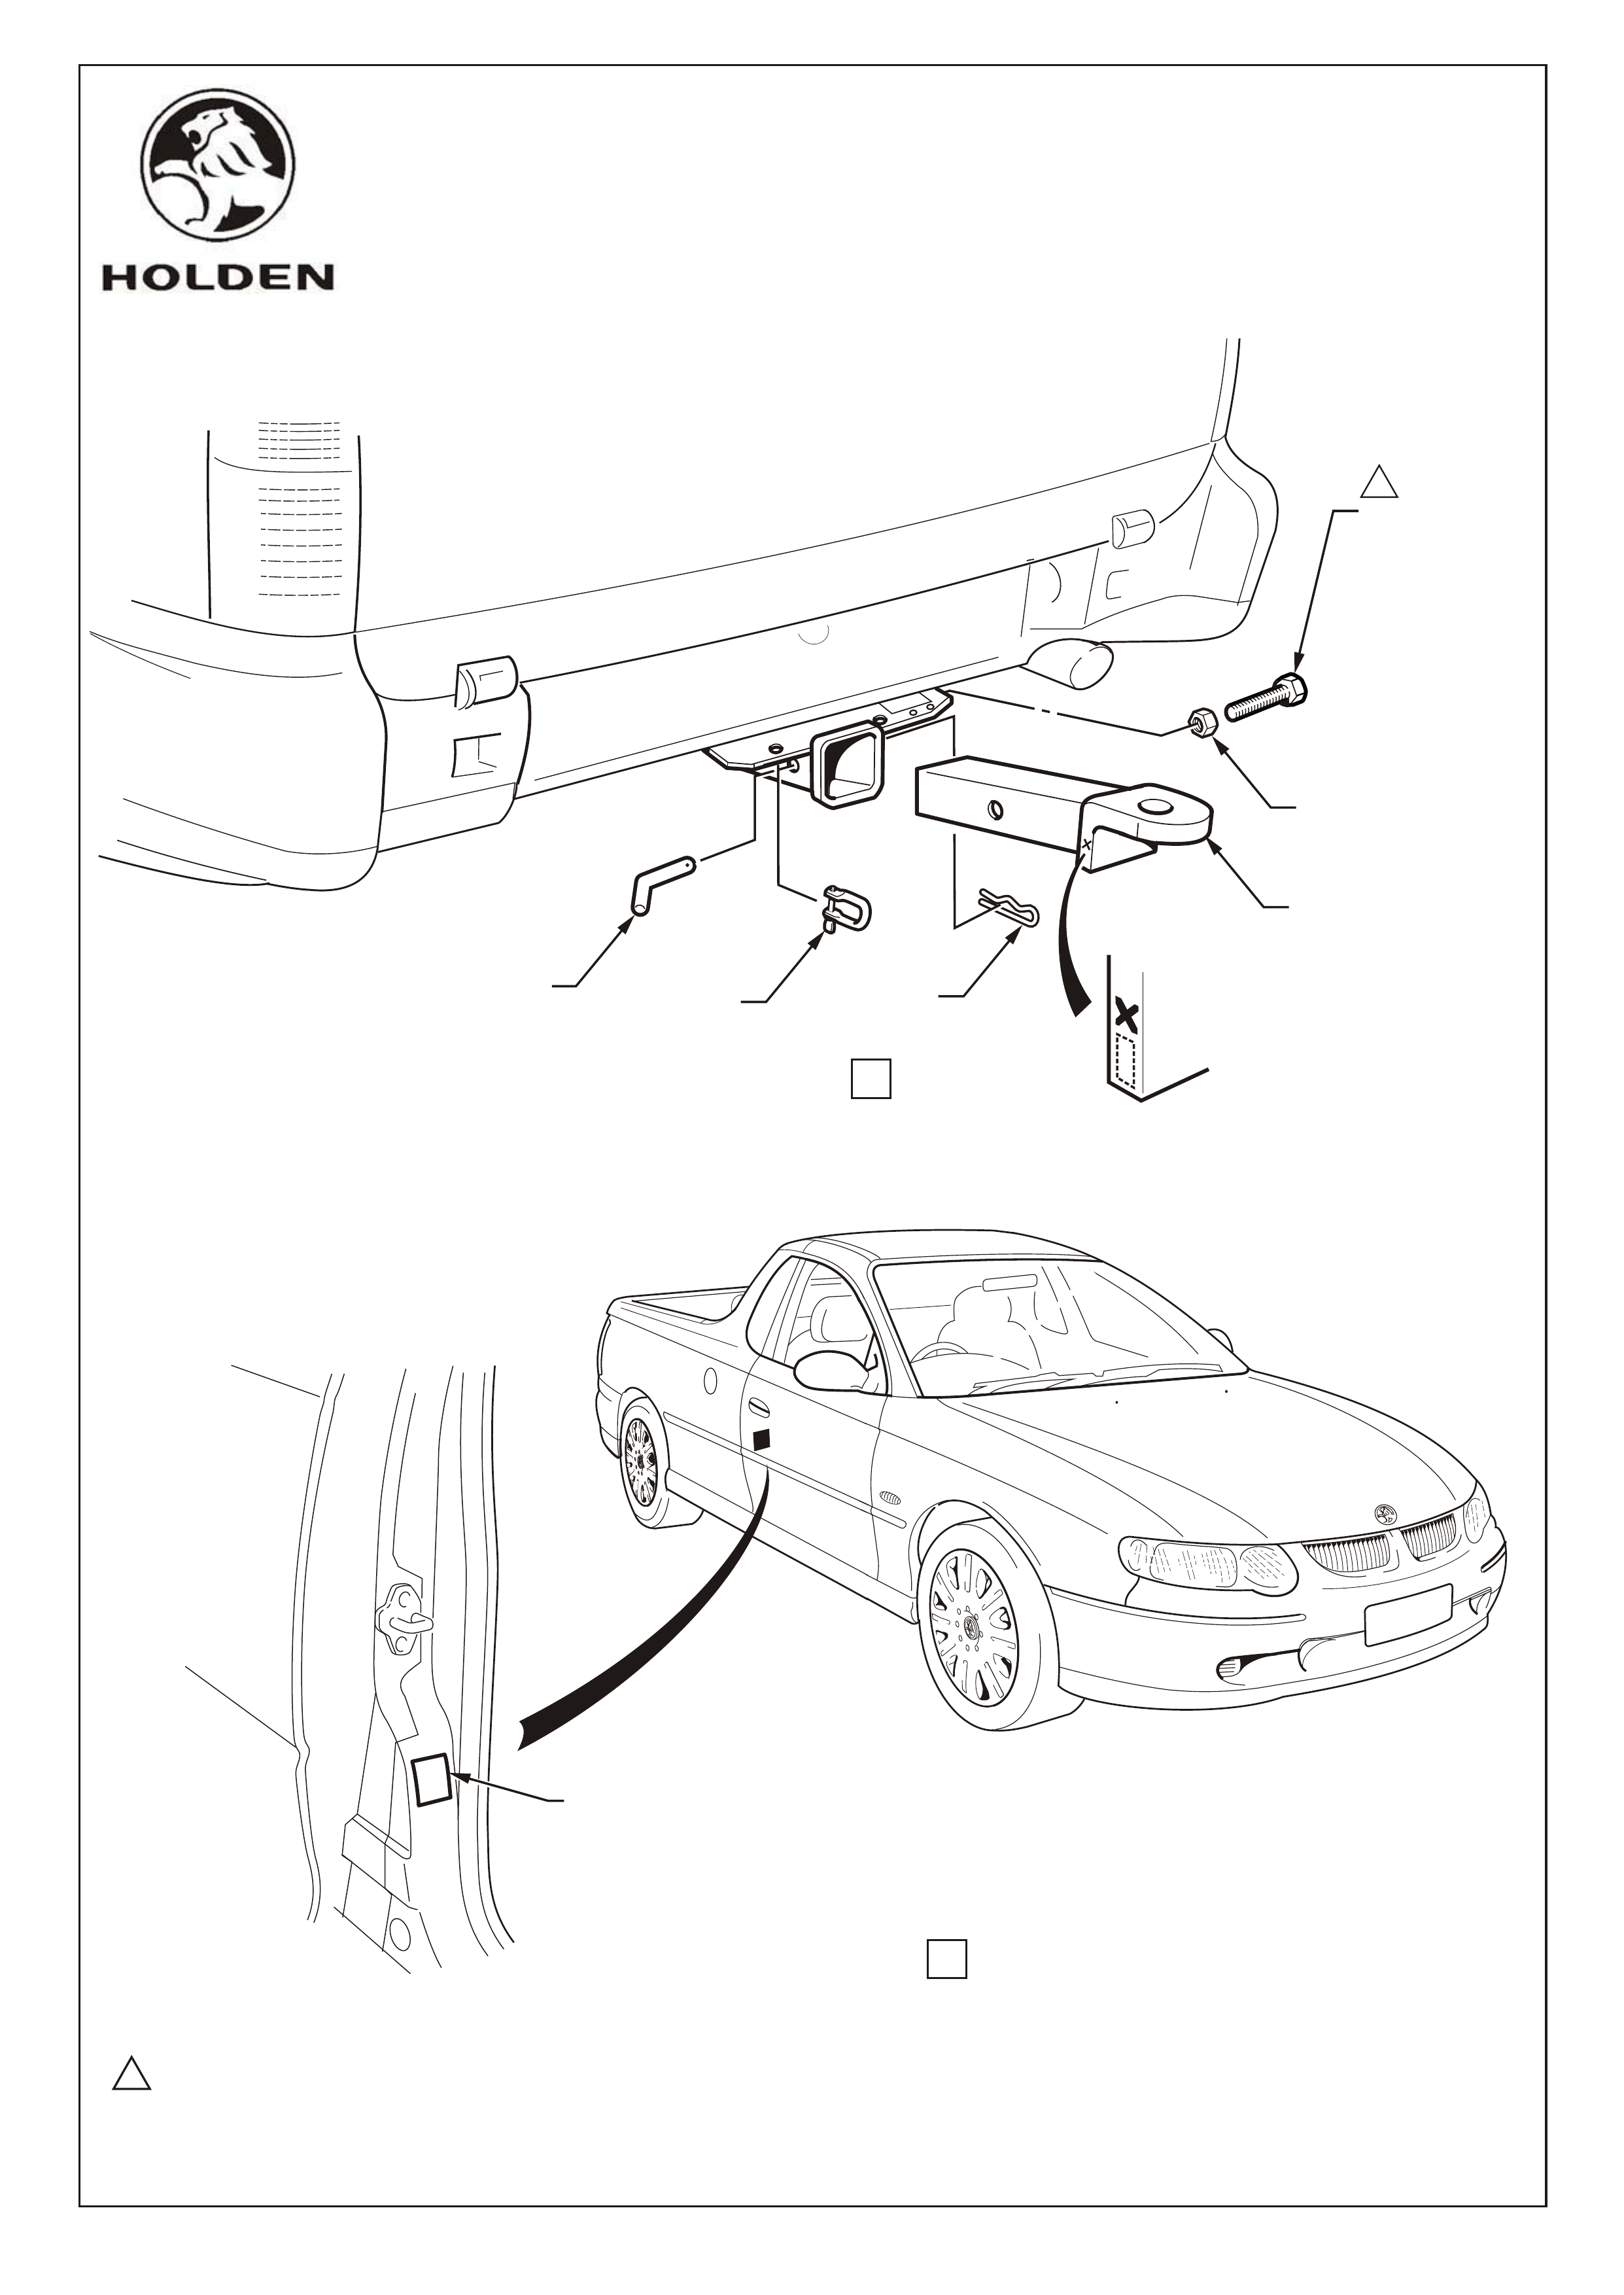
6. Install the tow bar tongue to the tow bar assembly using the J-pin and R-clip. Refer View D, Page 4.
Check "X" stamp on side of tongue to verify part.
7. Install the anti-rattle bolt and nut. Tighten to 5~10 Nm. Refer View D, Page 4.
IMPORTANT: The anti-rattle bolt and nut must only be used when the tow bar is unladen. Remove
the anti-rattle bolt and nut when the tow bar is loaded.
8. Install the trailer wiring harness as per fitting instructions included in the trailer wiring harness package.
9. Clean surface of driver's side B-pillar and apply the ADR and usage label. Refer View E, Page 4.
10.Once the tow bar installation is complete, place Fitting Instructions in glove box of vehicle.
FD1038-2
FD1038
27DE01
Page 3 of 5
COPYRIGHT
Reproduction in whole or part
prohibited without written approval
HOLDEN SERVICE PARTS OPERATIONS
Division of HOLDEN Ltd ACN 006 893 232
1
1
35 ~ 40 Nm
A
C
B
VIEW A
VIEW B
VIEW C
TOW BAR ASSEMBLY
FLANGED NUT M10
5 PLACES
FLAT WASHER M10
5 PLACES
COACH BOLT
3 PLACES
COACH BOLT
2 PLACES
REINFORCEMENT
PLATE ASM. LH
REINFORCEMENT
PLATE ASM. RH
APPLY A CONTINUOUS BEAD OF SILICON OR
BUTYL SEALER AROUND THE PERIPHERY OF
THE REINFORCEMENT PLATE MATING SURFACE
TO THE REAR FLOOR PANEL.
USING DIMPLES IN THE REAR
FLOOR PANEL, DRILL 18.0mm
DIA. HOLE 2 PLACES
USING DIMPLES IN THE REAR
FLOOR PANEL, DRILL 18.0mm
DIA. HOLE 3 PLACES
FD1038-3
FD1038
27DE01
COPYRIGHT
Page 4 of 5
HOLDEN SERVICE PARTS OPERATIONS
Reproduction in whole or part
prohibited without written approval
Division of HOLDEN Ltd ACN 006 893 232
WIPE SURFACE CLEAN
PRIOR TO APPLICATION
OF LABEL.
VIEW D
VIEW E
R-CLIP
TONGUE
ASSEMBLY
NUT M10
ANTI -RATTLE
BOLT M10 x 25
(ONLY USE
WHEN UNLADEN)
1
J-PIN
ADR AND USAGE LABEL
15 - 10Nm
D- SHACKLE
FD1038-4
FD1038
27DE01
"X" STAMP MARK
ON SIDE OF TONGUE

COPYRIGHT
Page 5 of 5
HOLDEN SERVICE PARTS OPERATIONS
Reproduction in whole or part
prohibited without written approval
Division of HOLDEN Ltd ACN 006 893 232
PART NO. DESCRIPTION QUANTITY
92143003 TOW BAR PACKAGE CONSISTS OF :
92059904 TOW BAR ASSEMBLY 1
FD962 TOW BAR FITTING INSTRUCTION BOOKLET 1
FD796 WARRANTY CARD 1
92145292 SUPPLEMENTARY KIT - MANDATORY TO FIT
REINFORCEMENT PLATE ASSEMBLY RH 1
REINFORCEMENT PLATE ASSEMBLY LH 1
NUT - FLANGE M10 5
BOLT - COACH M10 x 110 CFP 8.8 5
WASHER - FLAT M10 5
BOLT - ANTI RATTLE M10 x 25mm 1
NUT - ANTI RATTLE M10 1
92077203 'D' RING SAFTEY SHACKLE 1
ADR AND USAGE LABEL 1
92145254 PACKAGE - TOW BAR TONGUE 1
92145220 PIN & CLIP 1
92143924 PACKAGE - HEAT SHIELD, CENTRE BEARING 1
92142517 TRAILER WIRING HARNESS - FLAT 7 PIN 1
FD962 TOW BAR FITTING INSTRUCTION BOOKLET 1
FD796 WARRANTY CARD 1
SMALL PARTS KIT
TRAILER HARNESS ADAPTOR (LARGE ROUND TO 7 PIN FLAT)
TRAILER HARNESS ADAPTOR (SMALL ROUND TO 7 PIN FLAT)
92143004
92140149
92140150
COVERBALL TOW 92140106
92140068 TOW BALL ASSEMBLY (CHROME)
92140126 PACKAGE - LOAD DISTRIBUTION HITCH (FIXED)
NOT INCLUDED IN TOW BAR PACKAGE, BUT AVAILABLE SEPARATELY:
FITTING INSTRUCTIONS FOR
VU SERIES UTILITY TOW BAR PACKAGE
Part Number 92143003
FD1038
27DE01
FD1038-5