FITTING INSTRUCTIONS FOR
CAR FRIDGE KIT
FD1211
19AU04
COPYRIGHT
Reproduction in whole or part
prohibited without written approval
HOLDEN LTD
Division of HOLDEN Ltd ACN 006 893 232
Page 1 of 4
TOOLS REQUIRED:
Phillips Screwdriver, 10 mm Spanner, Tape Measure, 5.5mm Drill Bit, Drill, Corrosion Protection.
IMPORTANT: The car fridge kit in the Sedan and 2WD Wagon requires a 12V power accessory kit sold separately.
Part No. 92176735
FITTING INSTRUCTIONS FOR
CAR FRIDGE KIT
FD1211
19AU04
COPYRIGHT
Reproduction in whole or part
prohibited without written approval
HOLDEN LTD
Division of HOLDEN Ltd ACN 006 893 232
FITTING INSTRUCTIONS:
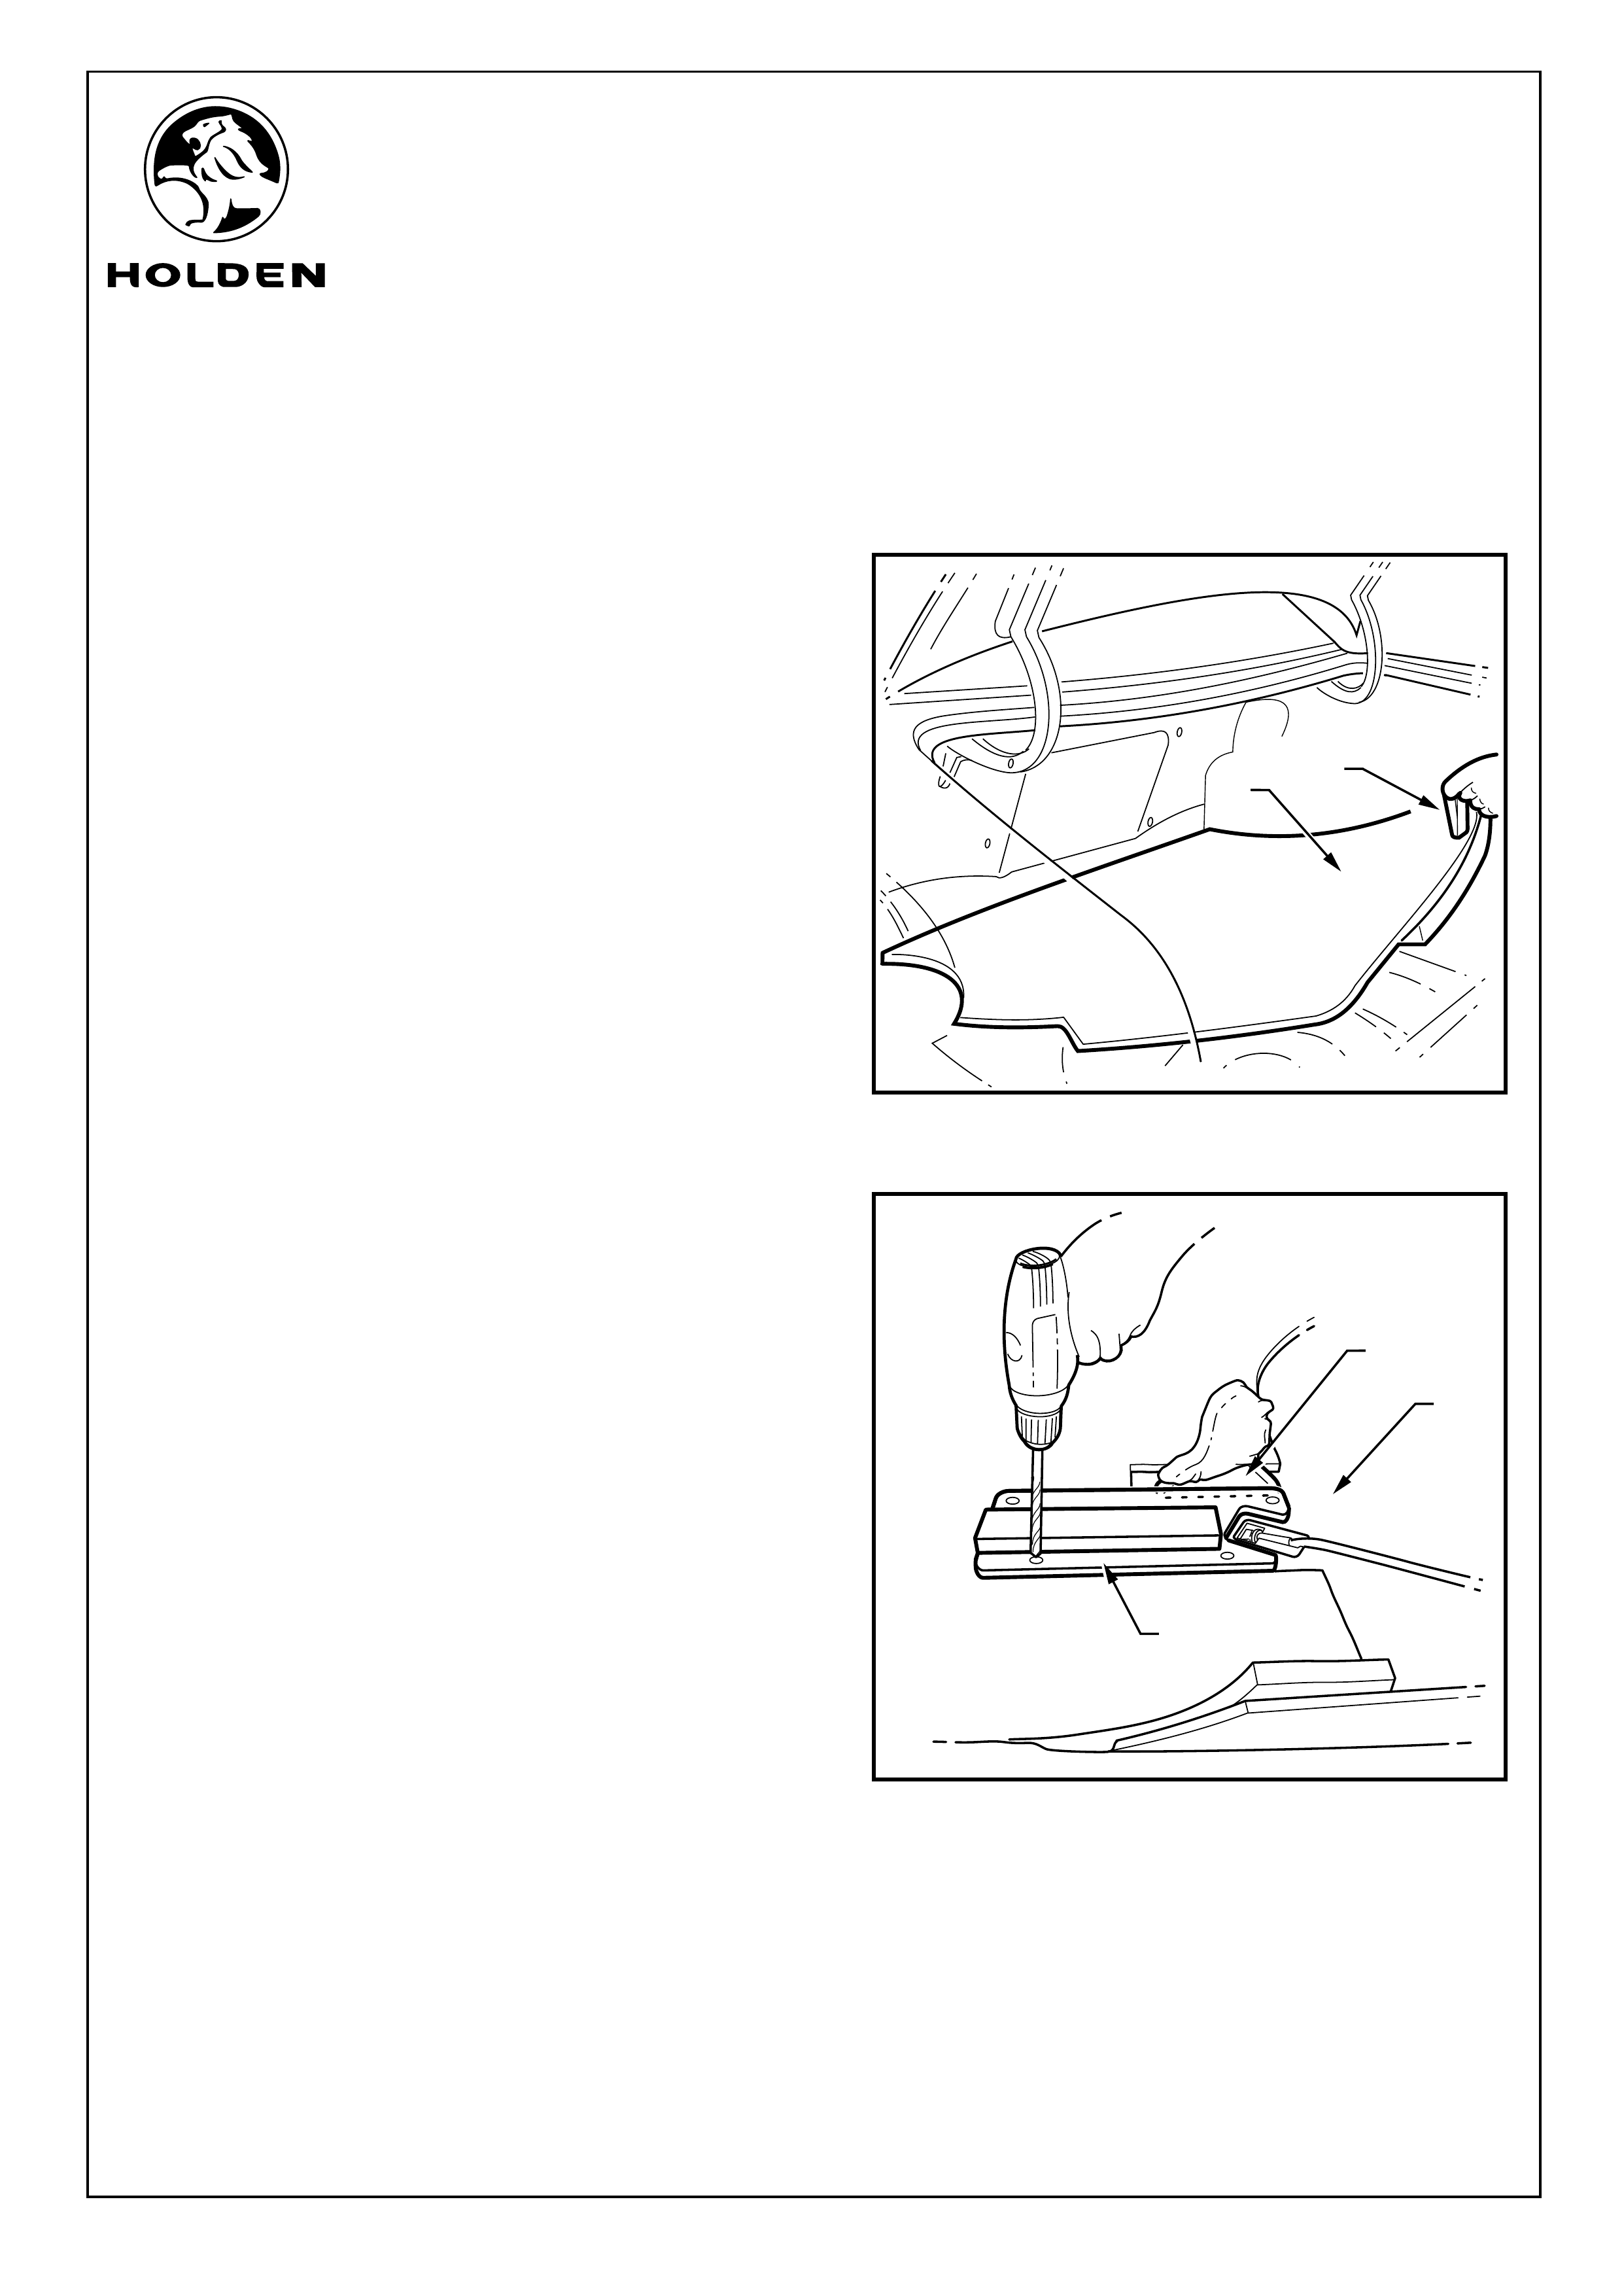
Refer to Figure 1 for the following:
1. For the wagon, remove the fur trees at the front of the
spare wheel cover.
2. Grasp the handle (1) on the spare wheel cover (2) and lift
the rear edge upward.
3. Lift the spare wheel cover from the rear compartment.
Refer to Figure 2 for the following:
4. Turn the spare wheel cover over and place some
suitable material between the cover and the work
surface to protect the surface from damage.
5. Position the clamping plate (1) on the spare wheel cover
(2) with the rubber backing facing upwards. Align the
end of the clamping plate as shown.
6. Using the clamp plate as a template, drill four 5.5mm
holes through the spare wheel cover.
FIGURE 1
Page 2 of 4
1
2
FIGURE 2
2
1
3
FITTING INSTRUCTIONS FOR
CAR FRIDGE KIT
FD1211
19AU04
COPYRIGHT
Reproduction in whole or part
prohibited without written approval
HOLDEN LTD
Division of HOLDEN Ltd ACN 006 893 232
Page 3 of 4
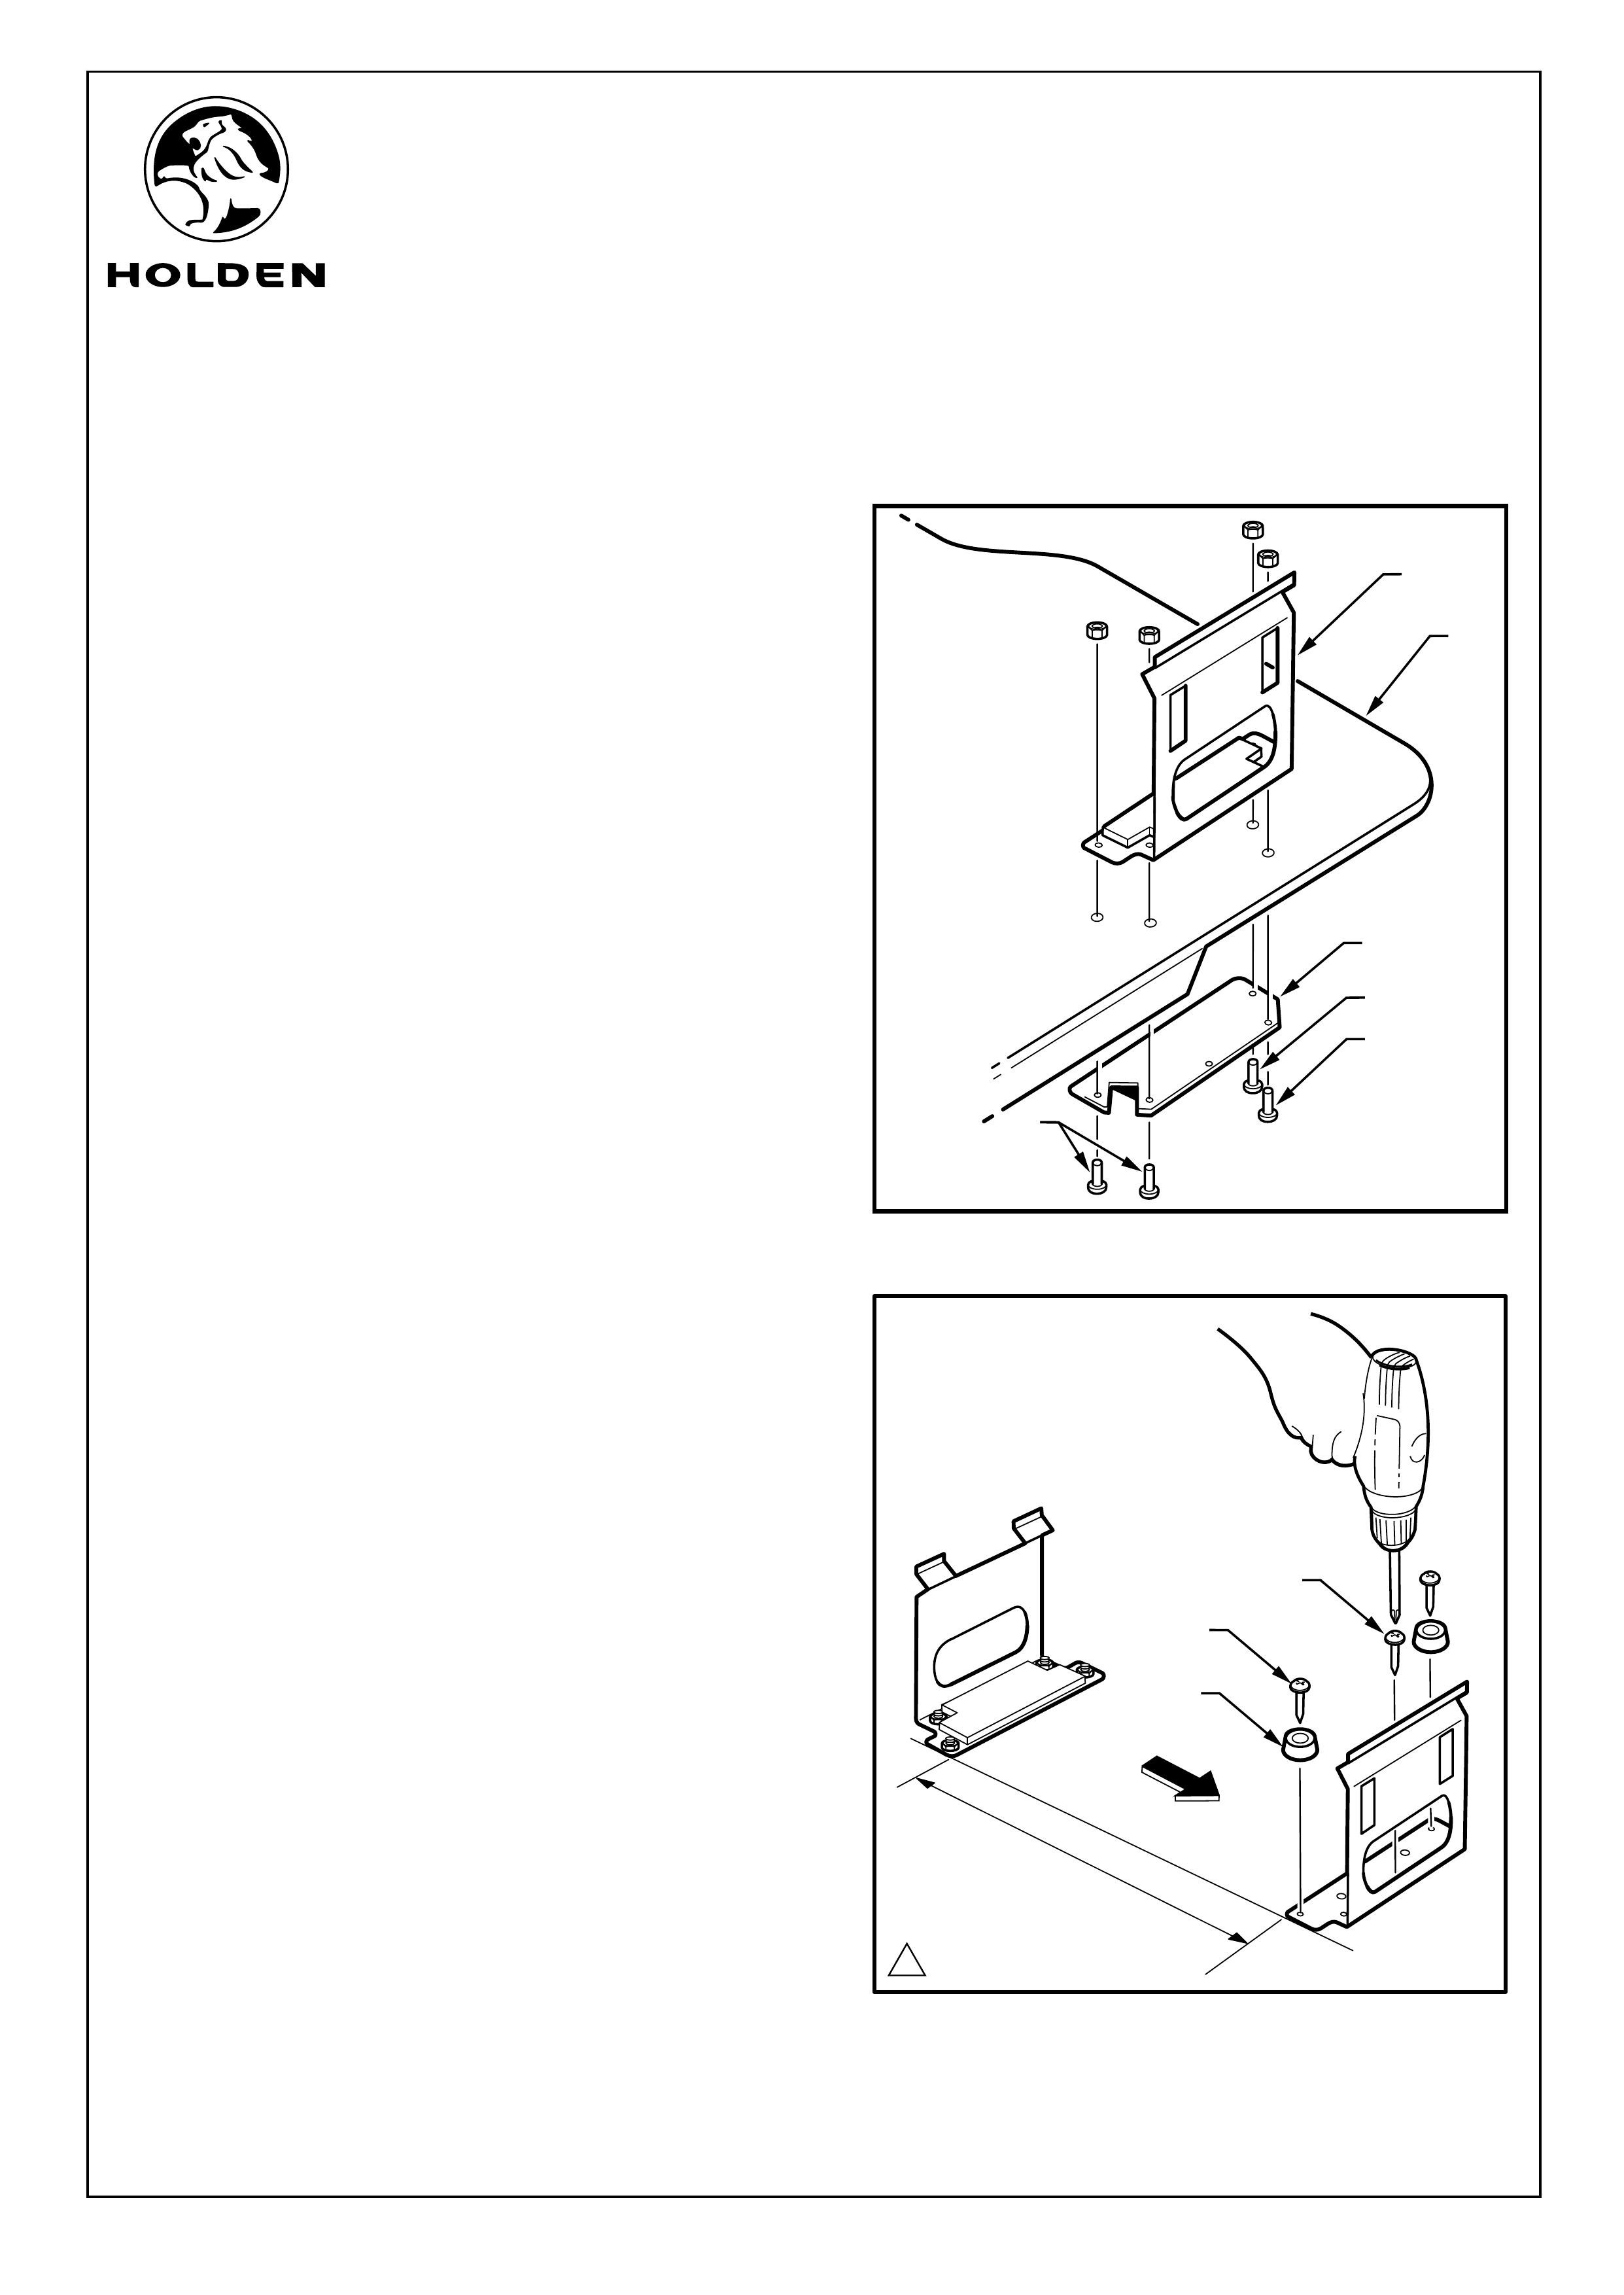
FITTING INSTRUCTIONS: - continued...
7. Attach the rear bracket (1) and the clamping plate (2) to
the spare wheel cover (3) using the 10mm long screw
(4), 12mm long screws (5) (3 places) and nuts (4
places). Refer to Figure 3.
Refer to Figure 4 for the following:
8. Refit the spare wheel cover into the vehicle.
9. The forward and rear mounting brackets are positioned
directly opposite each other 430mm apart. Use a tape
measure to identify the position of the forward bracket.
NOTE: The second bracket will screw through the
floor of the vehicle.
10. Use the centre screw (1) to attach the forward bracket
to the floor of the vehicle. Check that the forward
bracket is still square with the rear bracket. Place the
rubber feet (2) onto the self-drilling screws (3)
(2 places) and attach the bracket to the floor of the
vehicle.
FIGURE 3
FIGURE 4
430mm
3
1
2
3
2
11 - 20 Nm
FRONT
4
5
1
5
FITTING INSTRUCTIONS FOR
CAR FRIDGE KIT
FD1211
19AU04
COPYRIGHT
Reproduction in whole or part
prohibited without written approval
HOLDEN LTD
Division of HOLDEN Ltd ACN 006 893 232
Page 4 of 4
FITTING INSTRUCTIONS: - continued...
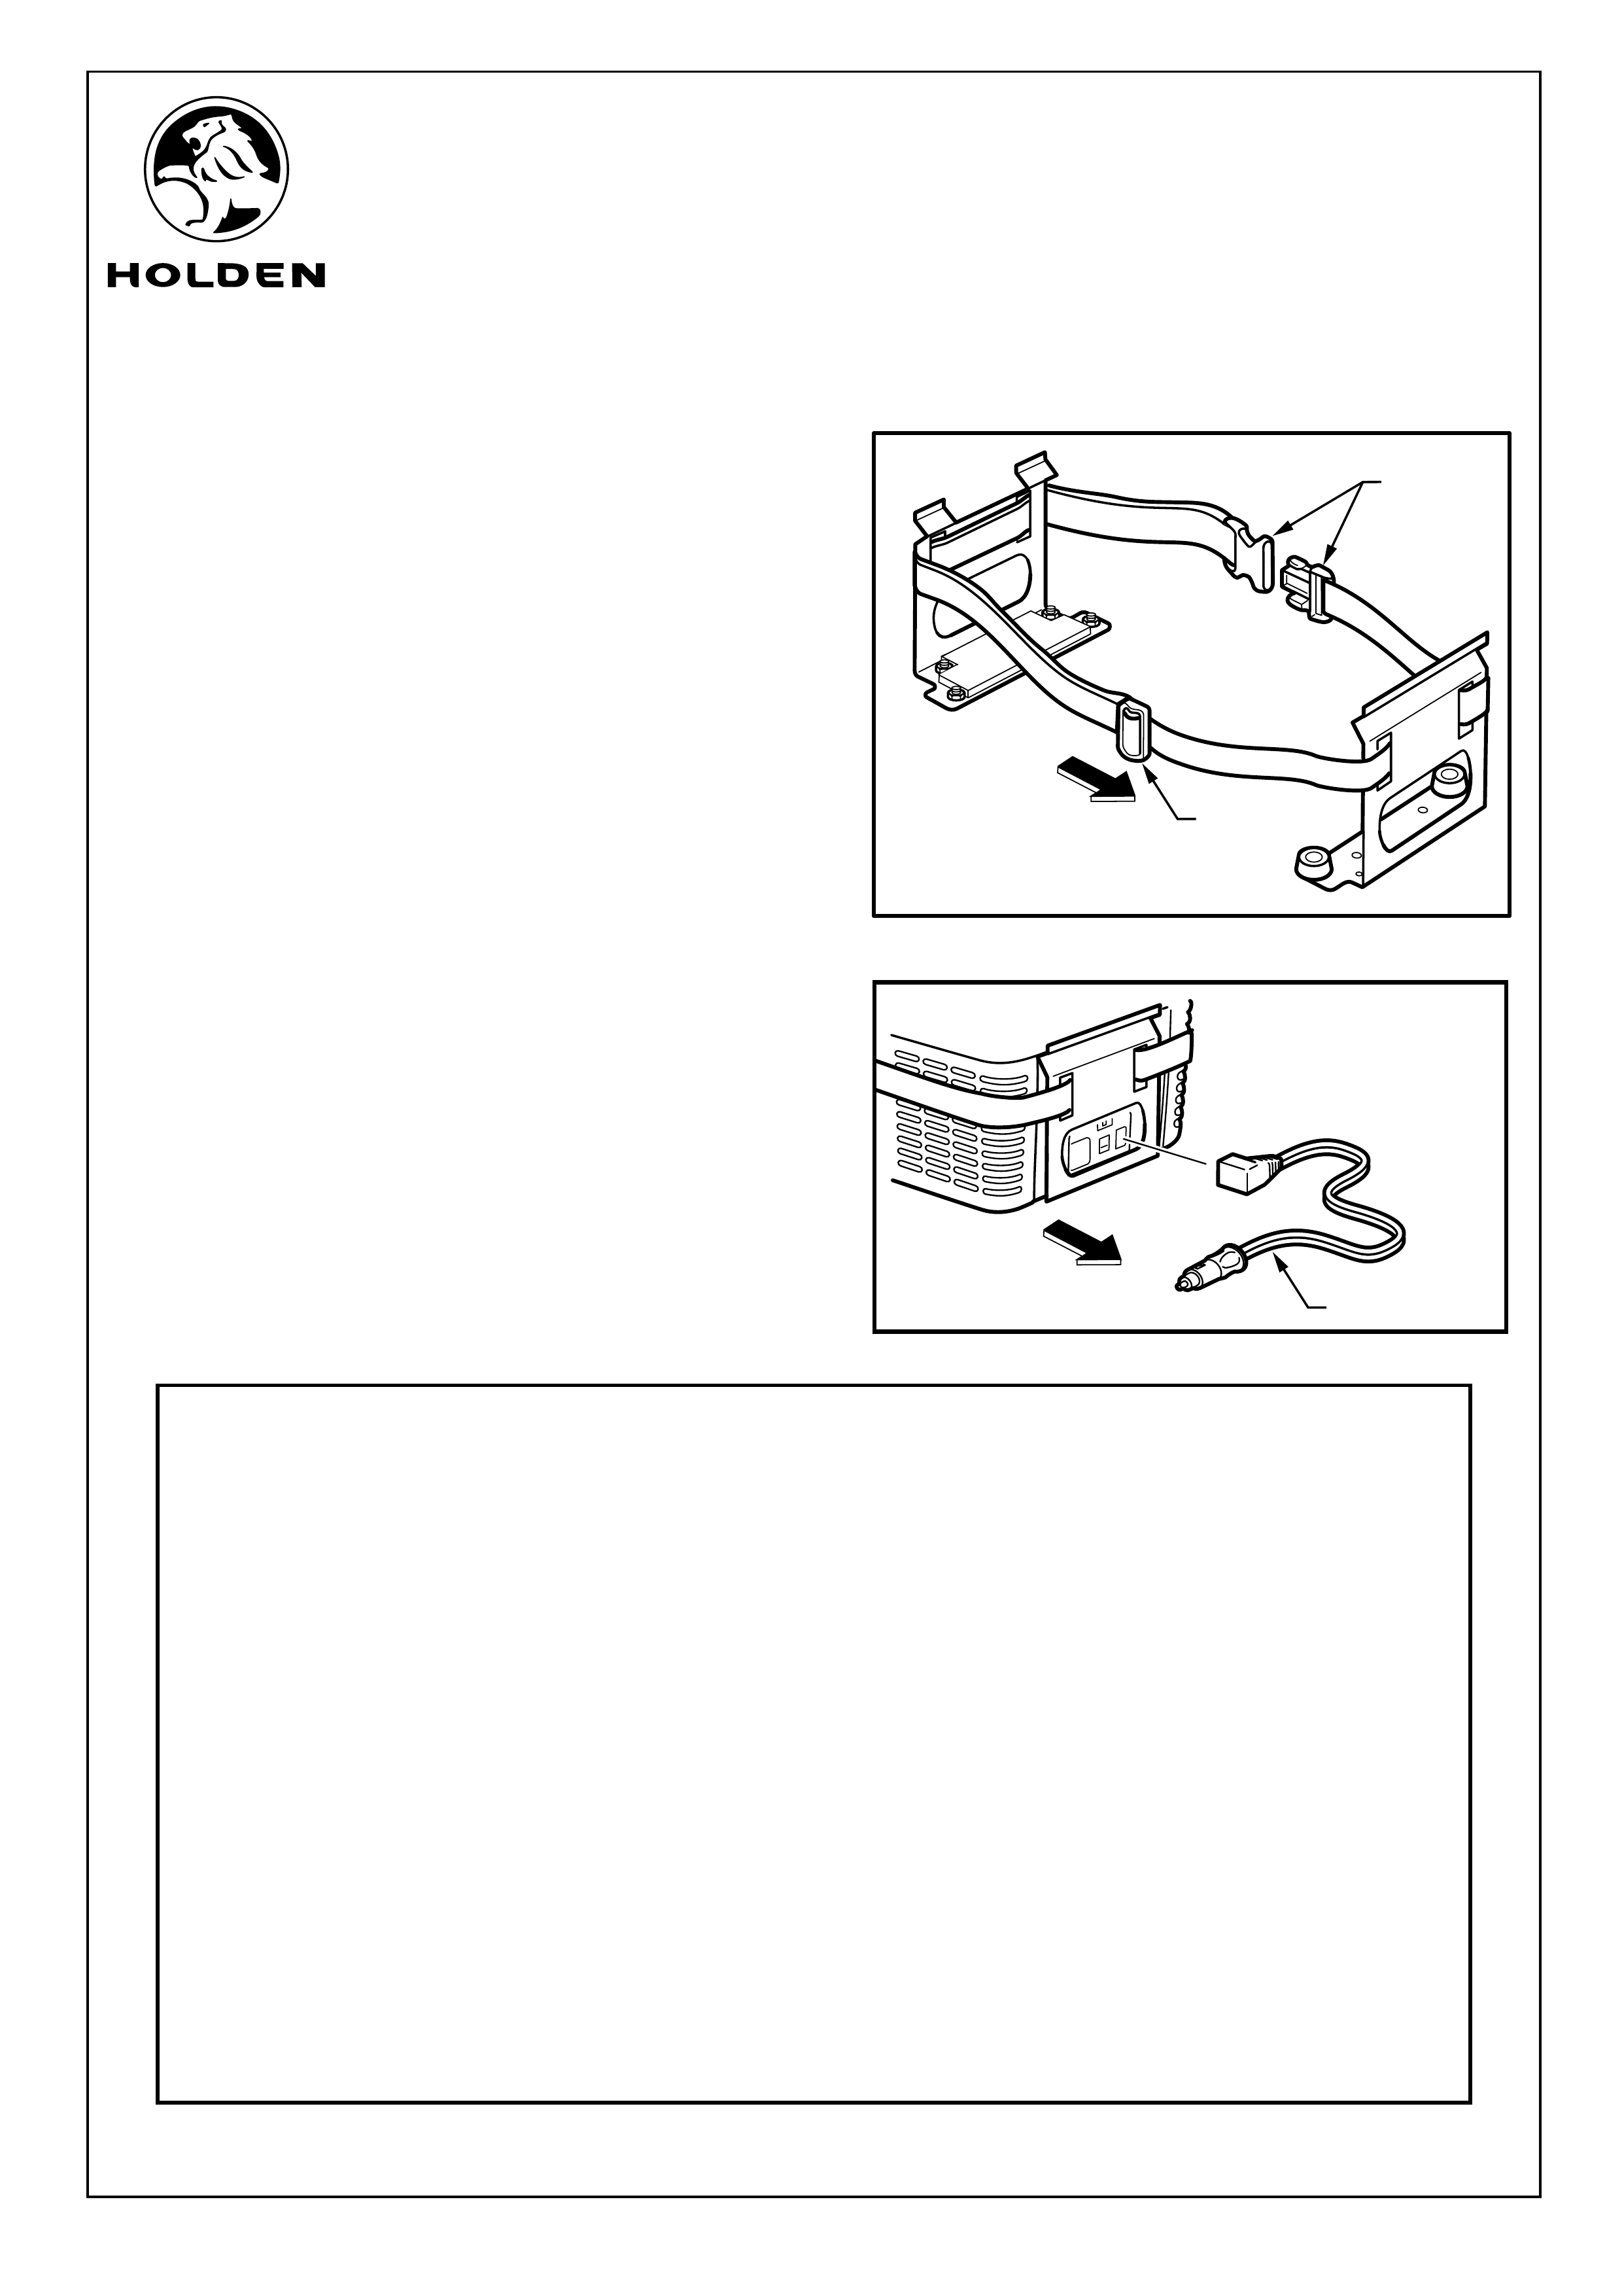
Refer to Figure 5 for the following:
11. Thread the fridge-retaining strap through the slots in the
brackets as shown. Ensure the release buckle (1) is
accessible in the centre of the vehicle.
12. Position the fridge in the vehicle so that the lid handle
is towards the rear of the vehicle. Clip the fastener on
the strap to attach the fridge to the brackets and use
the adjustment buckle (2) to remove the slack from
the strap.
13. Plug the DC power lead (1) through the forward
bracket into the fridge and the other end of the lead
into the vehicle 12V DC power outlet. Refer to
Figure 6.
NOTE: Some vehicles will required the fitment of a
power socket.
14. From under the vehicle identify the three self tapping
screws and paint with a corrosion resistant paint.
15. Place the fitting instructions in the glovebox.
FIGURE 5
PARTS LIST
PART NUMBER DESCRIPTION QUANTITY
92176735 FRIDGE KIT 1
NS FRIDGE 1
92171326 WIRING HARNESS 1
SMALL PARTS KIT 1
HANDLE 2
HANDLE ENDS 4
M5x20MM CAP HEAD 8
12V POWER LEAD 1
12V POWER LEAD ADAPTOR 1
AC POWER LEAD 1
92148859 SMALL PARTS KIT (MOUNTING KIT) 1
BRACKET 2
CLAMPING PLATE 1
M5 NUT 4
M5x12MM BOLT 3
STRAP 1
M5x30 SELF CUTTING SCREW 3
FOOT RUBBER 2
FD1280 OWNERS MANUAL 1
FD1211 FITTING INSTRUCTIONS 1
FD796 PROOF OF WARRANTY CARD 1
M5x10MM BOLT 1
FIGURE 6
1
1
2
FRONT
FRONT