HOLDEN LTD
Division of HOLDEN Ltd ACN 006 893 232
FD1225
26OCT04
COPYRIGHT
Reproduction in whole or part
prohibited without written approval
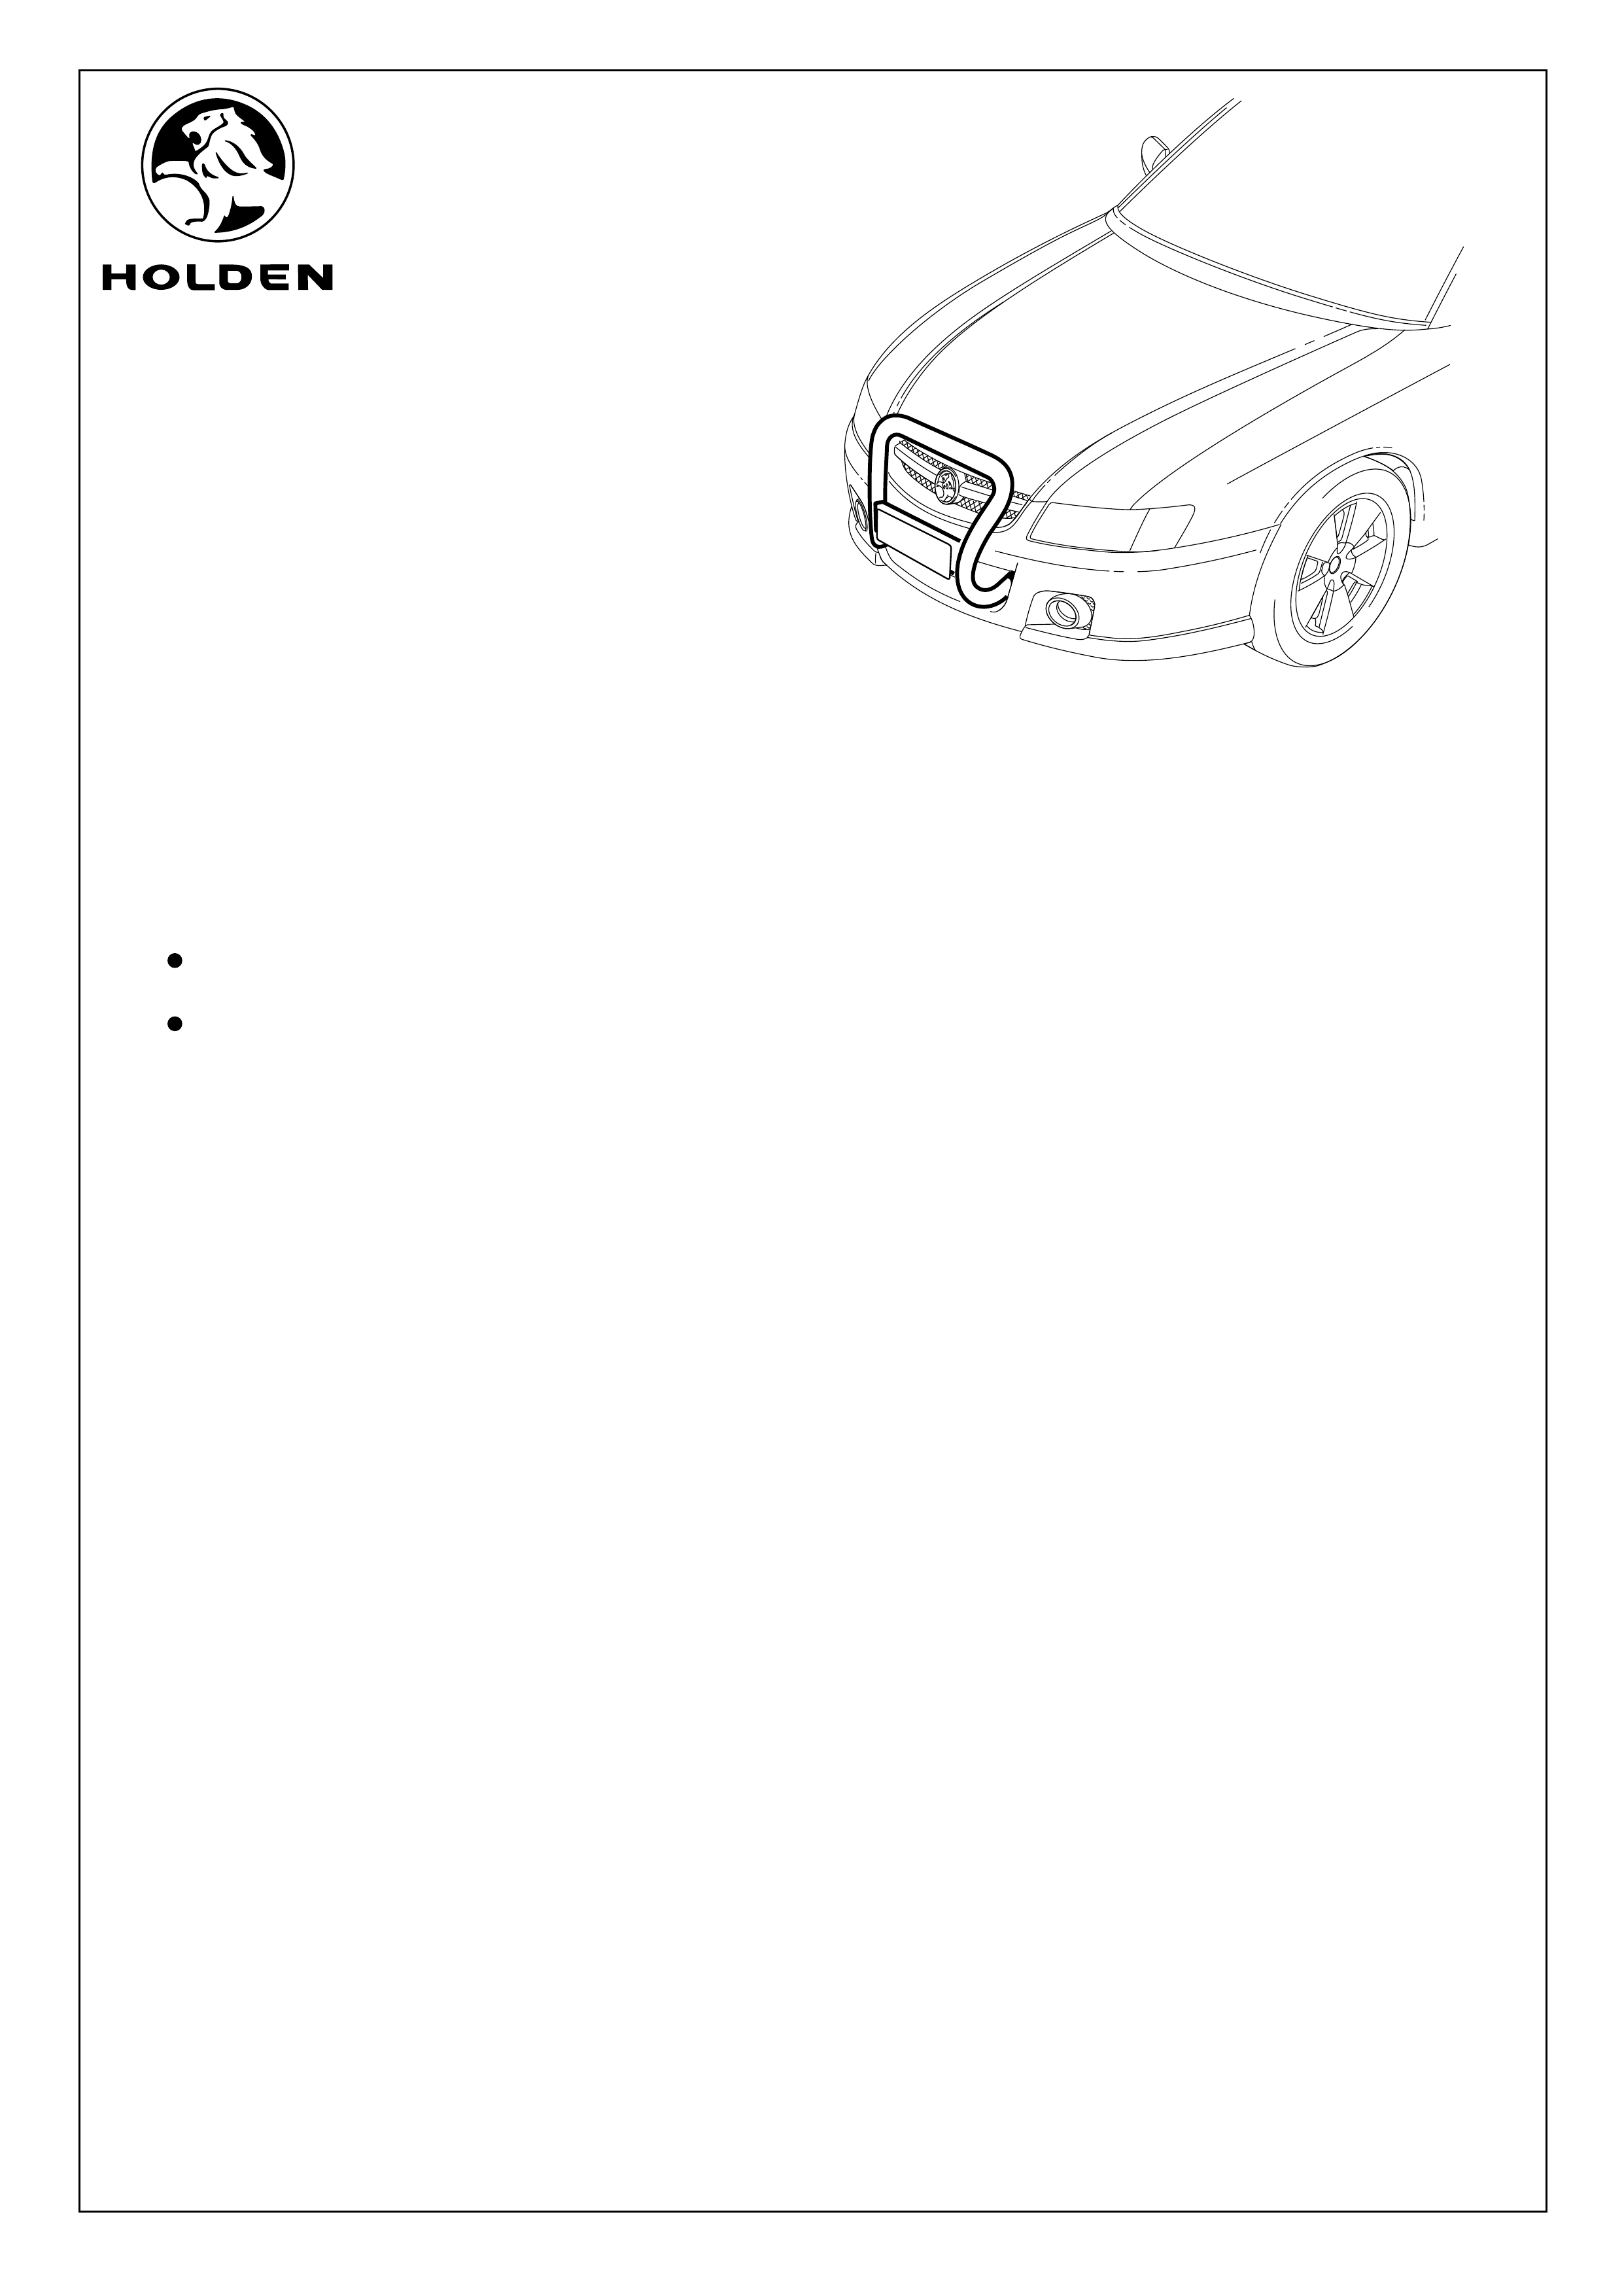
FITTING INSTRUCTIONS
VZ NUDGE BAR AND
BULL BAR PACKAGE
Page 1 of 3
NOTE:
For the purpose of these instructions the nudge bar is shown, bull bar fitment is similar.
Ensure ignition and lights are turned off prior to commencing installation.
FITTING INSTRUCTIONS:
When fitting to AWD vehicles also refer to page 3 (AWD vehicles only).
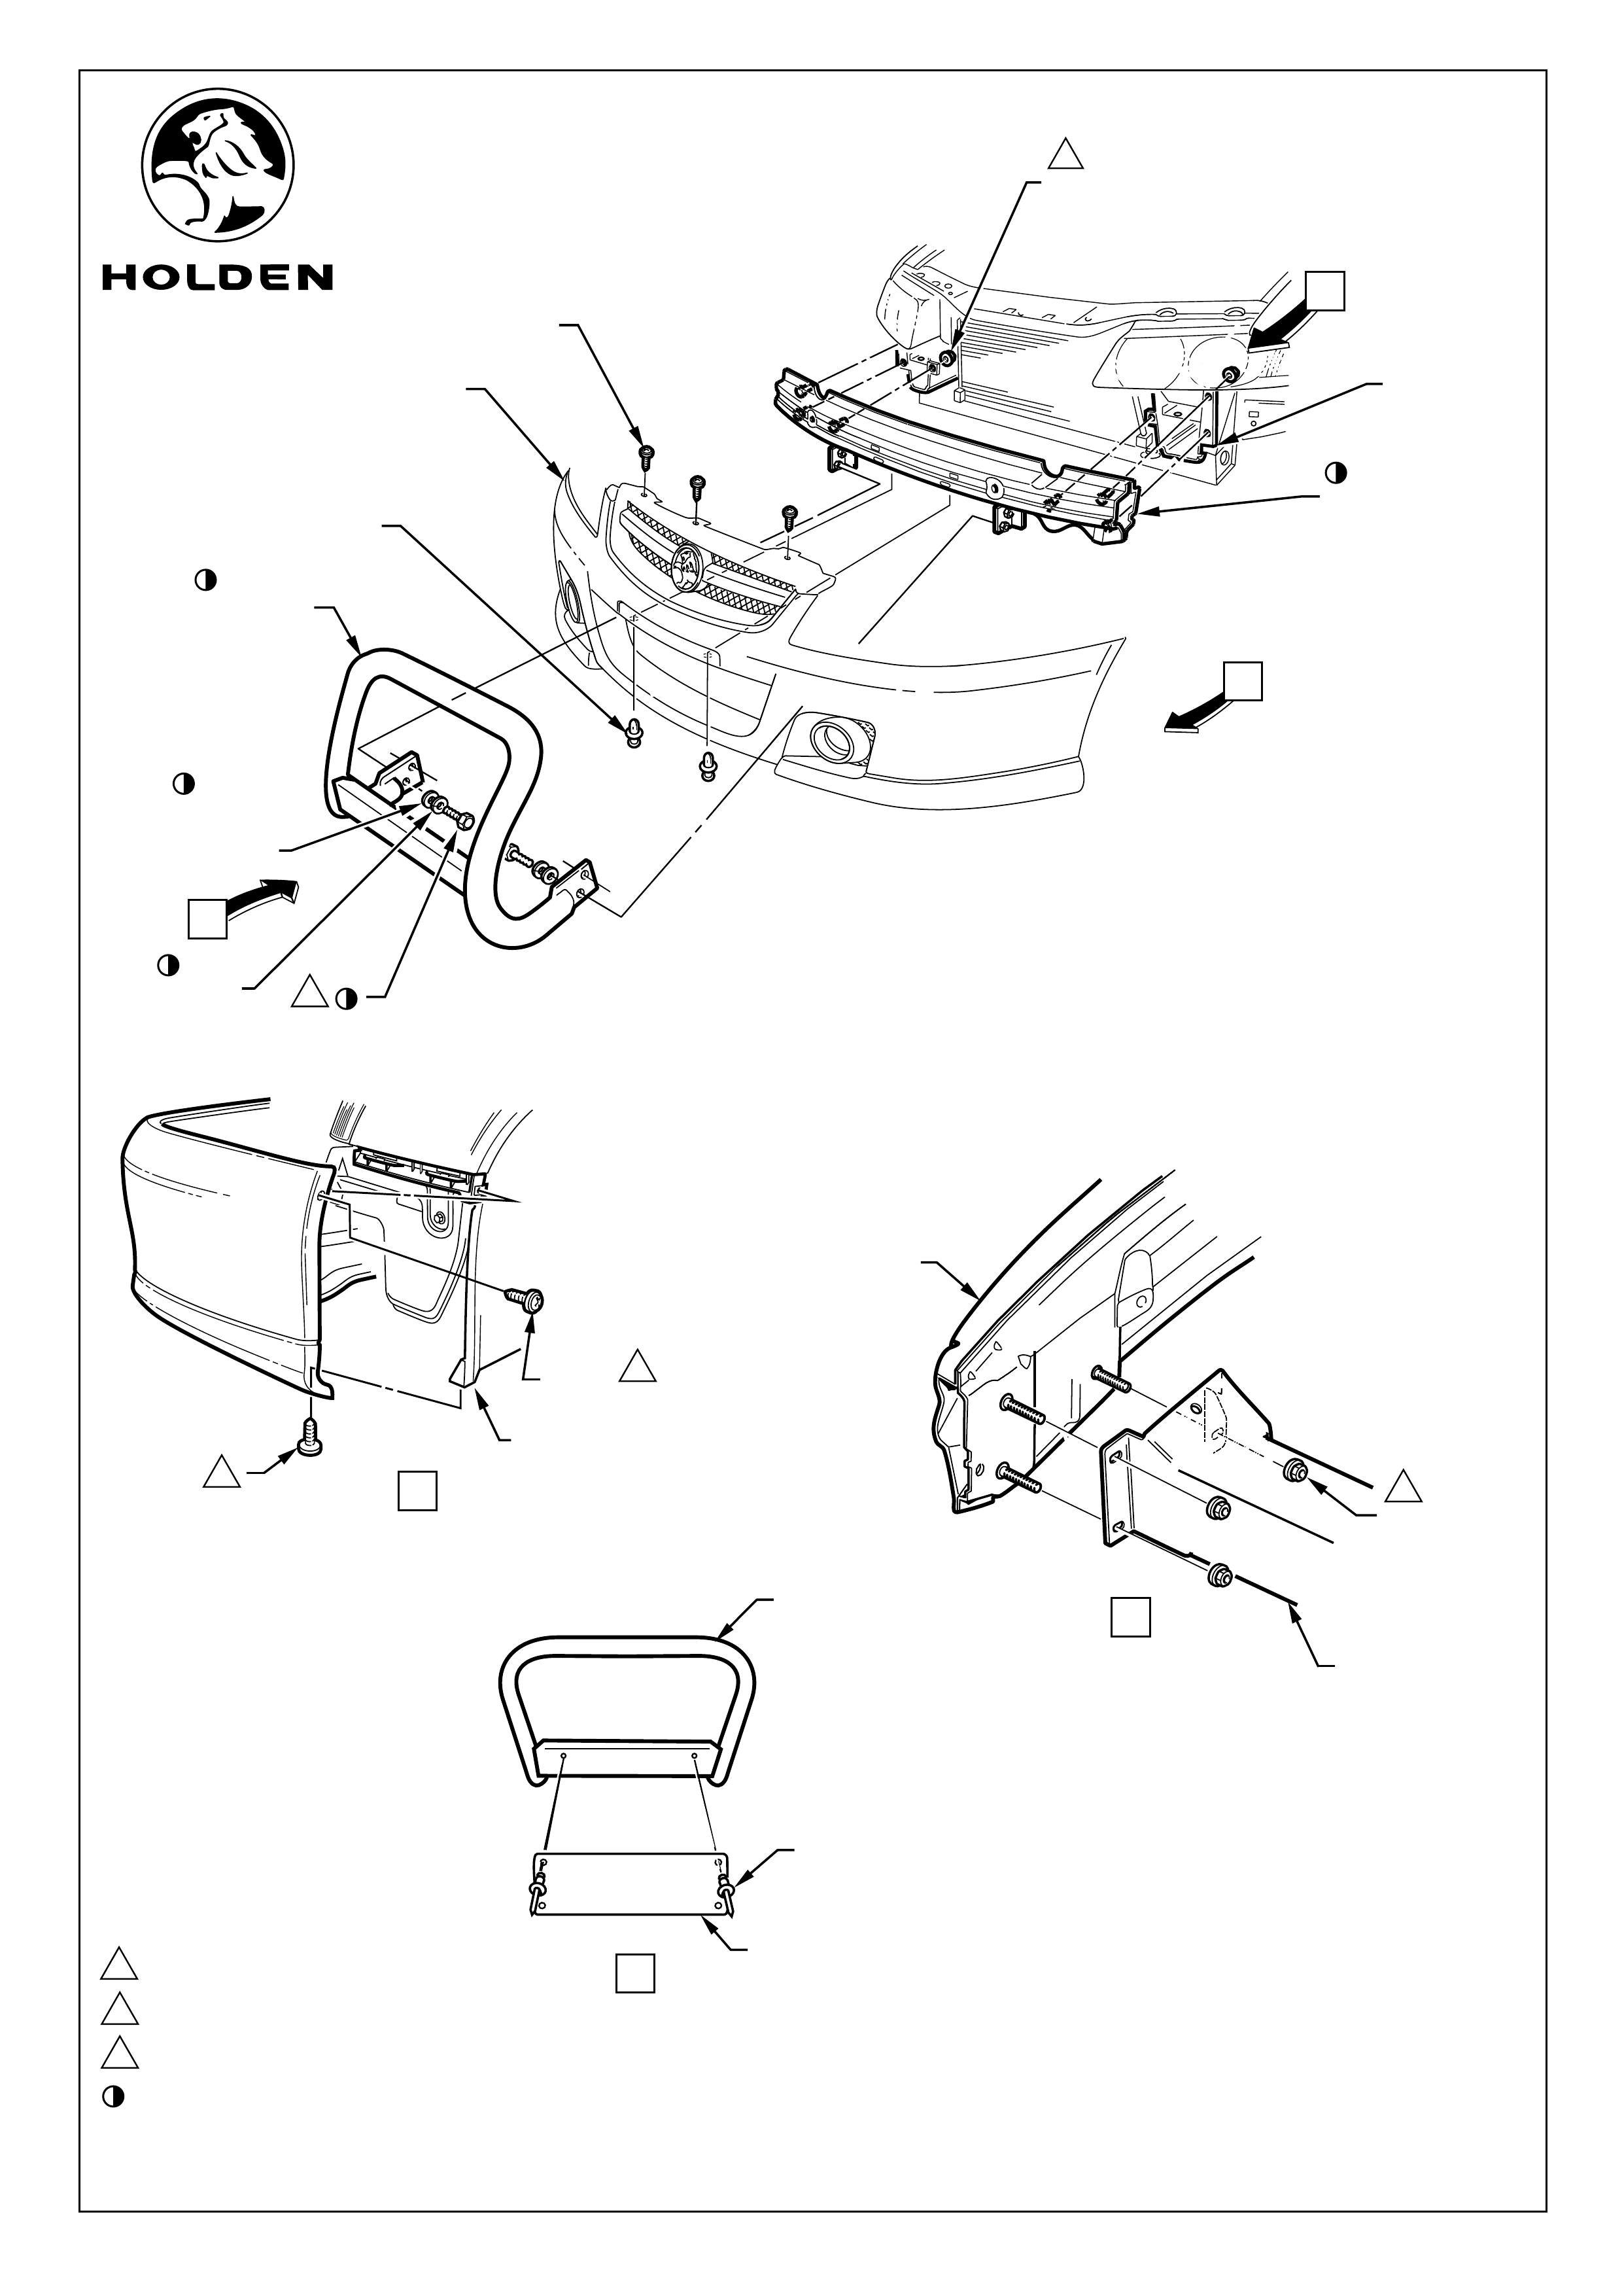
1. Disconnect the fog lamps (if fitted).
For the following, refer to page 2.
2. Remove the front fascia. Retain all fasteners.
3. Remove the horn/s (one or two depending on model) from the fascia beam.
4. Remove the front fascia support beam from the vehicle.
5. Install the new front fascia/nudge bar support beam, attach the M8 nuts (6 places) and hand tighten. (AWD
vehicles go to page 3, step 15)
6. Install the horn/s to the front fascia/nudge bar support beam.
7. Tighten the M8 nuts to 20 - 30Nm (6 places).
8. Reinstall the front fascia.
9. Remove the number plate from the front fascia.
10. Install the nudge bar onto the front fascia/nudge bar support beam brackets using the M12 bolts, spring
washers and flat washers supplied in the package. Tighten the M12 bolts to 75Nm (4 places).
11. Centralise the number plate mounting hole with those on the nudge bar. Refer to Page 2, View C
12. Rivet the number plate in position (2 places).
13. Check the alignment of the fog lamps (if fitted) and adjust as required. Refer Service Information.
14. On completion of the installation, place the fitting instructions in glove box.
NOTE: Recessed holes in the number plate beam are for mounting HID driving lamp components.
(Separate HSPO accessory).
TOOLS REQUIRED:
Philips Head Screw Driver, Rachet, 18mm Socket,
18mm Spanner, Pop Rivet Gun. (Small Flat bladed Screwdriver, Tin Snips. AWD Only).
HOLDEN LTD
Division of HOLDEN Ltd ACN 006 893 232
FD1225
26OCT04
COPYRIGHT
Reproduction in whole or part
prohibited without written approval
Page 2 of 3
VIEW
NUDGE BAR
NUMBER
PLATE
RIVET
(2 PLACES)
M8 NUT
(3 PLACES)
FASCIA/NUDGE
BAR SUPPORT BEAM
1
1
275Nm
20 - 30Nm
FASCIA BEAM
BRACKET
VIEW
C
31 - 3Nm
FASCIA/NUDGE BAR
SUPPORT BEAM
FRONT FASCIA
NUDGE BAR
SCREW
(3 PLACES)
SCRIVET
(2 PLACES)
M8 NUT
(6 PLACES)
1
FASCIA BEAM
BRACKET
VIEW
FRONT FENDER
INNER LINER
SCREW
(2 PLACES)
SCREW
(2 PLACES)
3
3
AA
B
A
A
B
PART OF NUDGE BAR PACKAGE FIGURE 1
C
FLAT
WASHER
(4 PLACES)
M12 BOLT
(4 PLACES)
3
SPRING
WASHER
(4 PLACES)
HOLDEN LTD
Division of HOLDEN Ltd ACN 006 893 232
FD1225
26OCT04
COPYRIGHT
Reproduction in whole or part
prohibited without written approval
FIGURE 2
2
1
2
3
FITTING INSTRUCTIONS: Continued...
(On AWD vehicles only)
15. From under the vehicle, remove the bolts (1) (7 places),
screws (2) (6 places) and scrivets (3) (6 places) and
remove the front bumper bar lower extension. Refer to
Figure 2.
Refer to Figure 3 for the following:
a. To release the front fascia support beam remove the
scrivets (1) (2 places) fixing the lower air intake duct
to the fascia support beam.
b. Remove the scrivets (2) (4 places) retaining the two
front fascia strengtheners. Fit the fascia
strengtheners to the new fascia support beam, refit
scrivets.
16. Cut two slots (1) (drivers side shown) in the lower air
intake duct to receive the nudge bar support brackets.
Refit the lower air intake duct to the front fascia support
beam with the two scrivets. Refer to Figure 4. Return to
Page 1, Step 6.
PART No. DESCRIPTION QTY
92177444 BULL BAR - SILVER
92177445 BULL BAR - BLACK
FASCIA/NUDGE BAR SUPPORT BEAM 1
BOLT, M12 4
SPRING WASHER, 12mm DIA. 4
FLAT WASHER, 12mm DIA. 4
RIVET 2
FD1225 FITTING INSTRUCTION 1
FD796 PROOF OF WARRANTY CARD 1
Parts List
PART No. DESCRIPTION QTY
92177443 NUDGE BAR - SILVER 1
FASCIA/NUDGE BAR SUPPORT BEAM 1
BOLT, M12 4
SPRING WASHER, 12mm DIA. 4
FLAT WASHER, 12mm DIA. 4
RIVET 2
FD1225 FITTING INSTRUCTION 1
FD796 PROOF OF WARRANTY CARD 1
} 1
FIGURE 4
1
FIGURE 3
2
2
1
Page 3 of 3