
FITTING INSTRUCTIONS FOR
WH HEADLAMP GUARDS
Part No. 92140074
FD917
30JN99
COPYRIGHT
Page 1 of 2
FD917-1
HOLDEN SERVICE PARTS OPERATIONS
Reproduction in whole or part
prohibited without written approval
Division of HOLDEN Ltd ACN 006 893 232
FITTING INSTRUCTIONS
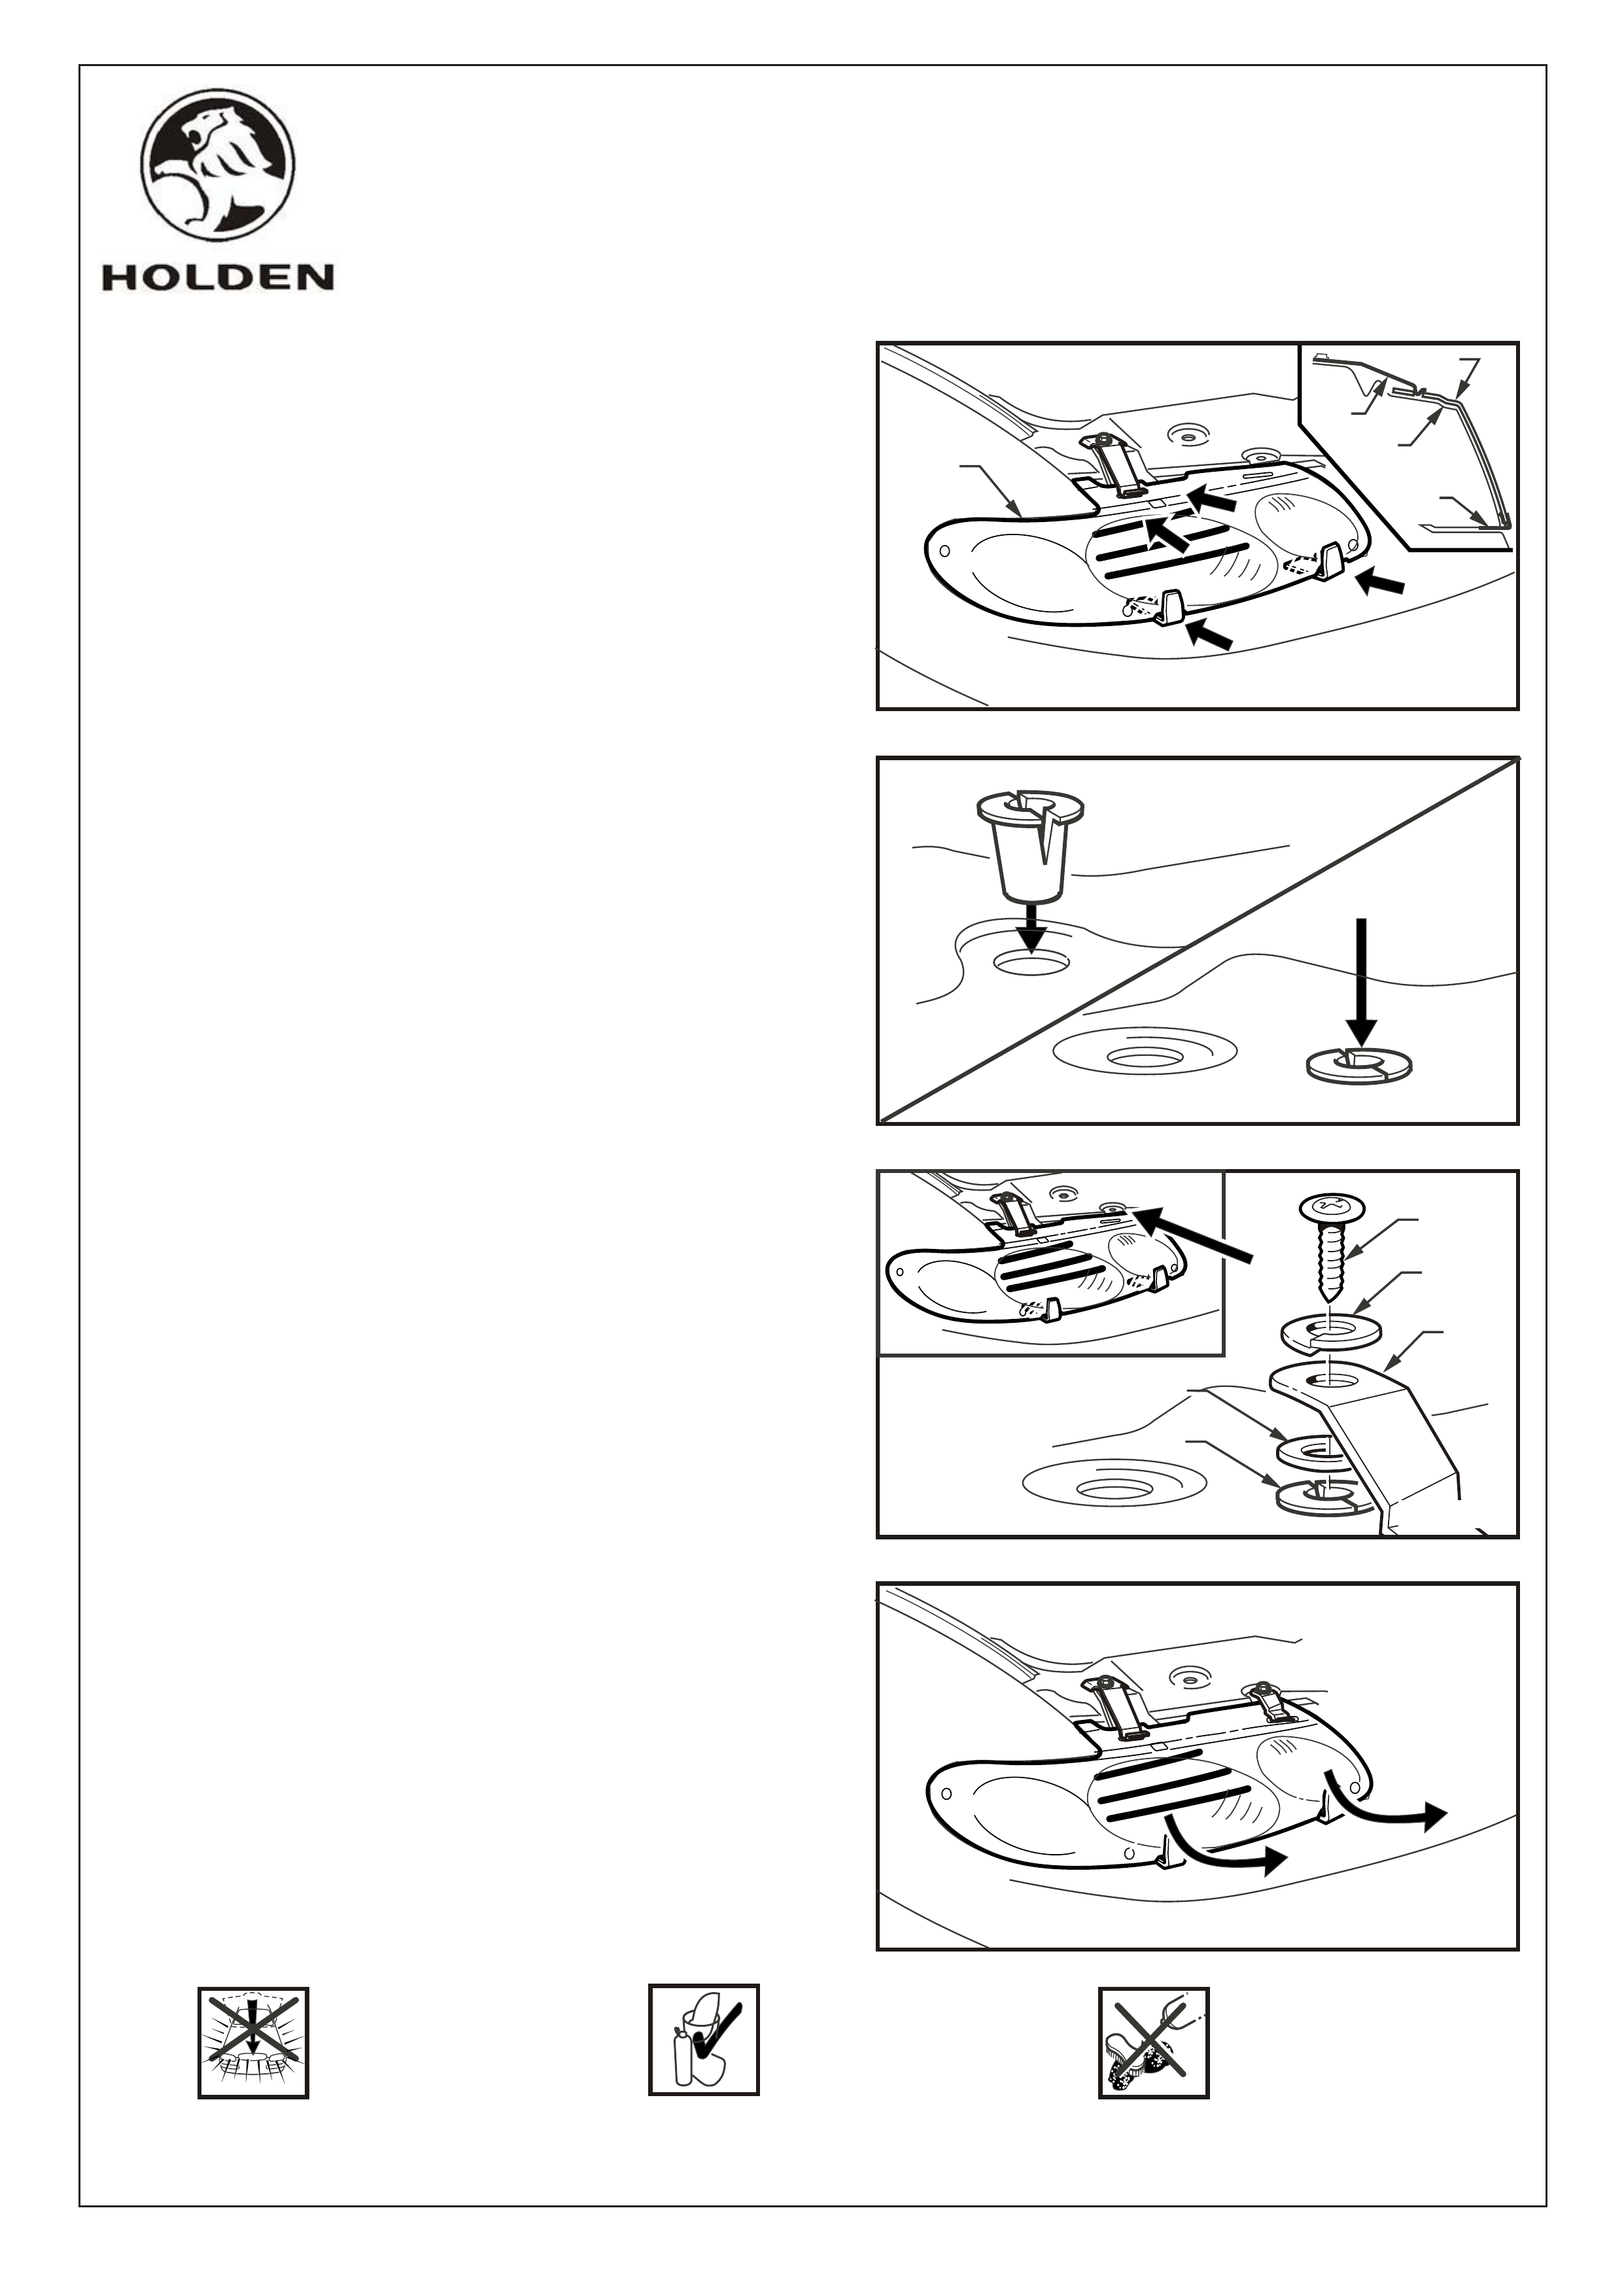
1. Open bonnet and clean Headlamps.
2. Identify the 'Drivers side outer' clip. Remove the
outer mounting bolt.
3. Place the flanges of clip over the edges of the lug
mounting and secure with bolt previously removed.
4. Attach plastic clips into the allocated slots on lower
edge of Headlamp Guard as shown.
FIGURE 4
FIGURE 2
LUG MOUNTING
BOLT
FIGURE 1
FIGURE 3
FD917
30JN99
COPYRIGHT
Page 2 of 2
FD917-2
HOLDEN SERVICE PARTS OPERATIONS
Reproduction in whole or part
prohibited without written approval
Division of HOLDEN Ltd ACN 006 893 232
FIGURE8
FITTING INSTRUCTIONS (continued)
5. Fit Headlamp Guard in place under drivers side
outer clip as shown. Spring clip must locate
positively into outer slot of Headlamp Guard. Locate
the lower edge plastic clips beneath headlamp.
6. Locate hole in radiator support panel, directly above
drivers side - inner slot of Headlamp Guard. Push
plastic captive nut into hole until flange is resting on
metal.
7. Place rubber washer on captive nut. Fit 'Drivers
side inner' clip over rubber washer, ensuring clip
locates positively into inner slot of Headlamp
Guard. Lastly place spring washer and tighten
screw. Repeat steps for Passenger side headlamp
using respective clips.
NOTE: DO NOT OVER- TIGHTEN SCREW.
8. TO REMOVE: Lift lower edge away from headlamp.
Do not slam the bonnet Clean Headlamp Guards with
a mild detergent and water
solution.
Do not use abrasive cleaners.
NOTE: AFTER INSTALLATION IS COMPLETE,
CLOSED BONNET SHOULD NOT CONTACT
HEADLAMP GUARD . ADJUST BONNET
BUMP STOPS FOR ADDITIONAL
CLEARANCE IF NECESSARY.
FIGURE 6
FIGURE 5
HEADLAMP
GUARD
GUARD
CLIP
LAMP
PLASTIC
CLIP
SCREW
SPRING
WASHER
INNER
CLIP
RUBBER
WASHER
NUT
FIGURE 7