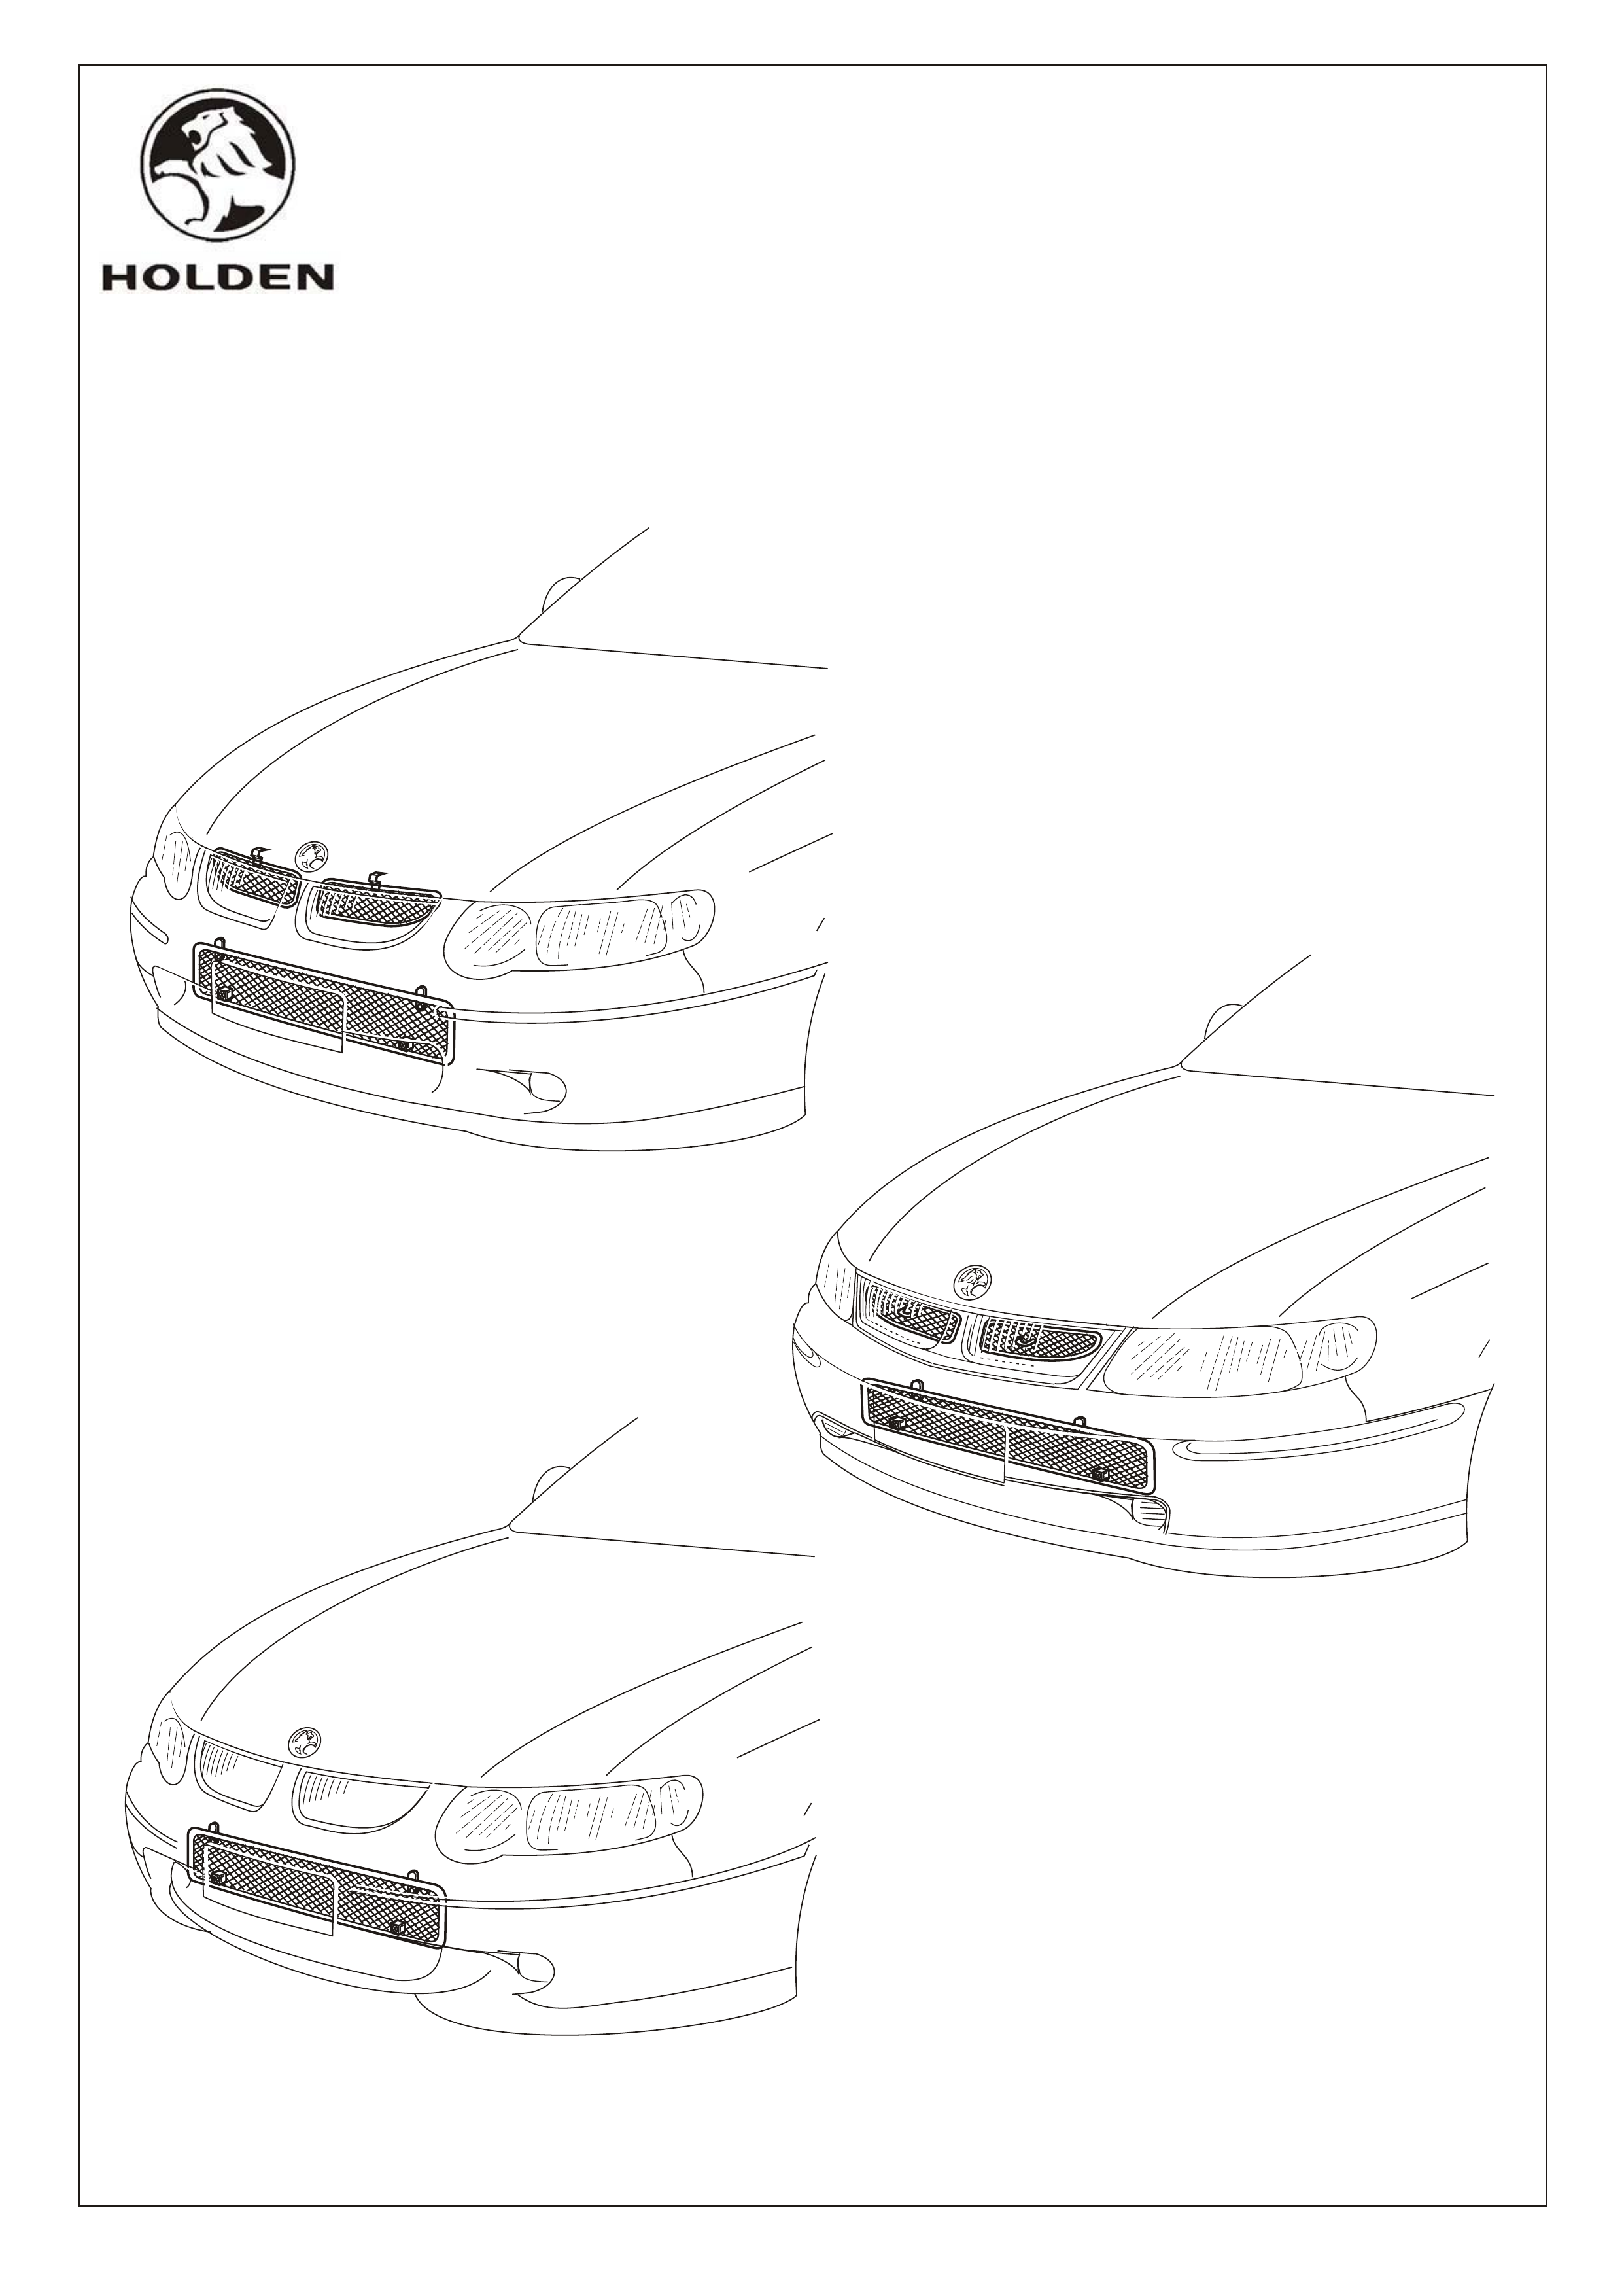
FITTING INSTRUCTIONS FOR
VX SERIES INSECT SCREENS
Part No. 92142897 EXECUTIVE
Part No. 92142898 BERLINA & CALAIS
Part No. 92142899 ‘S’ & ‘SS’
FD976
28JN00
COPYRIGHT
Page 1 of 6
FD976-01
HOLDEN SERVICE PARTS OPERATIONS
Reproduction in whole or part
prohibited without written approval
Division of HOLDEN Ltd ACN 006 893 232
BERLINA & CALAIS
‘S’ & ‘SS’
EXECUTIVE

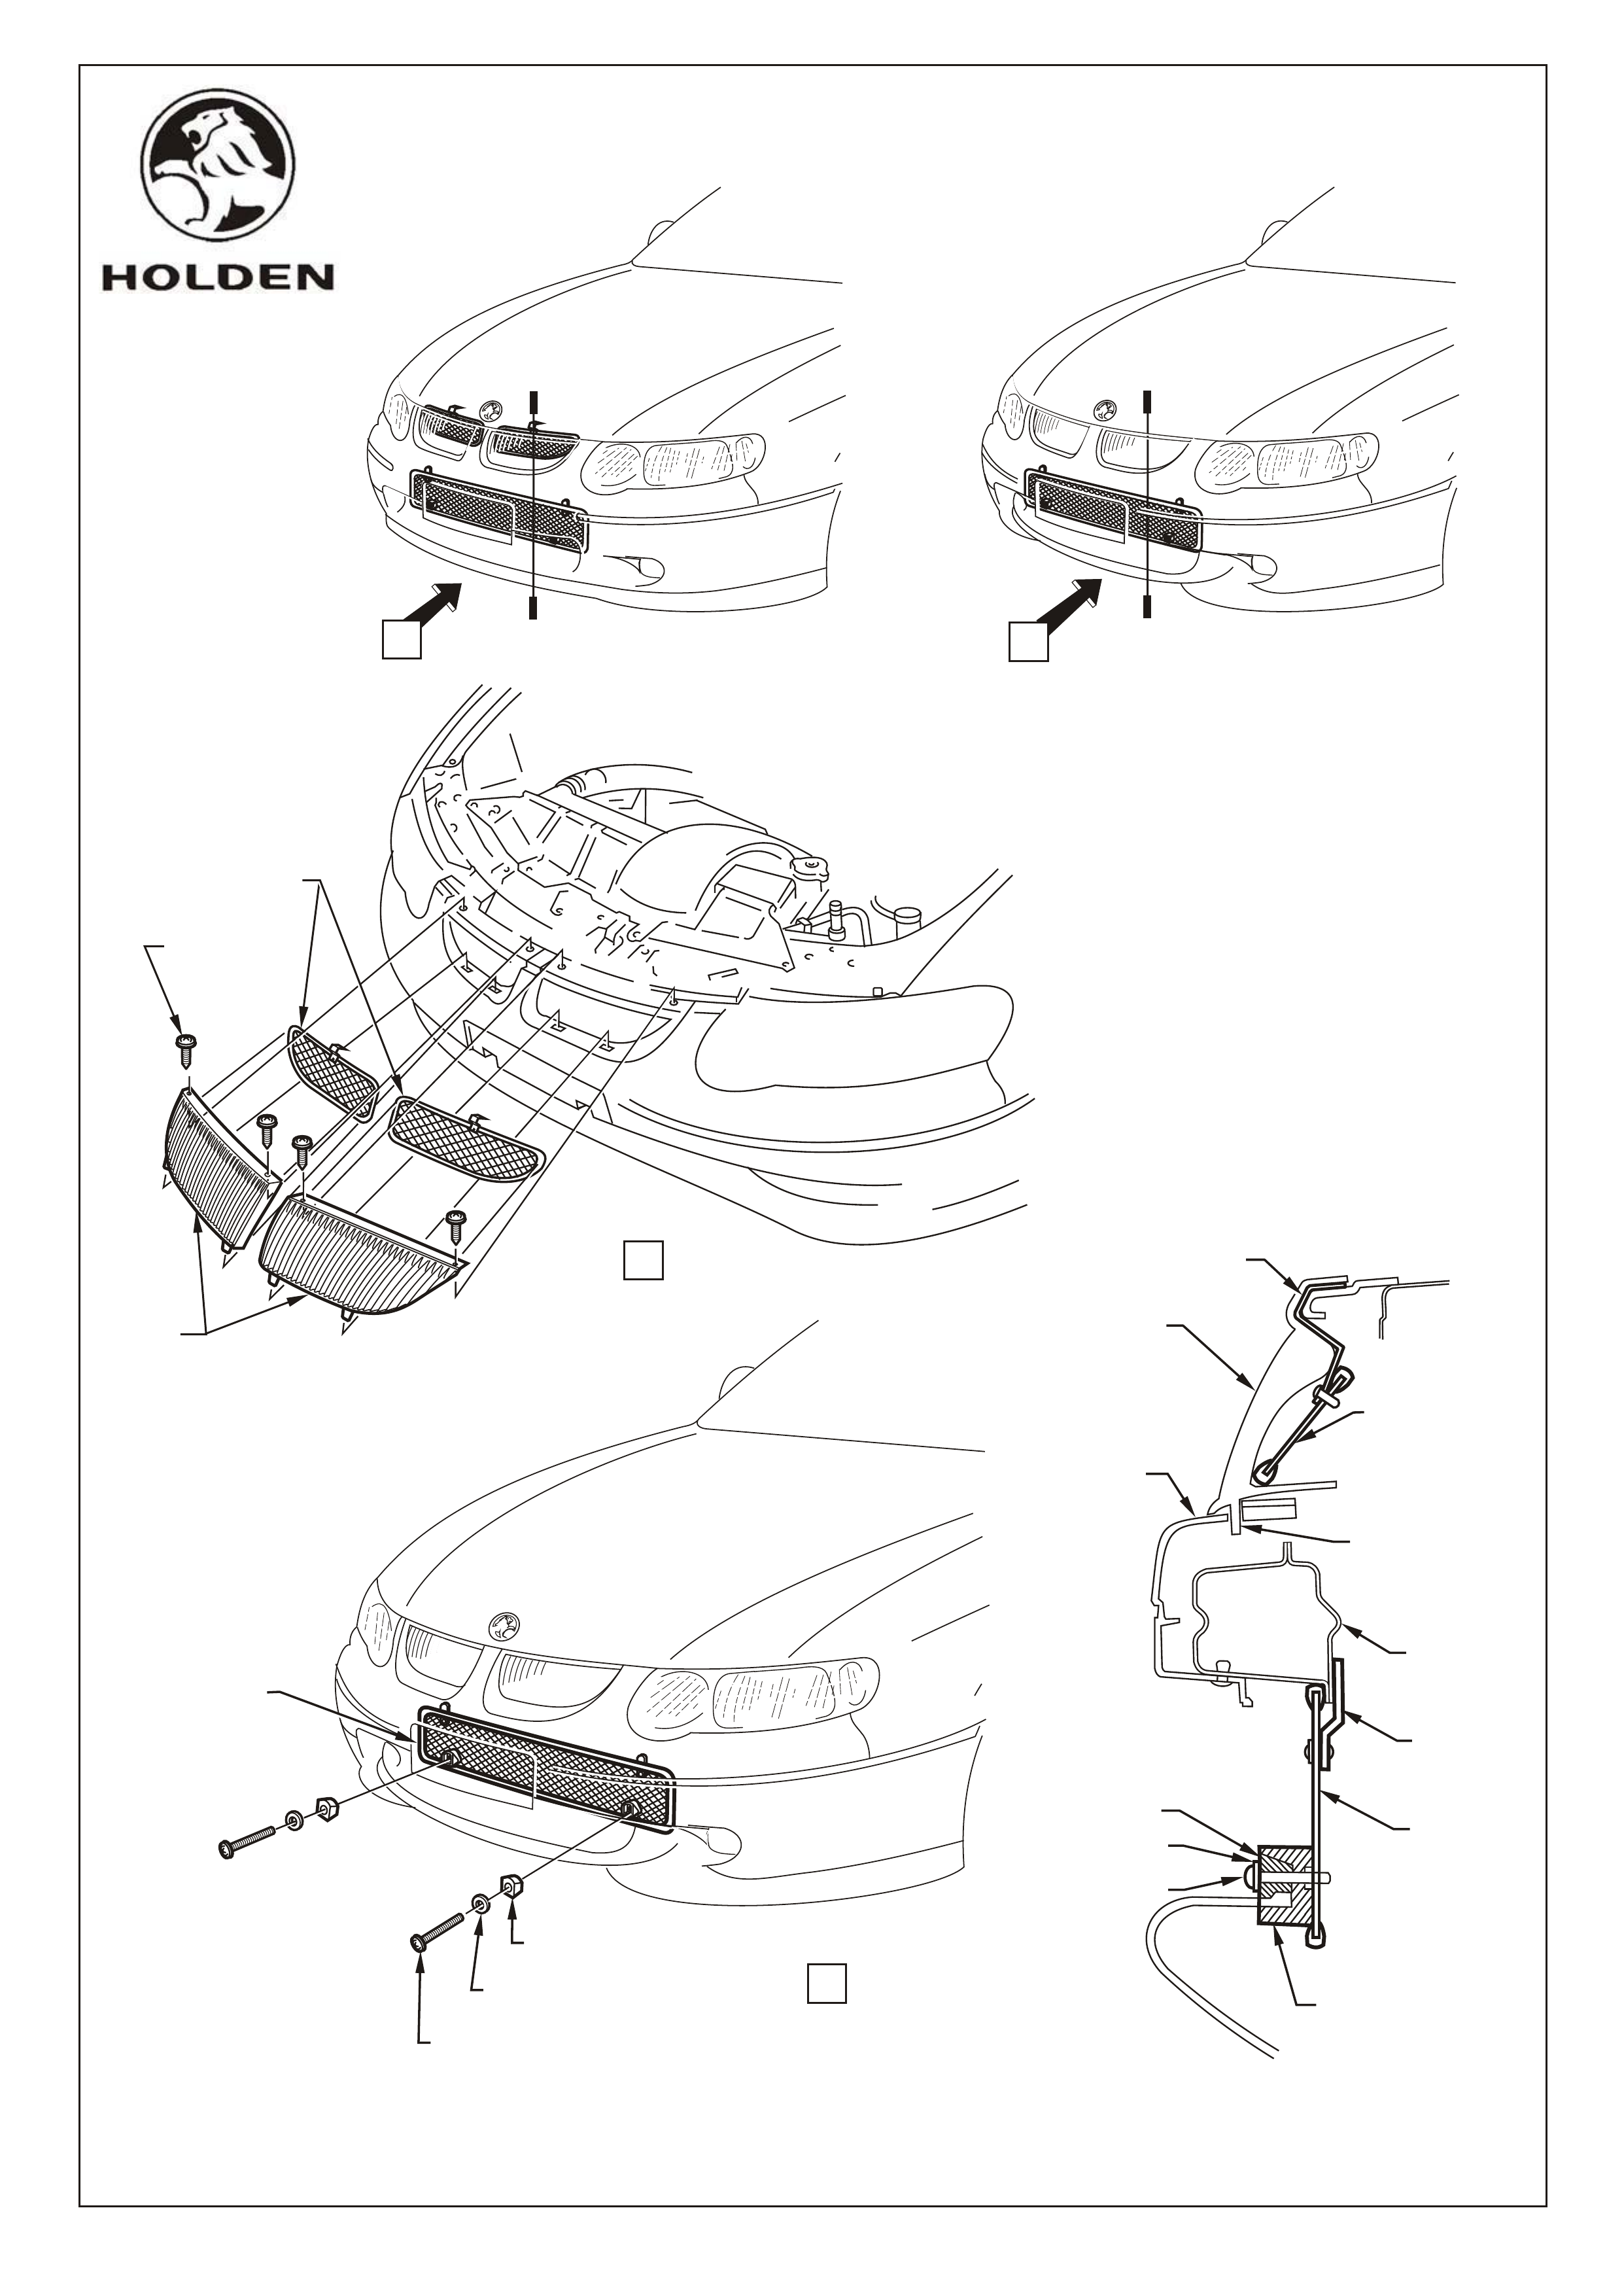
NOSE GRILLE INSECT SCREENS - EXECUTIVE ONLY
1. Lift bonnet and secure.
2. Undo the four screws attaching the two front facia grille inserts, refer Figure 1, VIEW A.
3. Gently pull the front facia grille inserts up to release them from the bumper moulding, refer Figure 1,
VIEW A.
4. Position the two upper insect screens into the rear of the front facia grilles, refer Figure 1, SECTION
A-A.
5. Re-attach the front facia grilles with the insect screens installed, to the bumper in reversal to steps 2
and 3.
NOTE: Ensure locating pins on lower edge of front facia grille inserts are correctly located into bumper
facia when reinstalling inserts, refer Figure 1, SECTION A-A.
FACIA MOUTH INSECT SCREEN -EXECUTIVE, 'S'& 'SS'
6. From under rear of the facia, position the lower insect screen into the mouth of the facia, refer Figure 1,
SECTION A-A.
7. Ensure the three tabs are facing upwards as the screen must be positioned in front of the lower steel
flange of the bumper support beam and the plastic tabs behind the flange, refer Figure 1, SECTION
A-A.
8. With a sliding motion, position the screen centrally about the mouth of the facia. Clip the body of the
clamps onto the lower section of the mouth of the facia, refer Figure 1, SECTION A-A.
9. Using the screw and washer from the fitting kit, screw the wedge blocks into the clamps bodies so as to
lock up the screen onto the facia, refer Figure 1, SECTION A-A and VIEW B.
FD976
28JN00
COPYRIGHT
Page 2 of 6
FD976-02
HOLDEN SERVICE PARTS OPERATIONS
Reproduction in whole or part
prohibited without written approval
Division of HOLDEN Ltd ACN 006 893 232
FITTING INSTRUCTIONS FOR
Part No. 92142897 EXECUTIVE
Part No. 92142899 ‘S’ & ‘SS’
A-A
SECTION
VIEW A
INSECT SCREENS
(GRILLE INSERTS)
GRILLE
INSERTS
SCREW
(4 PLACES)
FRONT
FACIA
GRILLE
INSERT
INSECT
SCREEN
(LOWER
FACIA
SCOOP)
INSECT SCREEN
GRILLE INSERT
(EXECUTIVE
MODELS ONLY)
METAL
BRACKET
BUMPER
SUPPORT
BEAM
GRILLE INSERT
LOCATING PIN
PLASTIC
TAB
CLAMP BODY
CLAMP
WEDGE
BOLT
WASHER
BUMPER
FACIA
Figure 1
Page 3 of 6
FD976-03
FD976
28JN00
COPYRIGHT
HOLDEN SERVICE PARTS OPERATIONS
Reproduction in whole or part
prohibited without written approval
Division of HOLDEN Ltd ACN 006 893 232
A
A
A
A
A
VIEW B
INSECT SCREEN
(FACIA MOUTH)
BOLT
(2 PLACES)
WASHER
(2 PLACES)
CLAMP WEDGE
(2 PLACES)
EXECUTIVE
'S' & 'SS'
'S' & 'SS' MODELS
EXECUTIVE
EXECUTIVE B

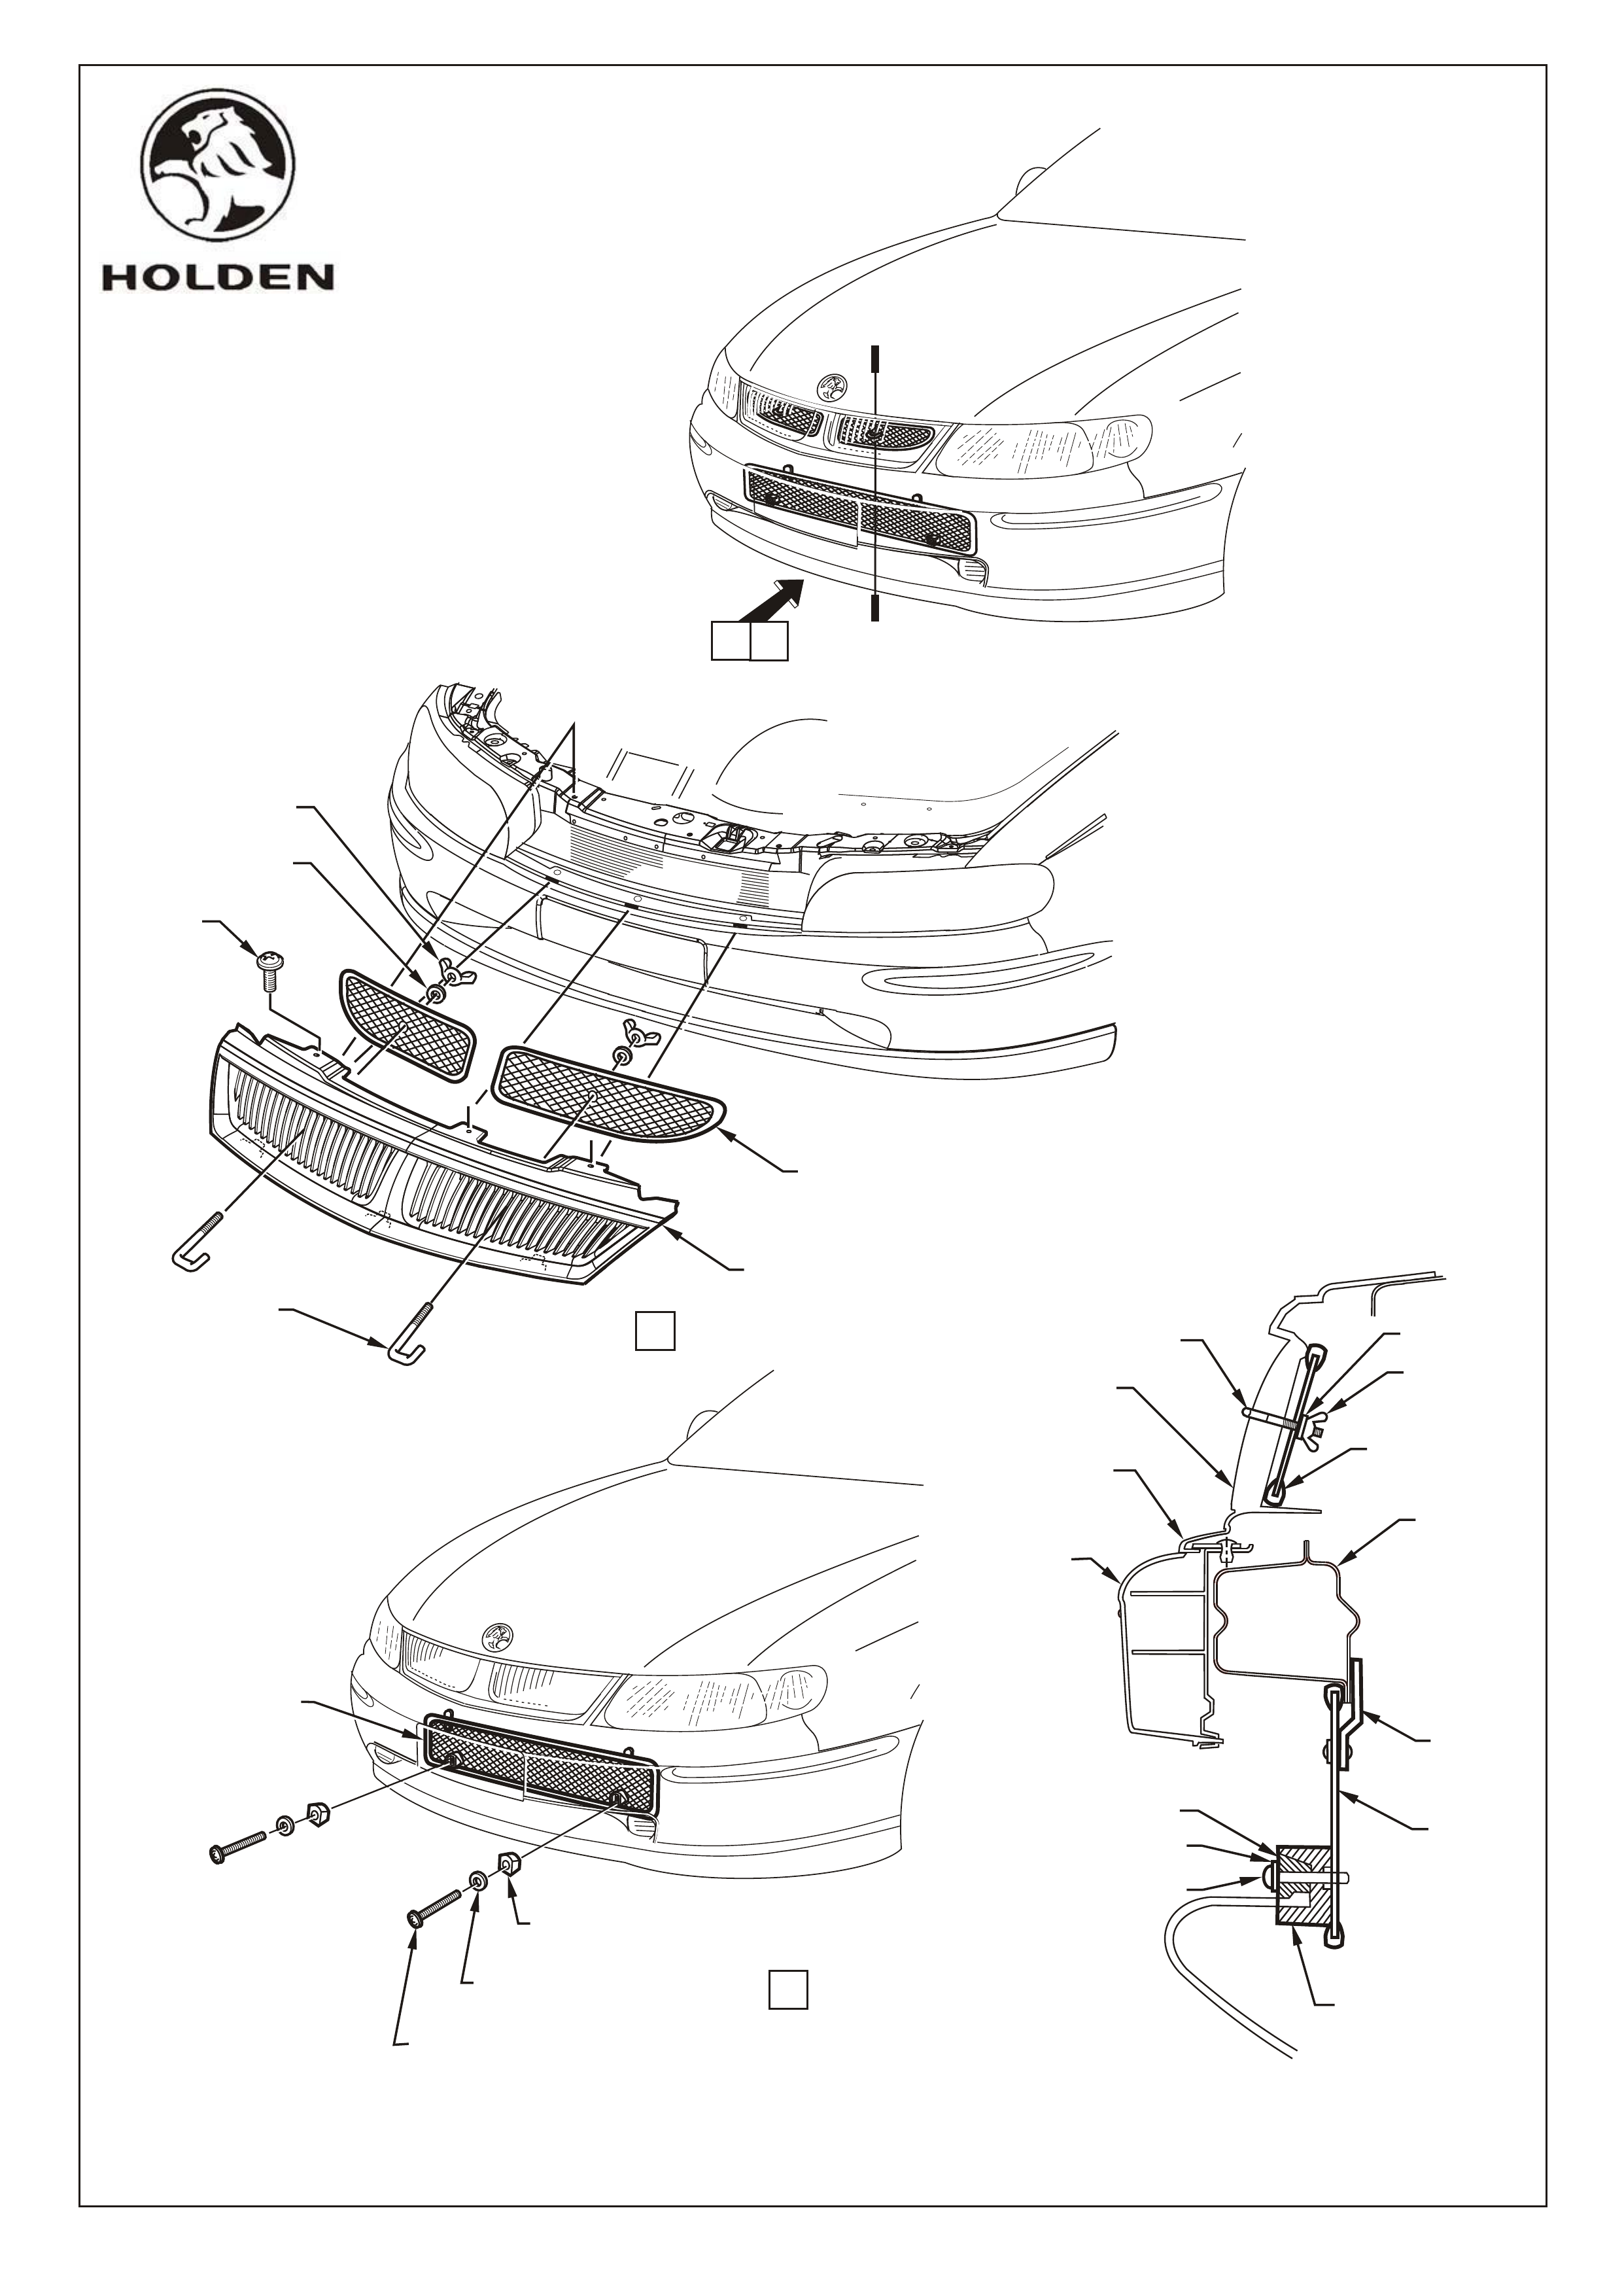
NOSE GRILLE INSECT SCREENS
1. Lift bonnet and secure.
2. Undo the three screws attaching the front facia grille , refer Figure 2, VIEW A.
3. Gently pull the front facia grille forward and up to release them from the bumper facia, refer Figure
2,VIEW A.
4. Position the two upper insect screens into the rear of the front facia grille, refer Figure 2, SECTION
A-A.
5. Install the J-bolts from the front side of the facia grille, ensuring the location aligns with the hole in the
insect screen. Install washers, wing nuts and tighten.
6. Re-attach the front facia grille with the insect screens installed, to the bumper facia in reversal to steps
2 and 3.
NOTE: Ensure locating pins on lower edge of front facia grille inserts are correctly located into bumper
facia when reinstalling inserts, refer Figure 2, SECTION A-A.
FACIA MOUTH INSECT SCREEN
7. From under rear of the facia, position the lower insect screen into the mouth of the facia, refer Figure 2,
VIEW B.
8. Ensure the two tabs are facing upwards as the screen must be positioned in front of the lower steel
flange of the bumper support beam and the plastic tabs behind the flange, refer Figure 2, SECTION
A-A.
9. With a sliding motion, position the screen centrally about the mouth of the facia. Clip the body of the
clamps onto the lower section of the mouth of the facia, refer Figure 2, SECTION A-A.
10. Using the screw and washer from fitting kit, screw the wedge blocks into the clamps bodies so as to
lock up the screen onto the facia, refer Figure 2, SECTION A-A and VIEW B.
FD976
28JN00
COPYRIGHT
Page 4 of 6
FD976-04
HOLDEN SERVICE PARTS OPERATIONS
Reproduction in whole or part
prohibited without written approval
Division of HOLDEN Ltd ACN 006 893 232
FITTING INSTRUCTIONS FOR
Part No. 92142898 BERLINA & CALAIS
A-A
SECTION
FRONT
FACIA
GRILLE
WING NUT
WASHER
J BOLT
INSECT
SCREEN
(LOWER
FACIA
SCOOP)
INSECT SCREEN
GRILLE INSERT
BUMPER
SUPPORT
BEAM
GRILLE
LOCATING
TONGUE
PLASTIC
TAB
CLAMP BODY
CLAMP
WEDGE
BOLT
WASHER
BUMPER
FACIA
Figure 2
Page 5 of 6
FD976
28JN00
COPYRIGHT
HOLDEN SERVICE PARTS OPERATIONS
Reproduction in whole or part
prohibited without written approval
Division of HOLDEN Ltd ACN 006 893 232
VIEW B
INSECT SCREEN
(FACIA MOUTH)
BOLT
(2 PLACES)
WASHER
(2 PLACES)
CLAMP WEDGE
(2 PLACES)
BERLINA & CALAIS
FD976-05
VIEW A
INSECT SCREENS
(GRILLE INSERTS)
GRILLE
WING NUT
(2 PLACES)
WASHER
(2 PLACES)
SCREW
(3 PLACES)
J BOLT
(2 PLACES)
A
A
B
A

Parts List
Parts List
Parts List
PART No. DESRIPTION QTY
INSECT SCREEN - GRILLE INSERT(LH) 1
INSECT SCREEN - GRILLE INSERT(RH) 1
INSECT SCREEN - FACIA MOUTH 1
CLAMP WEDGE 2
BOLT 2
WASHER 2
FD976 FITTING INSTRUCTION BOOKLET 1
PART No. DESRIPTION QTY
INSECT SCREEN - GRILLE INSERT(LH) 1
INSECT SCREEN - GRILLE INSERT(RH) 1
INSECT SCREEN - FACIA MOUTH 1
CLAMP WEDGE 2
BOLT 2
WASHER 4
J BOLT 2
WING NUT 2
FD976 FITTING INSTRUCTION BOOKLET 1
PART No. DESRIPTION QTY
INSECT SCREEN - FACIA MOUTH 1
CLAMP WEDGE 2
BOLT 2
WASHER 2
FD976 FITTING INSTRUCTION BOOKLET 1
FD976
28JN00
COPYRIGHT
Page 6 of 6
FD976-06
HOLDEN SERVICE PARTS OPERATIONS
Reproduction in whole or part
prohibited without written approval
Division of HOLDEN Ltd ACN 006 893 232
VX SERIES INSECT SCREENS
Part No. 92142897 EXECUTIVE
VX SERIES INSECT SCREENS
Part No. 92142898 BERLINA & CALAIS
VX SERIES INSECT SCREENS
Part No. 92142899 ‘S’ & ‘SS’