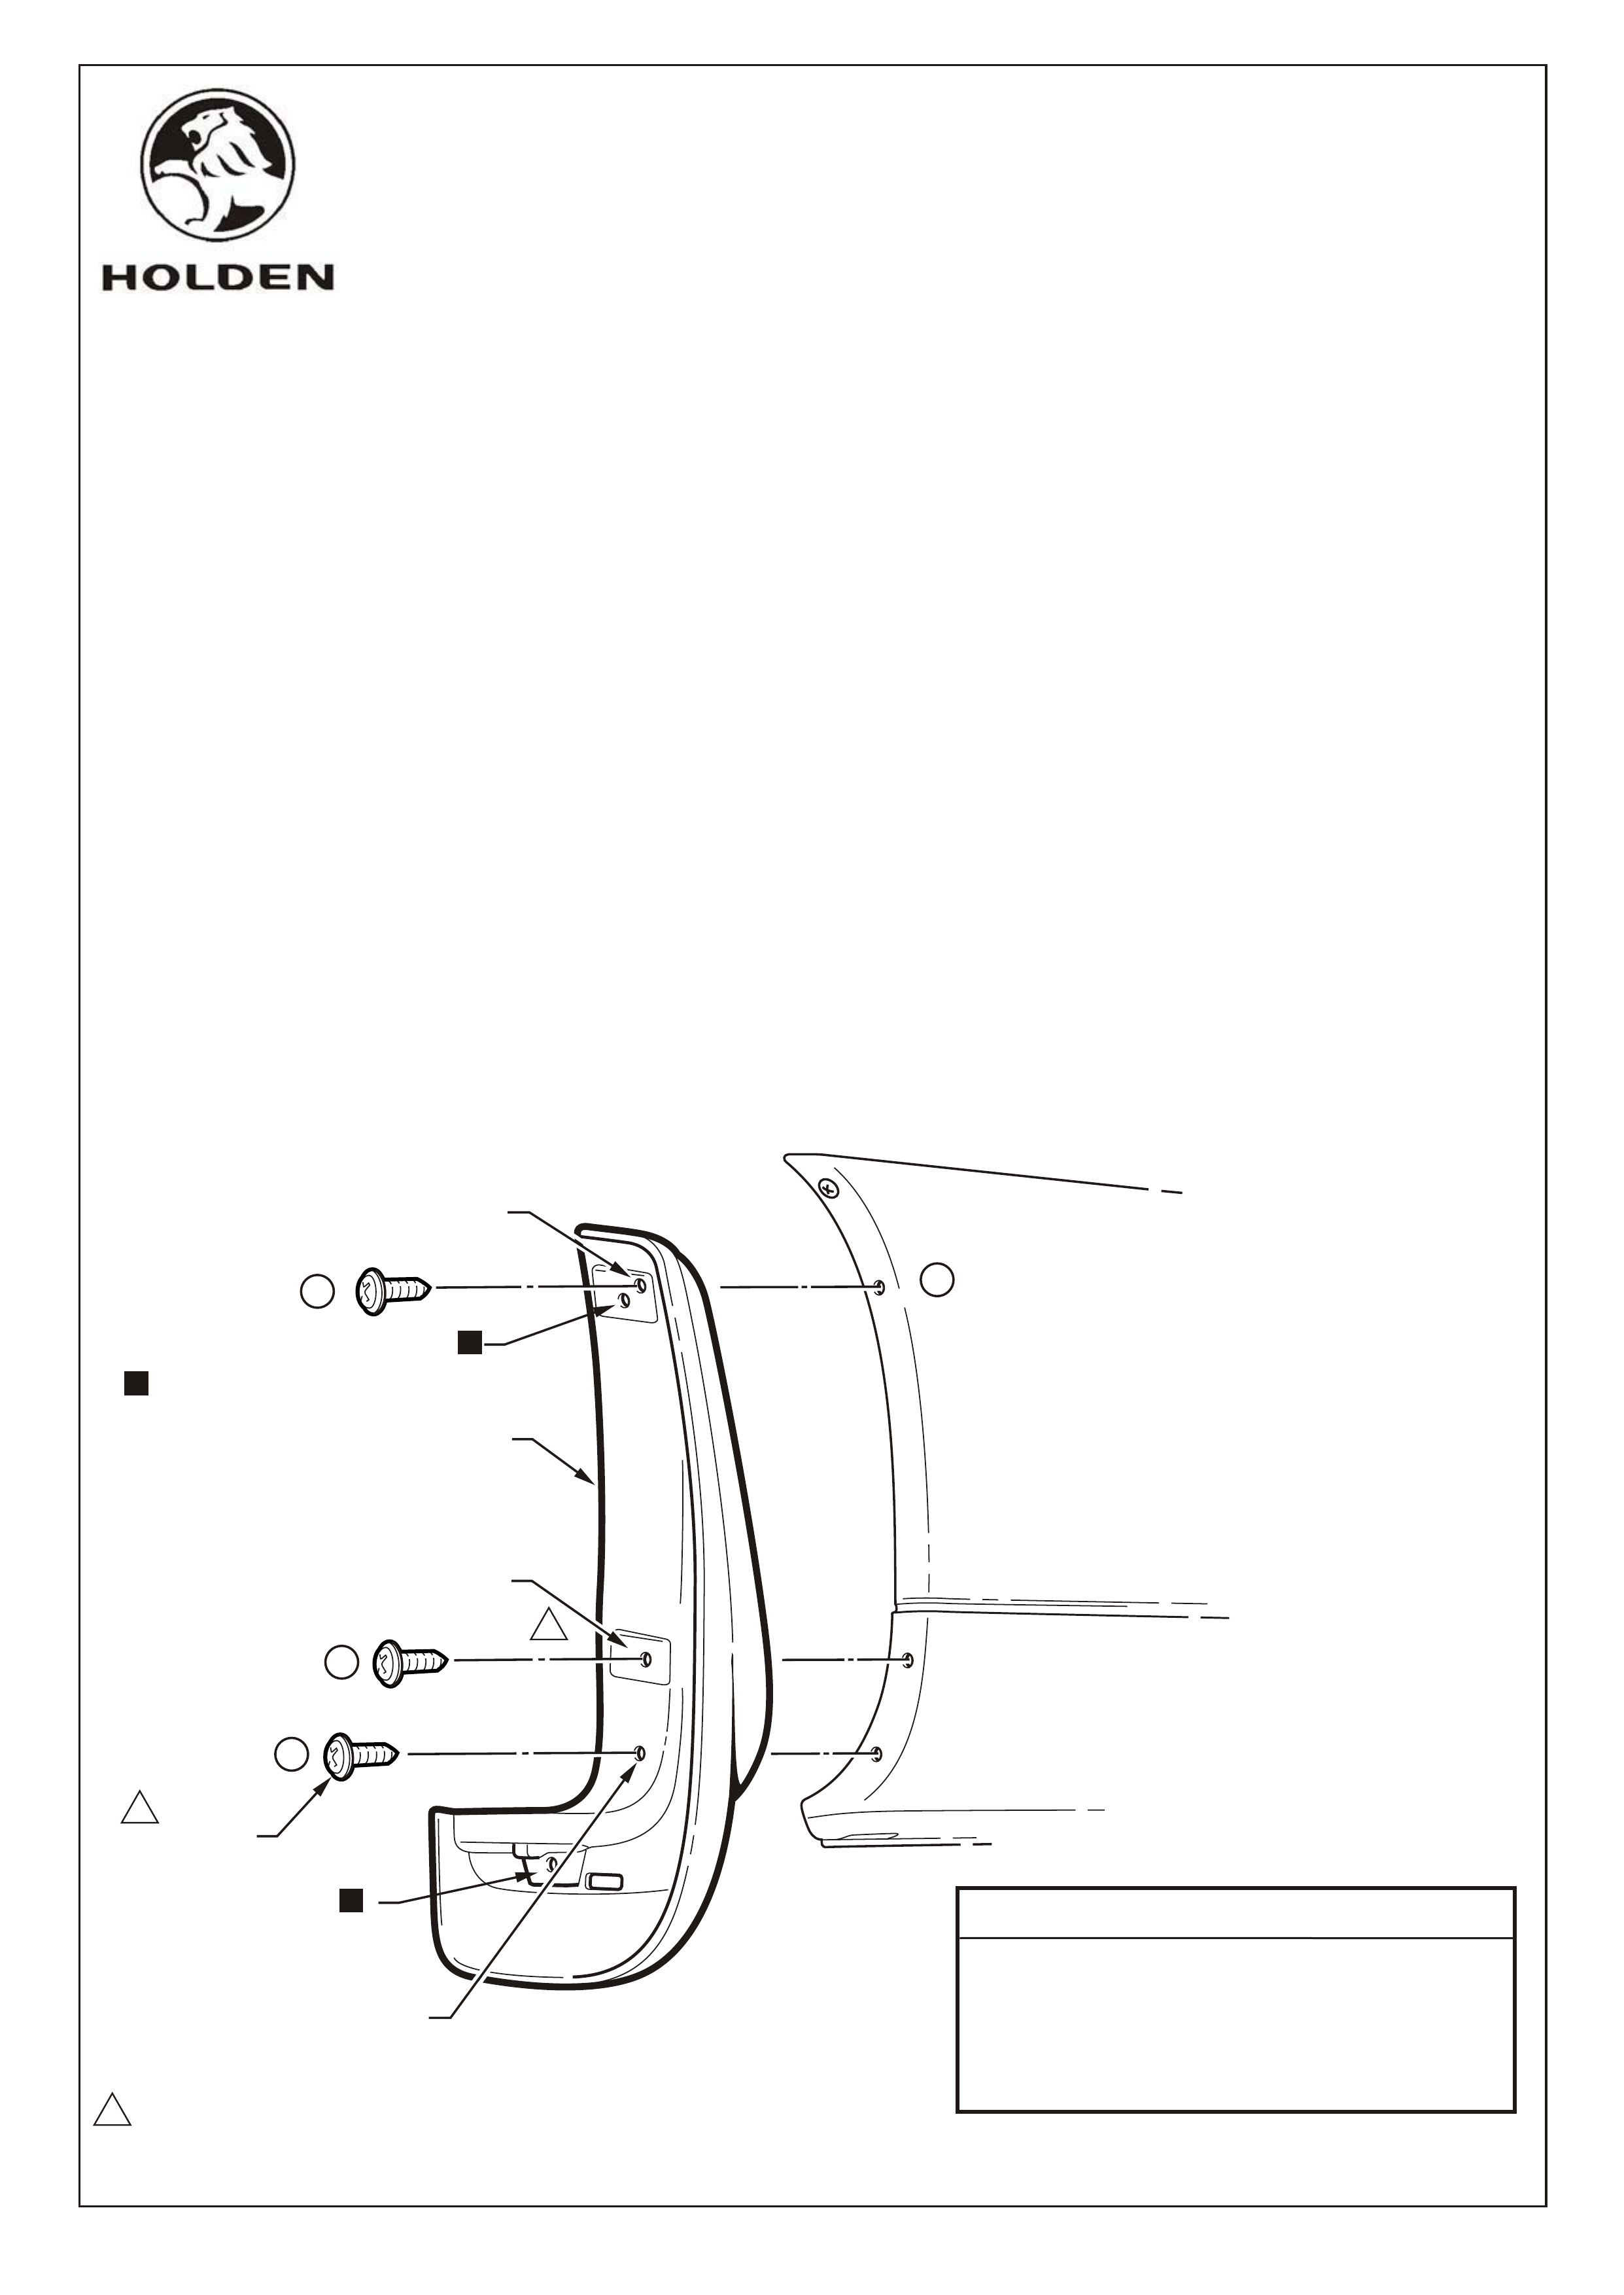
1. Remove the rear road wheel.
2. Remove and discard the existing screw from the bumper facia wheelhouse flange at location A.
3. Firmly align the mud flap in position and
self tapping screw . Tighten to specified torque.
5. Ensuring to maintain alignment and fit, drill a 2.5 mm dia. hole through the mud flap at location 2,
into the bumper facia.
6.
7. Drill a 2.5 mm dia. hole through the dimple in the mud flap and bumper facia wheelhouse flange
at location 3.
8.
9. Refit the rear road wheel.
10.
drill a 2.5 mm dia. hole in the dimple on the mud flap at
location 1, ensuring it aligns with the existing hole in the bumper facia wheelhouse flange at
location A.
4. Install the supplied in the package
Install the self tapping screw supplied in the package. Tighten to specified torque.
Install the self tapping screw supplied in the package. Tighten to specified torque.
Repeat for the opposite side.
FITTING INSTRUCTIONS FOR
VU UTILITY REAR MUD FLAPS
EXCEPT 'SS'
Part No. 92143830
FD994
02MR01
Page 1 of 1
COPYRIGHT
HOLDEN SERVICE PARTS OPERATIONS
Reproduction in whole or part
prohibited without written approval
Division of General Motors - Holden's Automotive Limited ACN 006 893 232
FD994-1
PART No. DESCRIPTION QTY
- MUD FLAP (LH) 1
- MUD FLAP (RH) 1
SP4048 SCREW, SELF TAPPING 6
FD994 FITTING INSTRUCTIONS 1
PARTS LIST
MUD FLAP
SCREW -SELF
TAPPING
3 PLACES
1.0~3.0 Nm
NOTE:HOLE NOT USED
FOR INSTALLATION
2
3
1A
DRILL 2.5MM DIA. HOLE THROUGH
EXISTING MUD FLAP HOLE INTO
BUMPER WHEELHOUSE FLANGE
DRILL 2.5MM DIA. HOLE THROUGH DIMPLE
IN MUD FLAP TO ALIGN AT THE BUMPER
FACIA MOUNTING HOLE.
DRILL 2.5MM DIA. HOLE
THROUGH DIMPLE IN MUD
FLAP AND BUMPER FACIA
WHEELHOUSE FLANGE
1
1
1