Tools Required
Marking pen, No.20 Torx Head Screw Driver, Philips Head Screw Driver, 8mm Socket and Tension Wrench.
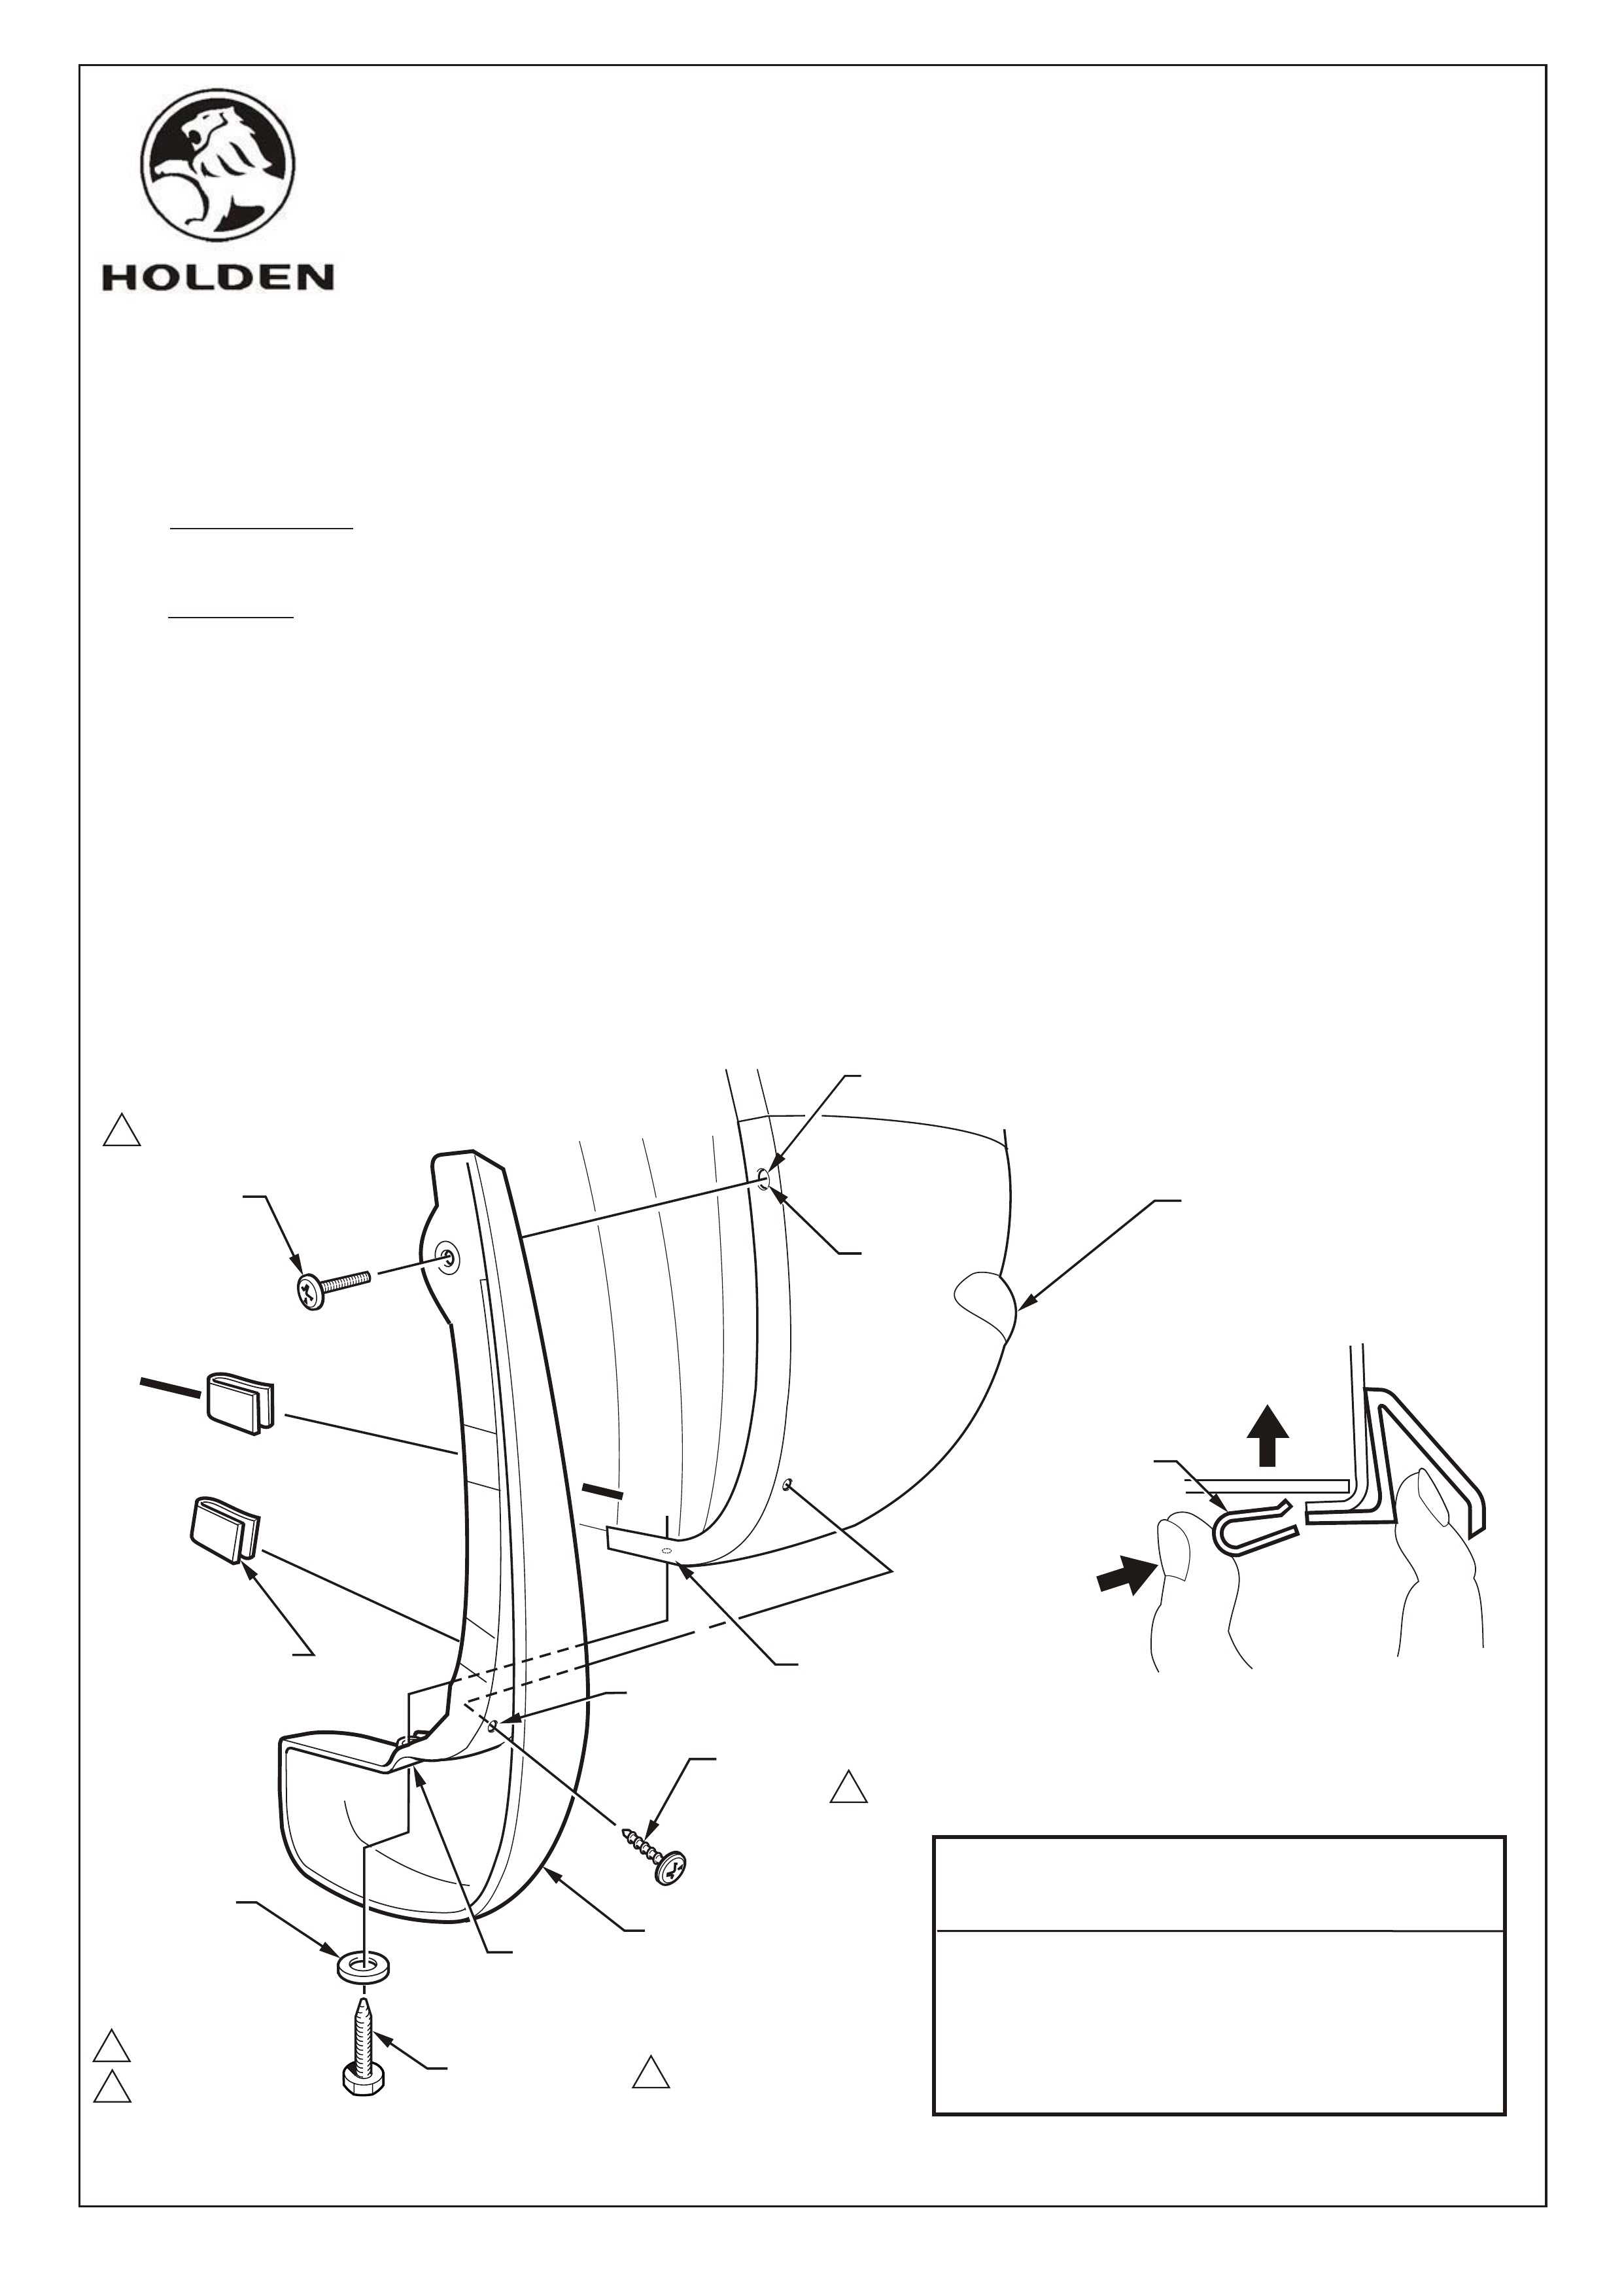
1. Remove the rear road wheel.
2. Remove the fender liner screw from the bumper facia at location A and retain.
3. Remove the screw from the bumper facia at location B and discard.
4. Align the mud flap to existing holes in bumper facia and at the lower location D, using a flat washer and
hex/head screw, fix the mud flap to bumper facia at location B. Tighten to specified torque.
5. Install the existing machine screw through mud flap and into existing hole in location A. Tighten to
specified torque
6. Push the wheelhouse liner away to provide access to fit the retainer clips attaching the mud flap to
bumper facia. Refer Section A-A
7. At location C, using the feature line as a guide, install the self tapping screw through the mud flap and
into the bumper facia. Insert the screw as far inside the section as possible. Tighten to specified
torque.
FITTING INSTRUCTIONS FOR
ZAFIRA
REAR MUD FLAPS
Part No. 92144217
FD1004
15JA01
Page 1 of 1
COPYRIGHT
HOLDEN SERVICE PARTS OPERATIONS
Reproduction in whole or part
prohibited without written approval
Division of General Motors - Holden's Automotive Limited ACN 006 893 232
FD1004-1
PART No. DESCRIPTION QTY
9121695 KIT MUD FLAP 1
90347913 RETAINER CLIP 4
92143332 SCREW, SELF TAPPING 2
SCREW, HEX HEAD 2
FD1004 FITTING INSTRUCTIONS 1
PARTS LIST
2.5 Nm
1.3 Nm SELF-TAPPING
SCREW
EXISTING
MACHINE
SCREW
RETAINER CLIP
( 2 PLACES )
RETAINER CLIP
MUD FLAP
WASHER
1
1
SELF-TAPPING
SCREW 2
2
2
SECTION A-A
A
D
B
A
C
A
REMOVE EXISTING
BUMPER FACIA SCREW
BUMPER
FACIA
PUSH UP
LINER
Procedure