FD1238
12JUL04
COPYRIGHT
Reproduction in whole or part
prohibited without written approval
HOLDEN LTD
Division of HOLDEN Ltd ACN 006 893 232
FITTING INSTRUCTIONS FOR
VT - VZ COUPE BONNET PROTECTOR
Page 1 of 2
TOOLS REQUIRED:
Phillips Head Screwdriver.
FITTING INSTRUCTION
NOTE: It is recommended that the vehicle is washed
and dry before starting to fit the bonnet protector.
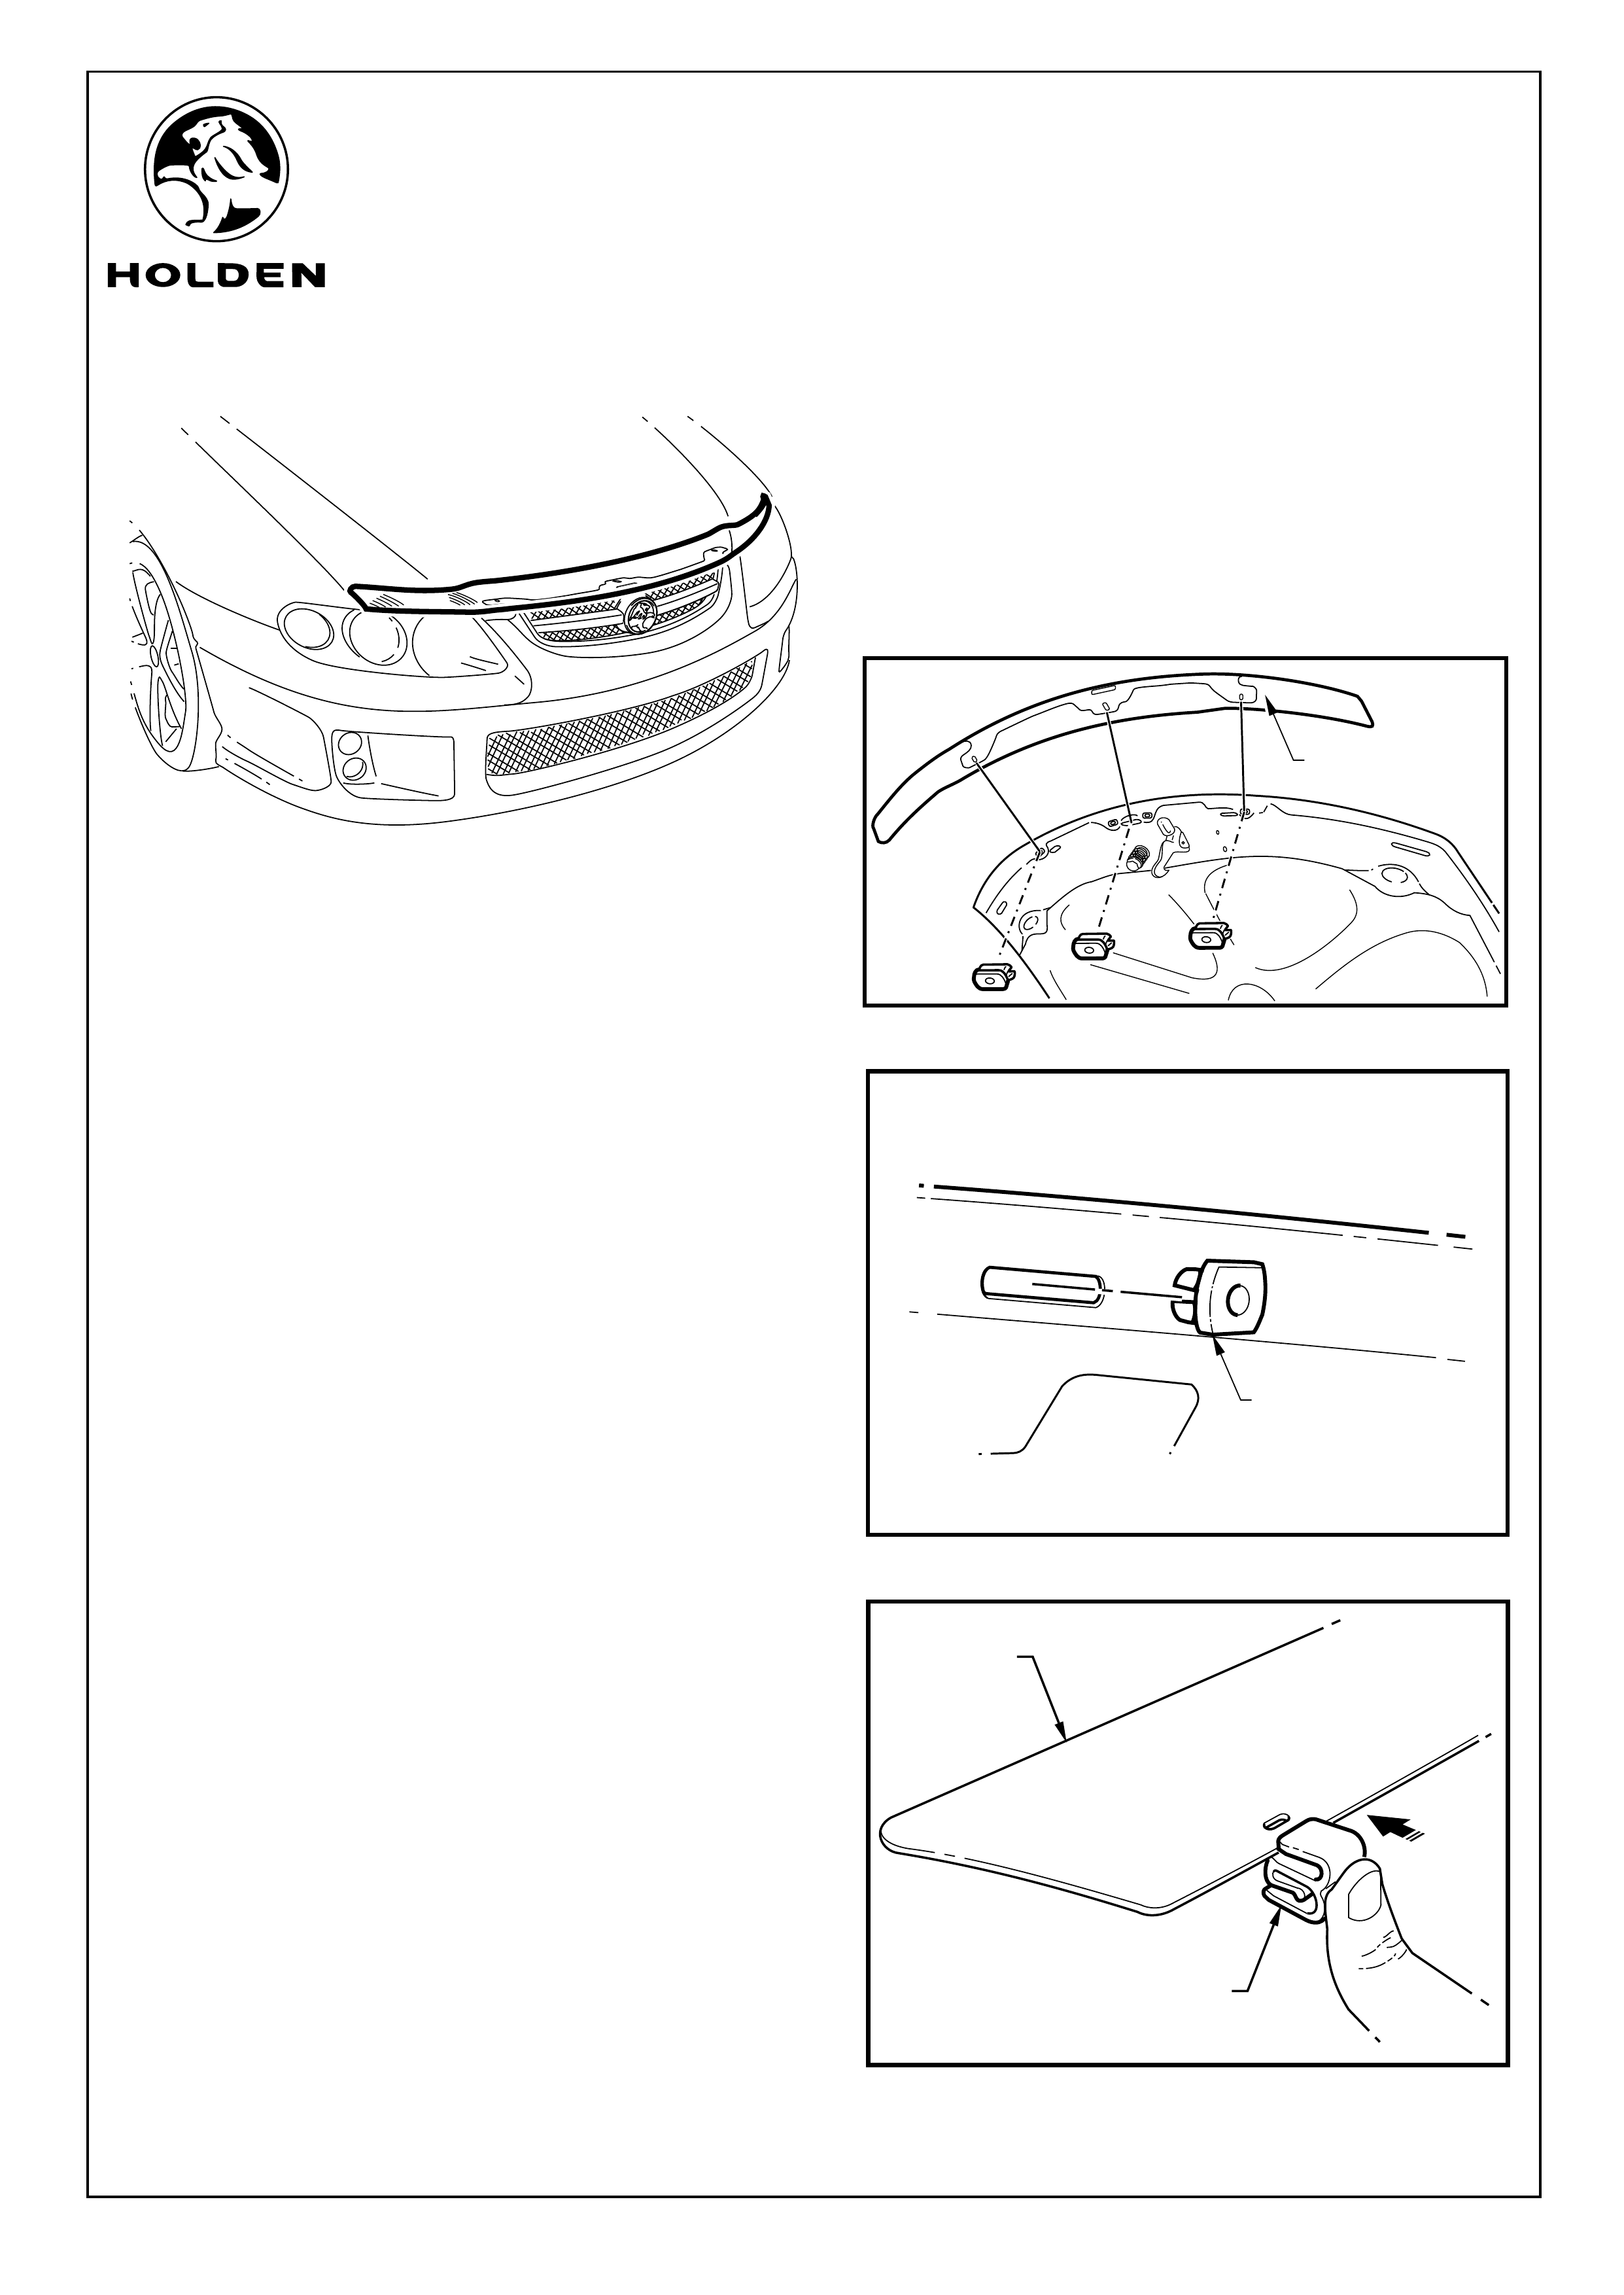
1. Pull the bonnet latch to release the bonnet, lift the safety
latch under the front edge of the bonnet to allow the gas
struts to open the bonnet.
2. Place the bonnet protector (1) in position and note the
slots where the screw lugs will go. Remove the bonnet
protector. Refer to Figure 1.
3. Fit the screw lugs (1) in the bonnet slots (3 places). Refer
to Figure 2.
4. Fit the plastic clips (1) on each end of the bonnet
protector (2). Refer to Figure 3.
Part No. 92209792
2
1
1
FIGURE 1
FIGURE 2
FIGURE 3
1
FD1238
12JUL04
COPYRIGHT
Reproduction in whole or part
prohibited without written approval
HOLDEN LTD
Division of HOLDEN Ltd ACN 006 893 232
FITTING INSTRUCTIONS FOR
VT - VZ COUPE BONNET PROTECTOR
Page 2 of 2
PARTS LIST
PART NUMBER DESCRIPTION QUANTITY
92209792 BONNET PROTECTOR KIT 1
BONNET PROTECTOR 1
92148801 SMALL PART KIT 1
WASHER 3
SCREW - SELF TAPPING 3
SCREW LUG 3
CLIPS 2
ABRASIVE RESISTANT PATCH 2
CLEANING PAD 1
FD1238 FITTING INSTRUCTIONS 1
FD796 PROOF OF WARRANTY CARD 1
FITTING INSTRUCTION: Continued...
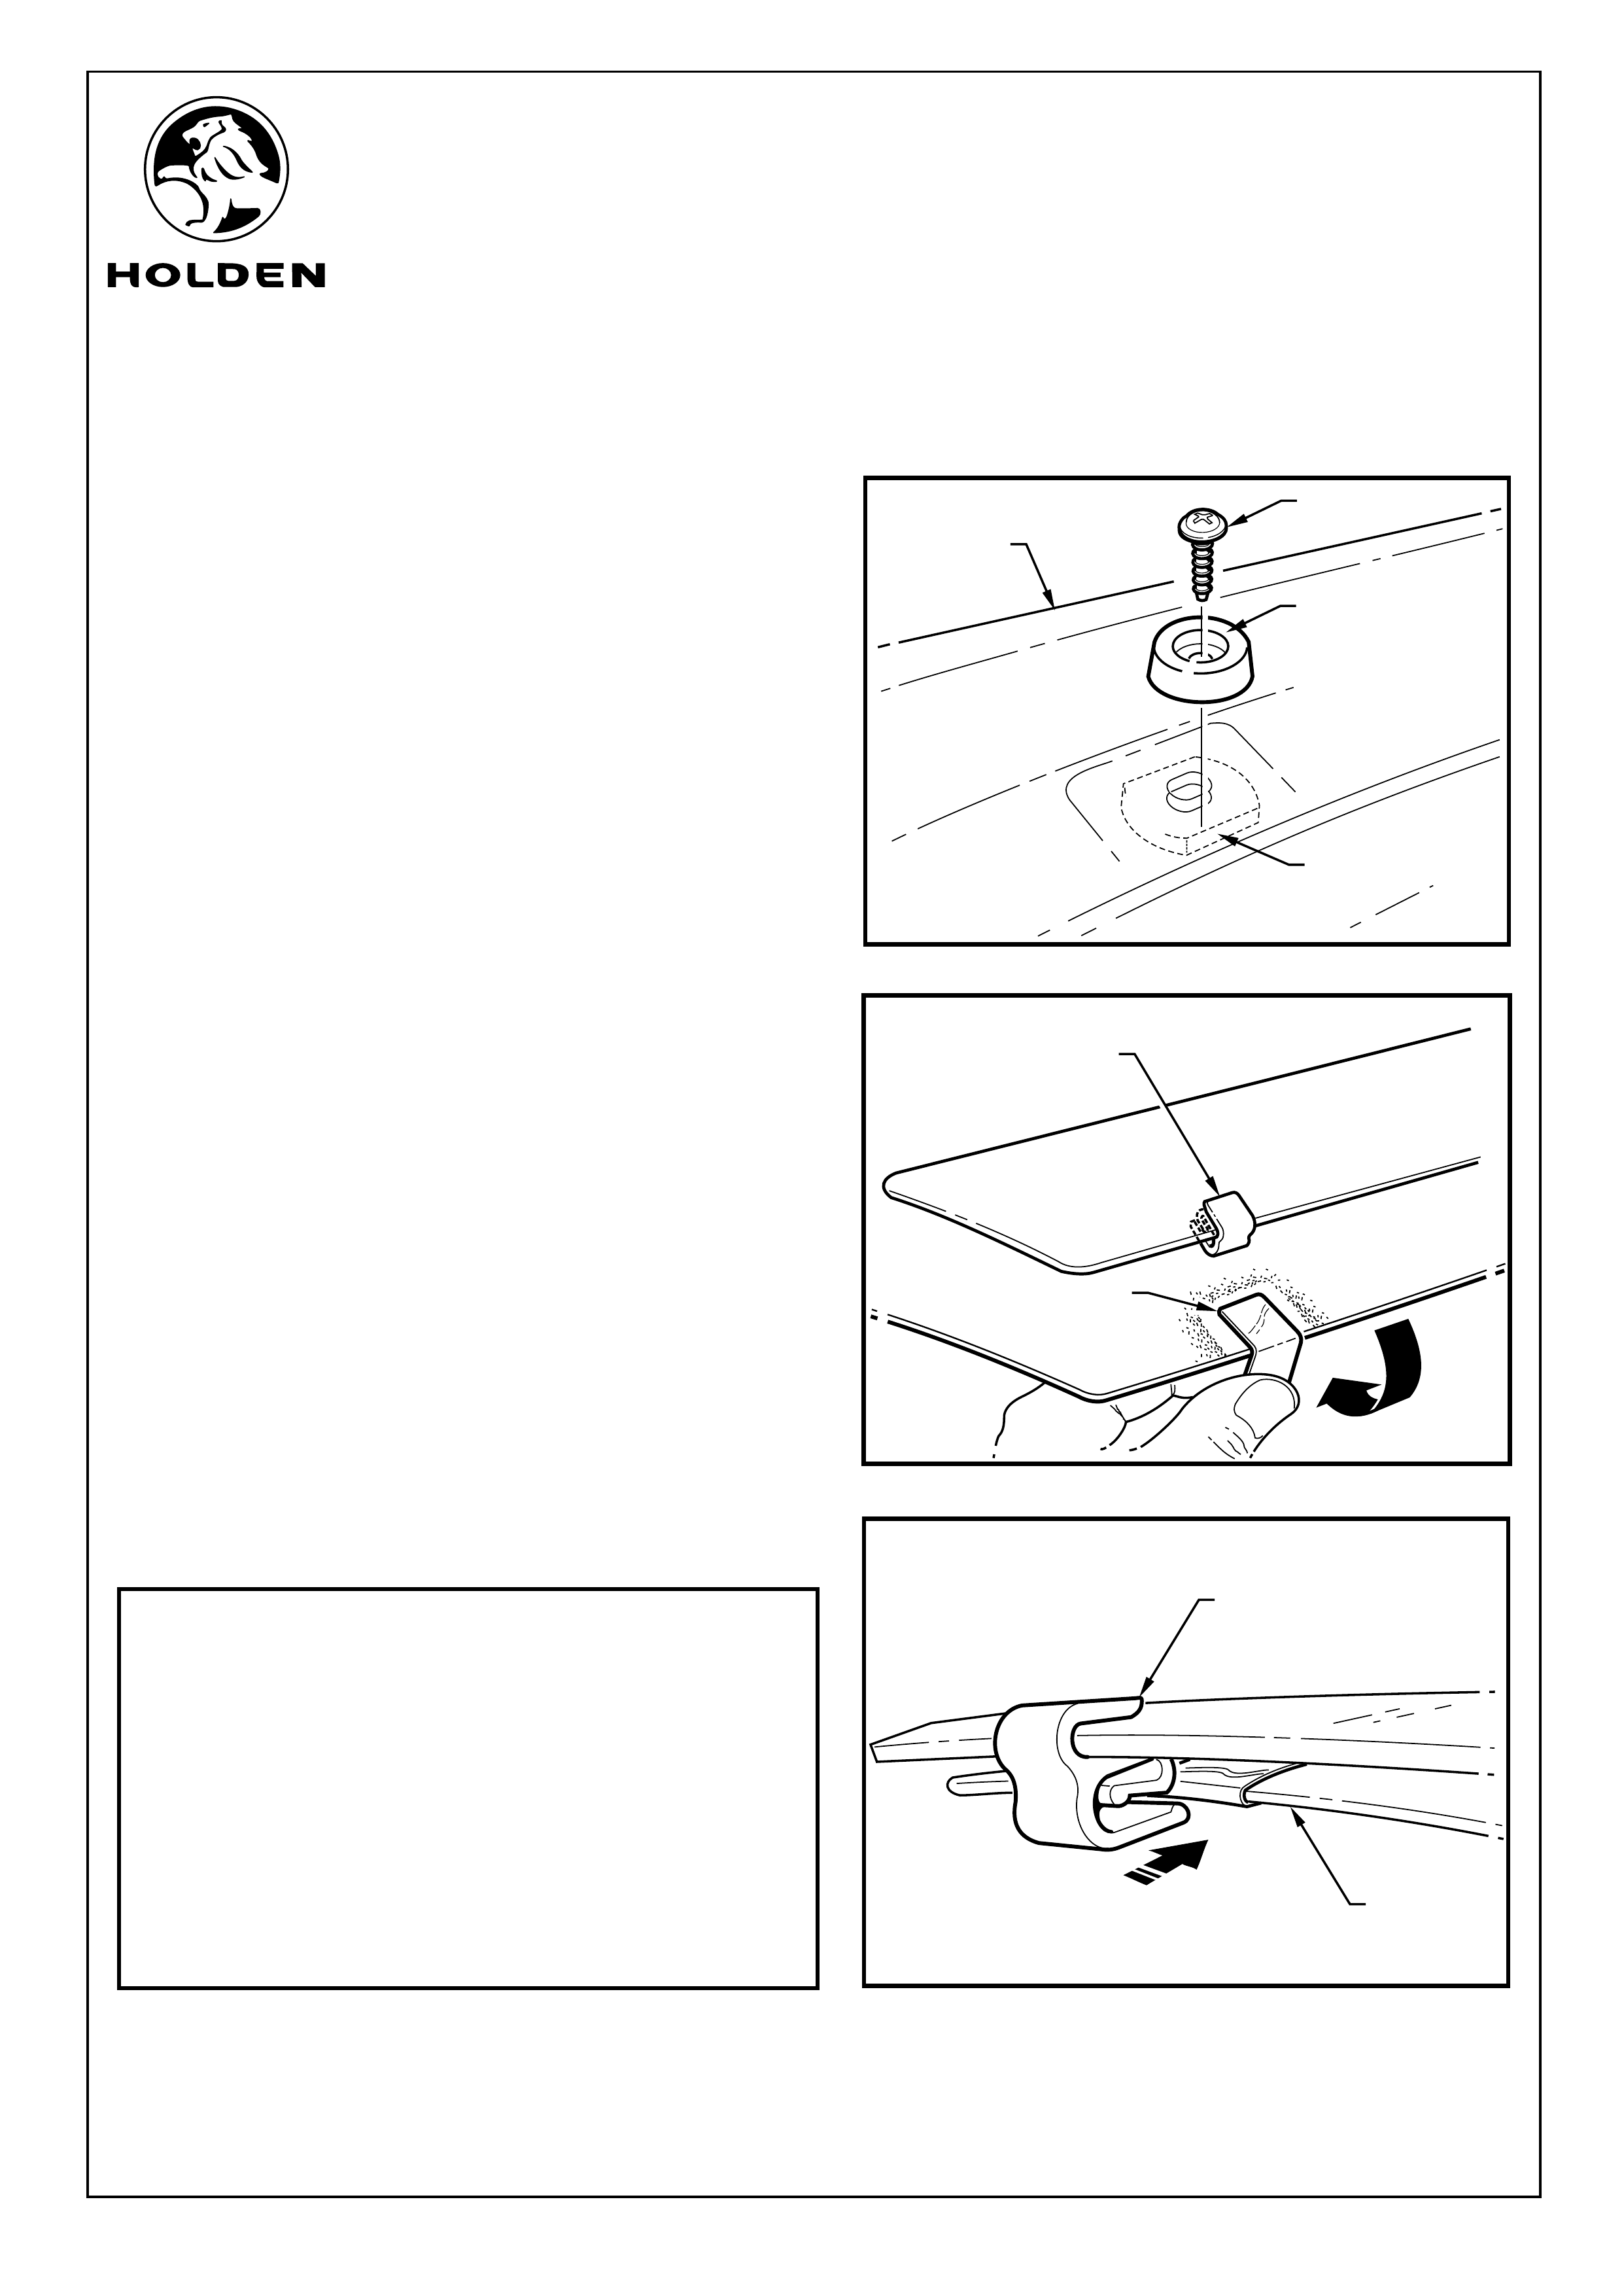
5. Put the bump stops (1) on the screws (2), then fit the
bonnet protector (3). Align the bonnet protector so that it
is centrally located on the bonnet. Attach the bonnet
protector to the bonnet using the screws (3 places) into
the screw lugs (4) (3 places) and tighten.
Refer to Figure 4.
Refer to Figure 5 for the following:
6. Use the cleaning pad to clean the bonnet in the area
where the bonnet protector clips will clip over the edge
of the bonnet.
7. Peel off the backing tape from the abrasive resistant
patch and wrap around the edge of the bonnet (1) where
the plastic clip will fit (2). Repeat on other side.
8. Fit the clips (1) onto the bonnet (2). Refer to Figure 6.
9. Place fitting instructions in glovebox.
3
2
1
FIGURE 4
4
1
2
2
1
FIGURE 5
FIGURE 6