FITTING INSTRUCTIONS FOR
XC BARINA
FRONT MUD FLAPS
Part No. 92144464
HOLDEN SERVICE PARTS OPERATIONS
Reproduction in whole or part
prohibited without written approval
Division of General Motors - Holden's Automotive Limited ACN 006 893 232
FD1009
COPYRIGHT
Page 1 of 3
FD1009
05MY01
COPYRIGHT
Page 2 of 3
HOLDEN SERVICE PARTS OPERATIONS
prohibited without written approval
Reproduction in whole or part
Division of HOLDEN Ltd ACN 006 893 232
FD1009
05MY01
FD1009
FIGURE 1
FIGURE 2
FIGURE 3
FIGURE 4
MUD FLAP
75mm
3M
PRIMER
MUD FLAP
PROTECTIVE
TAPE
REMOVE EXISTING
SCREW
FITTING INSTRUCTIONS
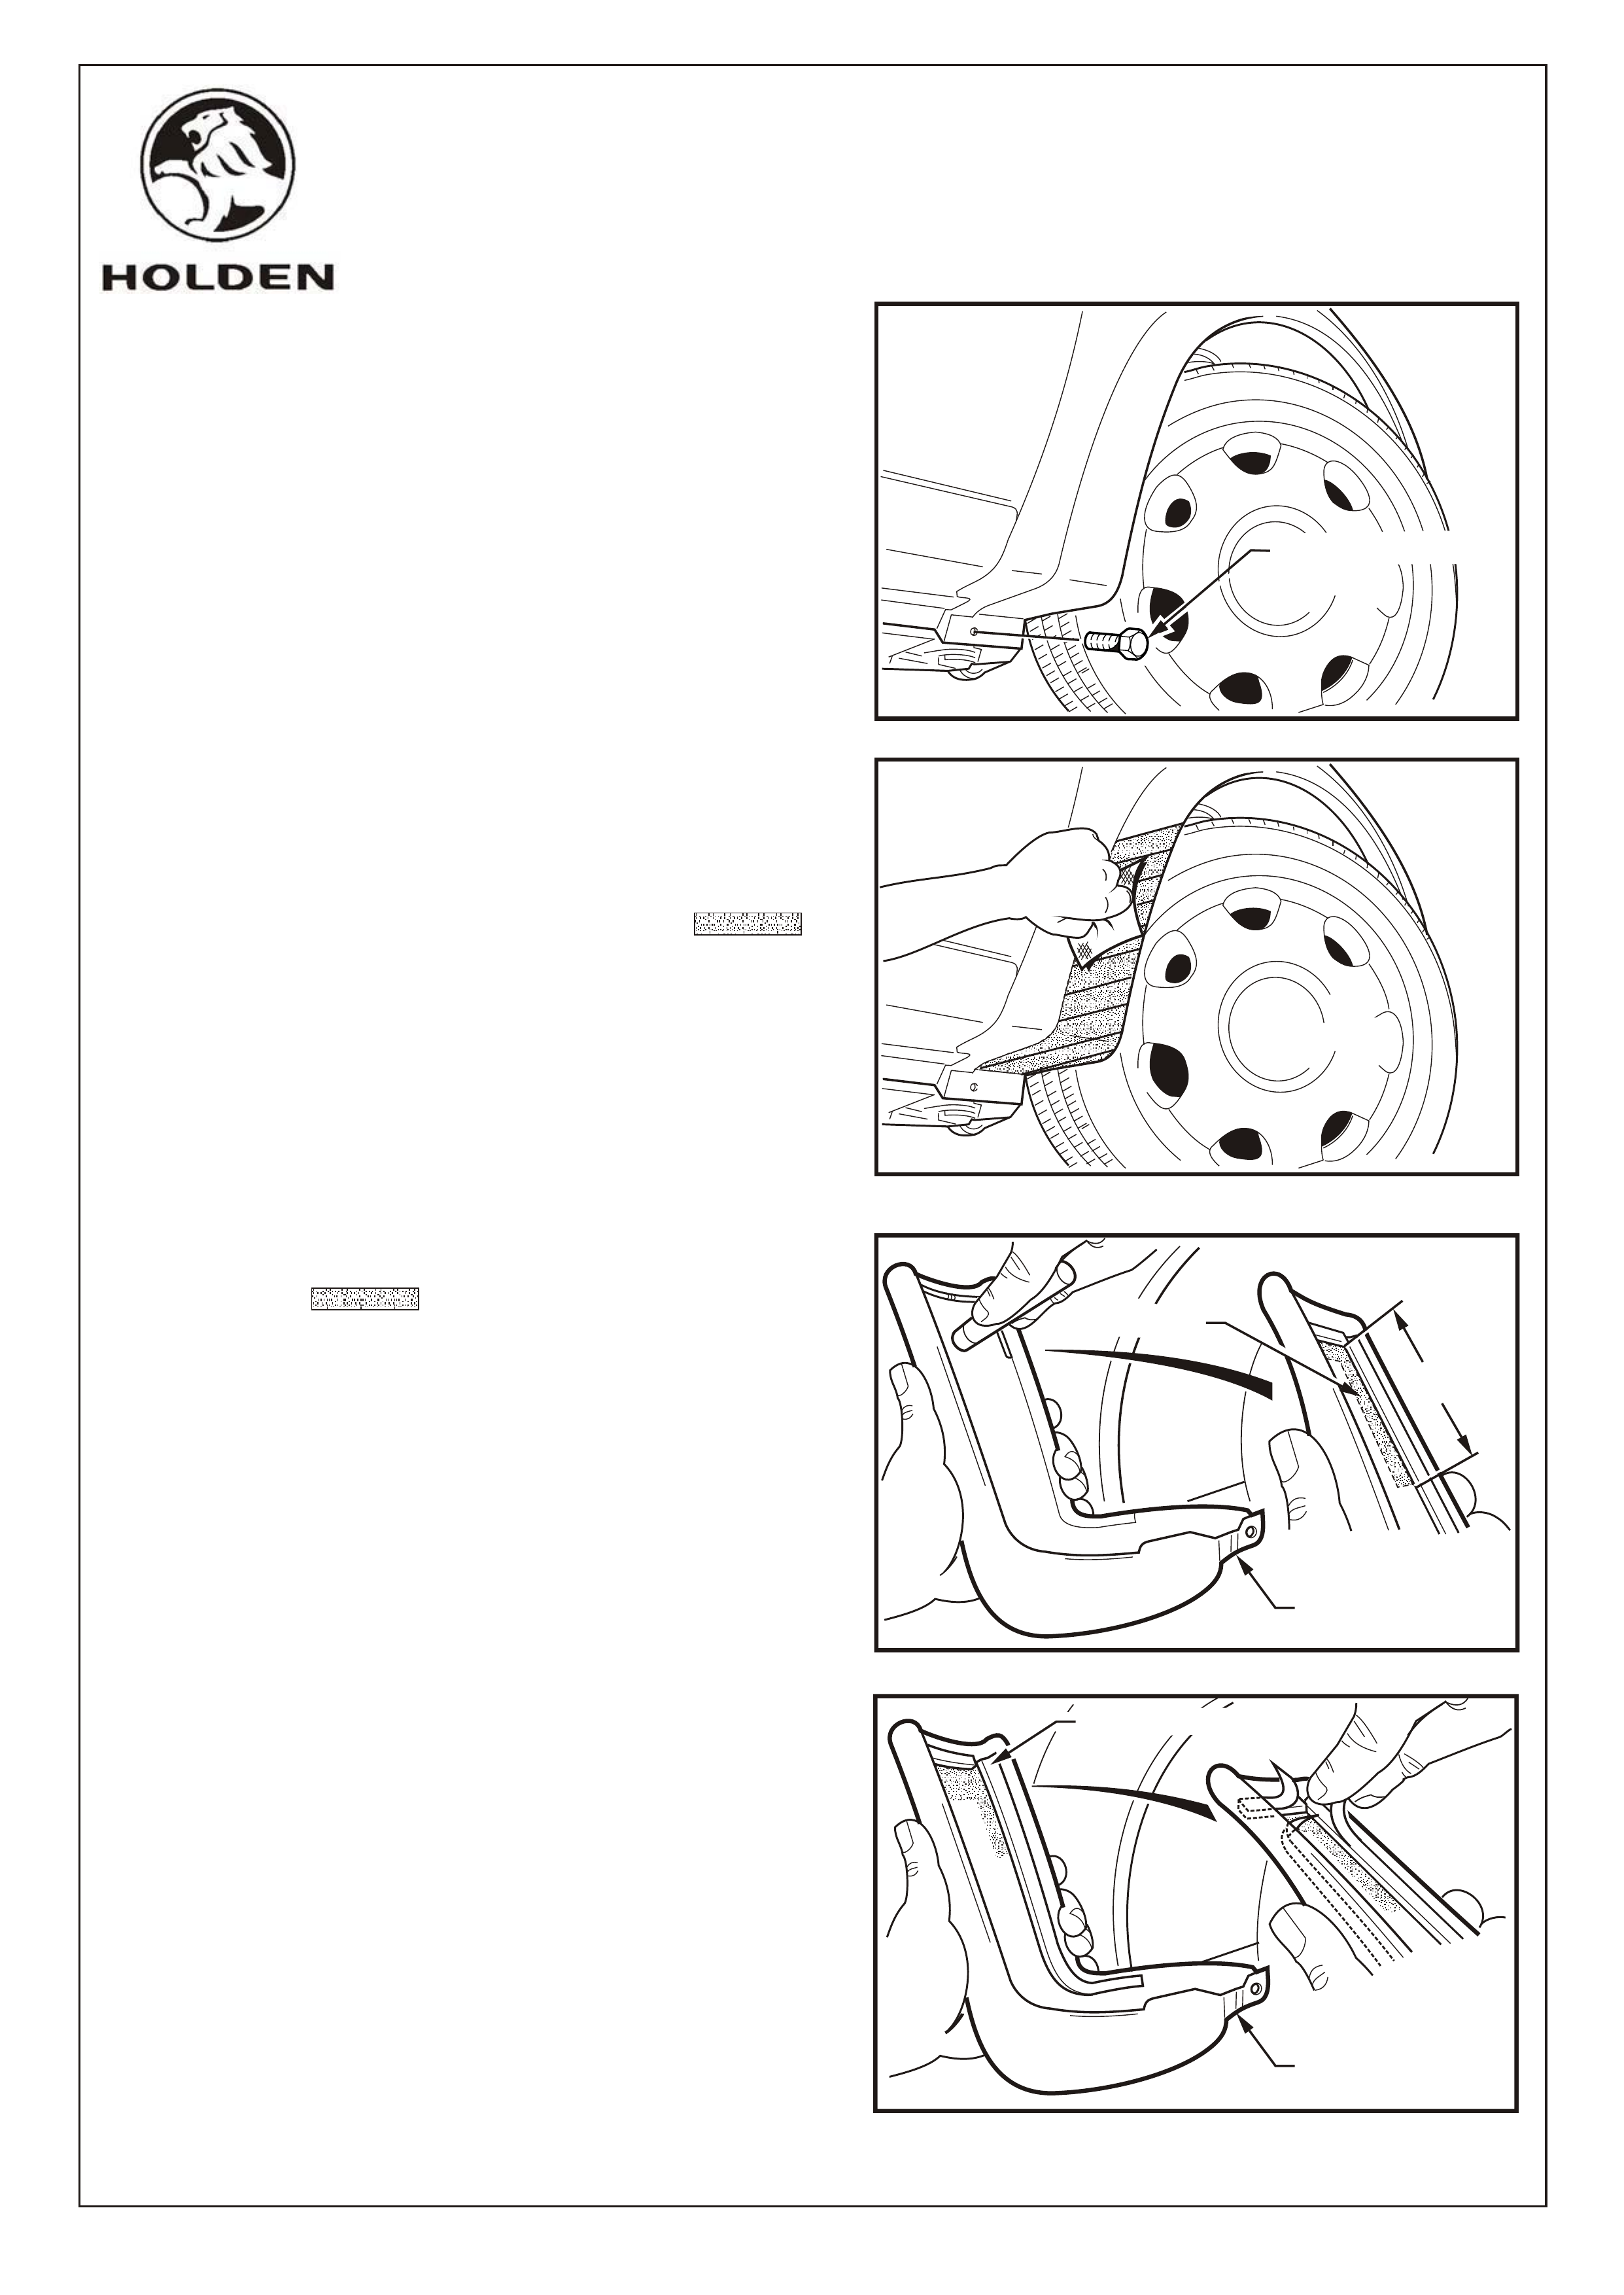
1. Remove screw from lower rear facia and discard.
Refer Figure1.
2. Thoroughly clean any road grime from the mating
surface of the wheel arch to which the mud flap
attaches. Using the alcohol wipe supplied in the
package, wipe the contact area shown
on the wheel arch to prepare the surface for the
adhesive application. Refer Figure 2.
3. Prepare surface area of adhesive application
shown on the mud flap, by using the
3M Primer 94 as supplied in the package. Refer
Figure 3.
4. Peel a small amount of protective backing tape
from the adhesive strips on the mud flap. Refer
Figure 4
NOTE: The warranty is void, if the above
processes are not carried out.
TOOLS REQUIRED
Spanner 13mm, Screw Driver Philips Head, Betaseal
55402 polyurethane adhesive (P/N 92143609) &
Cleaning Cloth.
MUD FLAP
ADHESIVE
75mm
4mm DIA. BEAD
5.0 - 8.0 Nm
1
SELF-TAPPING
SCREW
SCREW
COPYRIGHT
Page 3 of 3
HOLDEN SERVICE PARTS OPERATIONS
Reproduction in whole or part
prohibited without written approval
Division of HOLDEN Ltd ACN 006 893 232
FD1009
FIGURE 5
FIGURE 6
FIGURE 7
DESCRIPTION QUANTITY
MUDFLAP RH 1
MUDFLAP LH 1
3M PRIMER 94 1
ALCOHOL WIPE 2
SCREW SELF TAPPING 2
SCREW-MACHINE 2
FITTING INSTRUCTIONS-FD1009 1
PARTS LIST
SCREW
LOCATION
FITTING INSTRUCTIONS...continued
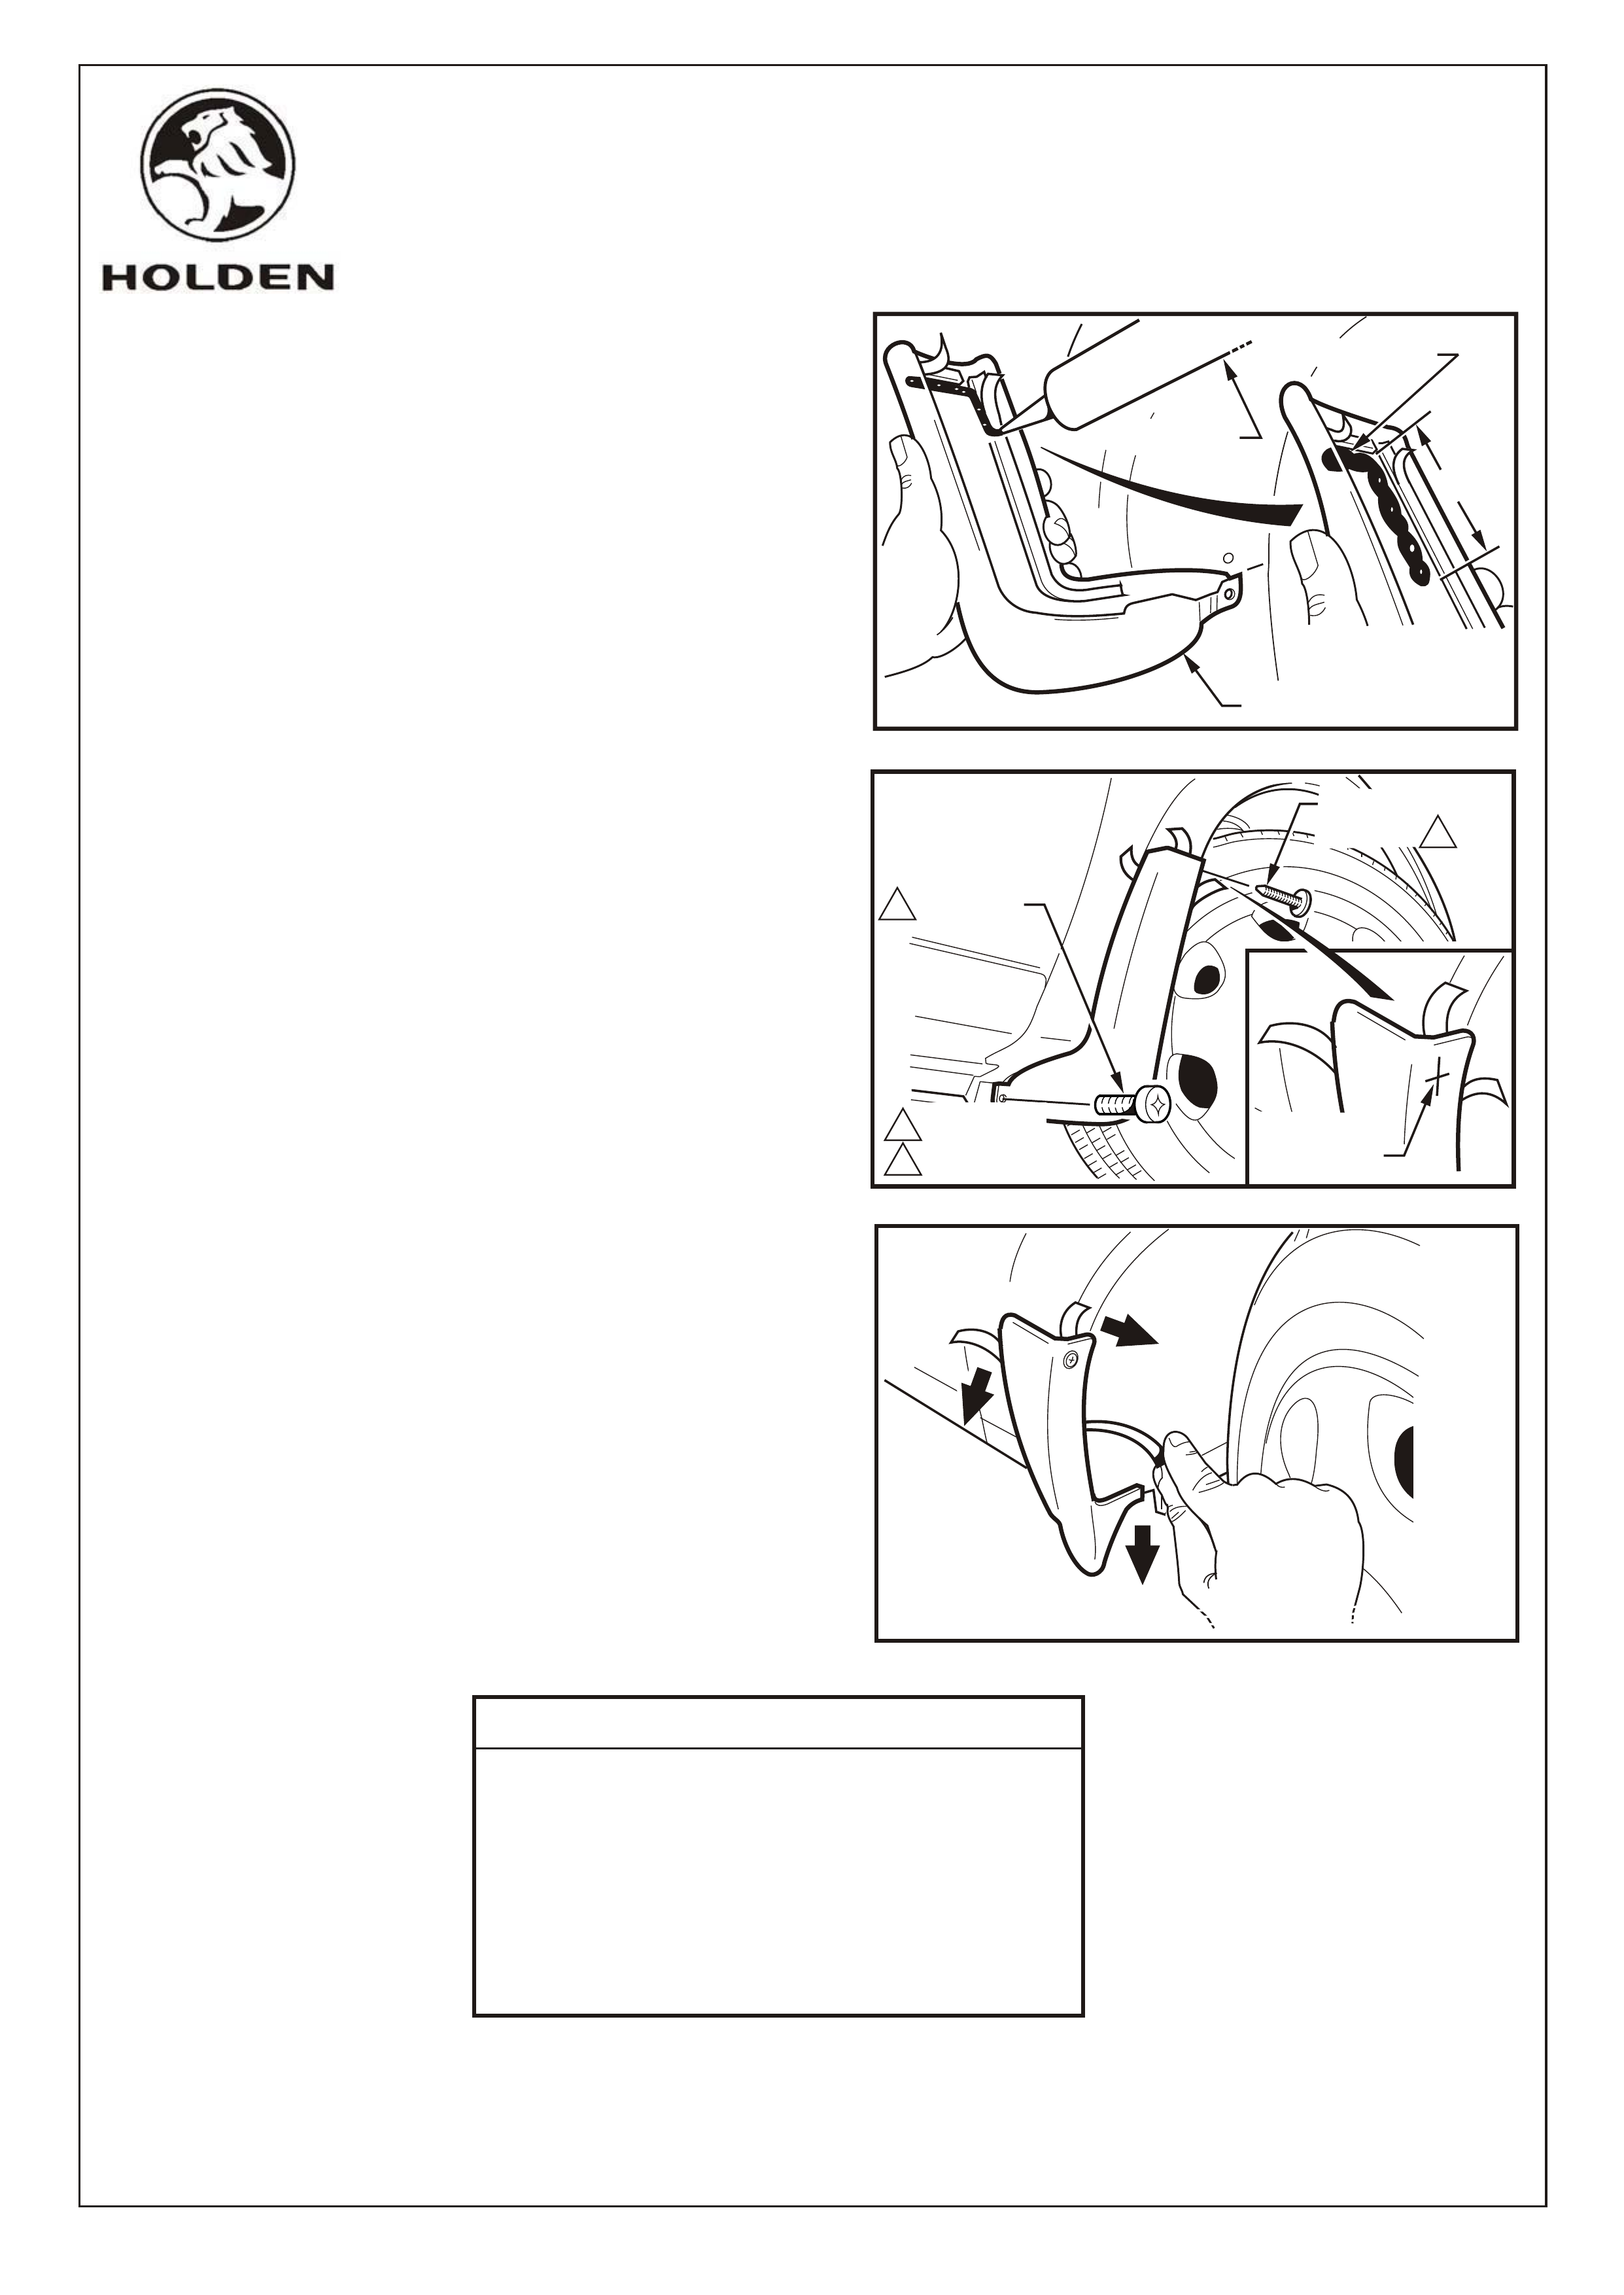
5. Apply a 4.0mm dia. bead of polyurethane adhesive
Betaseal 55402 over area as indicated on the
contact surface of the mud flap. Refer Figure 5.
6. Fit the mud flap to the vehicle and fix by installing
the self tapping screw and the machine screw
supplied in the package. Tighten to specified
torque. Refer Figure 6.
7. Pull the exposed backing strips from the adhesive
strips and apply pressure for to ensure permanent
adhesion. Allow 24 hours to attain full adhesion.
Refer Figure 7
8. Repeat fitting process to opposite side of the
vehicle.
9. Place fitting instructions in the vehicles glove box.
1.0 - 3.0 Nm
2
2
1
FD1009
05MY01