
Stati onary Windows Page 1A6–1
Page 1A6–1
Section 1A6
Stationary Windows
ATTENTION
Before performing any service operation or other procedure described in this Section, refer to Section 00
Warnings, Cautions and Notes for correct w orkshop practices with regard to safety and/or property damage.
1 General Information............................................................................................................................... 2
2 Service Operations................................................................................................................................ 3
2.1 Rear Quarter Window Assembly...........................................................................................................................3
Remove ...................................................................................................................................................................3
Reinstall..................................................................................................................................................................4
3 Torque Wrench Specifications............................................................................................................. 5
Techline

Stati onary Windows Page 1A6–2
Page 1A6–2
1 General Information
With the following exceptions, MY 2004 VY Series AWD Wagon Stationary Windows information carries over from
MY 2004 VY Series vehicles.
• Rear quarter window
For Stationary Windows information not contained within this Section, refer to Section 1A6 Stationary Windows in the
MY 2004 VY and V2 Series Service Information.
A new rear quarter window is fitted to MY 2004 AWD Wagon vehicles which feature a rear quarter window applique
assembly. The window is attached to the vehicle with nuts and incorporates a foam seal.
Stati onary Windows Page 1A6–3
Page 1A6–3
2 Service Operations
2.1 Rear Quarter Window Assembly
LT Section 11 – 030
Remove
Safety glasses and work gloves must be worn
at all times when operating with glass. Care
must be taken during any operation involving
the quarter window assembly removal or
installation, not to exert any load on the
window. Failure to observe this may result in
damage to the window.
NOTE
The quarter window nuts will be damaged during
this operation and must be replaced to retain a
watertight seal.
1 Remove the following parts as required:
a Rear quarter window applique assembly, refer to Section 1A9, 2.10 Rear Quarter Window Applique
Assembly.
b Rear door opening weatherstrip assembly, refer to Section 1A5, 3.19 Rear Door Opening Weatherstrip
Assembly in the MY 2003 VY and V2 Series Service Information.
c Body lock pillar garnish, refer to Section 1A8, 3.7 Body Lock Pillar Garnish in the MY 2003 VY and V2 Series
Service Information.
d Body rear corner garnish, refer to Section 1A8, 3.9 Body Rear Corner Garnish in the MY 2003 VY and V2
Series Service Information.
e Quarter inner trim panel assembly, refer to Section 1A8, 3.11 Quarter Inner Trim Panel Assembly in the
MY 2003 VY and V2 Series Service Information.
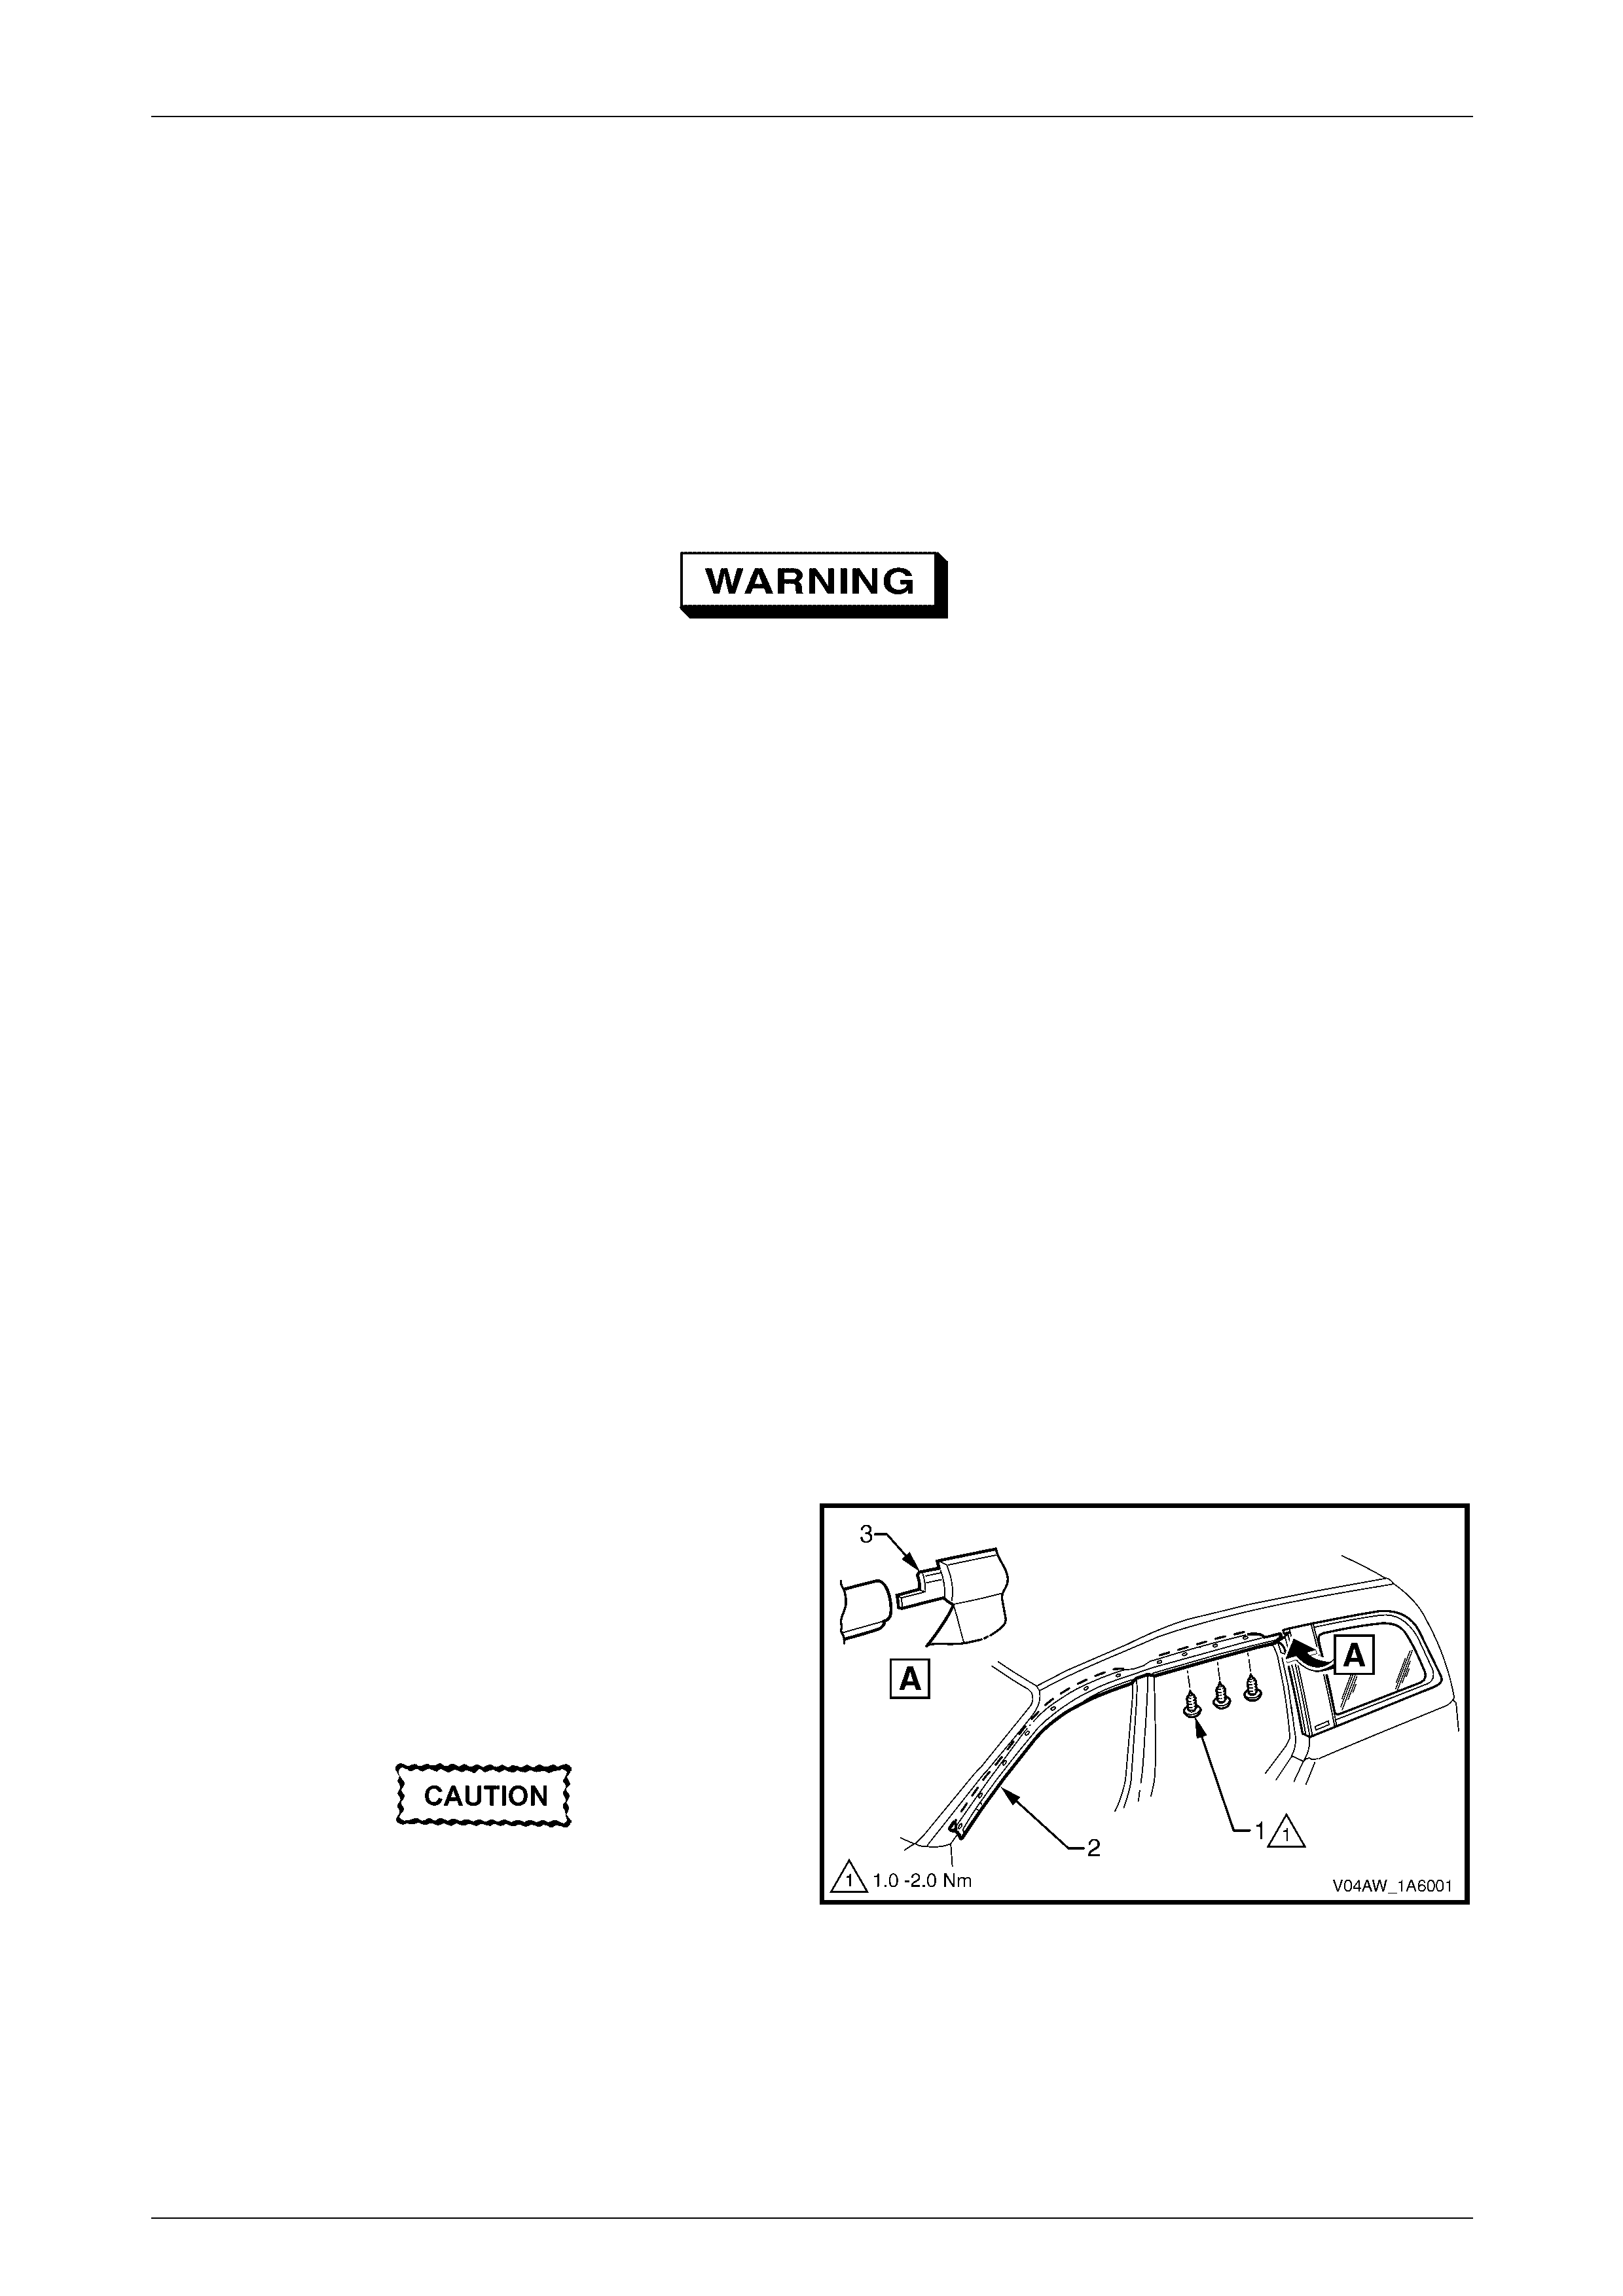
2 Remove the screw (1), three places, and partially
remove the rear section of the door opening frame
moulding (2) where it joins the rear quarter window
assembly tab (3).
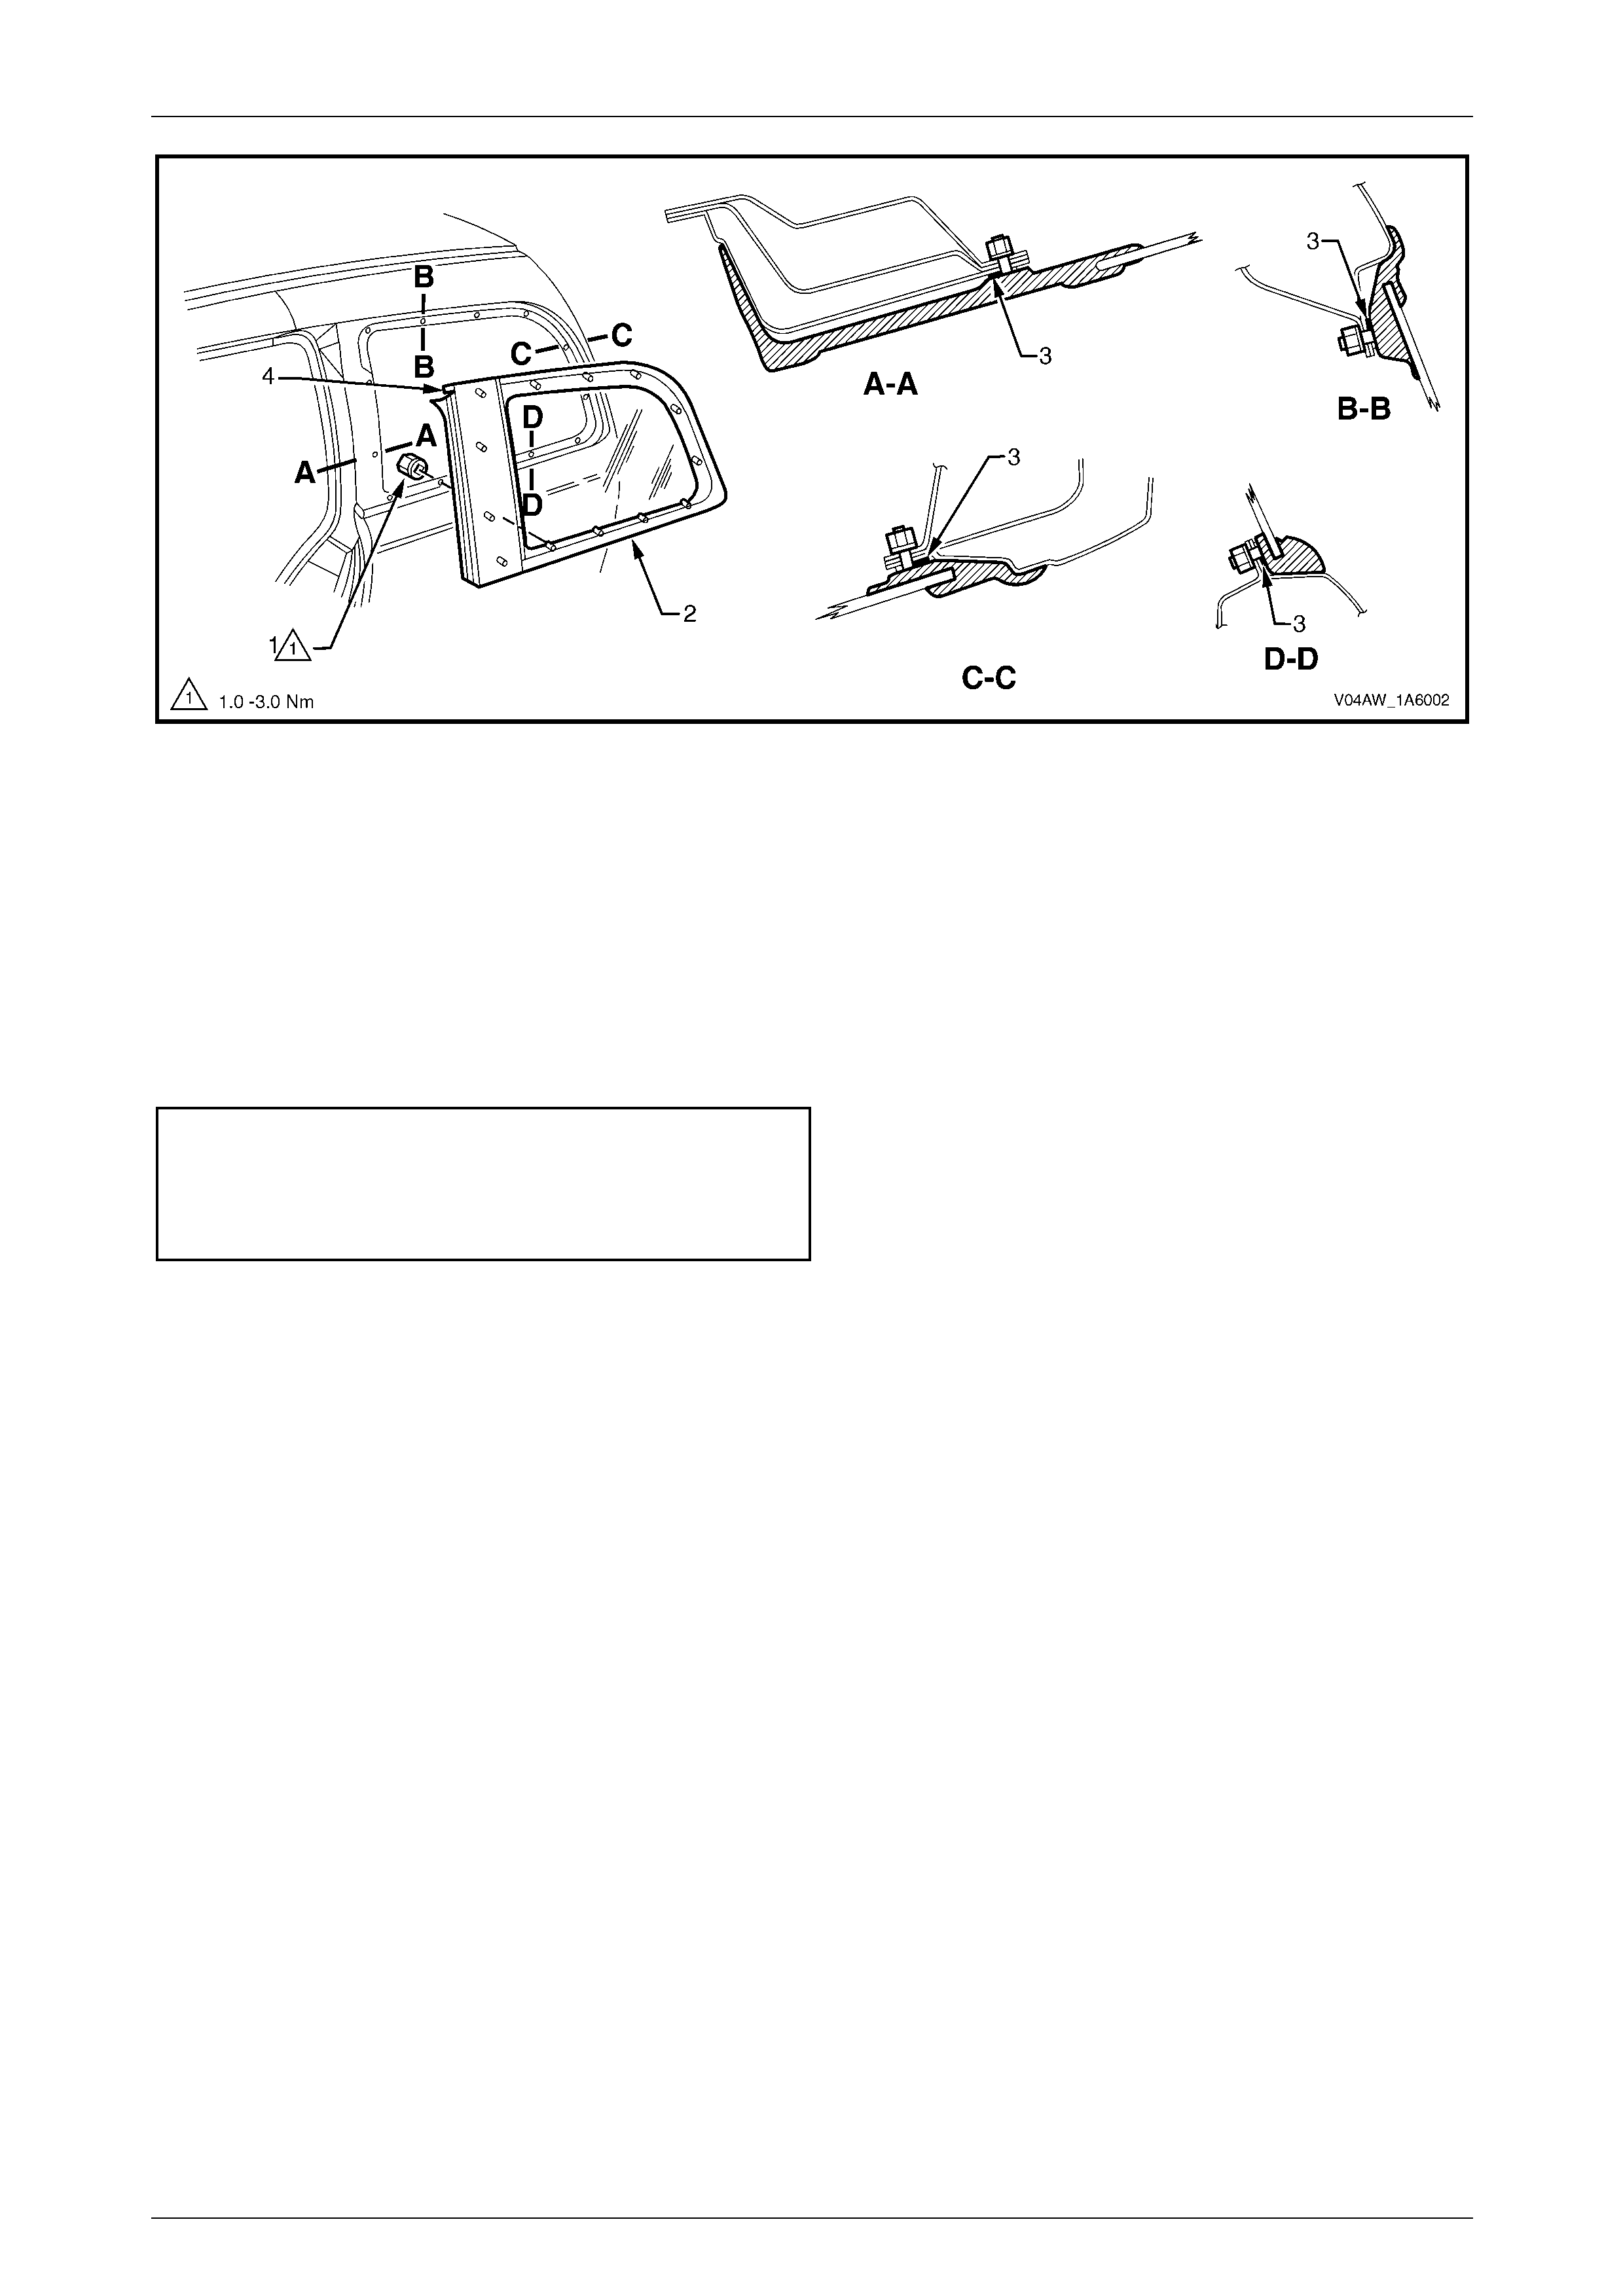
3 Remove the quarter window nut (1), 13 places,
securing the quarter window assembly (2) to the body
opening, refer to Figure 1A6 – 2.
Take care when removing the quarter
window from the body opening, that the
attaching pins are clear of the outer body.
4 Carefully lift the window from the vehicle.
Figure 1A6 – 1
Stati onary Windows Page 1A6–4
Page 1A6–4
Figure 1A6 – 2
Reinstall
Reinstallation of the rear quarter window assembly is the reverse of the removal procedure, noting the following.
1 Ensure the seal (3) is in sound condition, refer to Figure 1A6 – 2.
2 Slot the quarter window assembly tab (4) into the door opening frame moulding.
3 After installing the nuts, leave them loose until the door opening frame moulding is fastened into position, then
tighten the nuts to the correct torque specification.
Door frame opening moulding attaching
screw torque specification..........................1.0 – 2.0 Nm
Rear quarter window assembly attaching nut
torque specification....................................1.0 – 3.0 Nm

Stati onary Windows Page 1A6–5
Page 1A6–5
3 Torque Wrench Specifications
Rear Quarter Window Attaching Nut.............................................1.0 – 3.0 Nm
Door Frame Opening Moulding Attaching Screw ..........................1.0 – 2.0 Nm