
Hood, Rear Compartm ent Lid, Liftgat e & Endgate Page 1A4–1
Page 1A4–1
Section 1A4
Hood, Rear Compartment Lid, Liftgate & Endgate
ATTENTION
Before performing any service operation or other procedure described in this Section, refer to Section 00
Warnings, Cautions and Notes for correct workshop practices with regard to safety and/or property damage.
1 General Information............................................................................................................................... 2
1.1 Crew Cab Endgate..................................................................................................................................................2
2 Service Operations................................................................................................................................3
2.1 Endgate Latch Bracket and Cable Assembly, and Endgate Striker...................................................................3
Remove ...................................................................................................................................................................3
Reinstall ..................................................................................................................................................................4
3 Torque Wrench Specifications............................................................................................................. 5
Techline

Hood, Rear Compartm ent Lid, Liftgat e & Endgate Page 1A4–2
Page 1A4–2
1 General Information
With the following exceptions, MY 2004 VY Regular Cab and Crew Cab Hood and Endgate information carries over from
MY 2004 VY & V2 Series vehicles and MY 2003 VY Regular Cab vehicles:
• Crew Cab endgate latch bracket and cable assembly
For Hood, Rear Compartment Lid, Liftgate and Endgate information not contained within this Section, refer to
Section 1A4 Hood, Rear Compartment Lid, Liftgate and Endgate in the MY 2004 VY and V2 Series Service
information and Section 1A4 Hood, Rear Compartment Lid, Liftgate and Endgate in the MY 2003 VY Regular Cab
Service Information.
1.1 Crew Cab Endgate
As Crew Cab vehicles are fitted with a full-width rear bumper fascia, the endgate cannot be unhooked and lowered to the
vertical position. The endgate cable assembly has been revised so that the endgate cable is permanently attached to the
endgate latch bracket.
Hood, Rear Compartm ent Lid, Liftgat e & Endgate Page 1A4–3
Page 1A4–3
2 Service Operations
2.1 Endgate Latch Bracket and Cable
Assembly, and Endgate Striker
LT Section – 12-685
Remove
Disconnecting either end of the cable
assembly will cause the endgate to hang and
interfere with the bumper fascia, which could
result in damage to either the bumper fascia
or endgate. Ensure that the liftgate is
supported at all times during the following
procedure.
1 Remove the endgate handle and endgate inner panel access hole cover, refer to Section 1A4 Hood, Rear
Compartment Lid, Liftgate and Endgate in the MY 2004 VY and V2 Series Service Information.
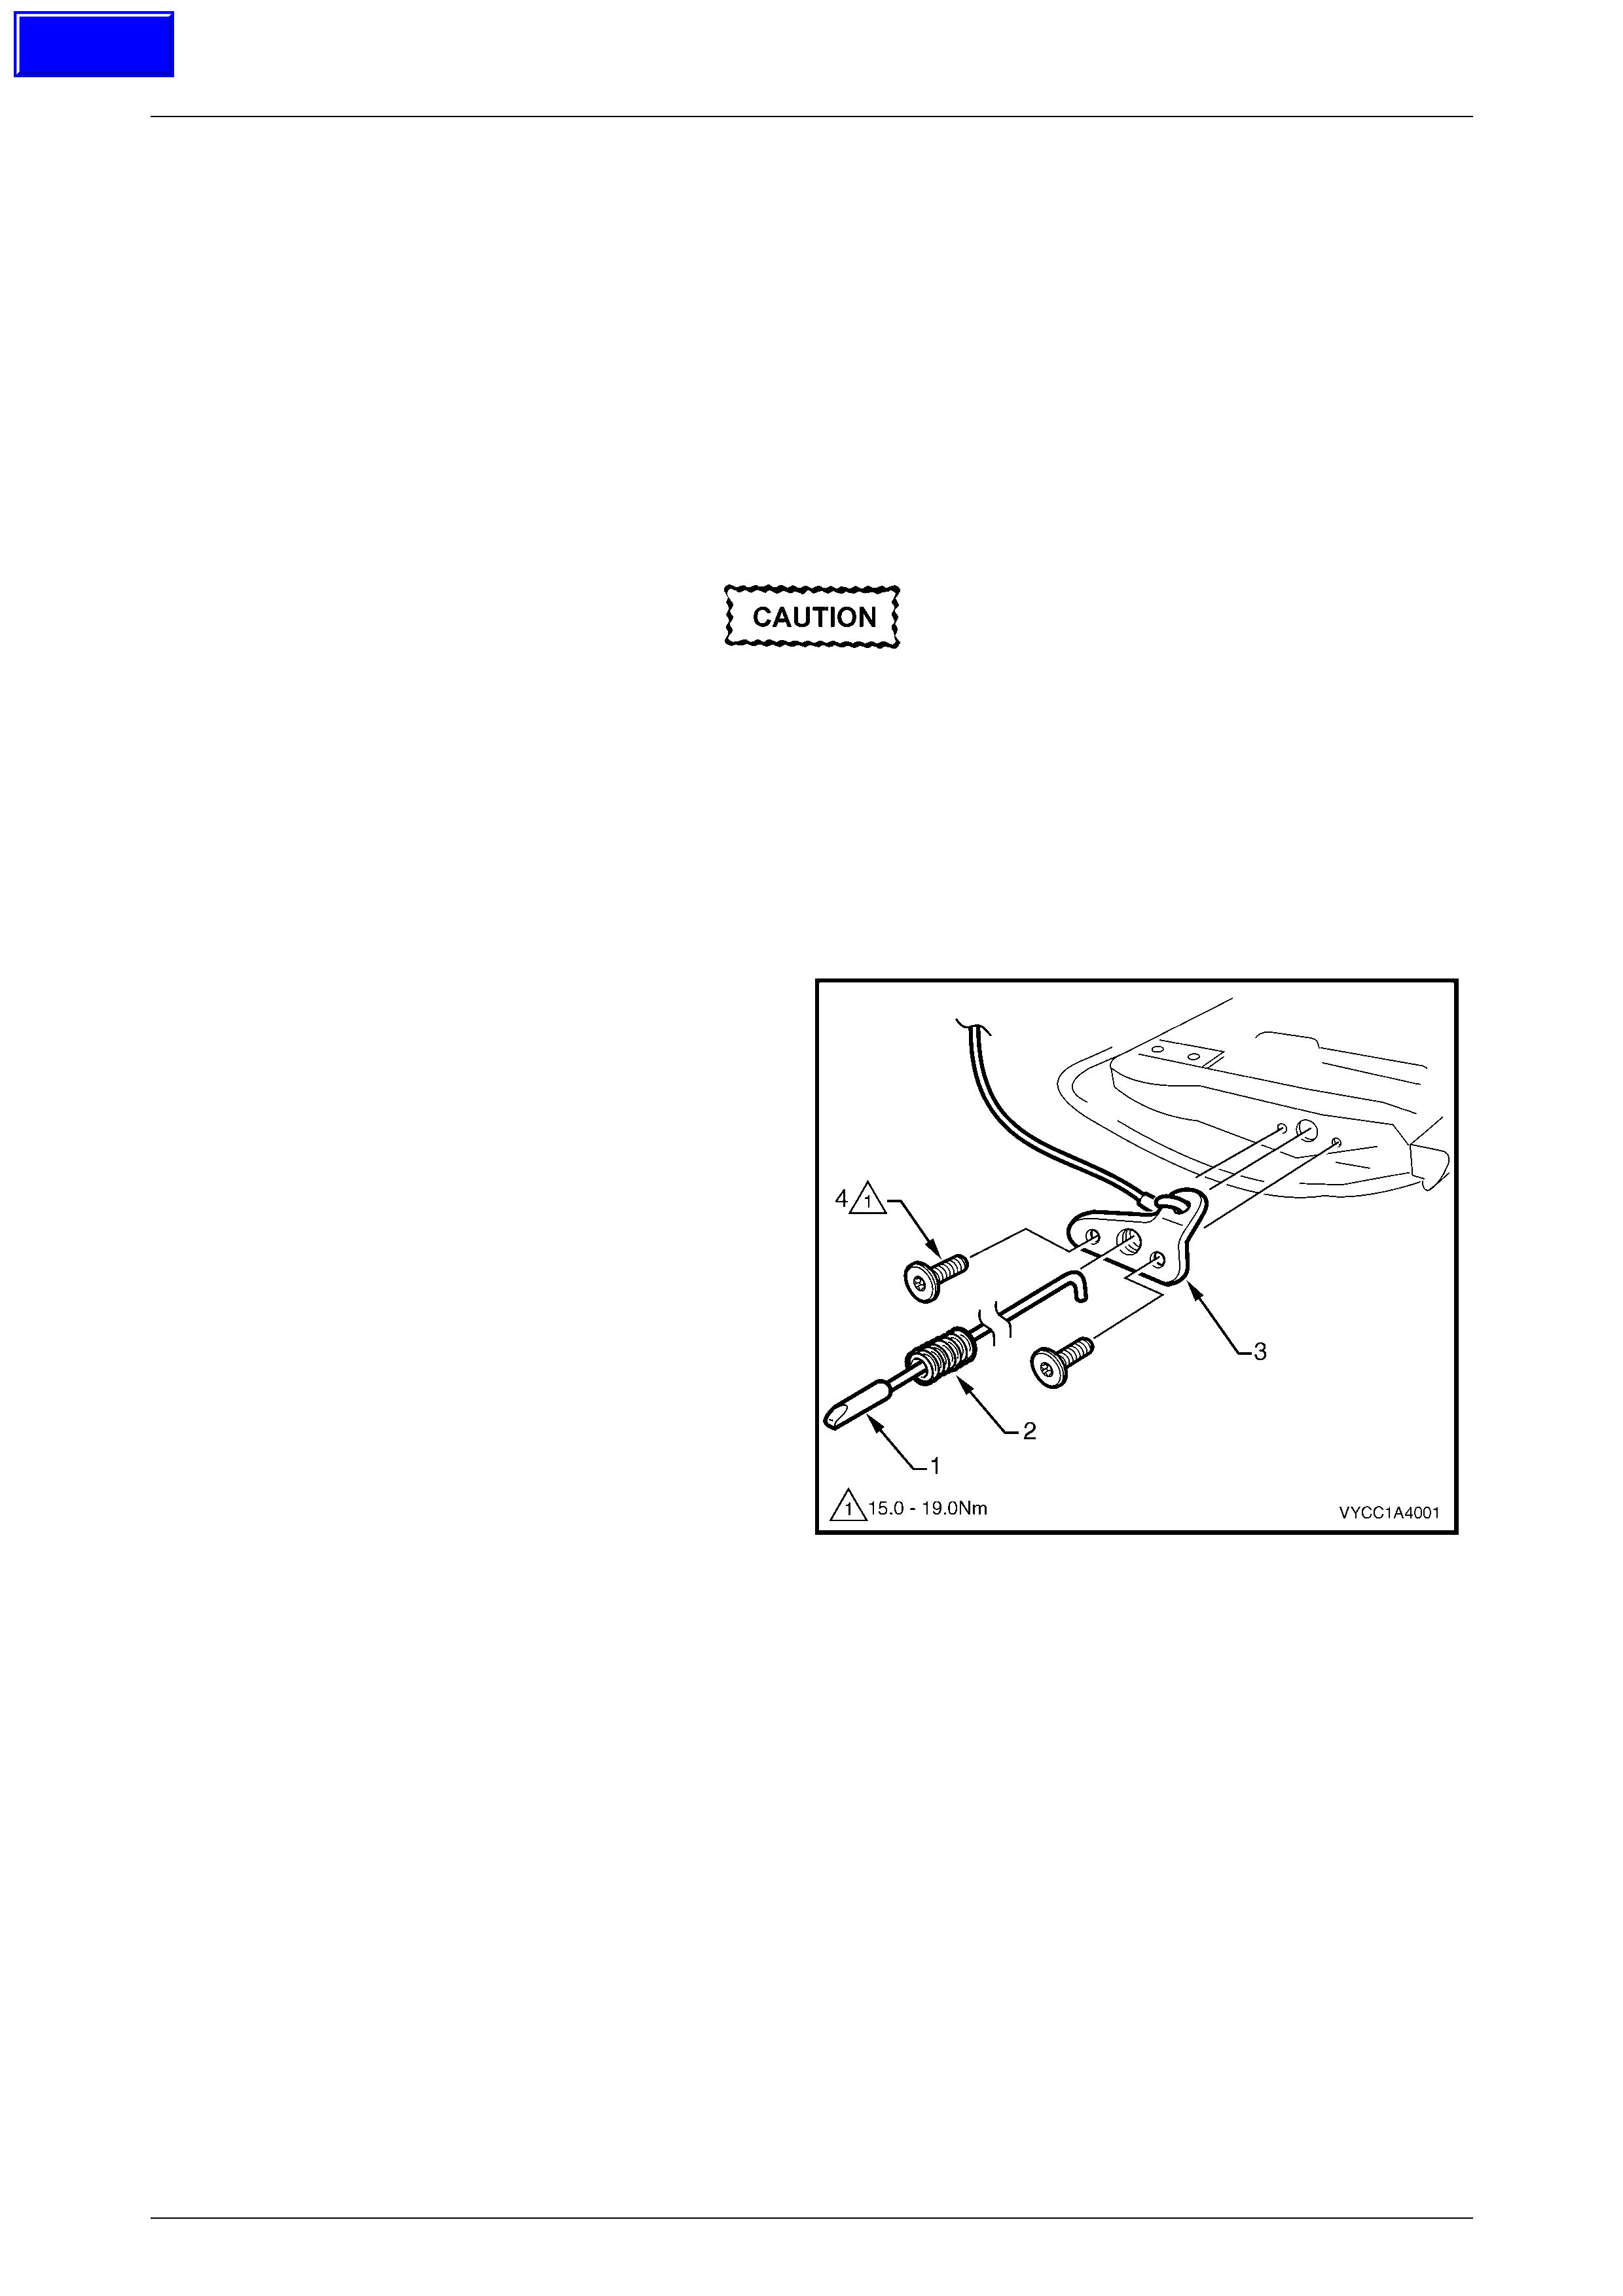
2 Unclip the endgate latch assembly retainer and
disconnect the endgate latch assembly (1) from the
endgate lock anchor plate assembly, refer to
Section 1A4 Hood, Rear Compartment Lid, Liftgate
and Endgate in the MY 2004 VY and V2 Series
Service Information.
3 Withdraw the endgate latch assembly and spring (2)
from the endgate latch bracket and cable
assembly (3).
4 Have an assistant support the endgate and remove
the Torx screw (4), in two places.
Figure 1A4 – 1
Techline
Hood, Rear Compartm ent Lid, Liftgat e & Endgate Page 1A4–4
Page 1A4–4
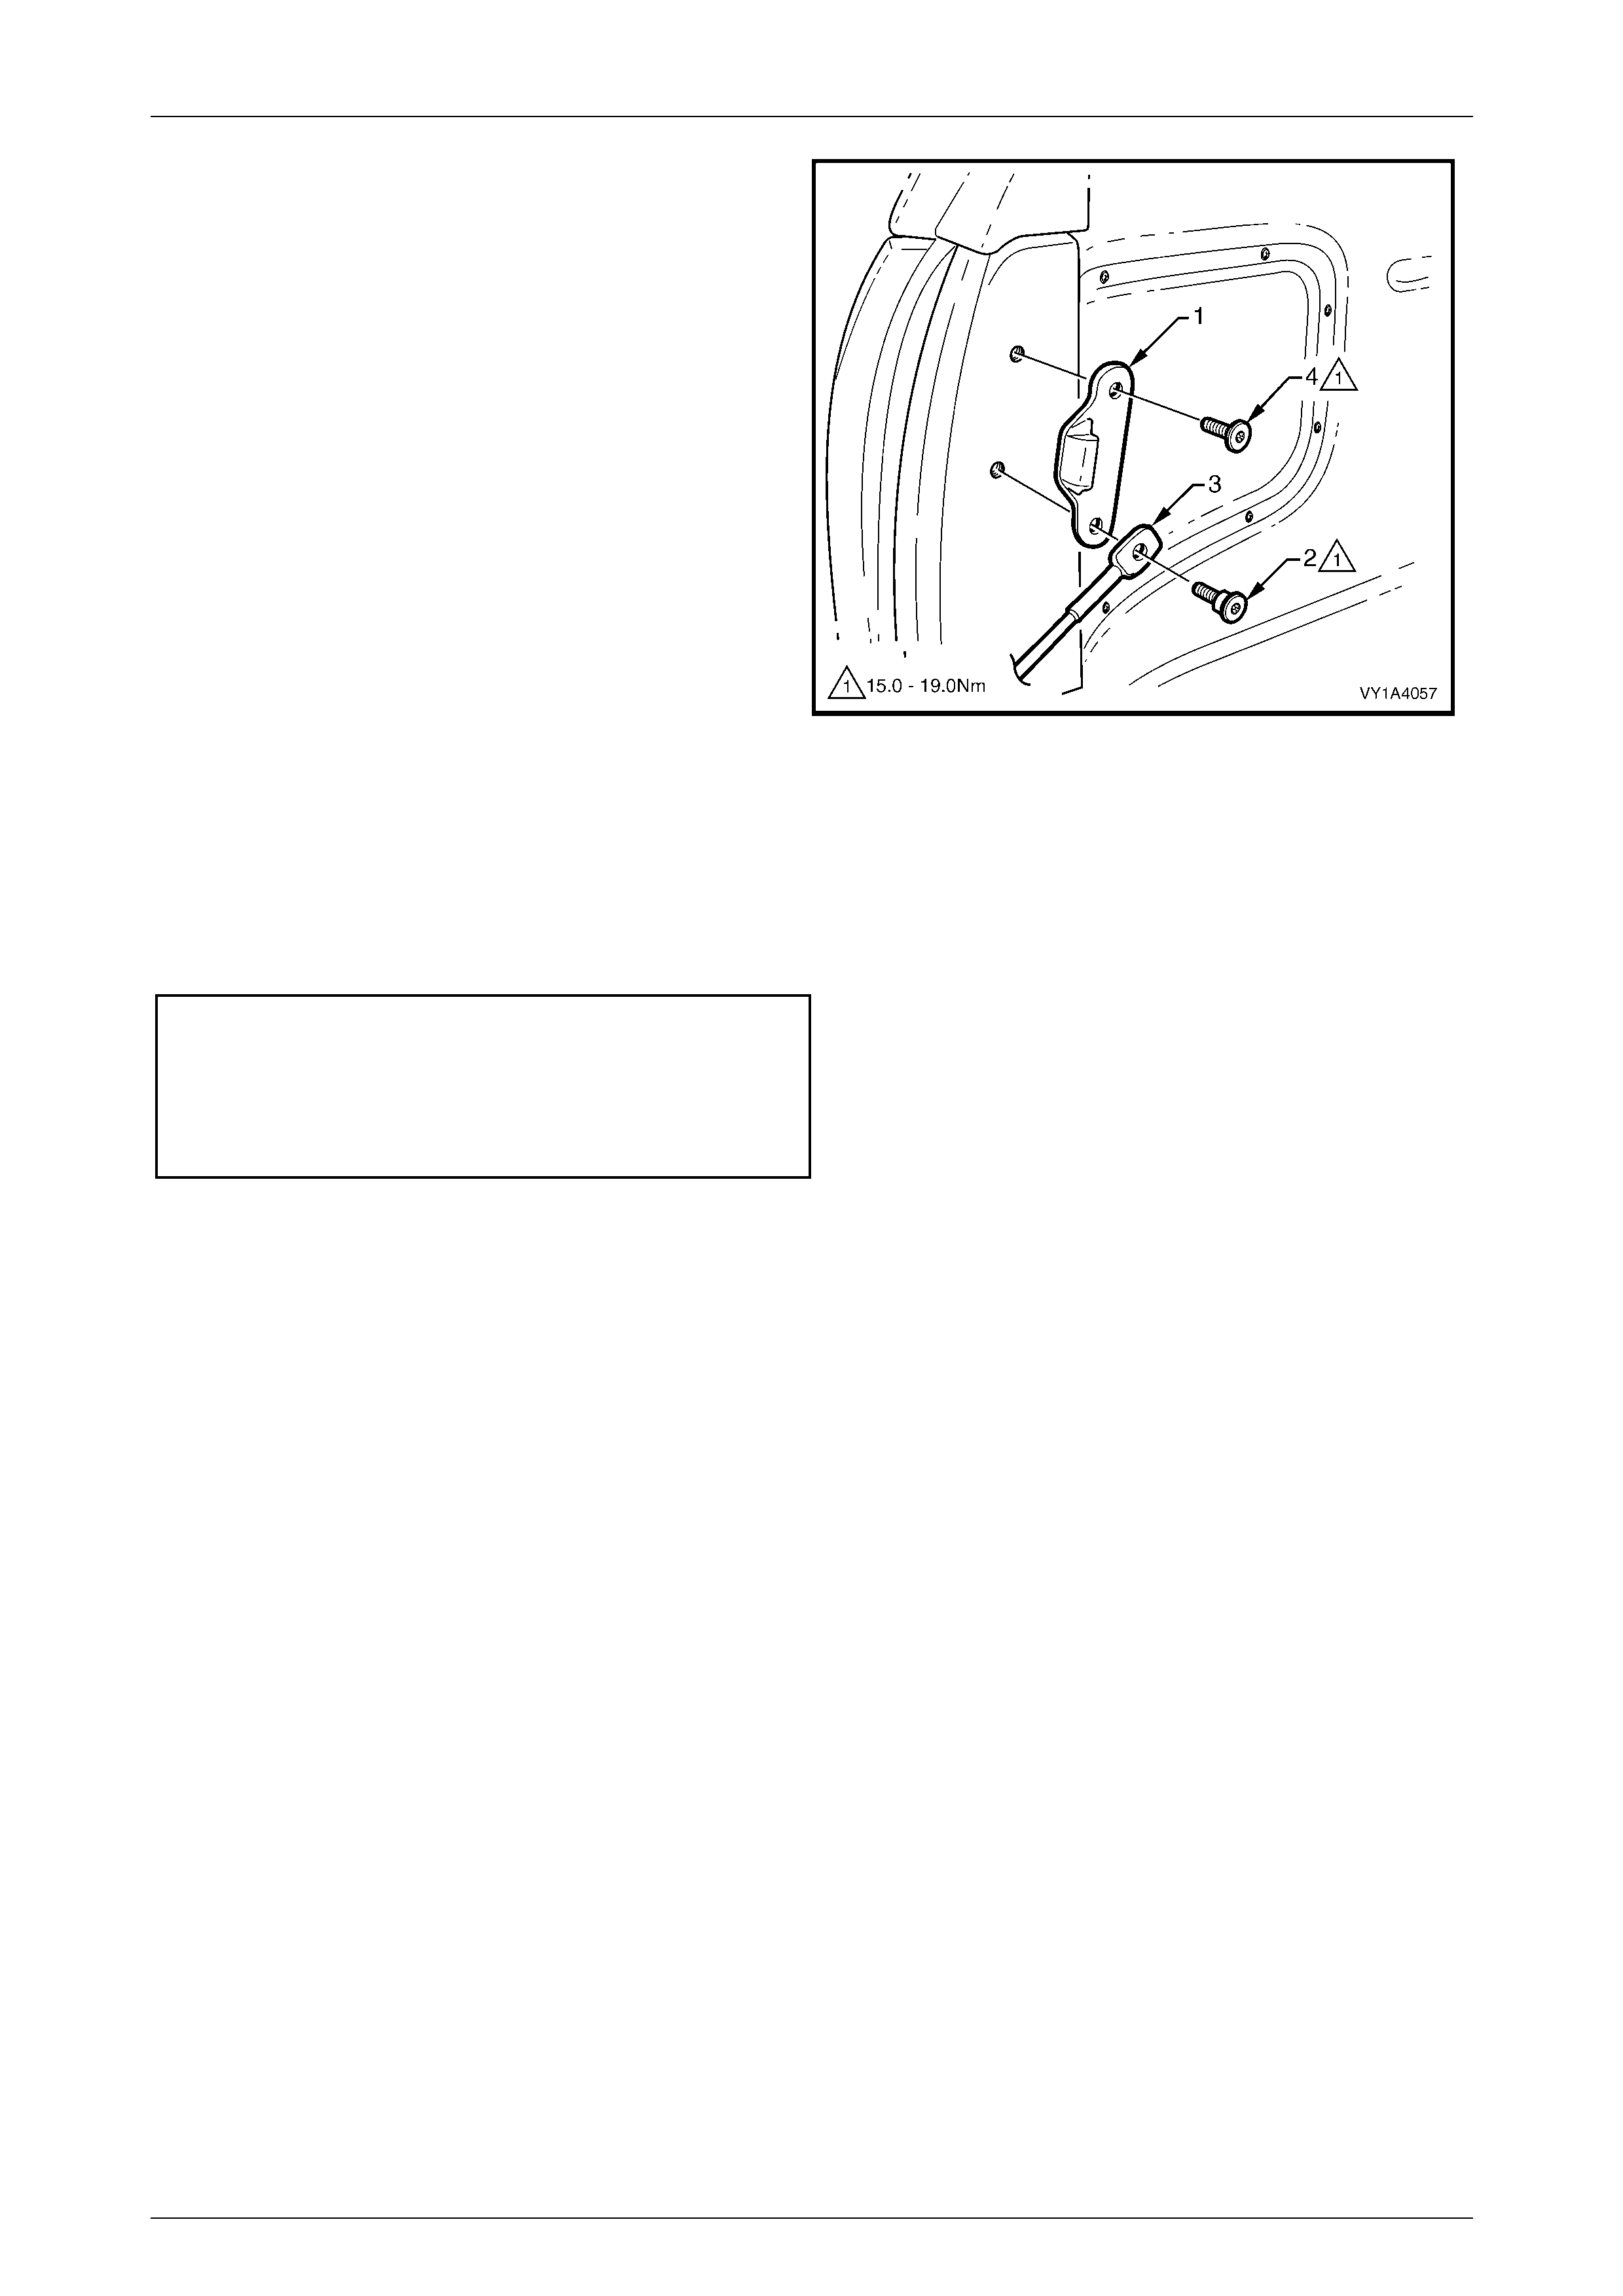
5 Mark the position of the endgate striker (1) with a
marker pen as required.
6 Remove the lower screw (2) attaching the endgate
latch bracket and cable assembly (3) and the endgate
latch striker to the vehicle. Remove the endgate latch
bracket and cable assembly.
7 If required, remove the upper screw (4) attaching the
endgate striker to the vehicle and remove the endgate
striker.
Figure 1A4 – 2
Reinstall
Reinstall atio n of the endgate l atch brac ket and cable assem bly , and endgate str iker is the rev erse of the remov al
procedure, noting the following:
1 Tighten the screws to the specified torque.
Endgate striker attaching screw
torque specification ................................ 15.0 – 19.0 Nm
Endgate latch bracket and cable
assembly attaching screw
torque specification ................................ 15.0 – 19.0 Nm

Hood, Rear Compartm ent Lid, Liftgat e & Endgate Page 1A4–5
Page 1A4–5
3 Torque Wrench Specifications
Endgate Striker Attaching Screw...............................................15.0 – 19.0 Nm
Endgate Latch Bracket and Cable Assembly
Attaching Screw.........................................................................15.0 – 19.0 Nm