
Hood, Rear Compartm ent Lid, Liftgate and Endgate Page 1A4–1
Page 1A4–1
Section 1A4
Hood, Rear Compartment Lid, Liftgate and
Endgate
ATTENTION
Before performing any service operation or other procedure described in this Section, refer to Section 00
Warnings, Cautions and Notes for correct workshop practices with regard to safety and/or property damage.
1 General Information............................................................................................................................... 2
2 Service Operations................................................................................................................................3
2.1 Liftgate Applique Assembly..................................................................................................................................3
Remove ...................................................................................................................................................................3
Disassemble ...........................................................................................................................................................3
Reassembly ............................................................................................................................................................4
Reinstall ..................................................................................................................................................................4
2.2 Rear Compartment Lid Moulding Assembly........................................................................................................5
3 Torque Wrench Specifications............................................................................................................. 6
Techline
Techline

Hood, Rear Compartm ent Lid, Liftgate and Endgate Page 1A4–2
Page 1A4–2
1 General Information
With the following exceptions, MY 2004 VY and V2 Series Hood, Rear Compartment Lid, Liftgate and Endgate
information carries over from MY 2003 VY and V2 Series vehicles:
• Liftgate applique assembly (licence plate surround)
• Rear compartment lid moulding assembly
For Hood, Rear Compartment Lid, Liftgate and Endgate information not contained within this Section, refer to
Section 1A4 Hood, Rear Compartment Lid, Liftgate and Endgate in the MY 2003 VY and V2 Series Service
information.
Hood, Rear Compartm ent Lid, Liftgate and Endgate Page 1A4–3
Page 1A4–3
2 Service Operations
2.1 Liftgate Applique Assembly
LT Section – 02-385
Remove
1 Remove the liftgate window lower garnish, refer to Section 1A4, 4.1 Liftgate Window Lower Garnish in the MY 2003
VY and V2 Series Service Information.
2 Remove the liftgate lower trim panel, refer to Section 1A4, 4.2 Liftgate Lower Trim Panel in the MY 2003 VY and V2
Series Service Information.
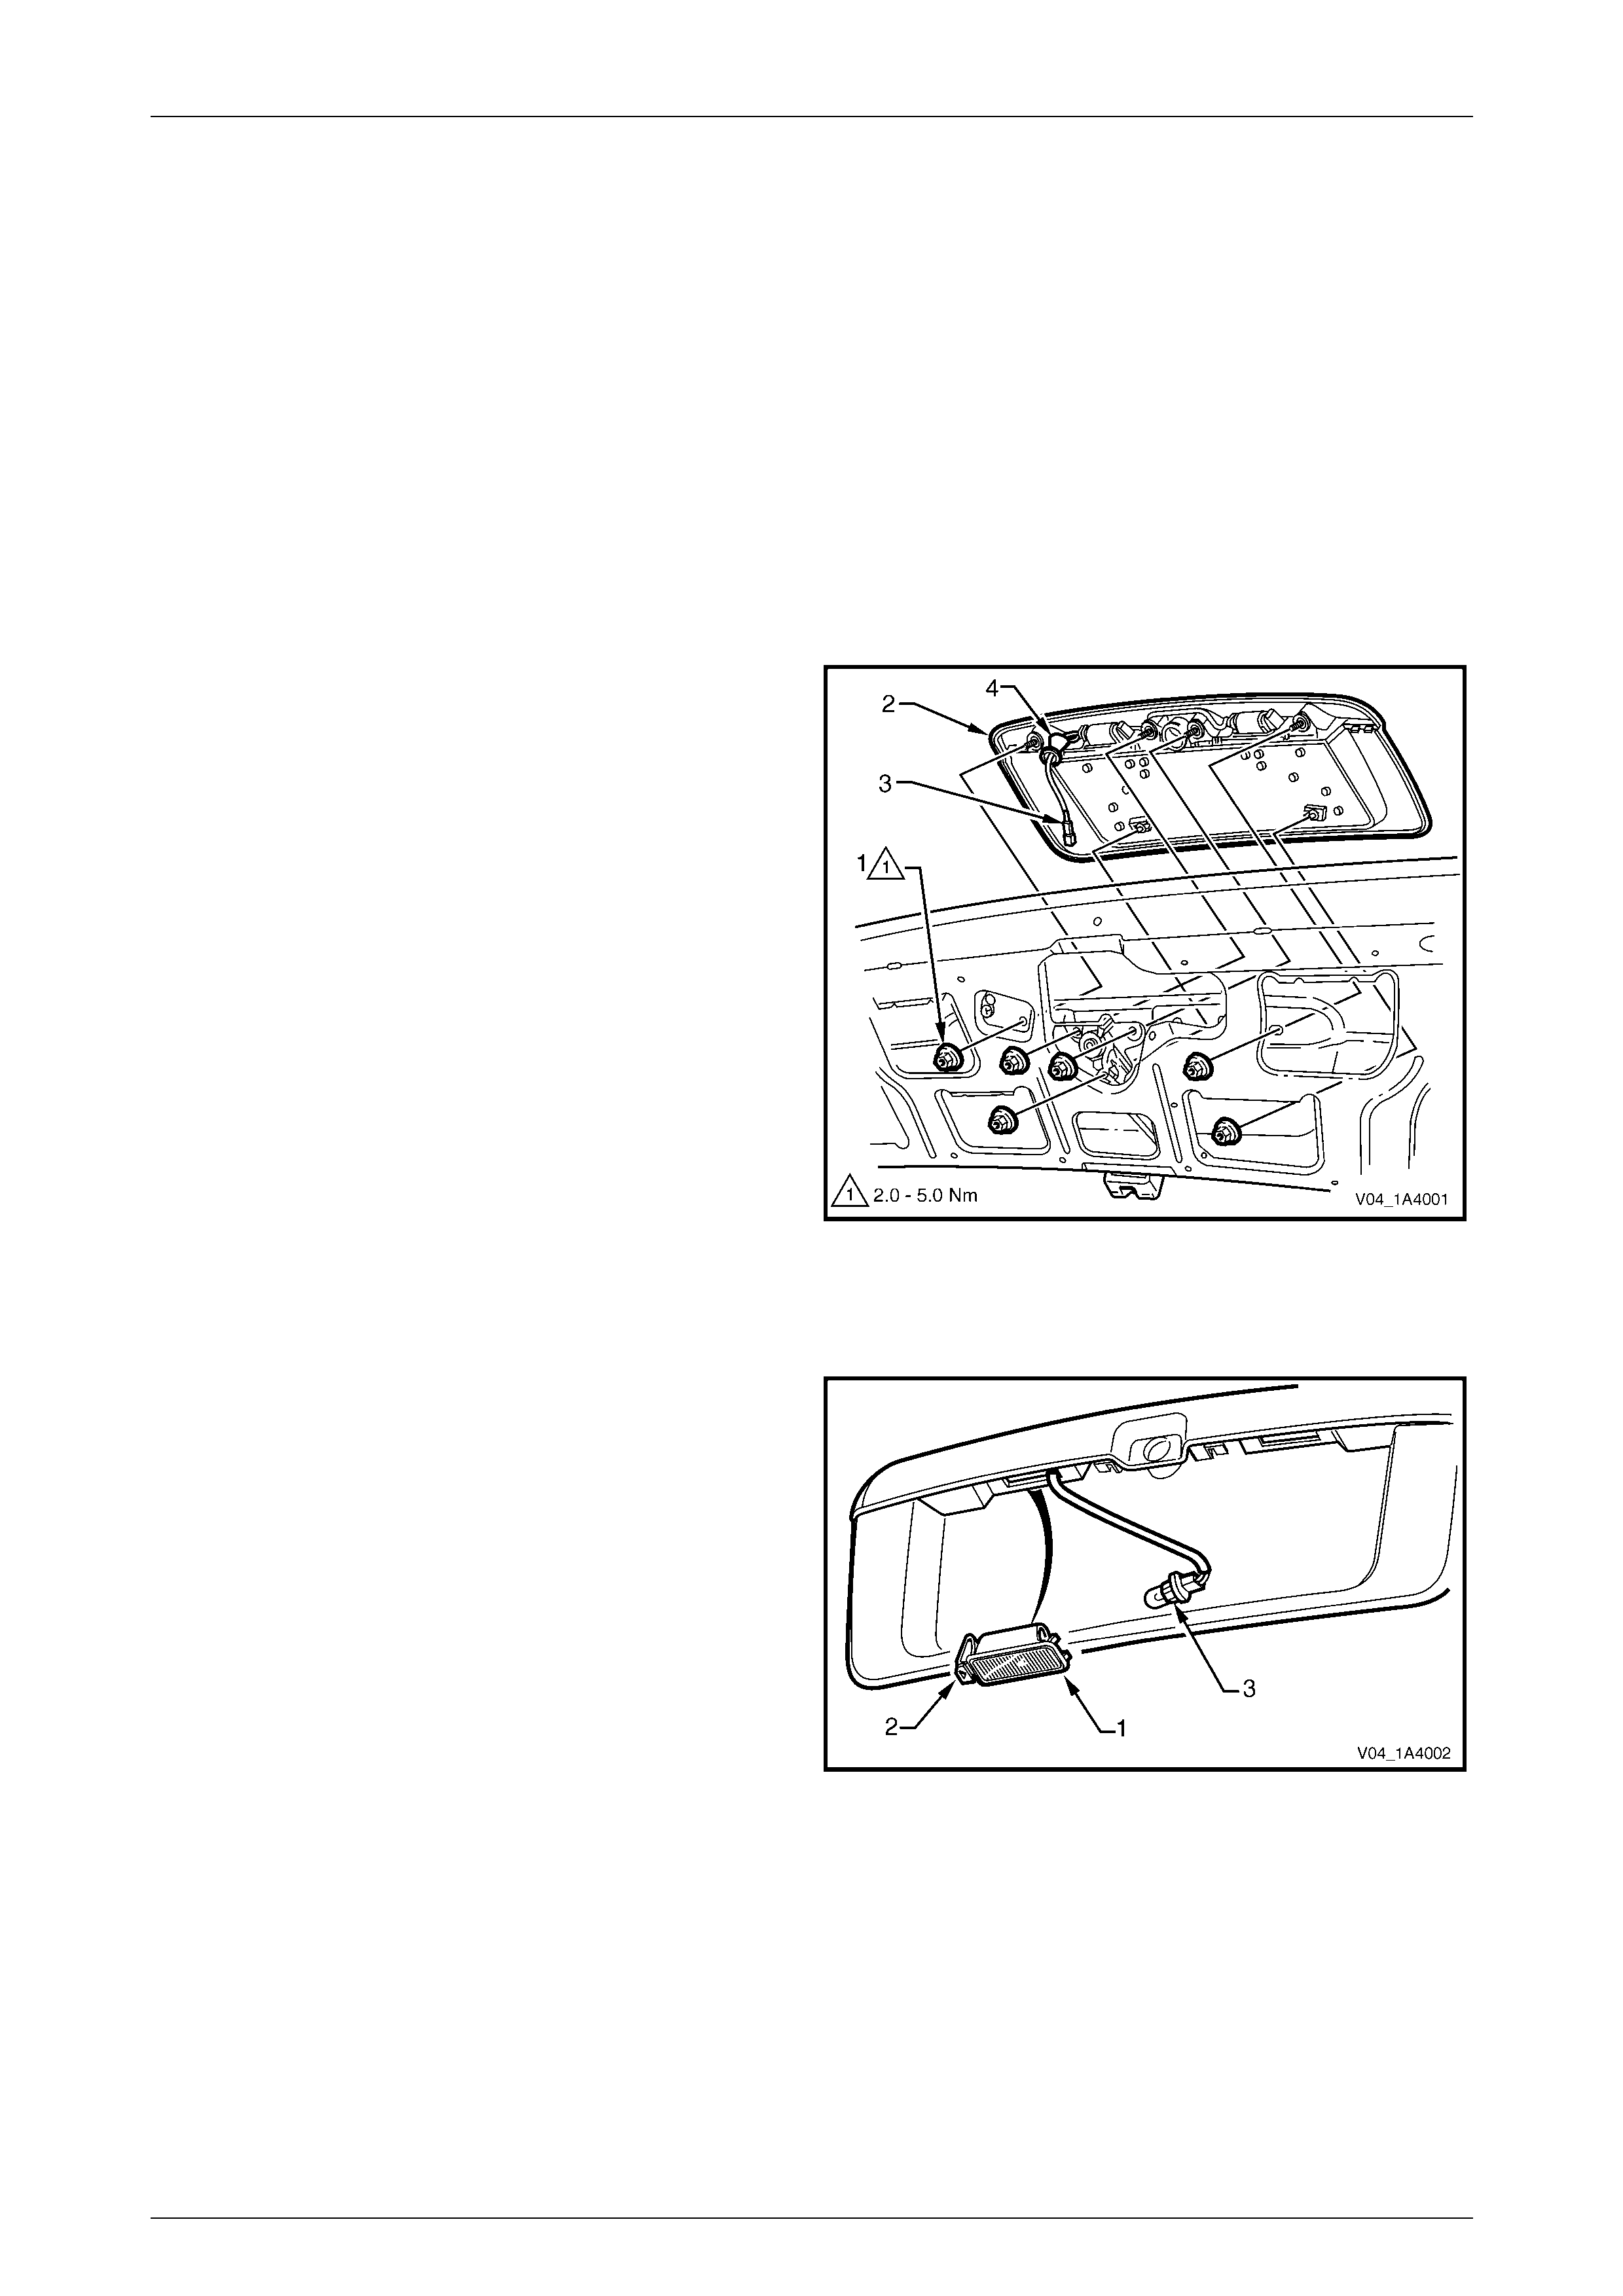
NOTE
The two inner nuts also attach the liftgate
applique push-button assemb ly.
3 From within the liftgate cavity, remove the nuts (1), in
six places, attaching the liftgate applique assembly (2)
to the liftgate assembly.
4 Disconnect the licence plate lamp wiring connector (3)
from within the liftgate cavity.
5 Remove the liftgate applique assembly from the
liftgate assembly and remove the licence plate lamp
wiring harness grommet (4).
6 Withdraw the licence plate lamp wiring harness and
remove the liftgate applique assembly.
Figure 1A4 – 1
Disassemble
1 Remove the rear licence plate lamp assembly (1), in
two places, from the liftgate applique assembly by
pushing on the tab (2) and removing the lamp housing
assembly in the direction shown.
2 Rotate the bulb socket (3) and remove from the lamp
housing asse mbly .
Figure 1A4 – 2

Hood, Rear Compartm ent Lid, Liftgate and Endgate Page 1A4–4
Page 1A4–4
3 If required, pass the bulb socket (1), in two places,
through the aperture in the liftgate applique assembly
and remove the licence plate lamp wiring harness (2).
Figure 1A4 – 3
Reassembly
Reassembly of the liftgate applique assembly is the reverse of the disassembly procedure, noting the following:
1 Ensure that the licence plate lamp wiring harness (1) is routed so that it clears the liftgate applique push-button
assembly and the edge of the liftgate applique assembly, refer to Figure 1A4 – 3.
Reinstall
Reinstallation of the liftgate applique assembly is the reverse of the removal procedure, noting the following:
1 Tighten the nuts to the specified torque.
Liftgate applique assembly attaching
nut torque specification .............................. 2.0 – 5.0 Nm


Hood, Rear Compartm ent Lid, Liftgate and Endgate Page 1A4–6
Page 1A4–6
3 Torque Wrench Specifications
Liftgate Applique Assembly Attaching Nut ...........................................................2.0 – 5.0 Nm