
Radiator Grille Page 1C–1
Page 1C–1
Section 1C
Radiator Grille
ATTENTION
Before performing any service operation or other procedure described in this Section, refer to Section 00
Warnings, Cautions and Notes for correct workshop practices with regard to safety and/or property damage.
1 General Description ...............................................................................................................................2
2 Service Operations.................................................................................................................................3
2.1 Service Notes......................................................................................................................................................... 3
Razor Blade Retainers........................................................................................................................................... 3
2.2 Radiator Grille Assembly, Except Coupe ............................................................................................................ 4
Remove................................................................................................................................................................... 4
Disassemble........................................................................................................................................................... 4
Radiator Grille Emblem...................................................................................................................................... 4
Reinstall.................................................................................................................................................................. 5
2.3 Radiator Grille Assembly, Coupe......................................................................................................................... 6
Remove................................................................................................................................................................... 6
Disassemble........................................................................................................................................................... 6
Radiator Grille Escutcheon................................................................................................................................. 6
Radiator Grille Emblem Assembly...................................................................................................................... 7
Reinstall.................................................................................................................................................................. 7
2.4 Lower Radiator Grille, Except Coupe................................................................................................................... 8
Remove................................................................................................................................................................... 8
Reinstall.................................................................................................................................................................. 8
2.5 Lower Radiator Grille, Coupe................................................................................................................................ 9
Remove................................................................................................................................................................... 9
Reinstall.................................................................................................................................................................. 9
3 Torque Wrench Specifications............................................................................................................10

Radiator Grille Page 1C–2
Page 1C–2
1 General Description
This Section describes the replacement of the rad iator grille and lower radiator grille assembli es.
The radiator grille assembly is attached to the front bumper fascia. Six key styles are offer ed depending on body type
and Model Level.
• Model Level 1, except SV6, SS, S Utility, S Regular Cab and S Crew Cab – A one pi ece, single bar design
featuring a diamond hon eycombed mesh background.
• SV6, SS, S Utility, S Regular Cab and S Crew Cab – A one piece, sin gle bar design featuring a hexagon
honeycombed mesh background.
• Model Levels 2 and 3 – A one piece, single bar design featuring an oval honeycombed mesh background.
• Coupe – A two piece, single bar design featuring a separate centre escutcheon and a hexagon honeycombed
mesh grille piece.
• AWD Wagon and AWD V8 Cr ew Cab – A one piece, single bar design featuring a hexagon honeycombed mesh
background.
• AWD Regular Cab and AWD V6 Crew Cab – A one piece, single bar desig n featuring a hexagon honeycombed
mesh background.
Four styles of lower radiator grilles are offered that also attach the front bumper fascia.
• SV6 and SS – A single piece grille featuring a hexagon honeycombed mesh pattern.
• Model Level 2 – A single pi ece grille featuring an ova l honeycombed mesh pattern.
• Model Level 3 – A single pi ece grille featuring an ova l honeycombed mesh pattern.
• Coupe – A single piece grill e featuring a hexagon honeycombed mesh pattern.
NOTE
Level 1 and AWD vehicles are not fitted with a
lower radiator grille.
As the lower radiator grille at taches to the rear of
the front bumper fascia assembly, the fascia
assembly must be removed first, refer to
Section 1D Bumper Bars.
For Model Level designation detai ls, refer to Section 0A General Information.
Radiator Grille Page 1C–3
Page 1C–3
2 Service Operations
2.1 Service Notes
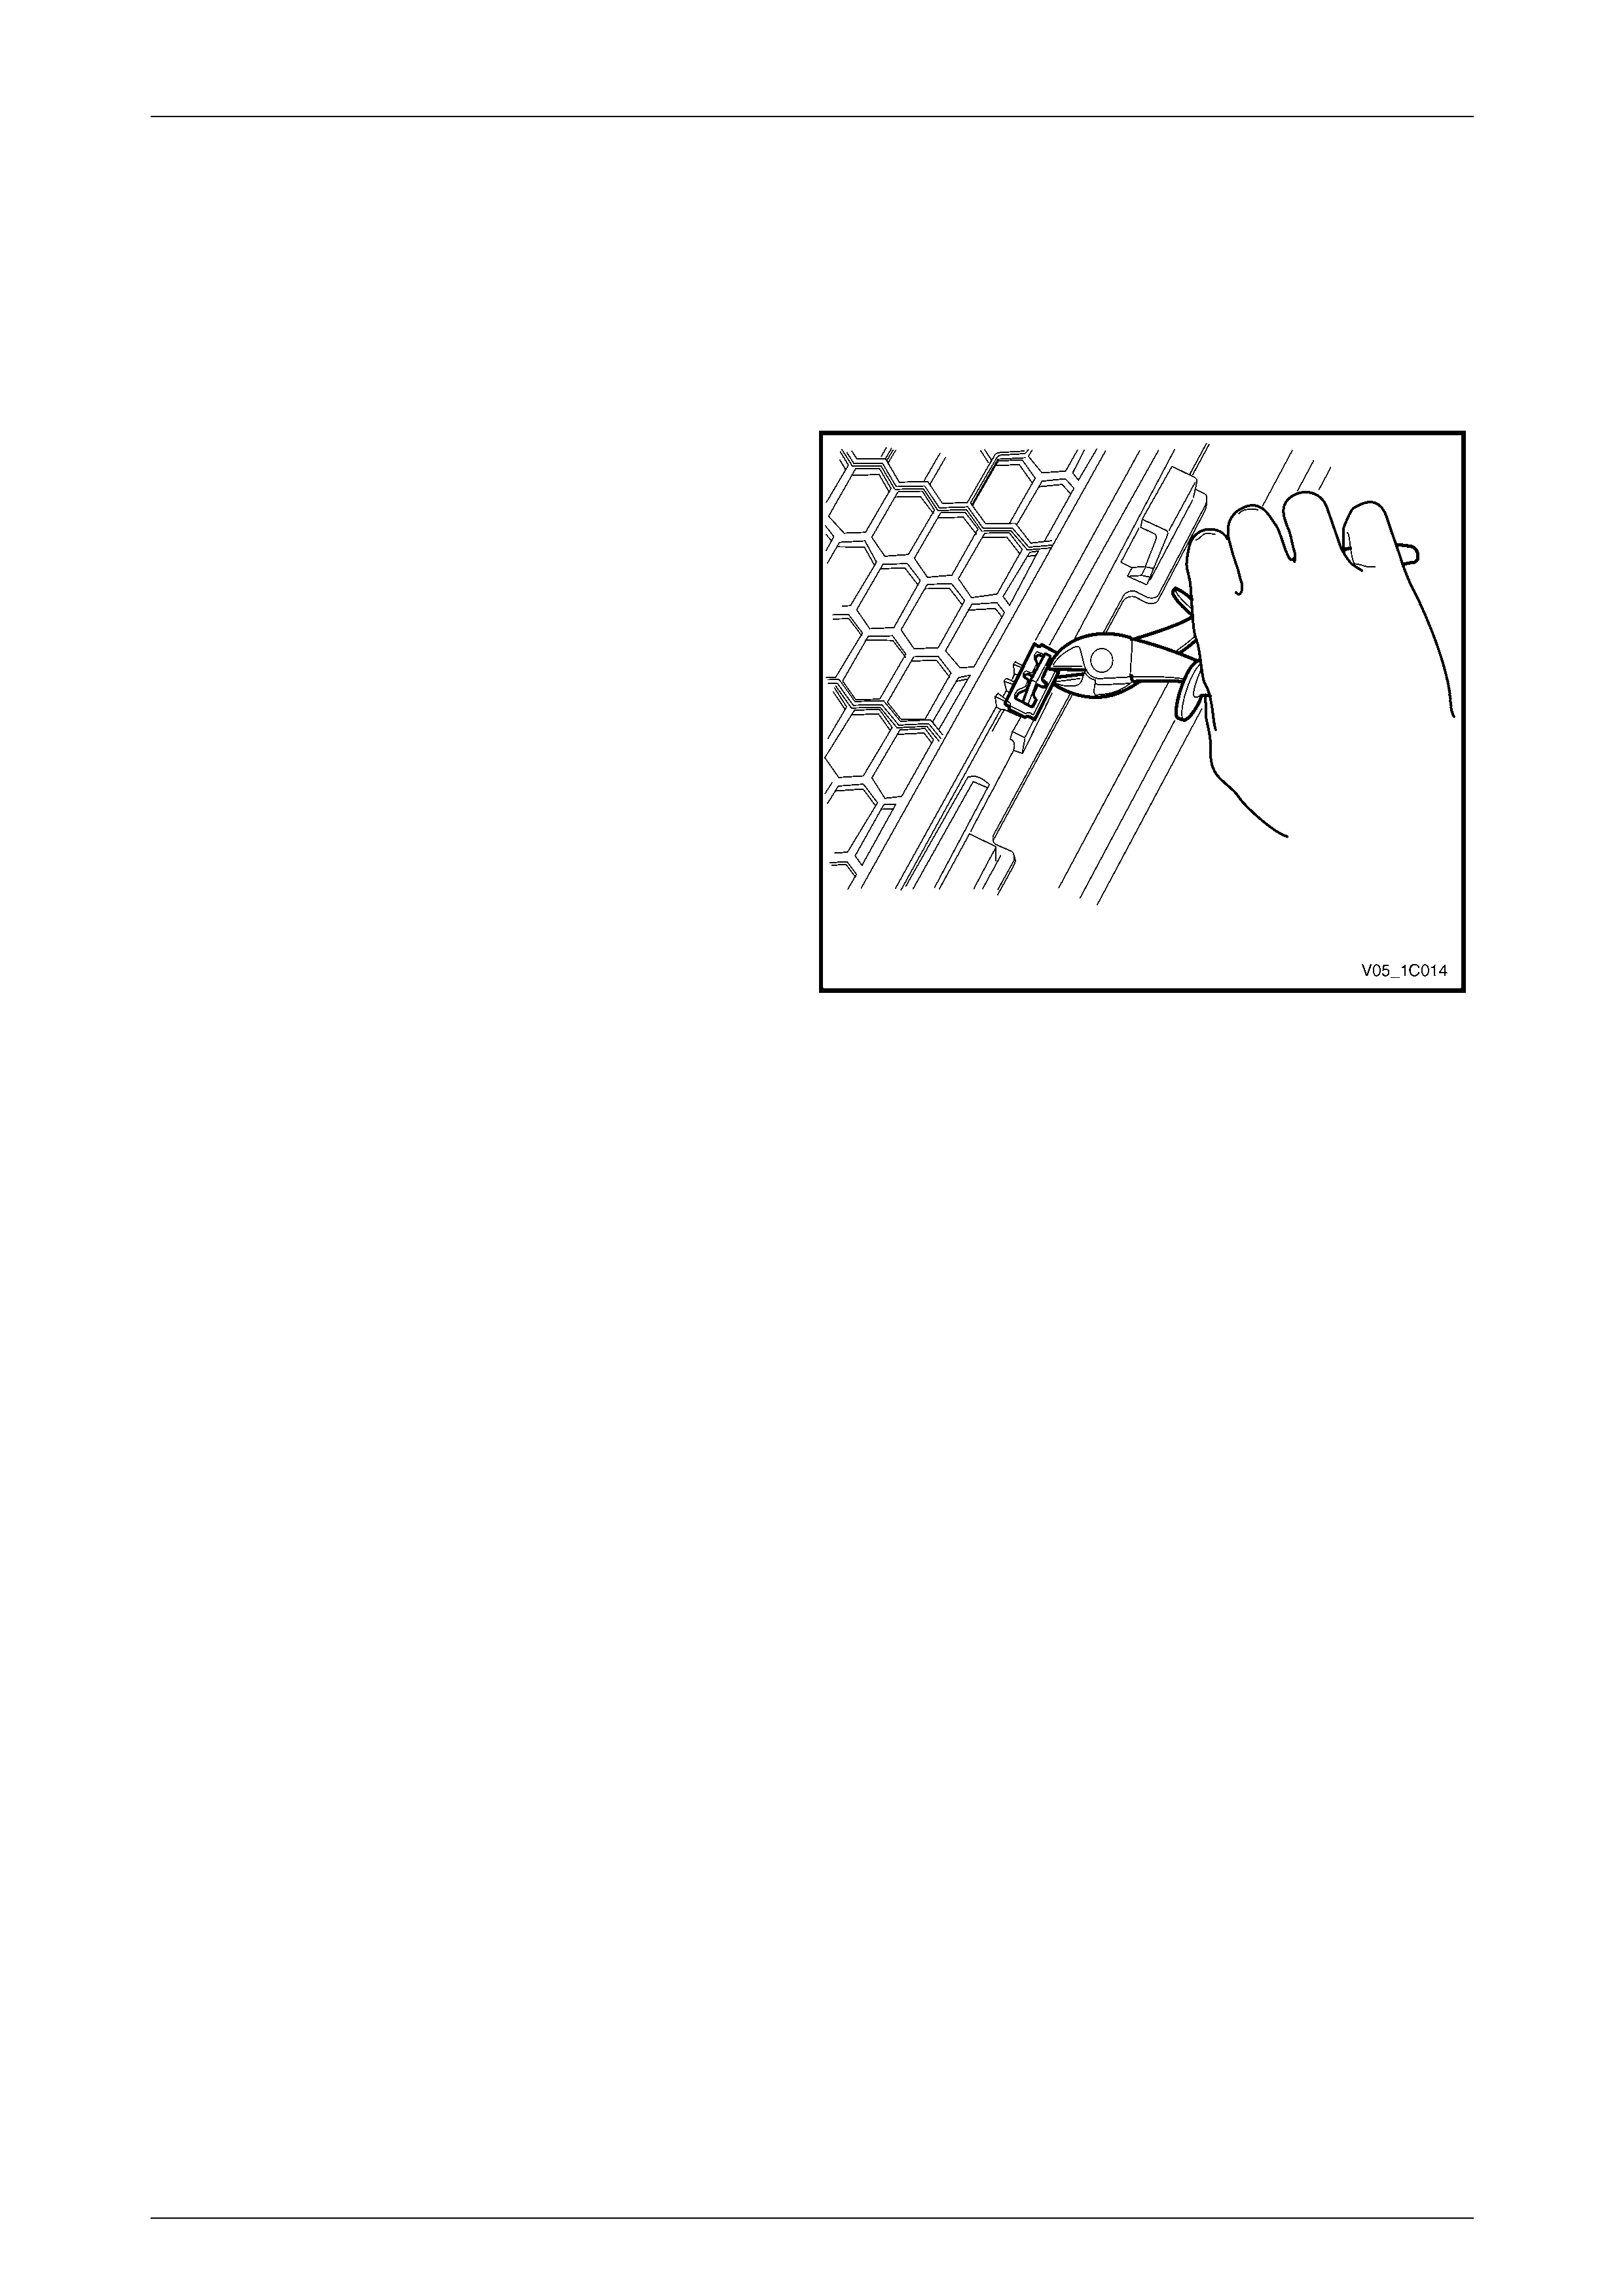
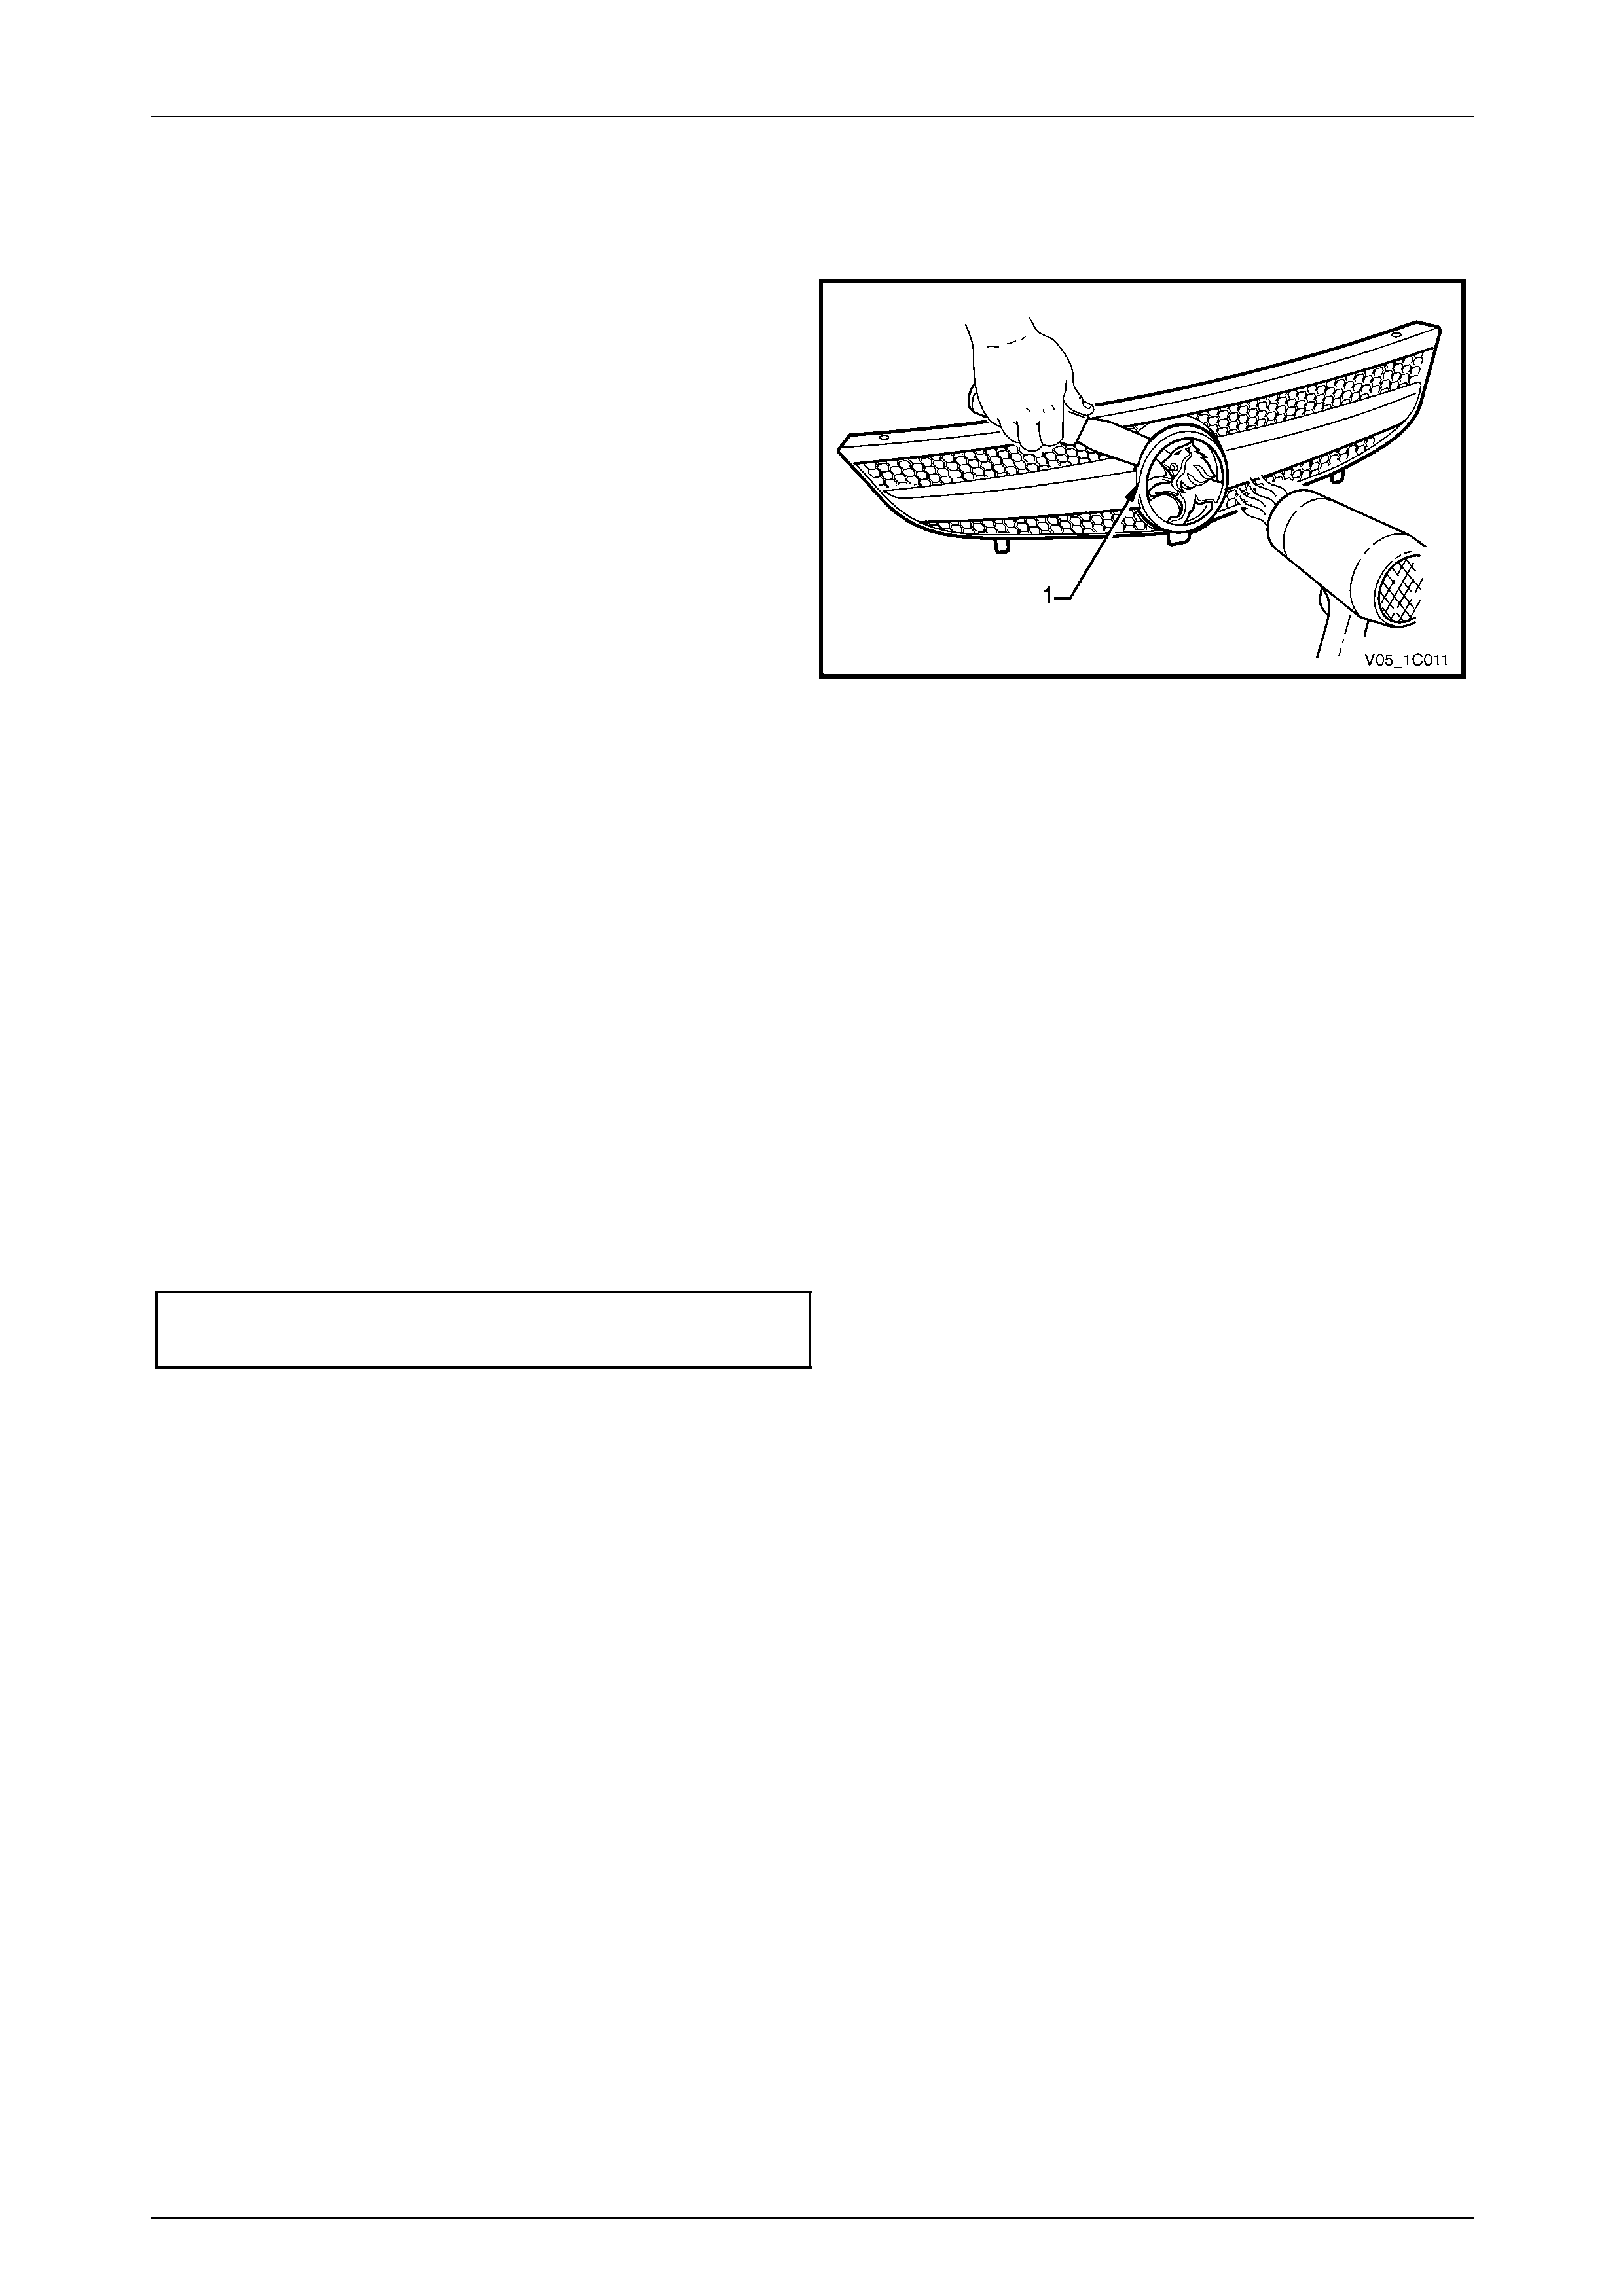
Razor Blade Retainers
1 Prise the edge of the razor blade retai ner away from
the surface, giving enough clearance to allow access
with side cutters.
2 With the side cutters cut the retainer and bend the
retainer from the mounting lug and remove.
3 Replace the razor blade retainer as required.
Figure 1C – 1
Radiator Grille Page 1C–4
Page 1C–4
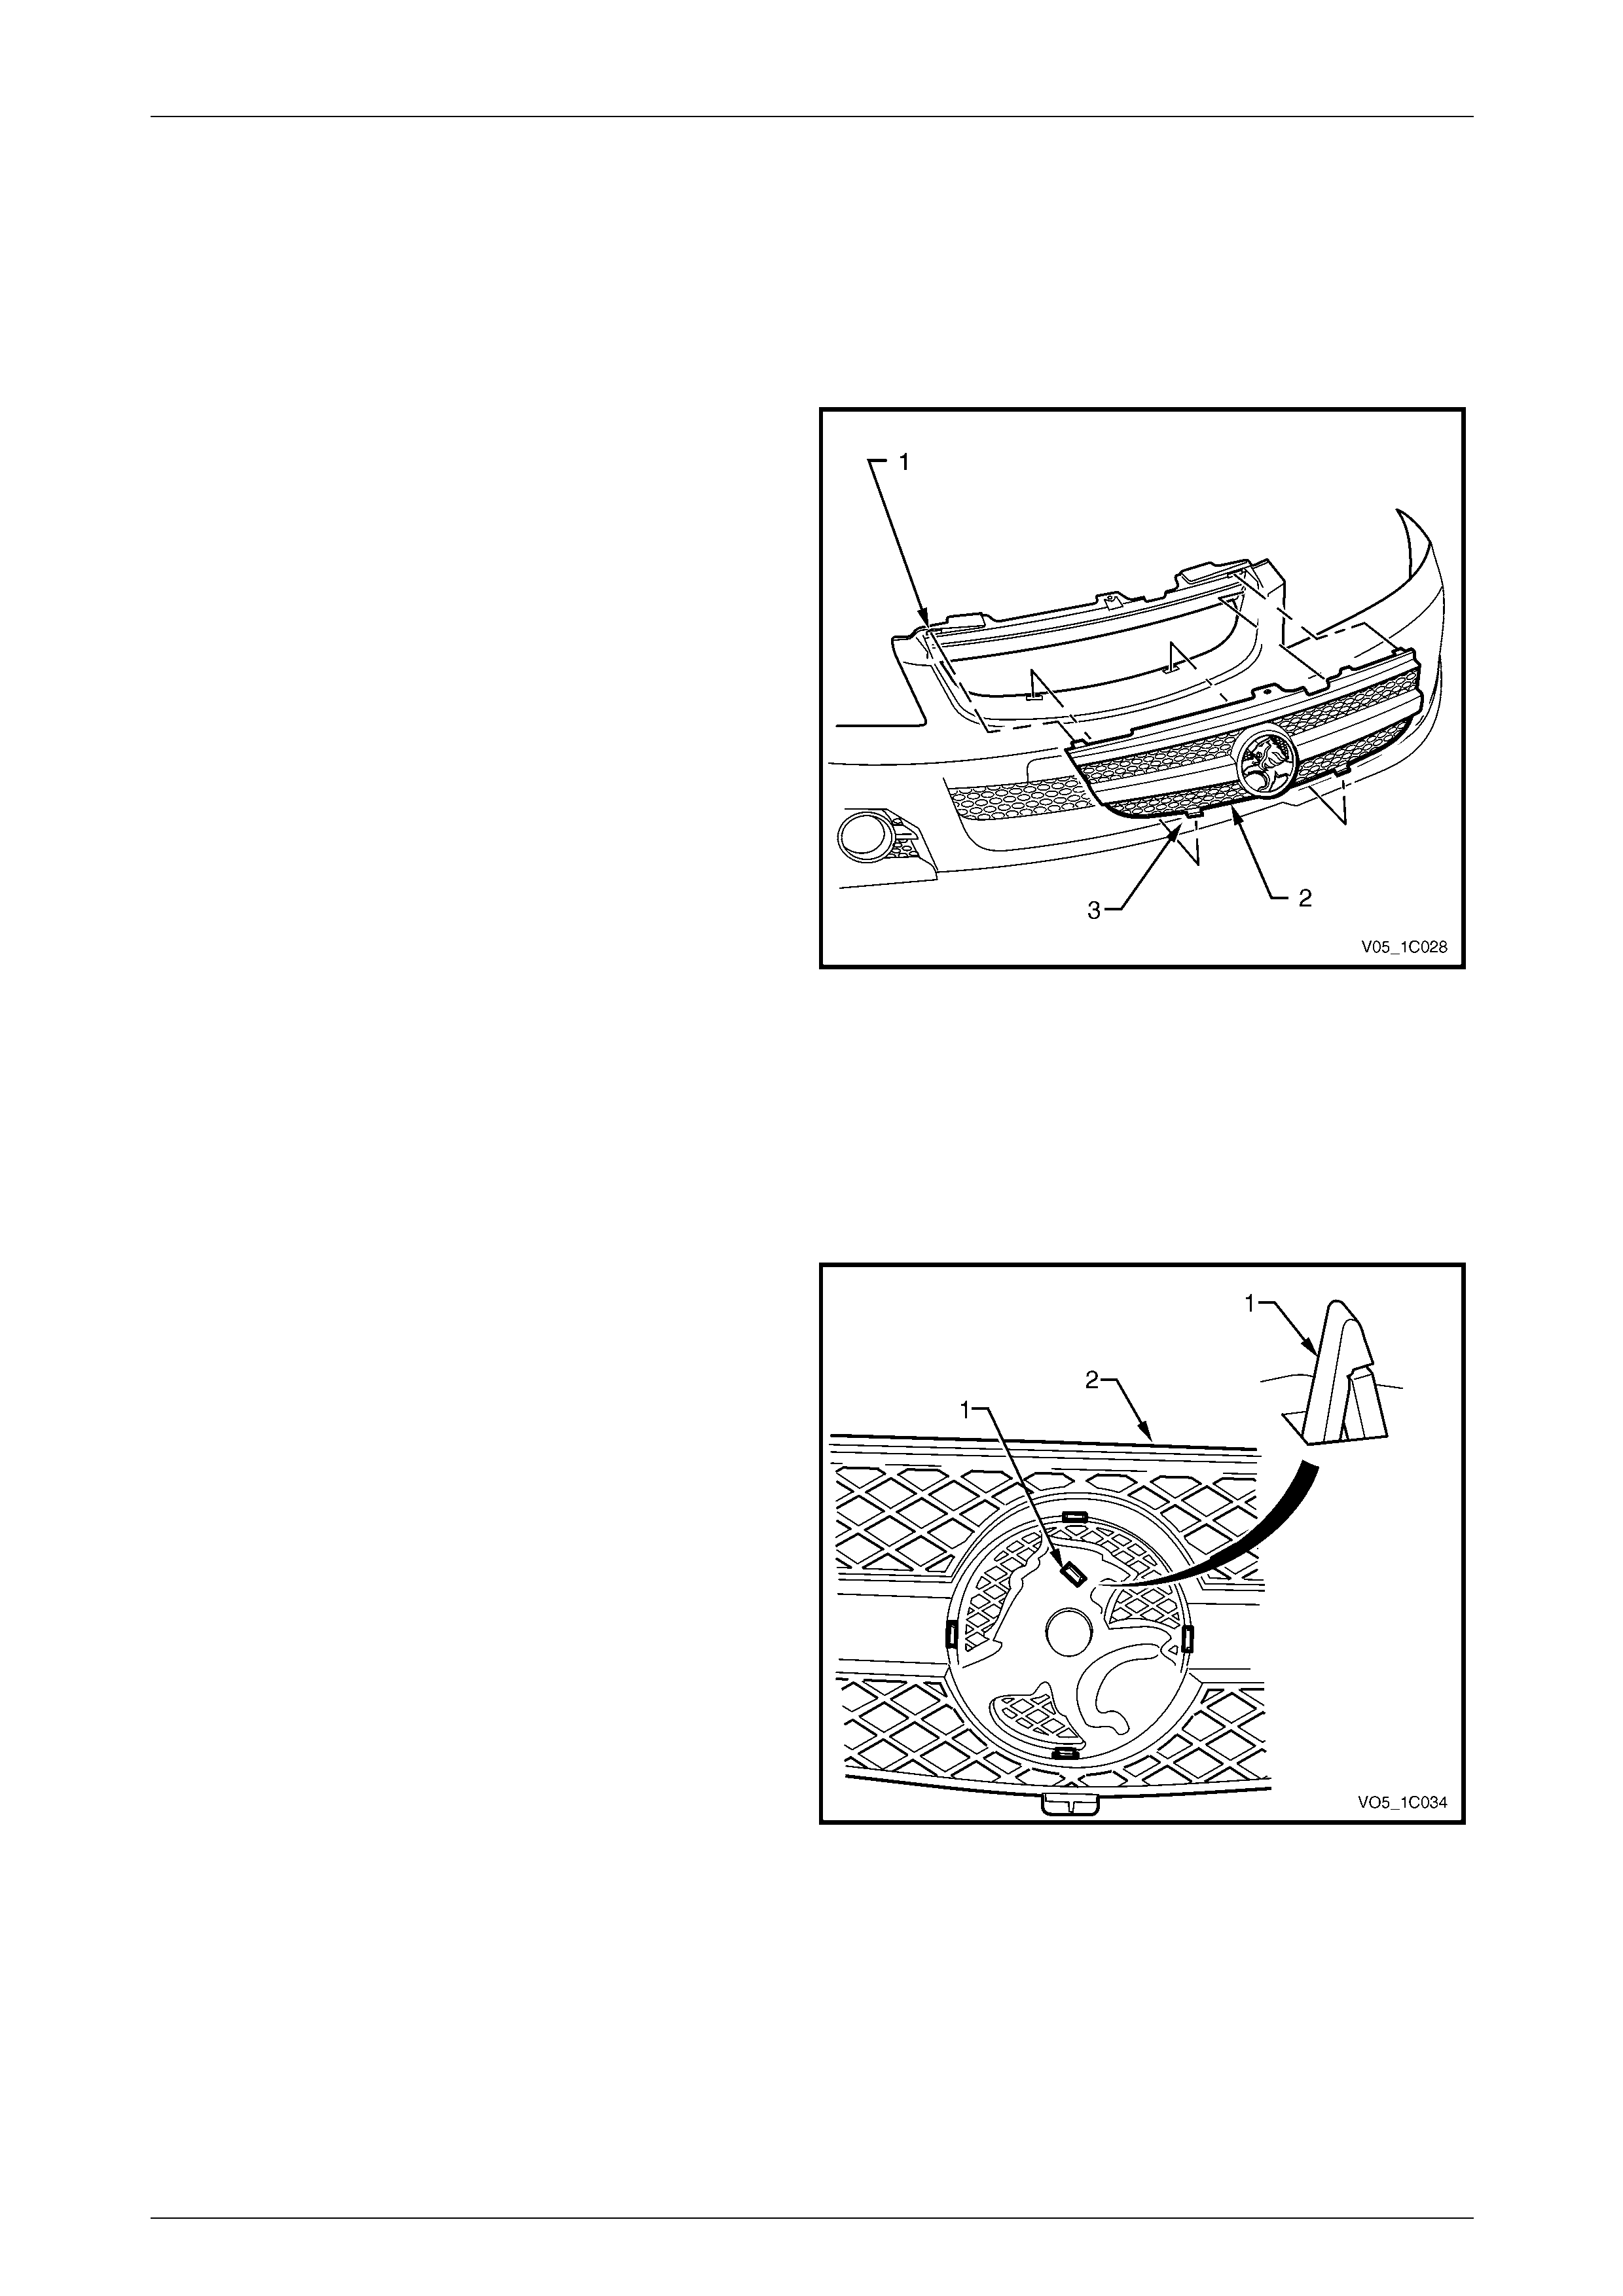
2.2 Radiator Grille Assembly, Except Coupe
LT Section No. — 07–500
Remove
1 Remove the front bumper fascia, refer to
Section 1D Bumper Bars.
2 From the rear of the front bumper fascia, depress the
top corner retainer (1), two places, and rotate the top
of the grille assembly (2) forward to release the
retainers from the bumper fascia.
3 Using slight pressure, detach the two lower retaining
pins (3) and remove the grille assembly.
Figure 1C – 2
Disassemble
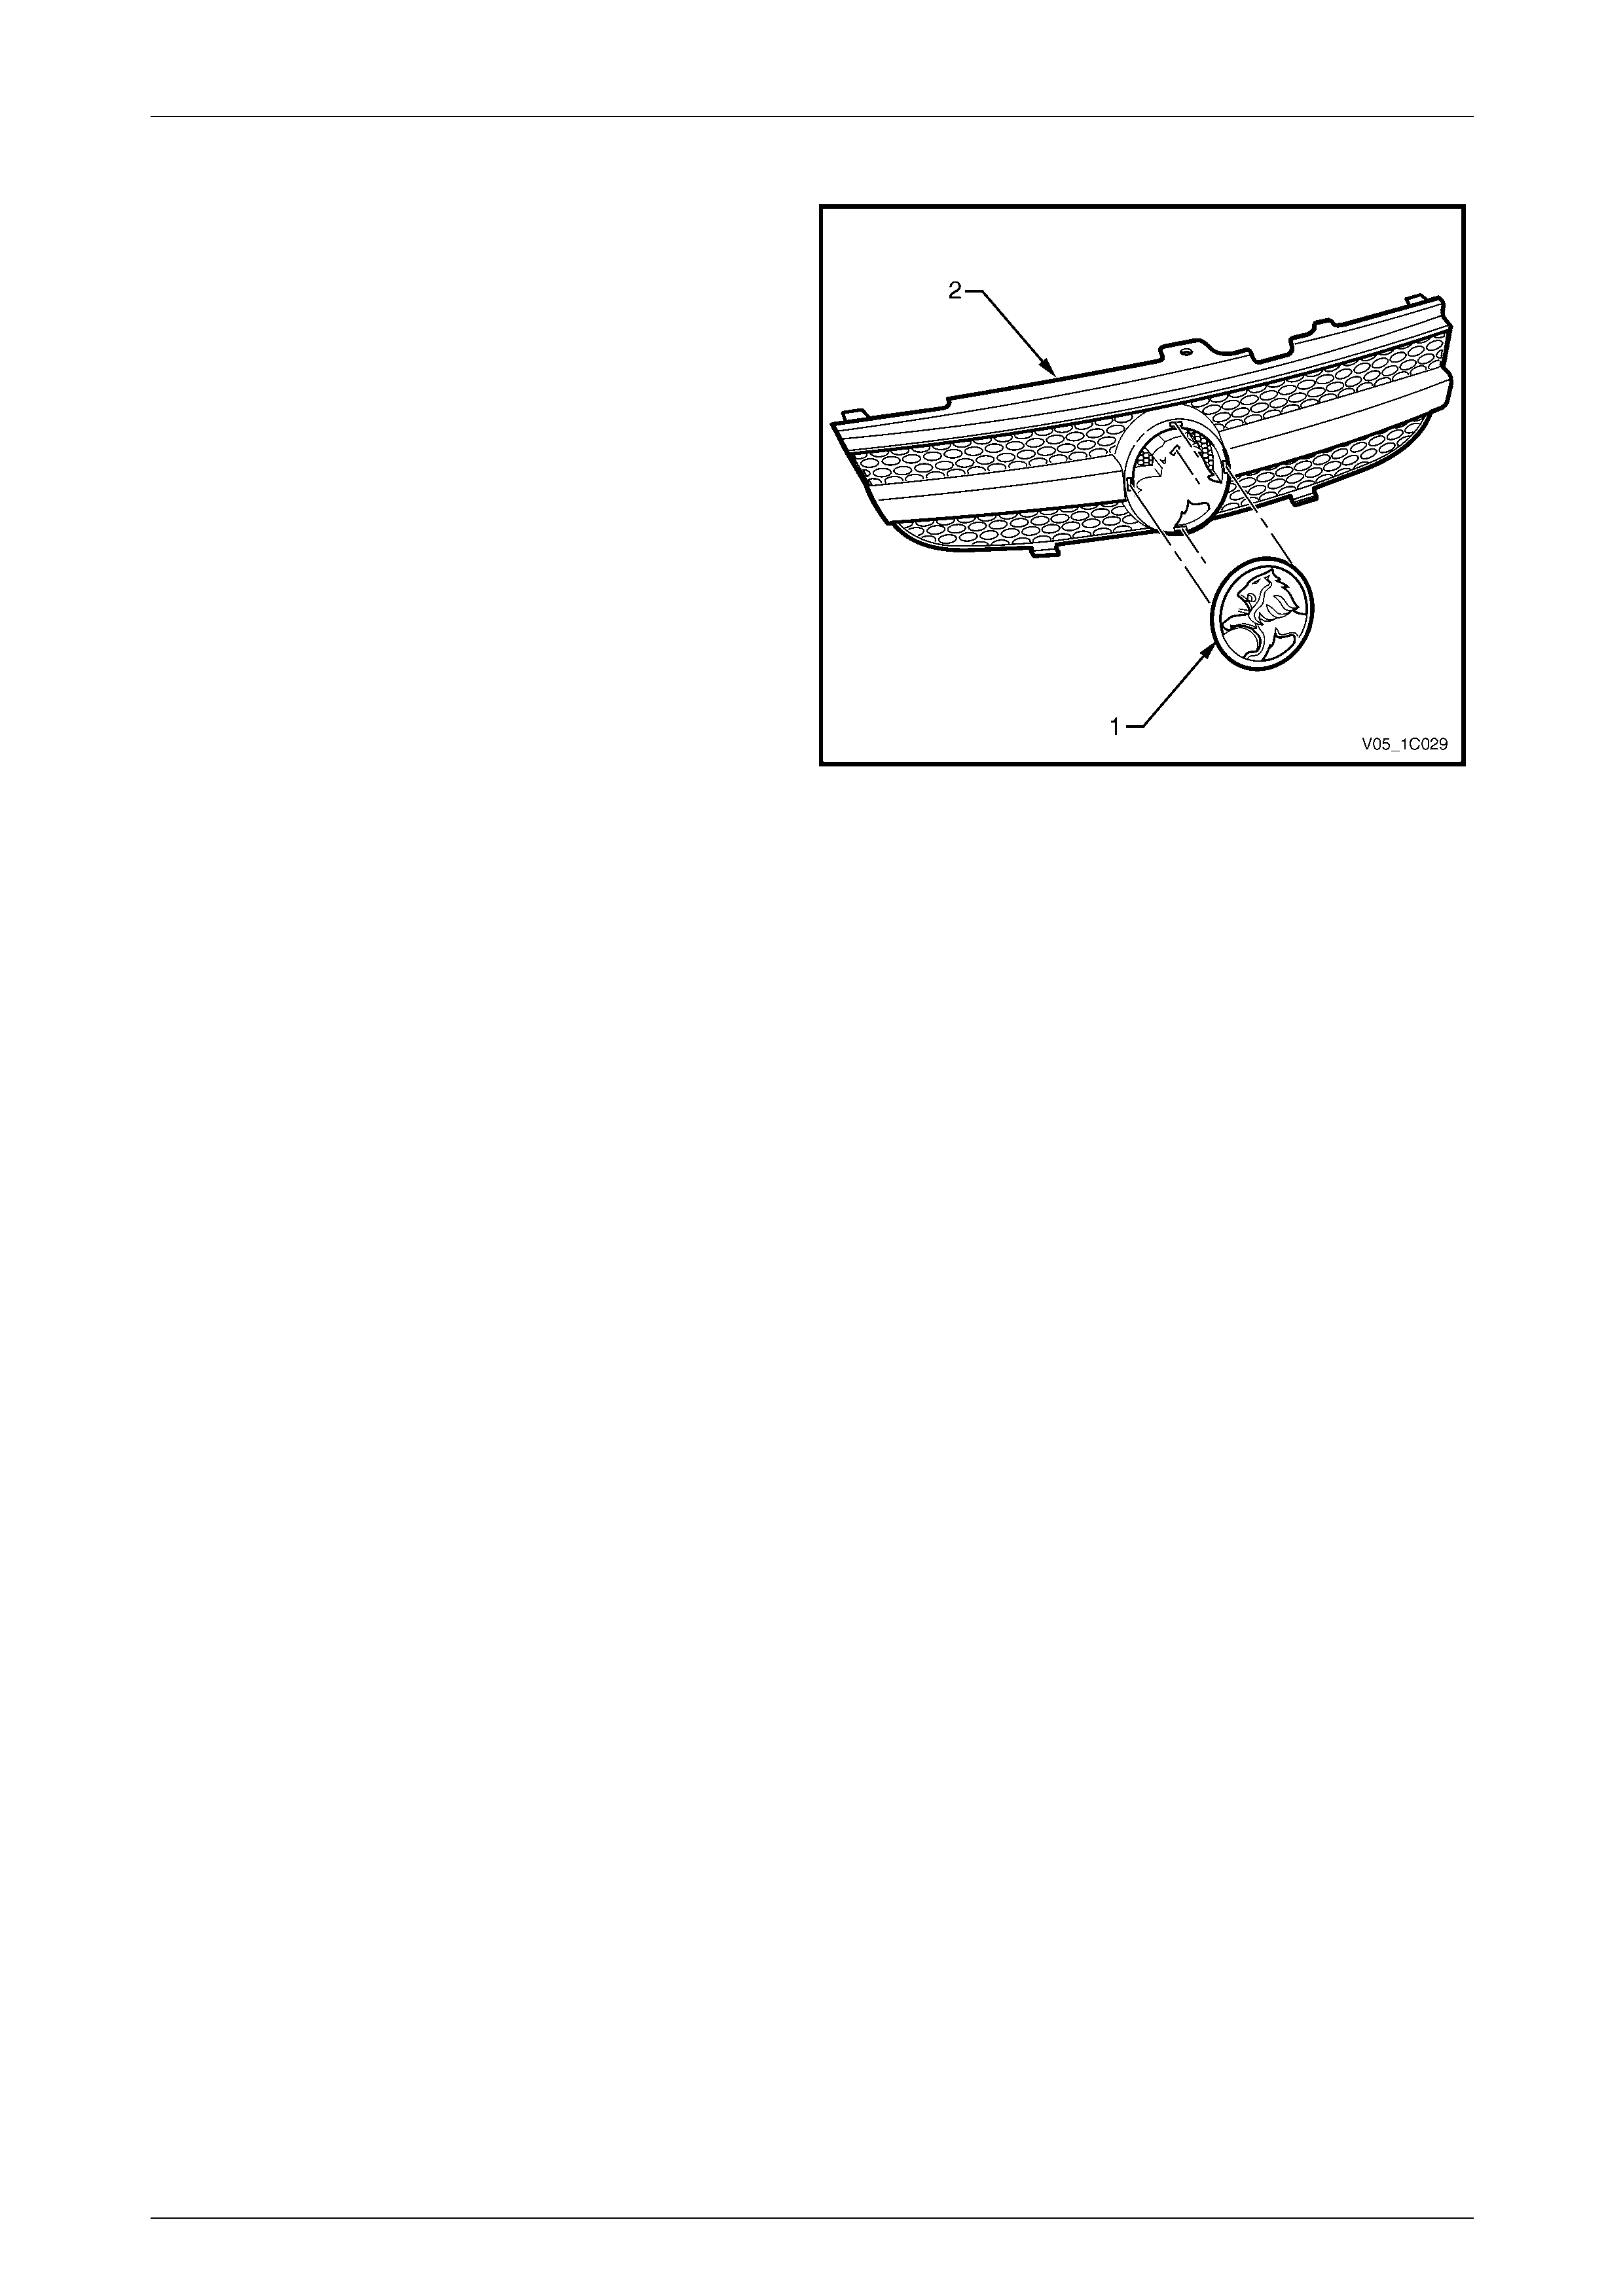
Radiator Grille Emblem
Remove
From the rear of the radiator grille, depress the five retainers
(1) and remove the radiator grille emblem from the grille(2).
Figure 1C – 3
Radiator Grille Page 1C–5
Page 1C–5
Reinstall
1 Align the emblem (1) by locating the retainers with
their corresponding holes in the grille (2).
2 Fit the components together and ensure the retainers
are seated correctly.
Figure 1C – 4
Reinstall
Reinstallation of the radiator grille assembly is the reverse of the removal procedure.
Radiator Grille Page 1C–6
Page 1C–6
2.3 Radiator Grille Assembly, Coupe
LT Section No. — 07–500
Remove
1 Remove the front bumper fascia, refer to
Section 1D Bumper Bars.
2 Remove the two screws (1) attaching the radiator grille
assembly (2) to the bumper fascia.
3 From behind, disengage the top centre retainer (3)
and tilt the grille assembly forward.
4 Lift the grille assembly out of the bumper fascia to
release the three pins (4) along the lower edge.
Figure 1C – 5
Disassemble
Radiator Grille Escutcheon
Remove
1 From the rear of the radiator grille assembl y , depress
the retaining tab (1), four places, attaching the radi ator
grille escutcheon (2).
2 Remove the escutcheon from the grille.
Reinstall
1 Align the escutcheon retai ners with their
corresponding slots in the grille.
2 Fit the two components together and ensure the
retainers are correctly seated.
Figure 1C – 6
Radiator Grille Page 1C–7
Page 1C–7
Radiator Grille Emblem Assembly
Remove
1 To assist removal, warm the emblem with a heat-lam p
or heat-gun to soften the adhesive.
2 Using a knife or paint scraper, carefully remove the
emblem assembly (1) from the grille assembl y, cutting
the double-sided tape.
NOTE
The emblem has two locating lugs which must
not be cut if the emblem is to be reused.
3 Remove any remaining double-sided tape as required.
Figure 1C – 7
Reinstall
1 If reinstalling the existing emblem, remove the existing double-sided tape and clean the surface with wax and
grease remover such as Prepsol or equiva lent. Apply new polyeth ylene double-sided tape such as 3M 4428 or
equivalent.
2 Clean the surface of the grille assembl y with wax and grease remover such as Prepsol or equivalent.
3 Remove the backing paper from the double-sided tape.
4 Align the emblem and locate the lugs with their corresponding ho les in the grille assembly.
5 Affix the emblem and press firmly over the entire em blem for at least 10 seconds to ensure sound adhesion.
Reinstall
Reinstallation of the radiator grille assembly is the reverse of the removal procedure. Tighten the scre ws to the specified
torque.
Radiator grille assembl y attaching screw
torque specification, Coupe ........................2.0 – 3.0 Nm
Radiator Grille Page 1C–8
Page 1C–8
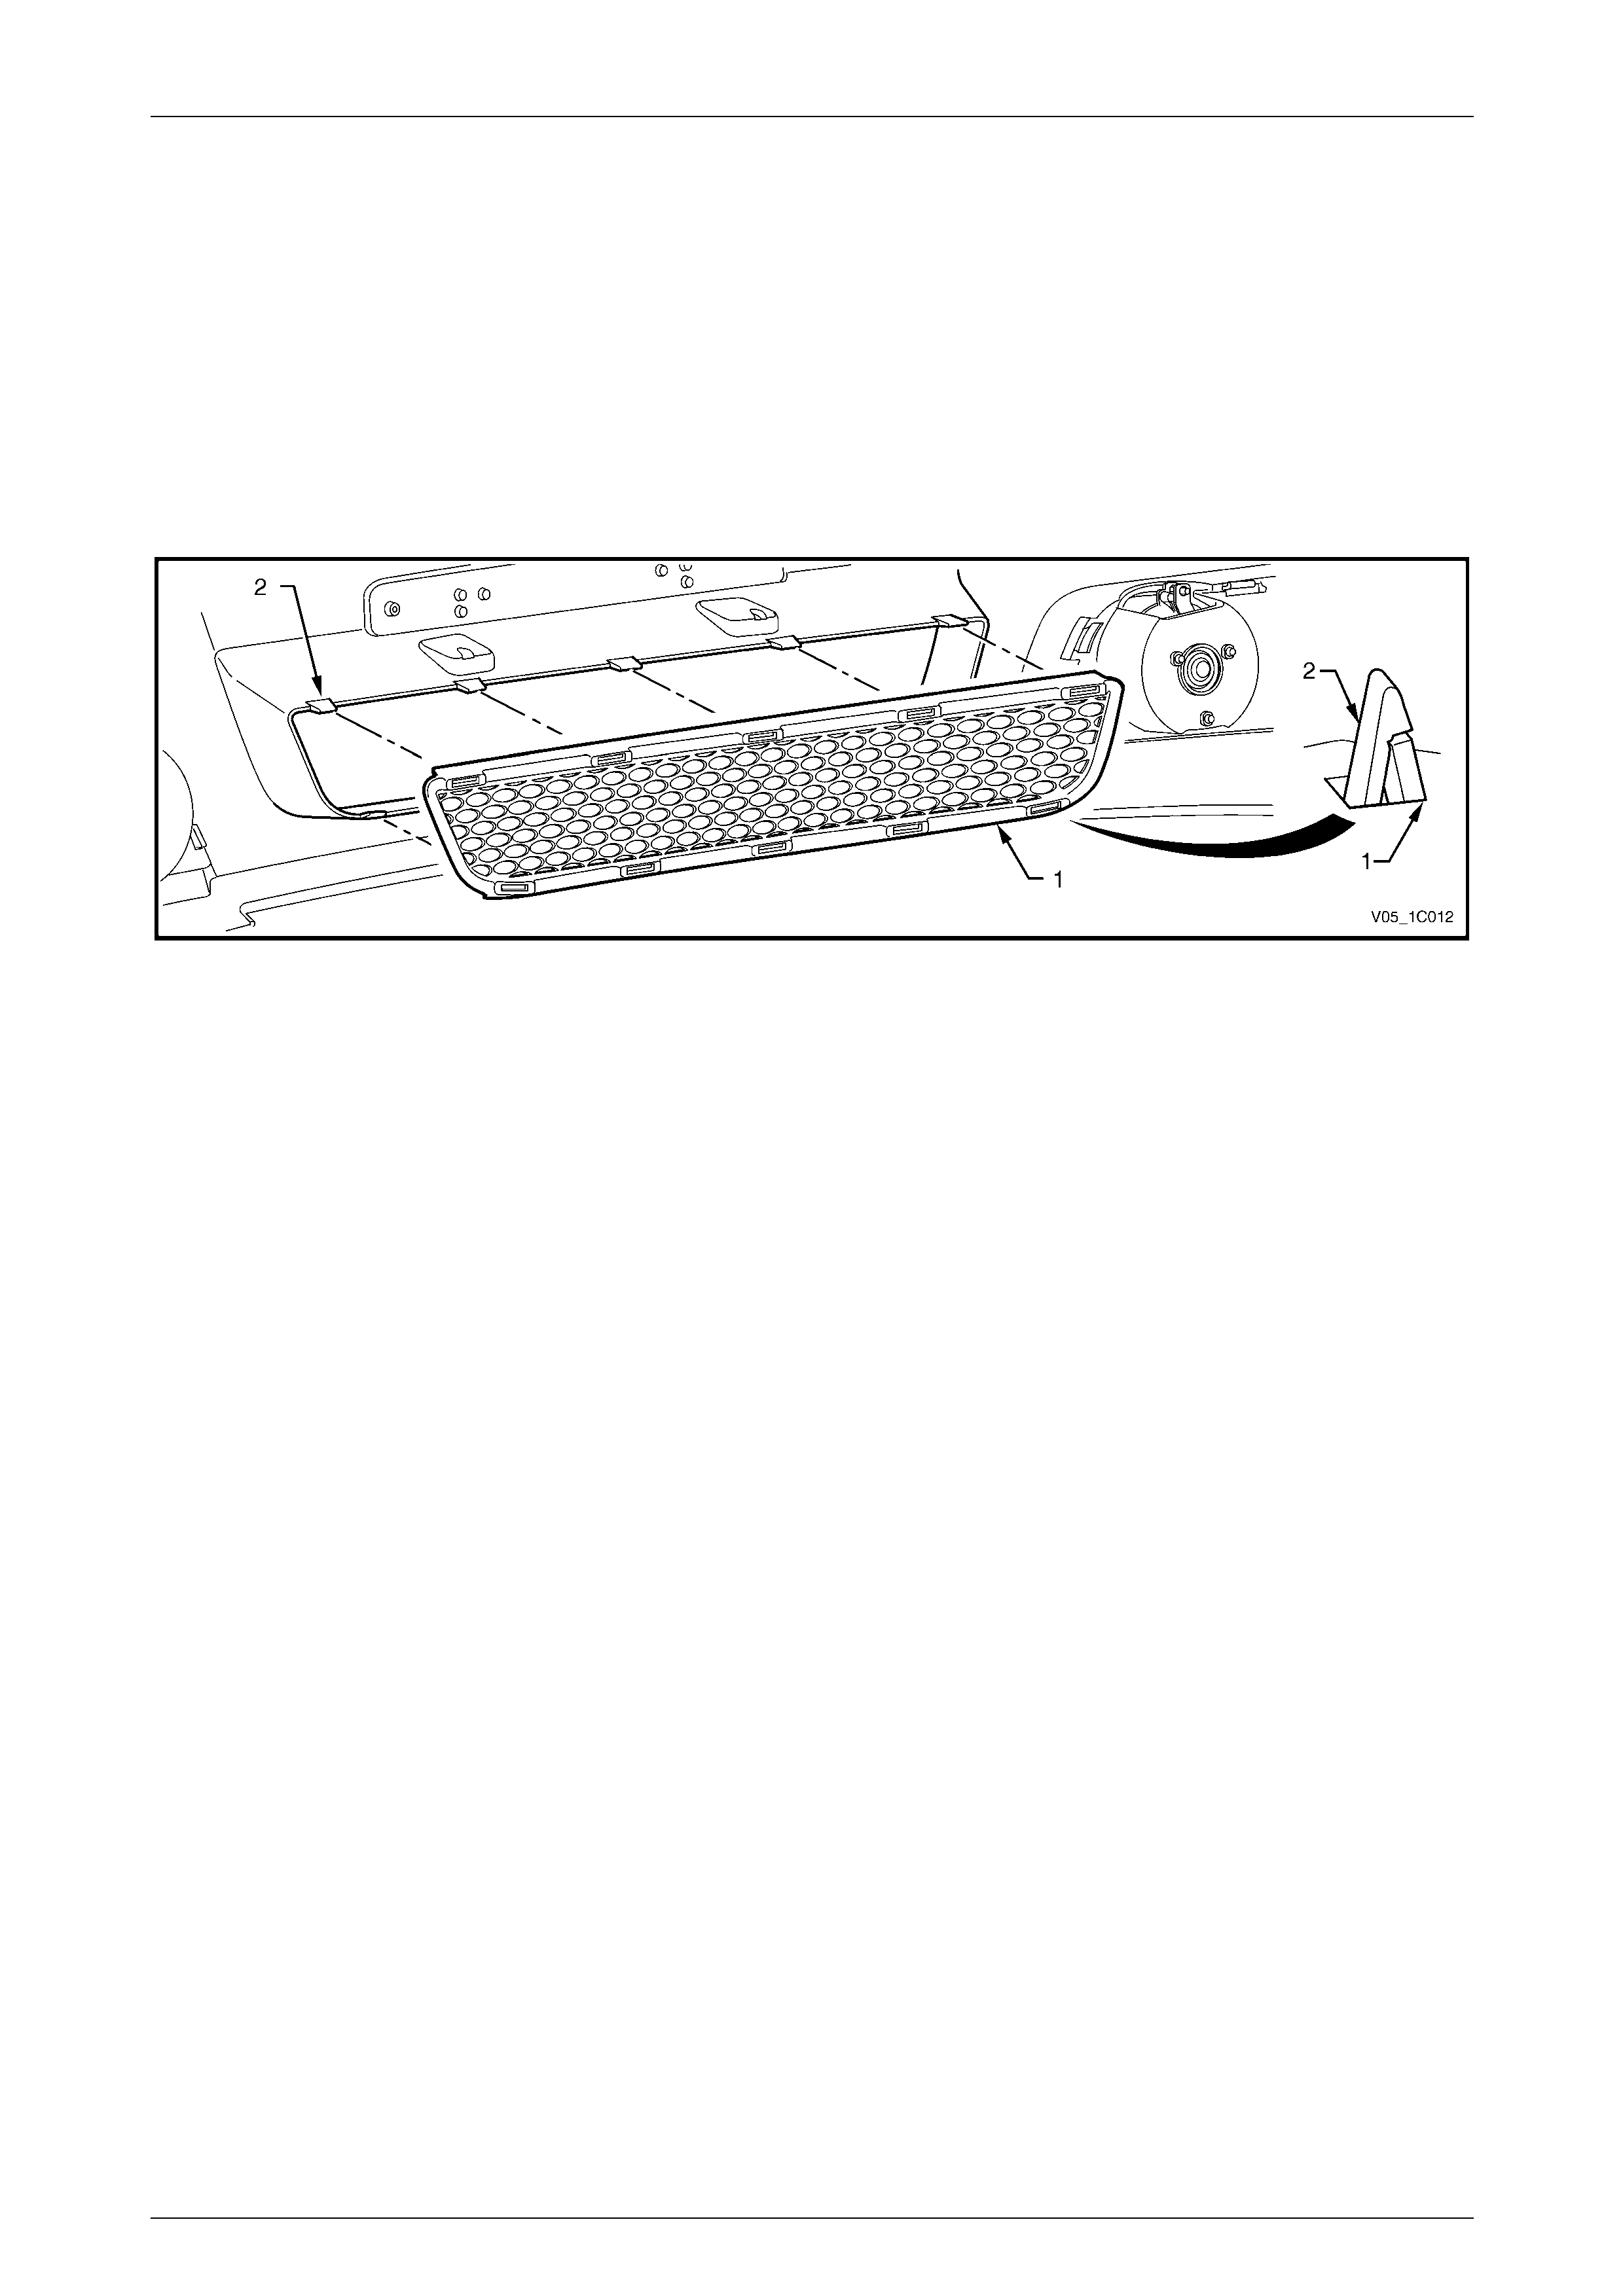
2.4 Lower Radiator Grille, Except Coupe
LT Section No. — 07–500
Remove
1 Remove the front bumper fascia assembly, refer to Section 1D Bumper Bars.
2 Unclip the retainer (2), ten places, securing the lo wer radiator grill e (1) to the bumper fascia, refer to Figure 1C – 8.
3 Remove the lower radiator grille.
Figure 1C – 8
Reinstall
Reinstallation of the lower radiator grille is the reverse of the removal procedur e. Ensure that all retainers are engaged
correctly.
Radiator Grille Page 1C–9
Page 1C–9
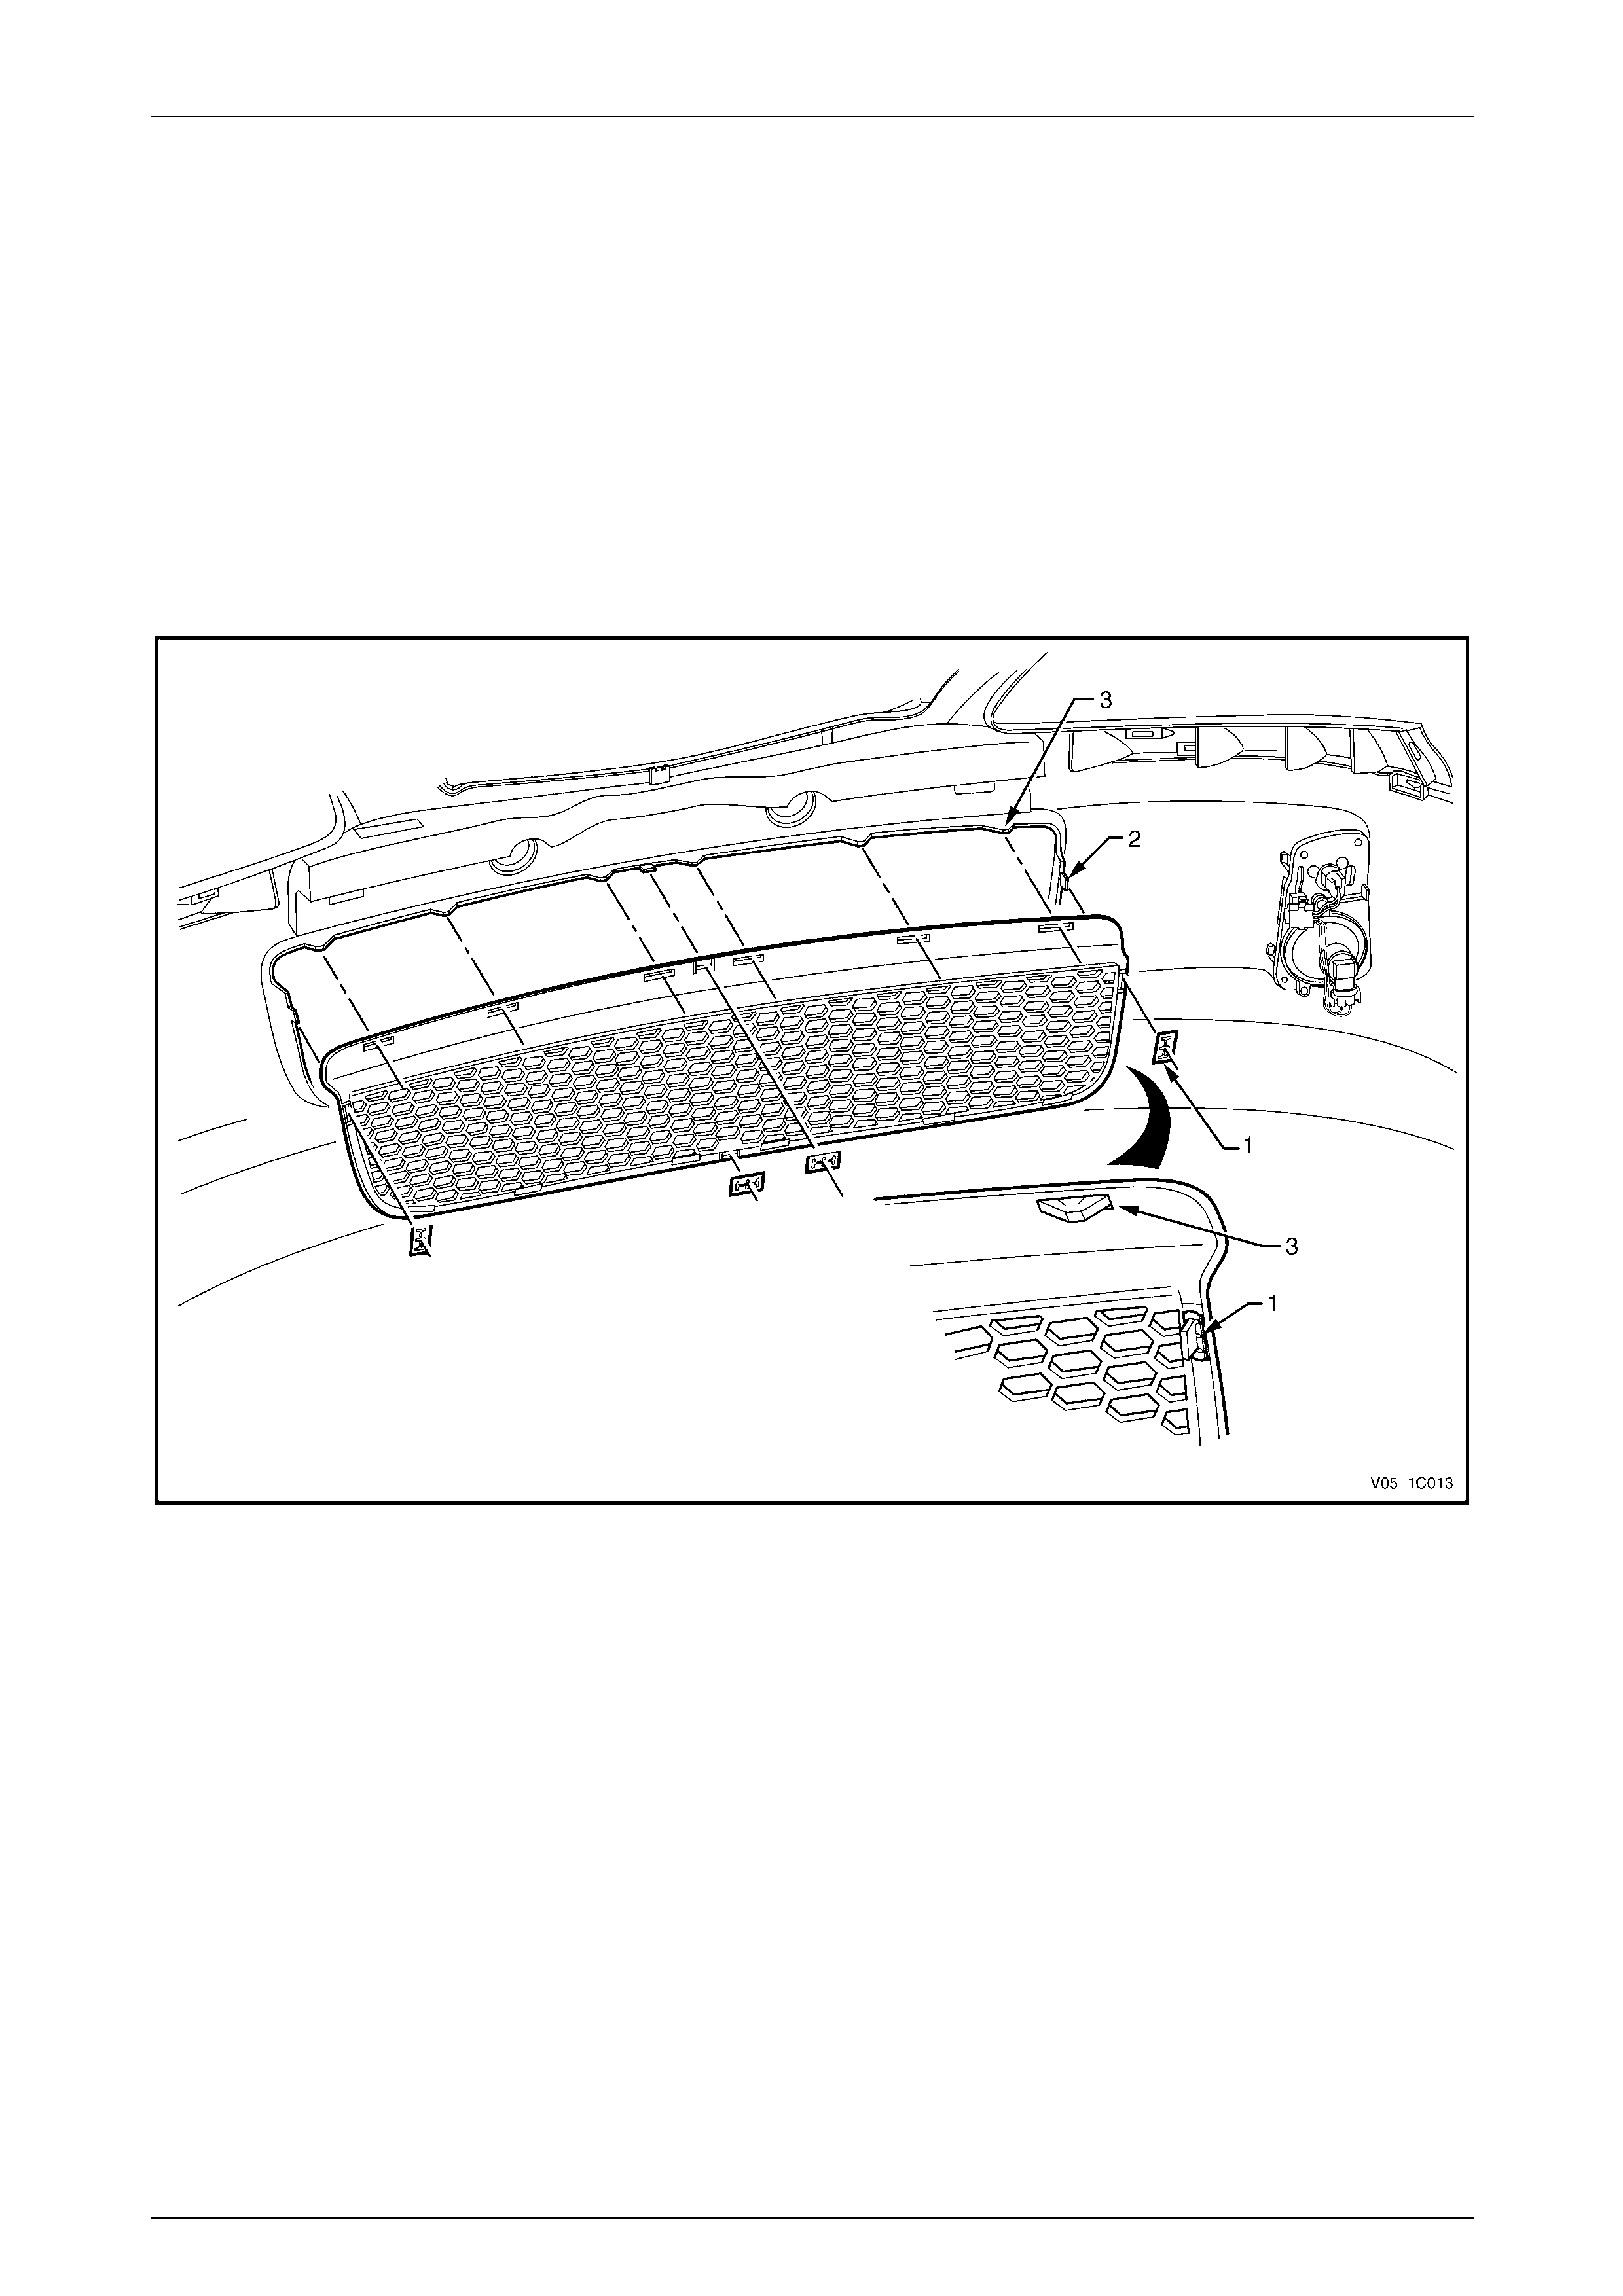
2.5 Lower Radiator Grille, Coupe
LT Section No. — 07–500
Remove
1 Remove the front bumper fascia assembly, refer to Section 1D Bumper Bars.
2 Remove the razor blade retainer (1) from the lug (2), four places, refer to Figure 1C – 9. For removal procedure of
razor blade retainers refer to 2.1 Service Notes.
3 Unclip the retainer (3), twelve places, securing the lower grille to the bump er fascia.
4 Remove the lower radiator grille.
Figure 1C – 9
Reinstall
1 Locate the lower radiator grille onto the loca ting lug (3), twelve places, and then clip into place,
refer to Figure 1C – 9.
2 Fit a razor blade retainer to the rear of each lug (2) securely.

Radiator Grille Page 1C–10
Page 1C–10
3 Torque Wrench Specifications
Radiator Grille Assembly Attaching Screw, Coupe ........................2.0 – 3.0 Nm