
Radiator Grille Page 1C–1
Page 1C–1
Section 1C
Radiator Grille
ATTENTION
Before performing any service operation or other procedure described in this Section, refer to Section 00
Warnings, Cautions and Notes for correct workshop practices with regard to safety and/or property damage.
1 General Information ...............................................................................................................................2
2 Service Operations.................................................................................................................................3
2.1 Radiator Grille Assembly ...................................................................................................................................... 3
Remove................................................................................................................................................................... 3
Reinstall.................................................................................................................................................................. 3
3 Torque Wrench Specifications..............................................................................................................4

Radiator Grille Page 1C–2
Page 1C–2
1 General Information
This Section describes the replacement of the radiator gri lle assembly. The radiator grille assembly is attached to the
hood. A lower radiator grille is also fitted, however as it is part of the front bumper fascia assembly, refer to 1D Bumper
Bars for service procedure.
Two grille styles are fitted. Level 4 vehicles are fitted with
grille style (1), while Level 5 v ehicles are fitted with grille
style (2).
NOTE
For model level designations, refer to
Section 0A General Information.
Figure 1C – 1
Radiator Grille Page 1C–3
Page 1C–3
2 Service Operations
2.1 Radiator Grille Assembly
LT Section – 07-500
Remove
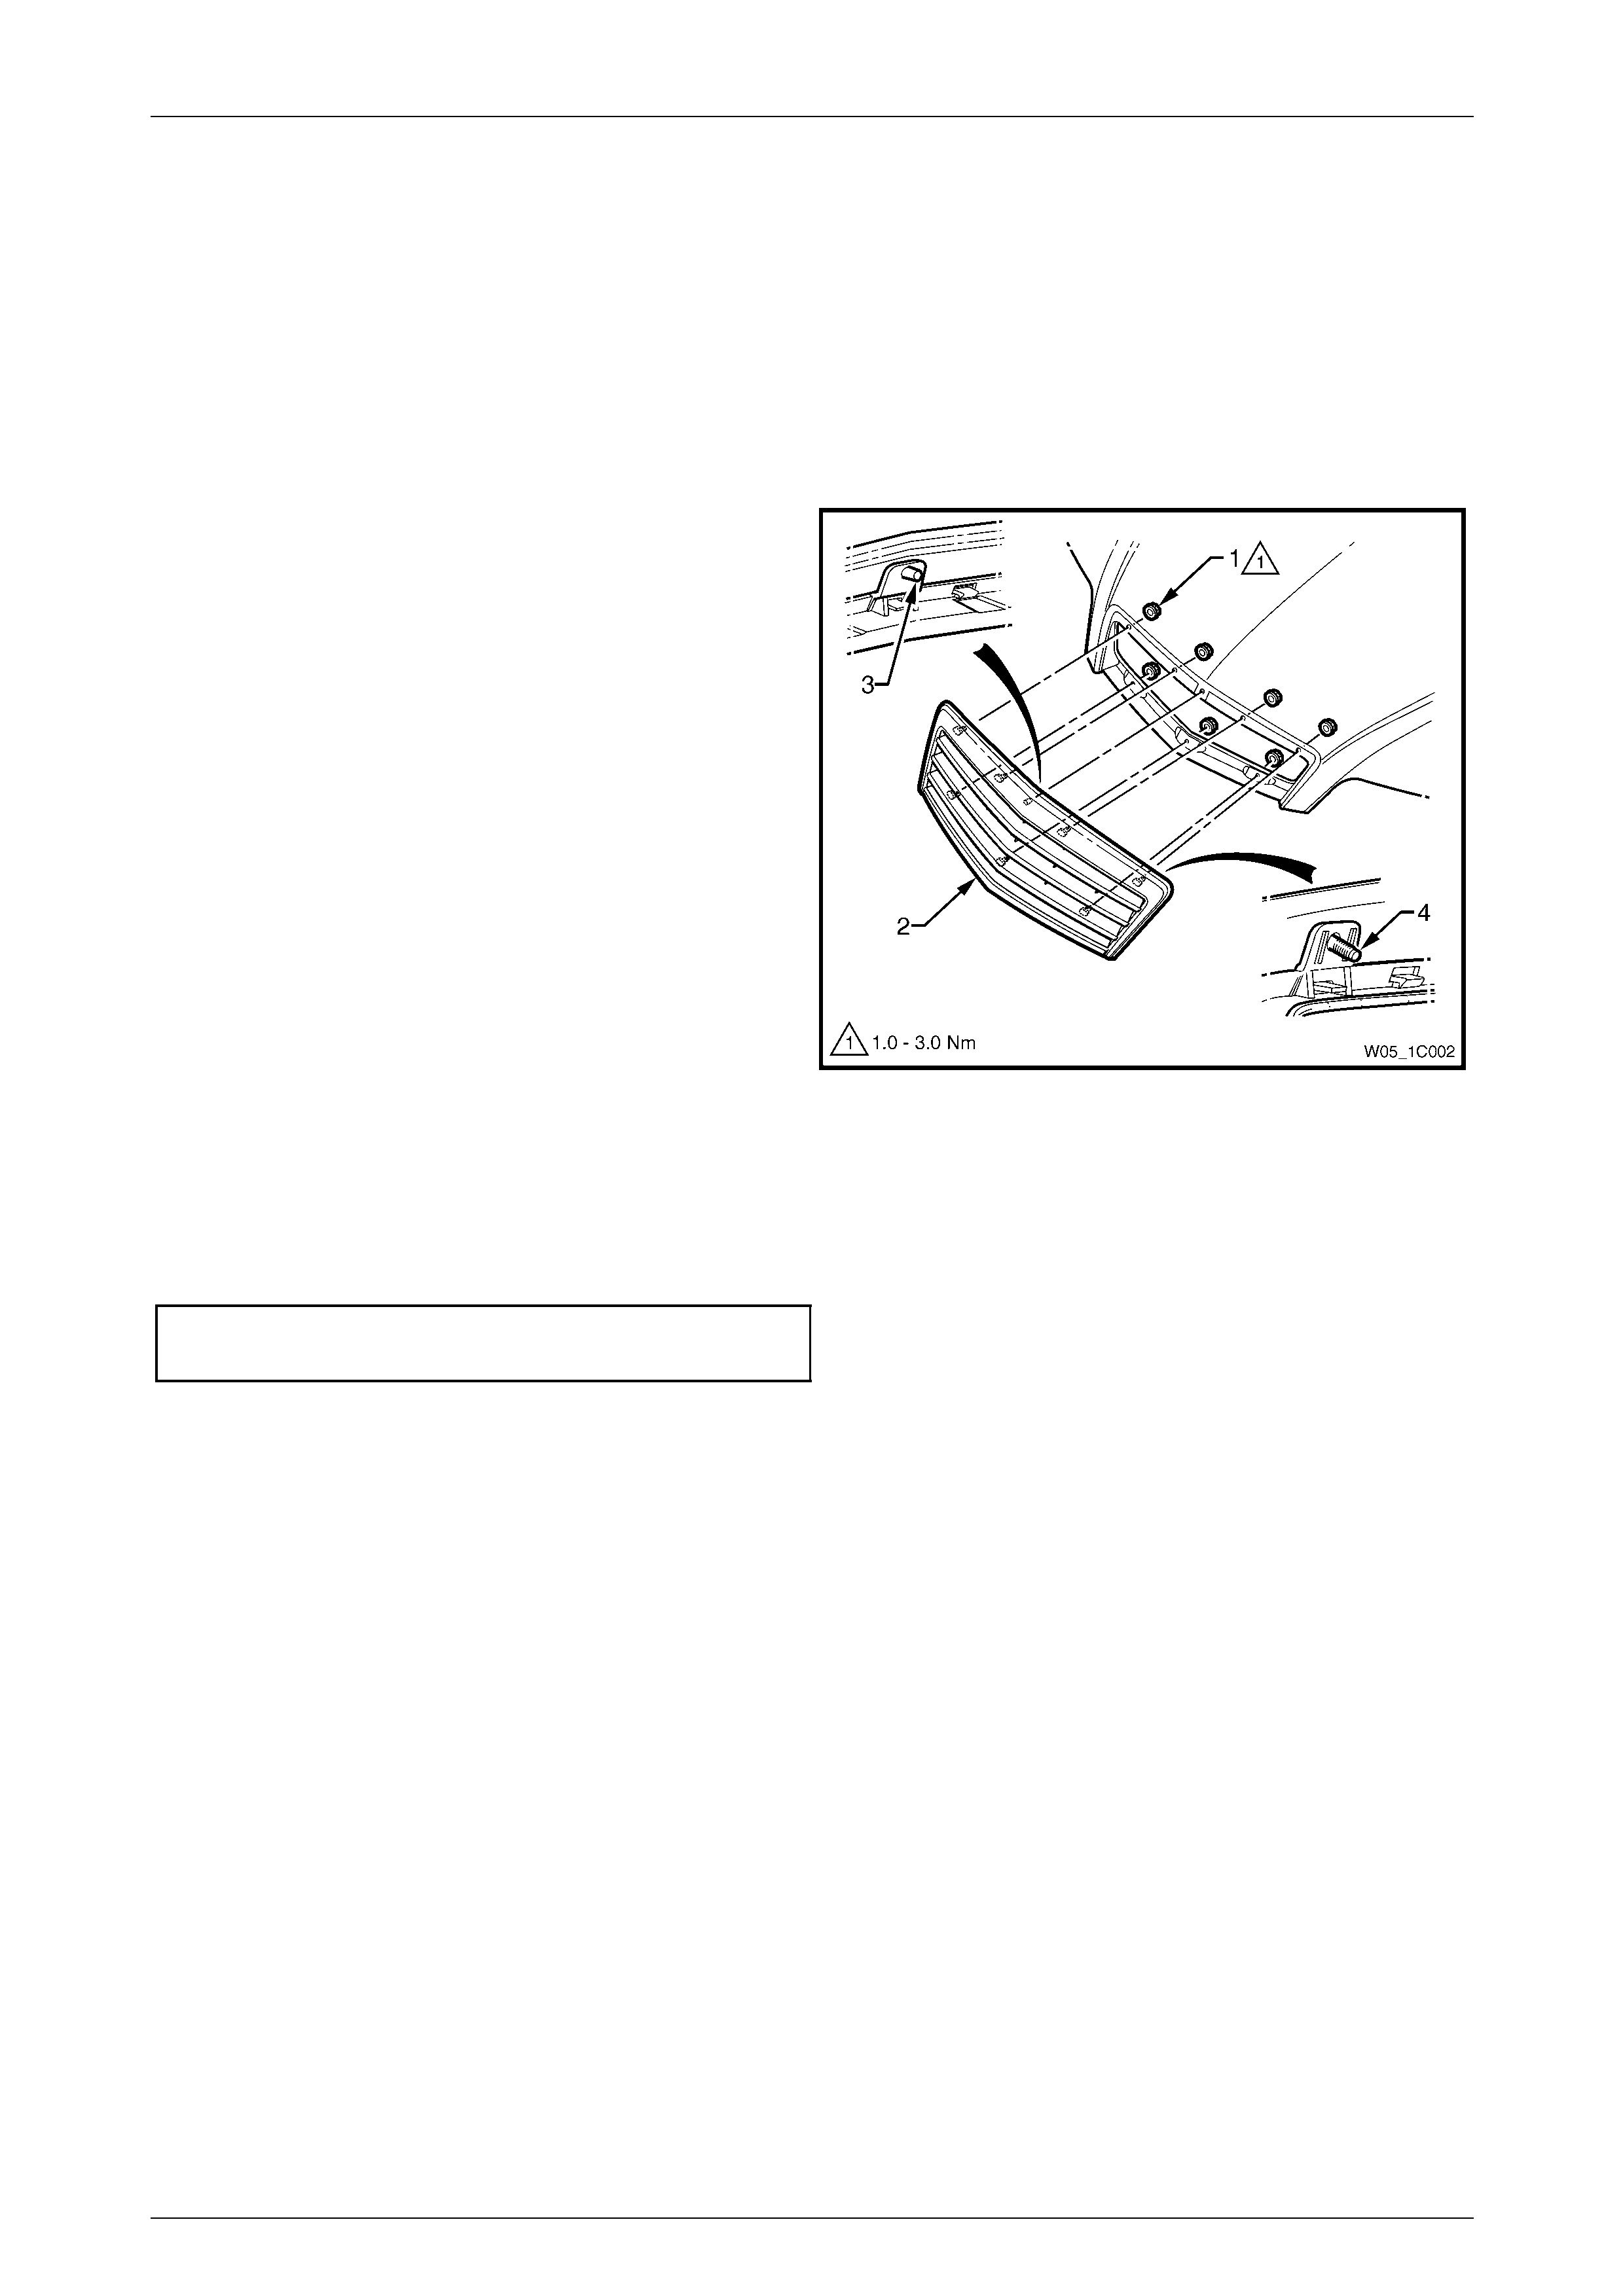
1 Open the hood.
2 Remove the seven nuts (1) attaching the radi ator grille
assembly (2) to the hood.
3 Remove the radiator grille assembly by pulling the
assembly away from the hood to disengage the guide
post (3) and attaching studs (4).
Figure 1C – 2
Reinstall
Reinstallation of the radiator grille assembly is the reverse of the removal procedure. Tighten the attaching nuts to the
specified torque.
Radiator grille assembly attaching
nut torque specification............................... 1.0 - 3.0 Nm

Radiator Grille Page 1C–4
Page 1C–4
3 Torque Wrench Specifications
Radiator Grille Assembly Attaching Nut.........................................1.0 – 3.0 Nm