SECTION 1B - SHEET METAL
REMOVAL AND INSTALLATION
ADJUSTMENT
REMO VAL AND INSTALLATION
1
2
3
4
5
67
8
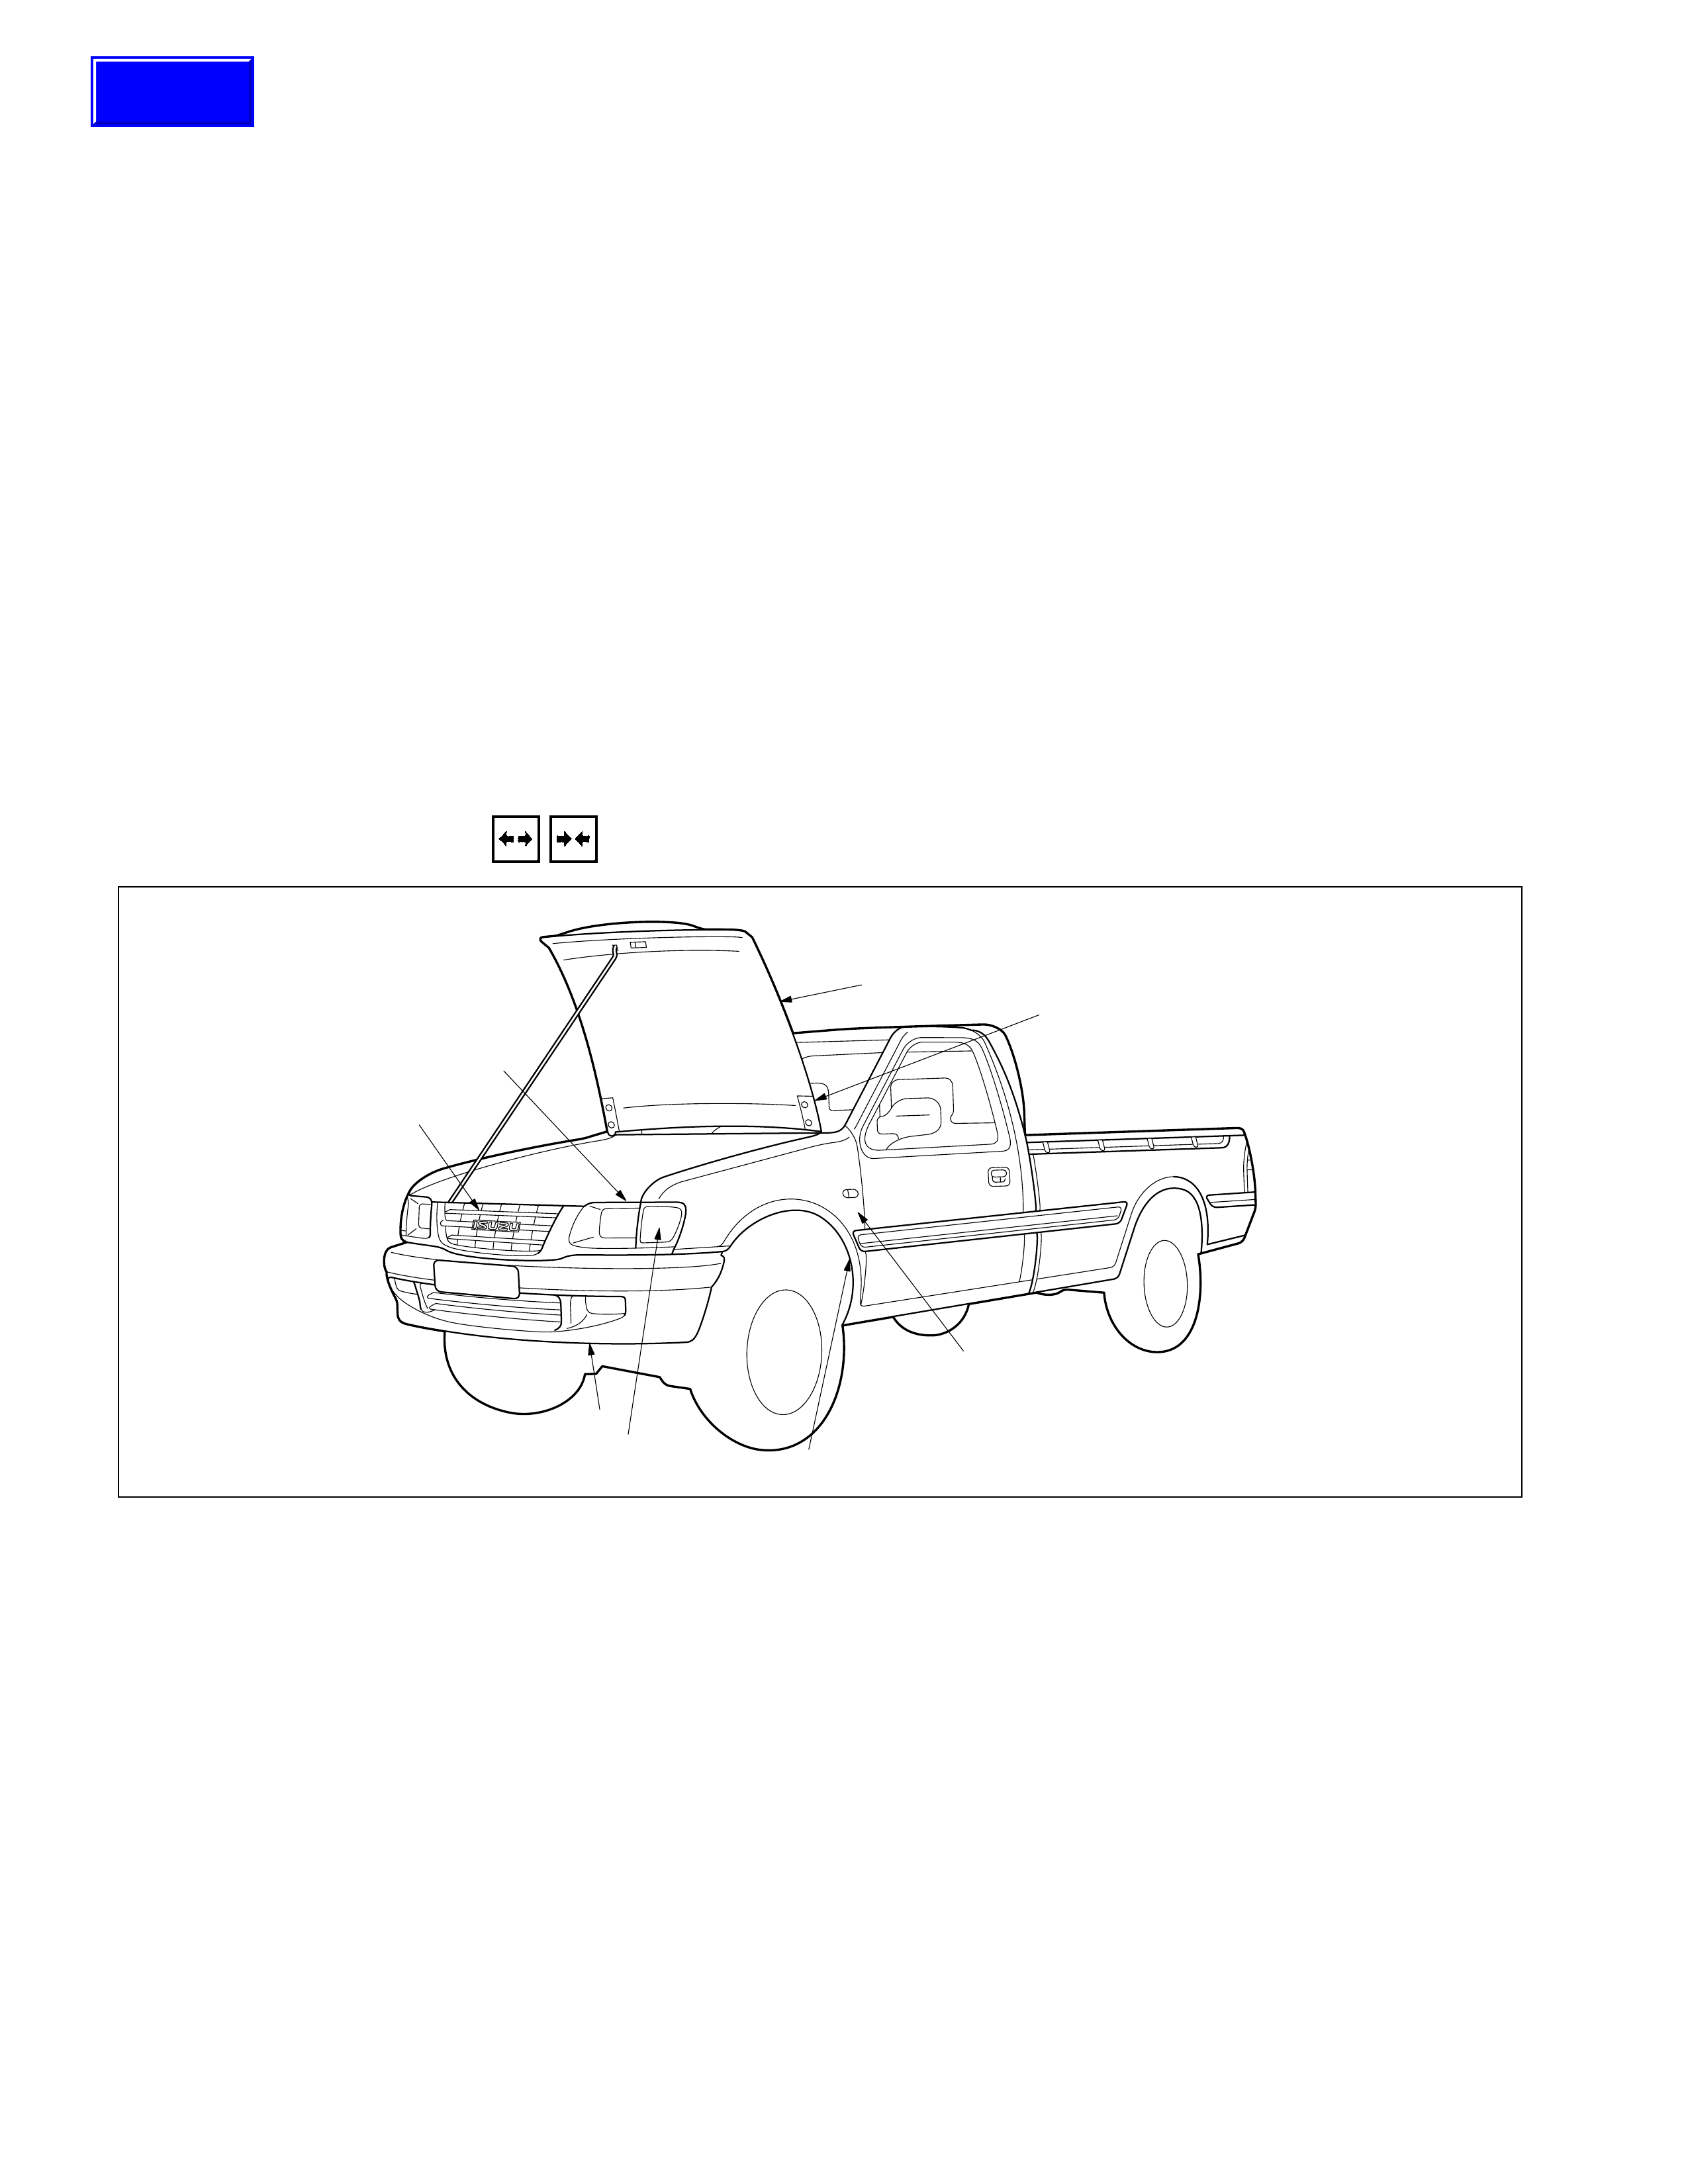
Removal Steps Installation Steps
Engine Hood Fender
▲1. Bolt 11. Fender
2. Engine hood assembly 10. ECM box (Driver side)
Fender 9. Antenna cable (Passenger side)
3. Combination lamp connector 8. Steering lower cover or speaker grille
▲4. Radiator grille 7. Inner liner
5. Bumper assembly 6. Combination lamp
▲6. Combination lamp 5. Bumper assembly
▲7. Inner liner 4. Radiator grille
8. Steering lower cover or speaker grille 3. Combination lamp connector
9. Antenna cable (Passenger side) Engine Hood
10. ECM box (Driver side) 2. Engine hood assembly
▲11. Fender 1. Bolt
Techline
Important Oper ati ons - Removal
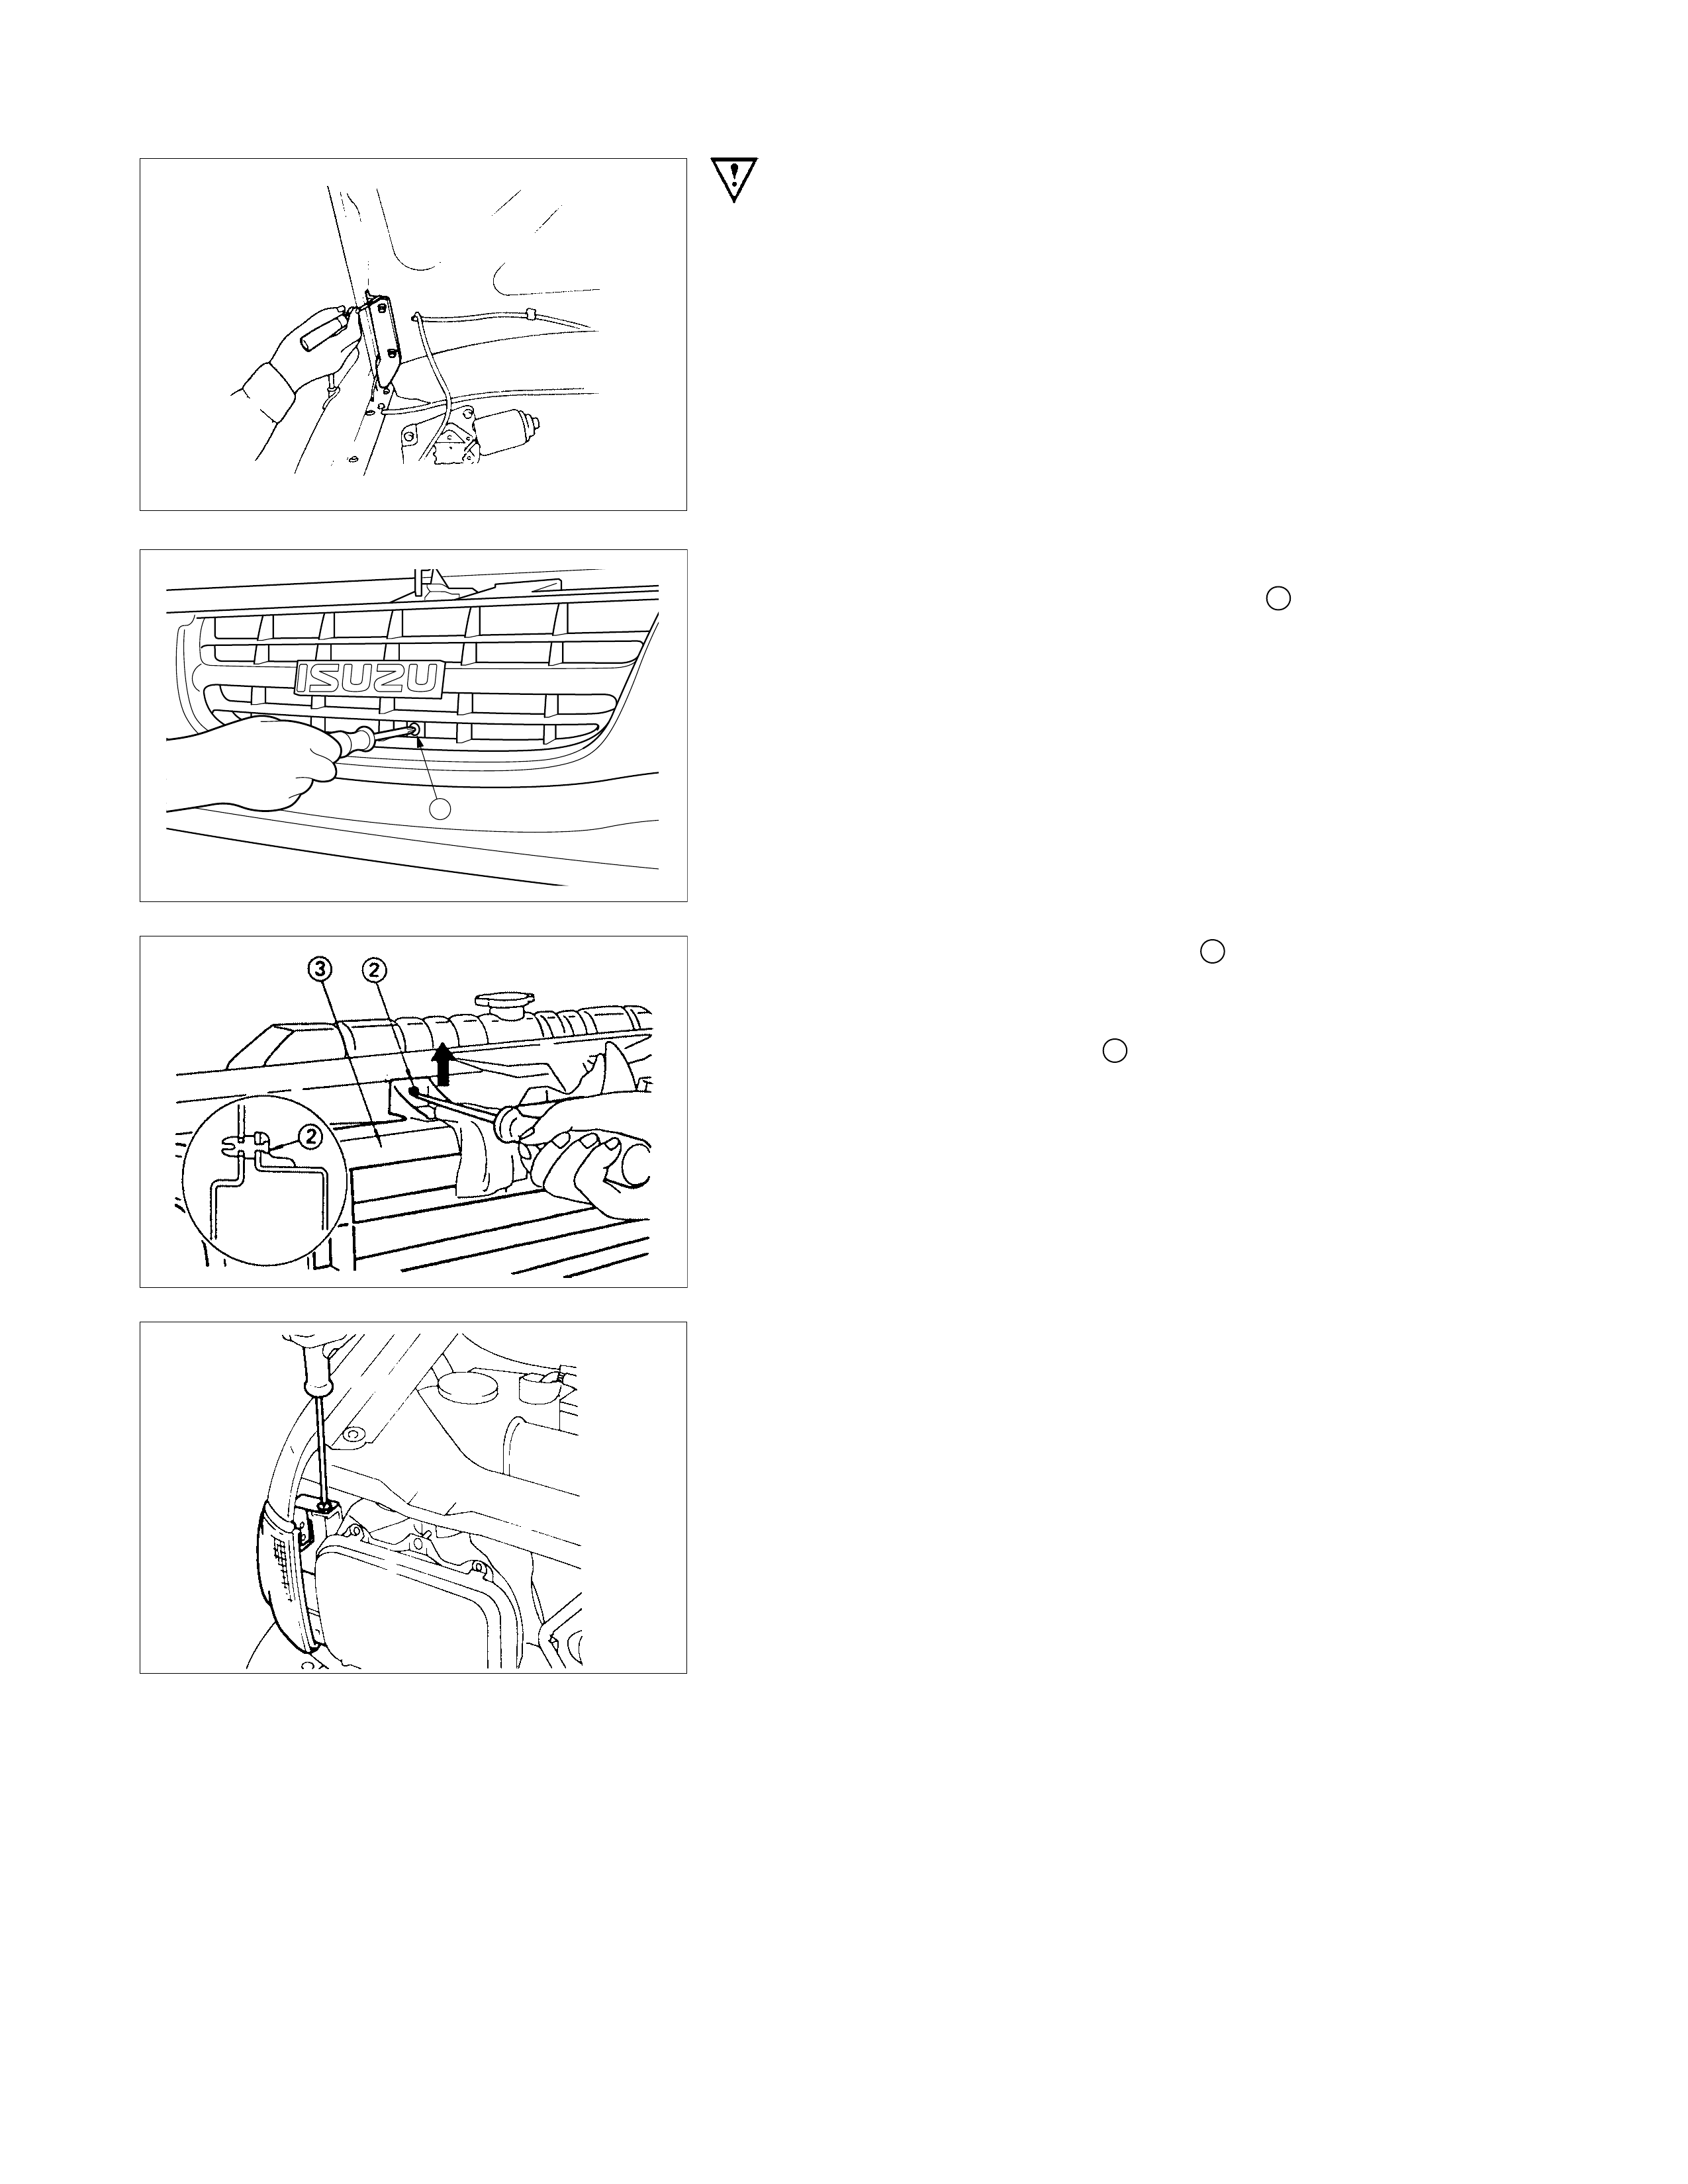
1. Bolt
Before removing the hinges from the engine hood, scribe a
mark showing location of the hinges to facilitate installation in
the original position.
1
4. Radiator Grille
Remove the radiator grille center screw 1.
(ONE POINT)
Use a screwdriver to raise the clip 2 and release the lock.
Place a clean rag beneath the screwdriver tip to protect the
body painted surfaces. (EIGHT POINTS)
Remove the radiator grille 3.
6. Combination Lamp
Remove the combination lamp fixing screws.
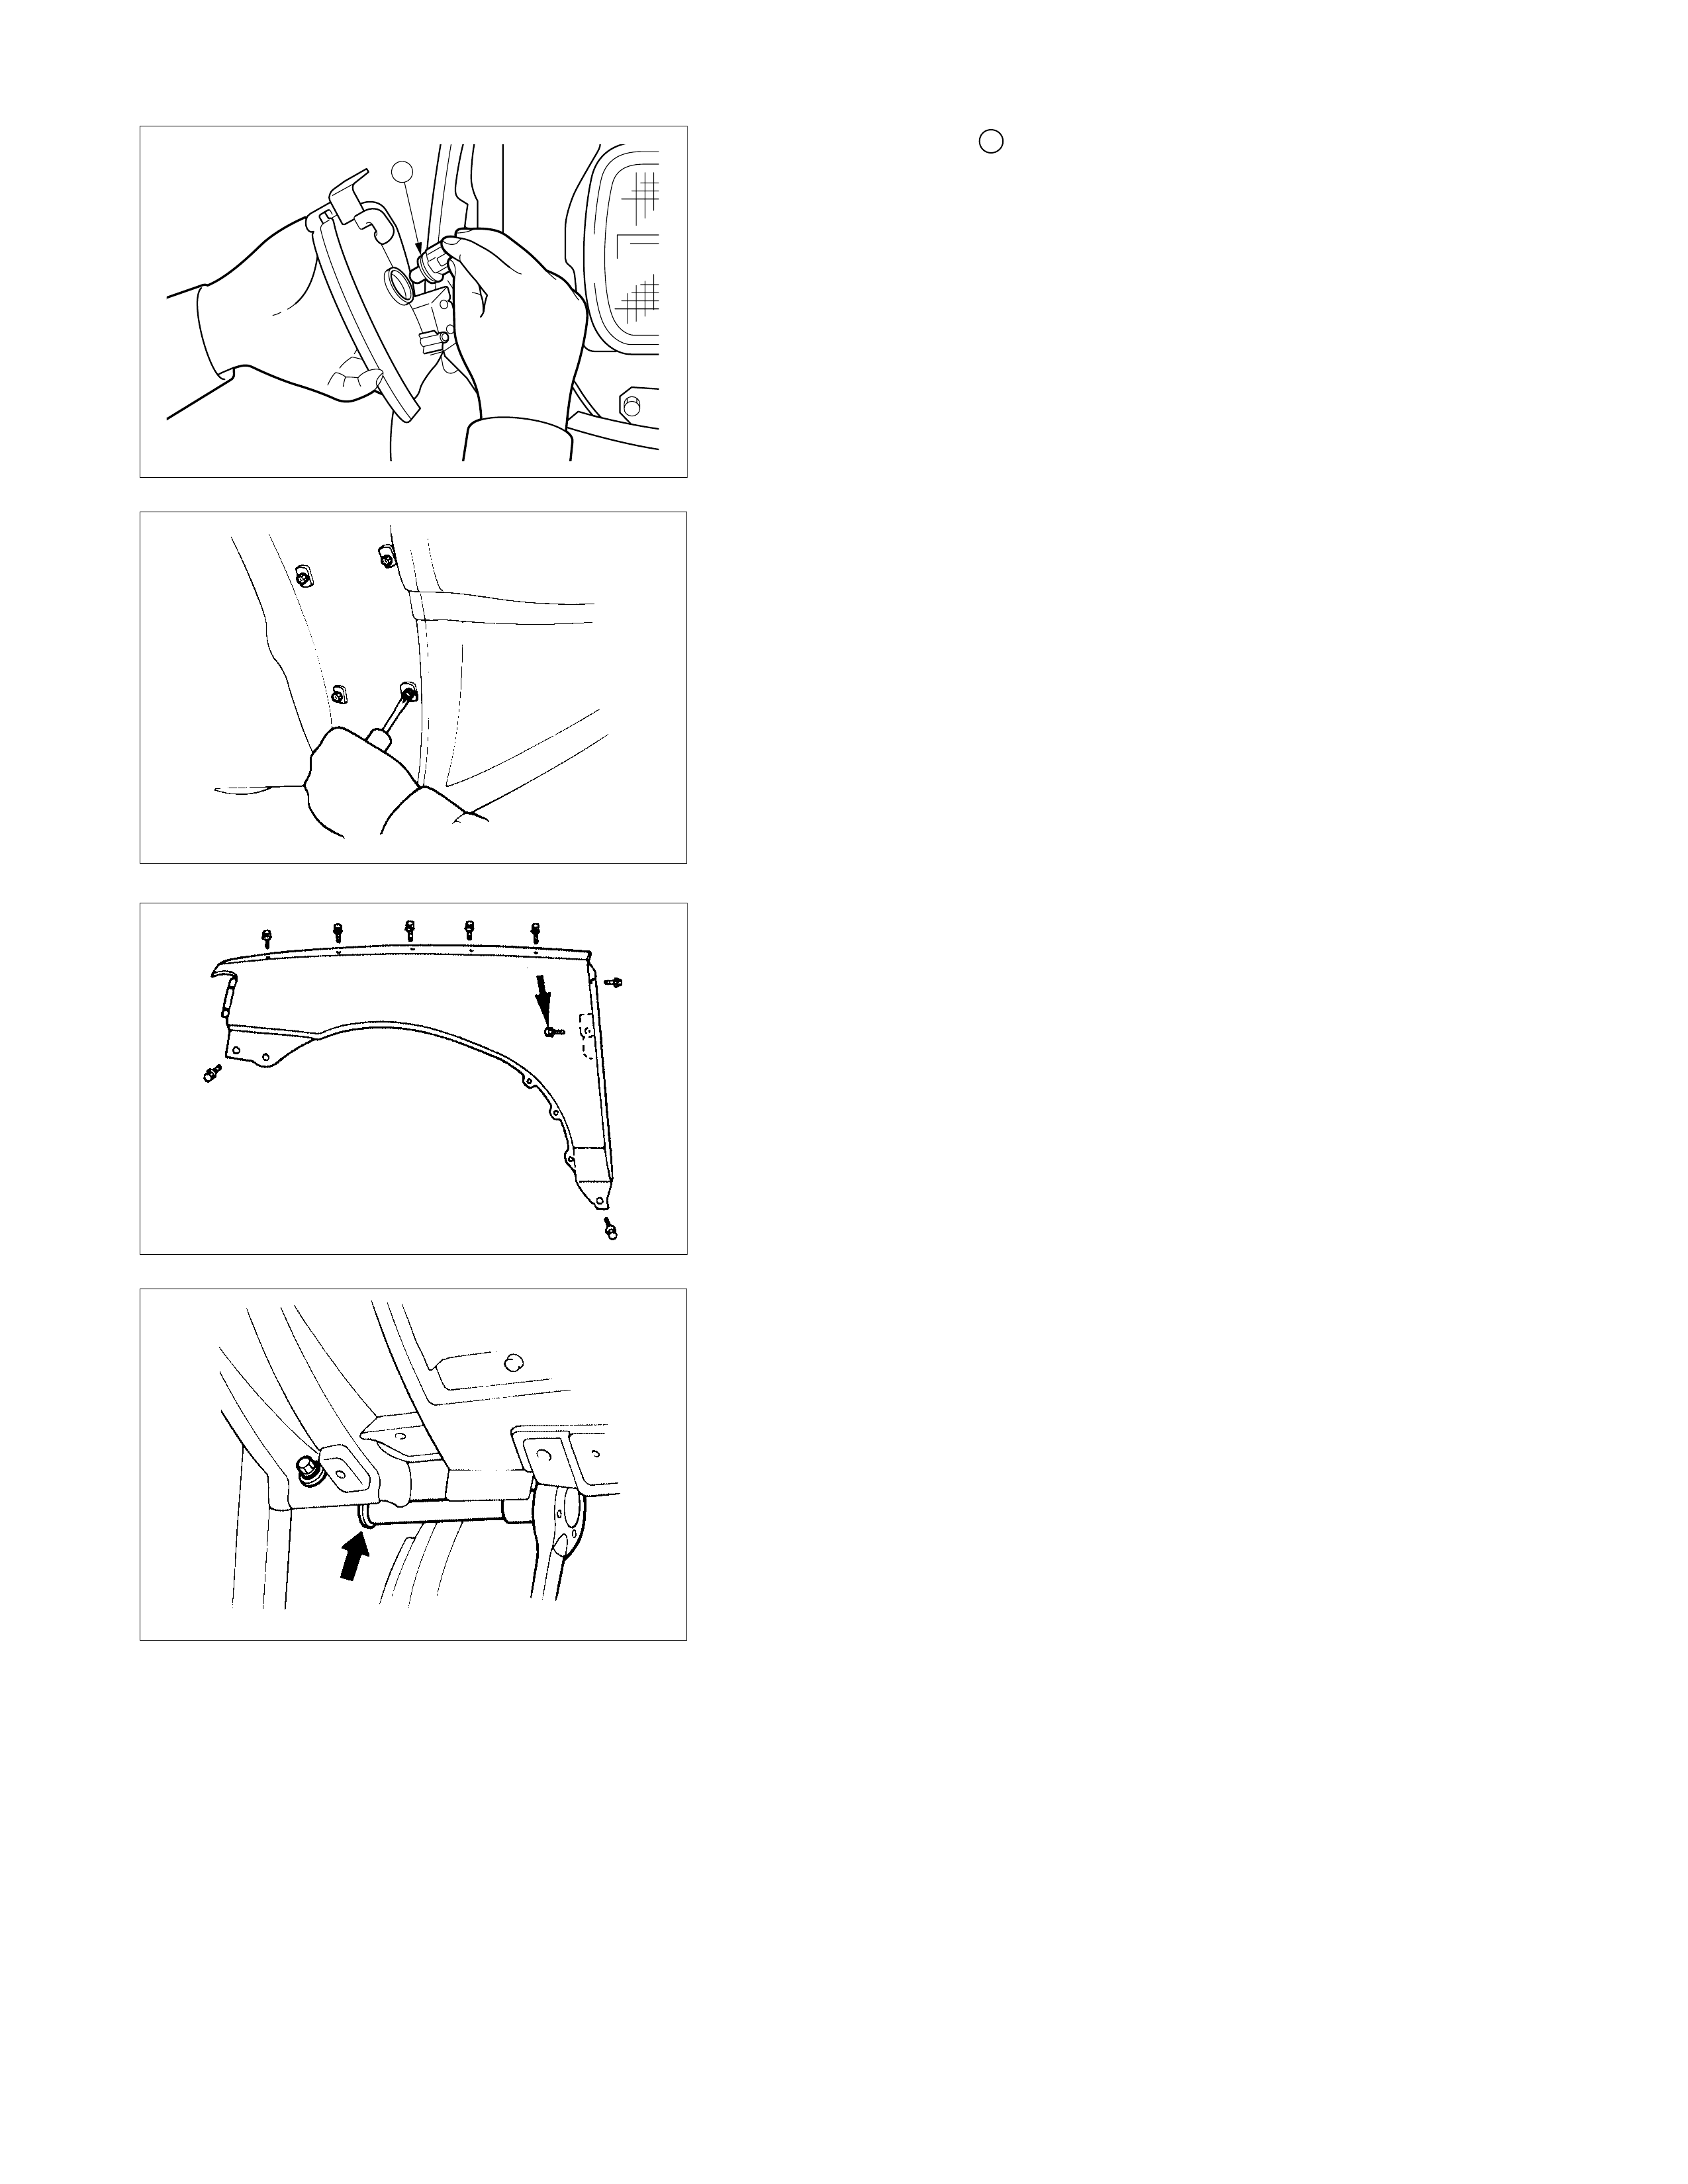
1
Turn the socket 1 counterclockwise to disconnect it from the
marker light housing.
Pull the bulb from the socket.
7. Inner Liner
Remove the inner liner fixing screws.
11. Fender
First, remove the bolt (See illustration arrow mark) from the
inside of the car.
ADJUSTM ENT
A
C
B
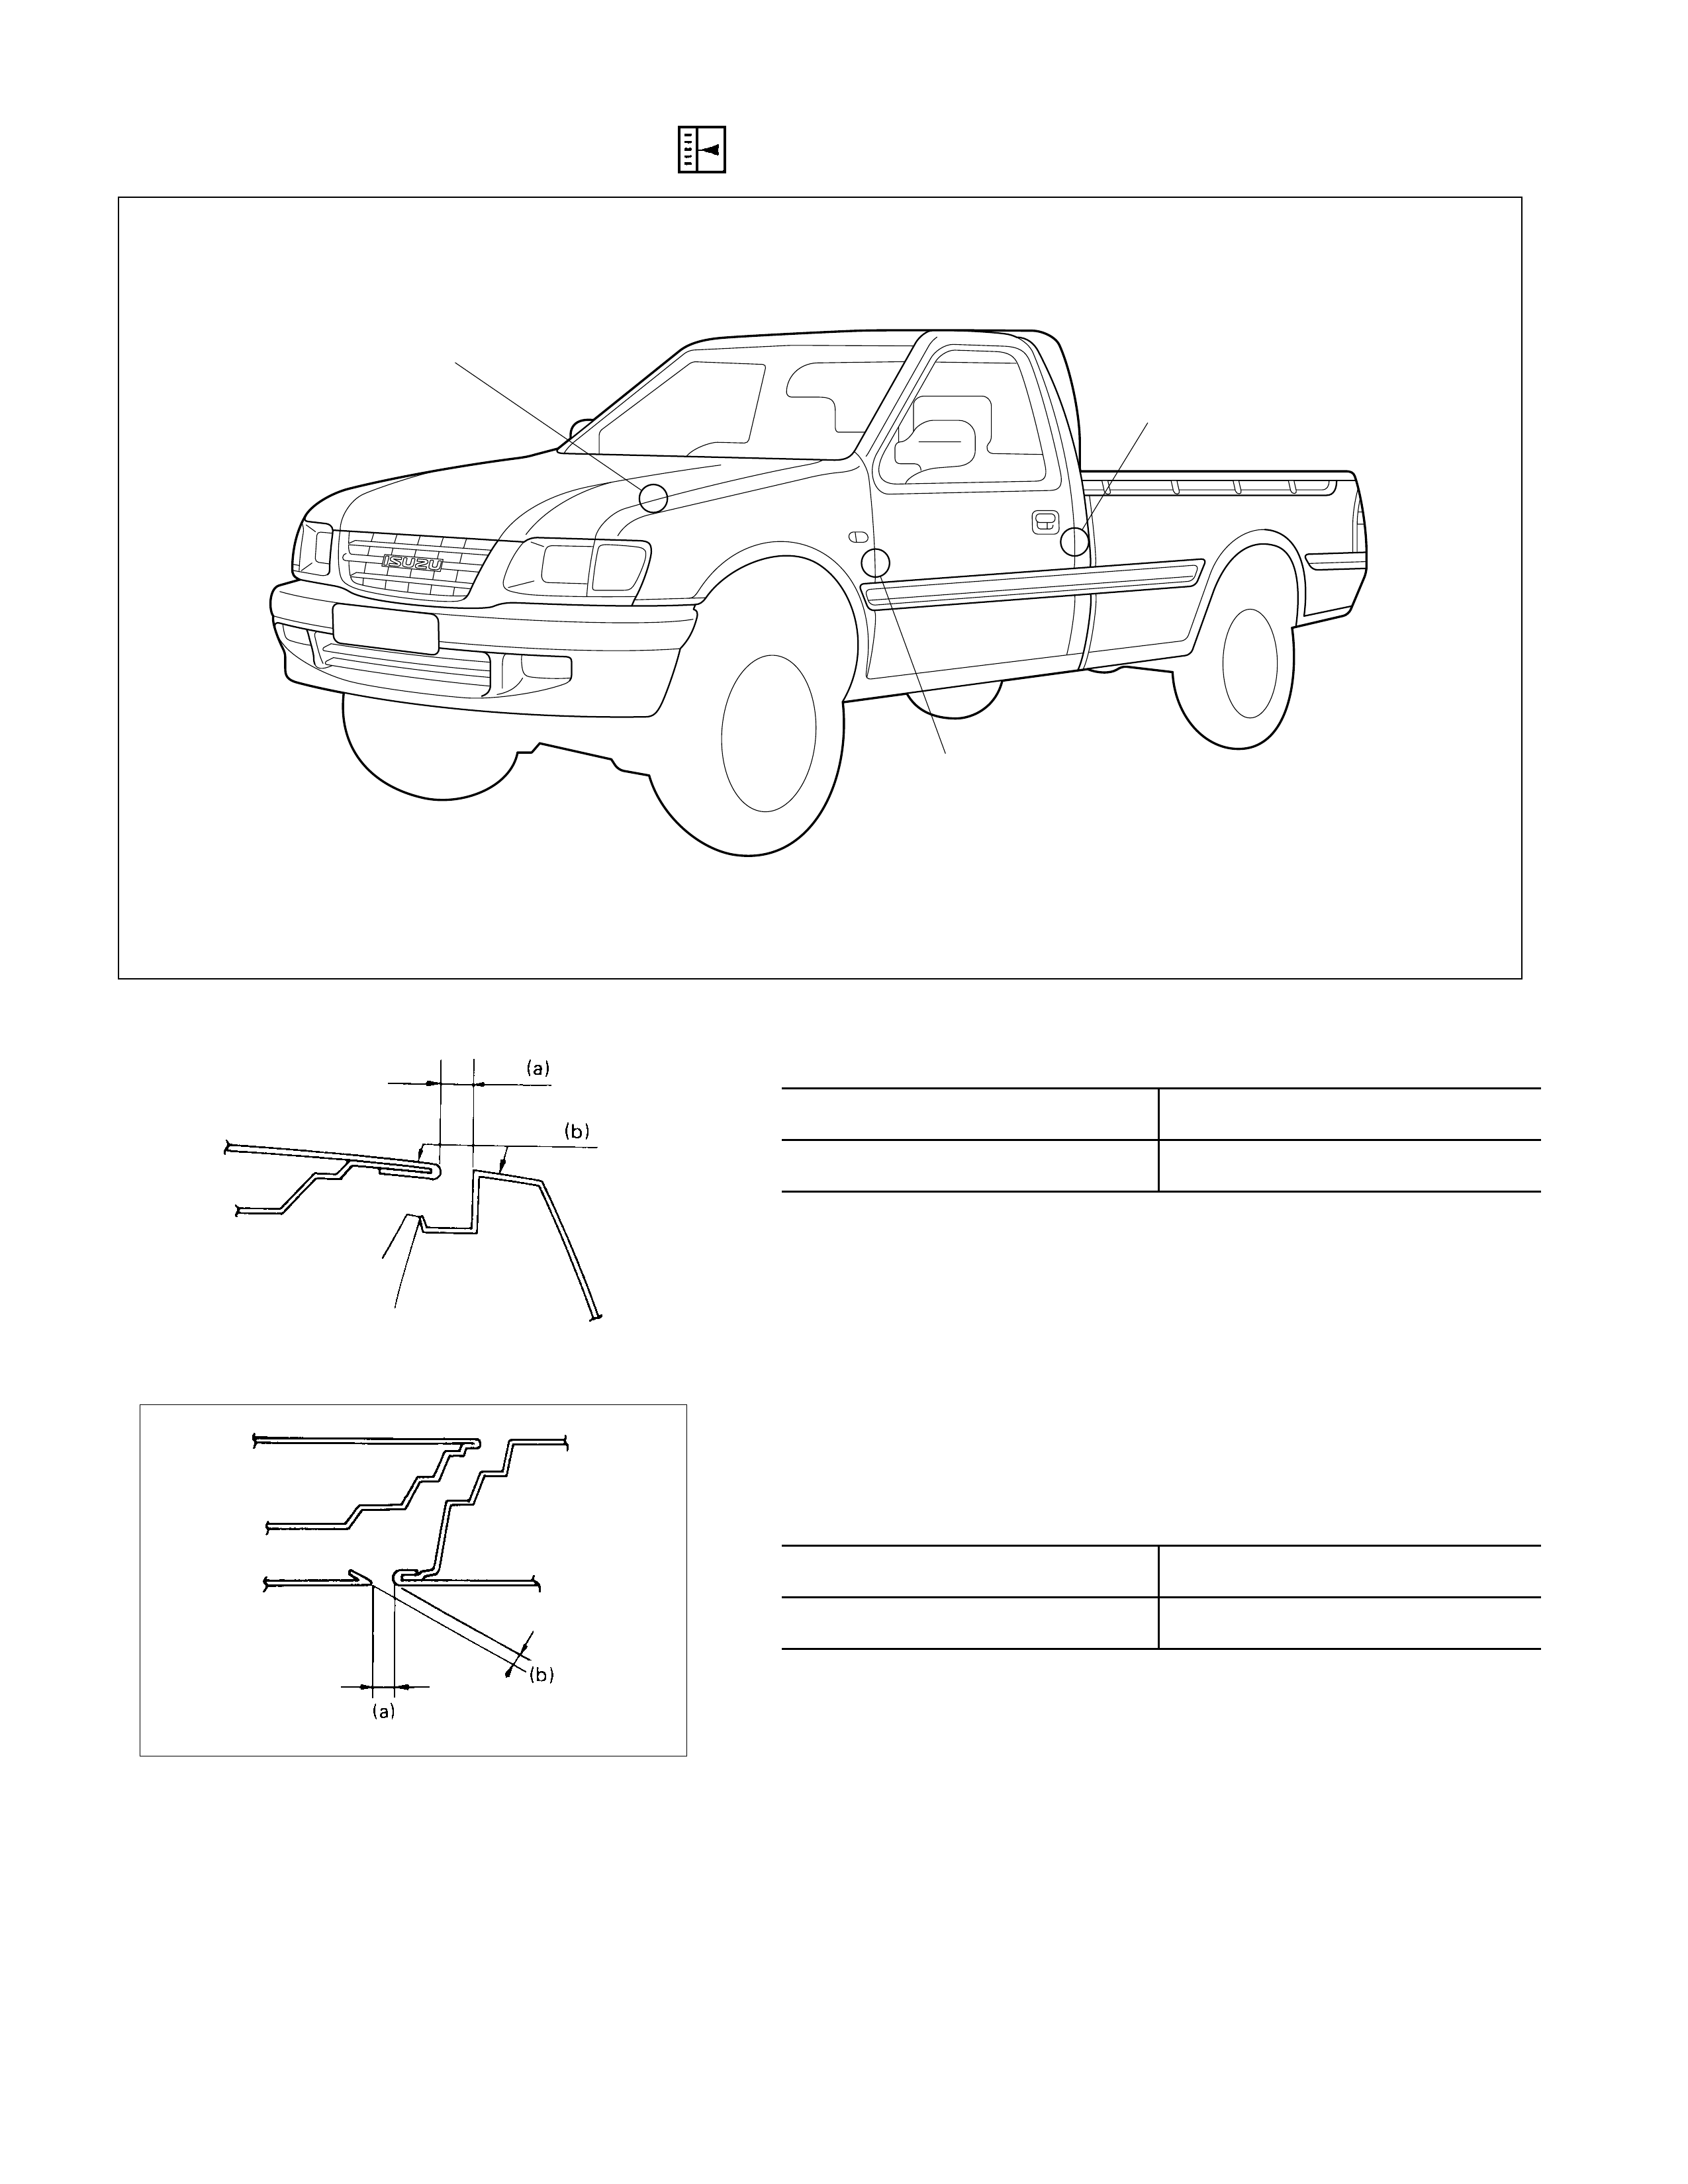
A. Check the Engine Hood and Fender mm (in.)
Clearance (a) 4 (0.157)
Height (b) Flush
Adjust the clearance (a) with the hinges on the engine hood.
Adjust the step (b) with the hood rests.
B. Check the Fender and Door
C. Check the Door and Body
D. Check the Front Door and Rear Door mm (in.)
Clearance (a) 5.5 (0.217)
Height (b) Flush
Adjust clearance (a) with door hinges.
Adjust the step (b) by tapping on the fender lightly with a rubber
hammer.