
SECTION 9 - ACCESSORIES
Parts Location
Circuit Diagram
Connector List
Front Speaker
Removal And Installation
Tweeter
Removal And Installation
Rear Speaker (Extend Cab)
Removal And Installation
Rear Speaker (Crew Cab)
Removal And Installation
Clock
Removal And Installation
Antenna
Removal And Installation
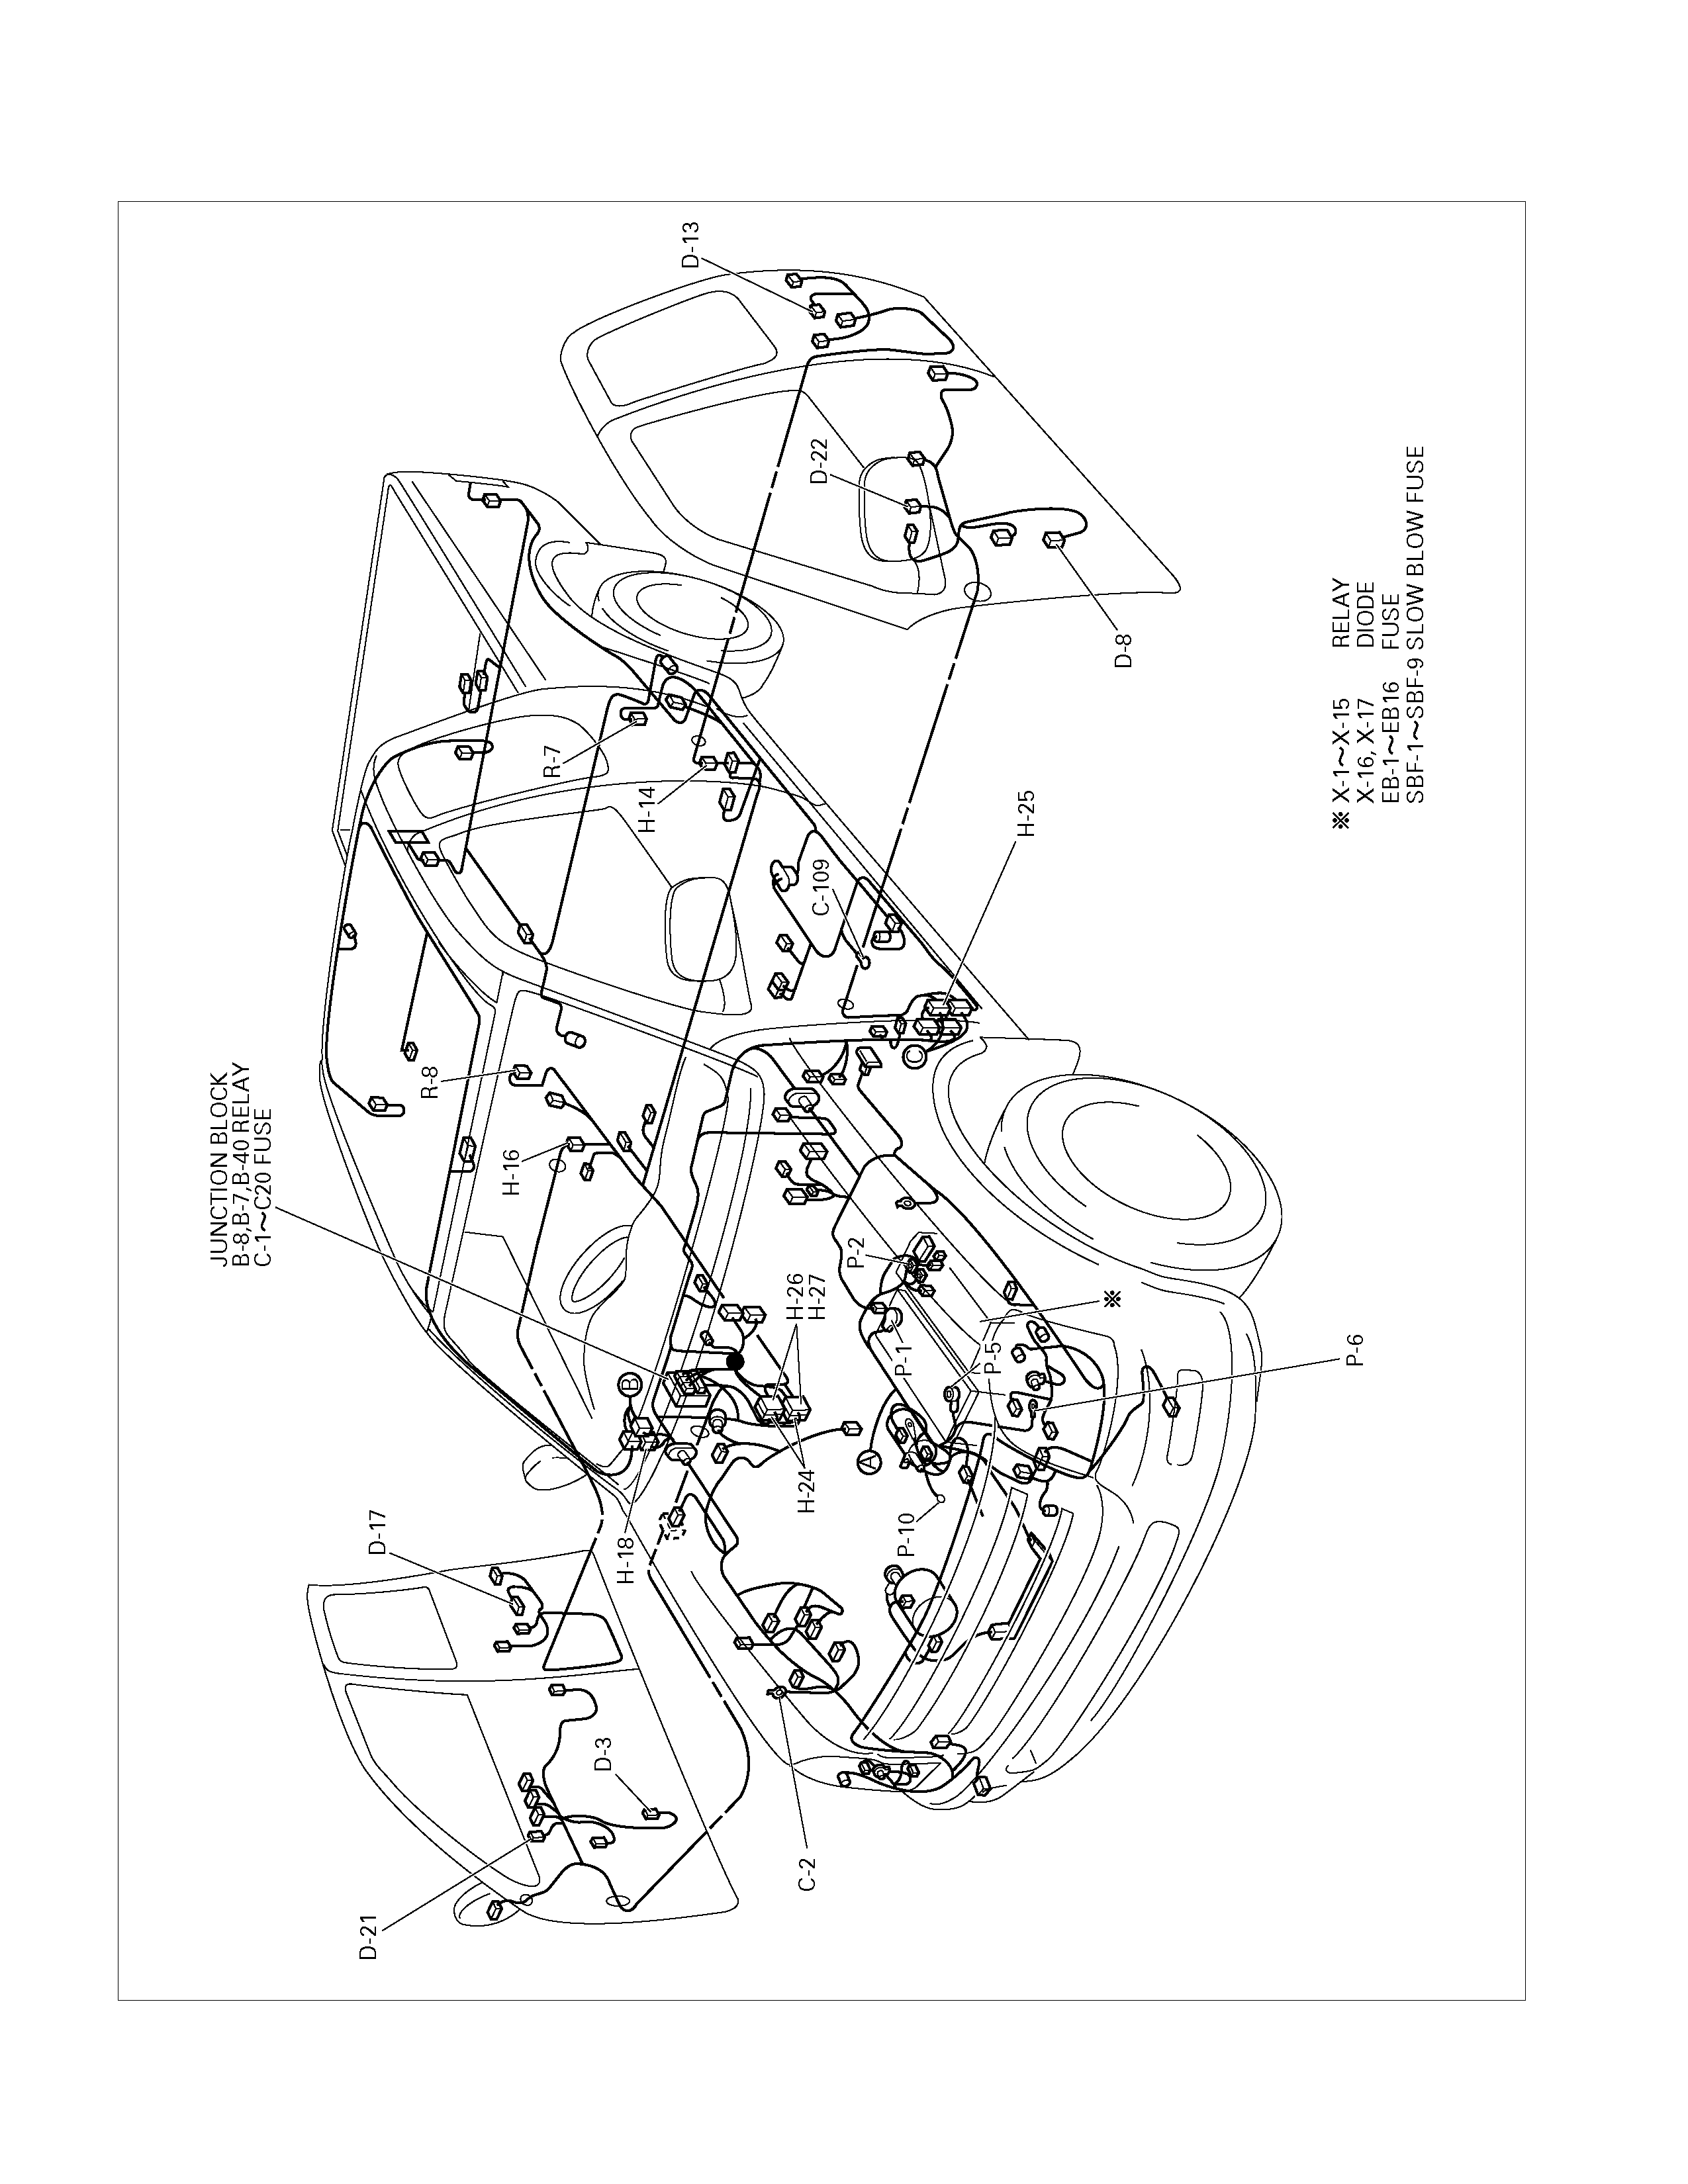
PARTS LOCATION
810R300016
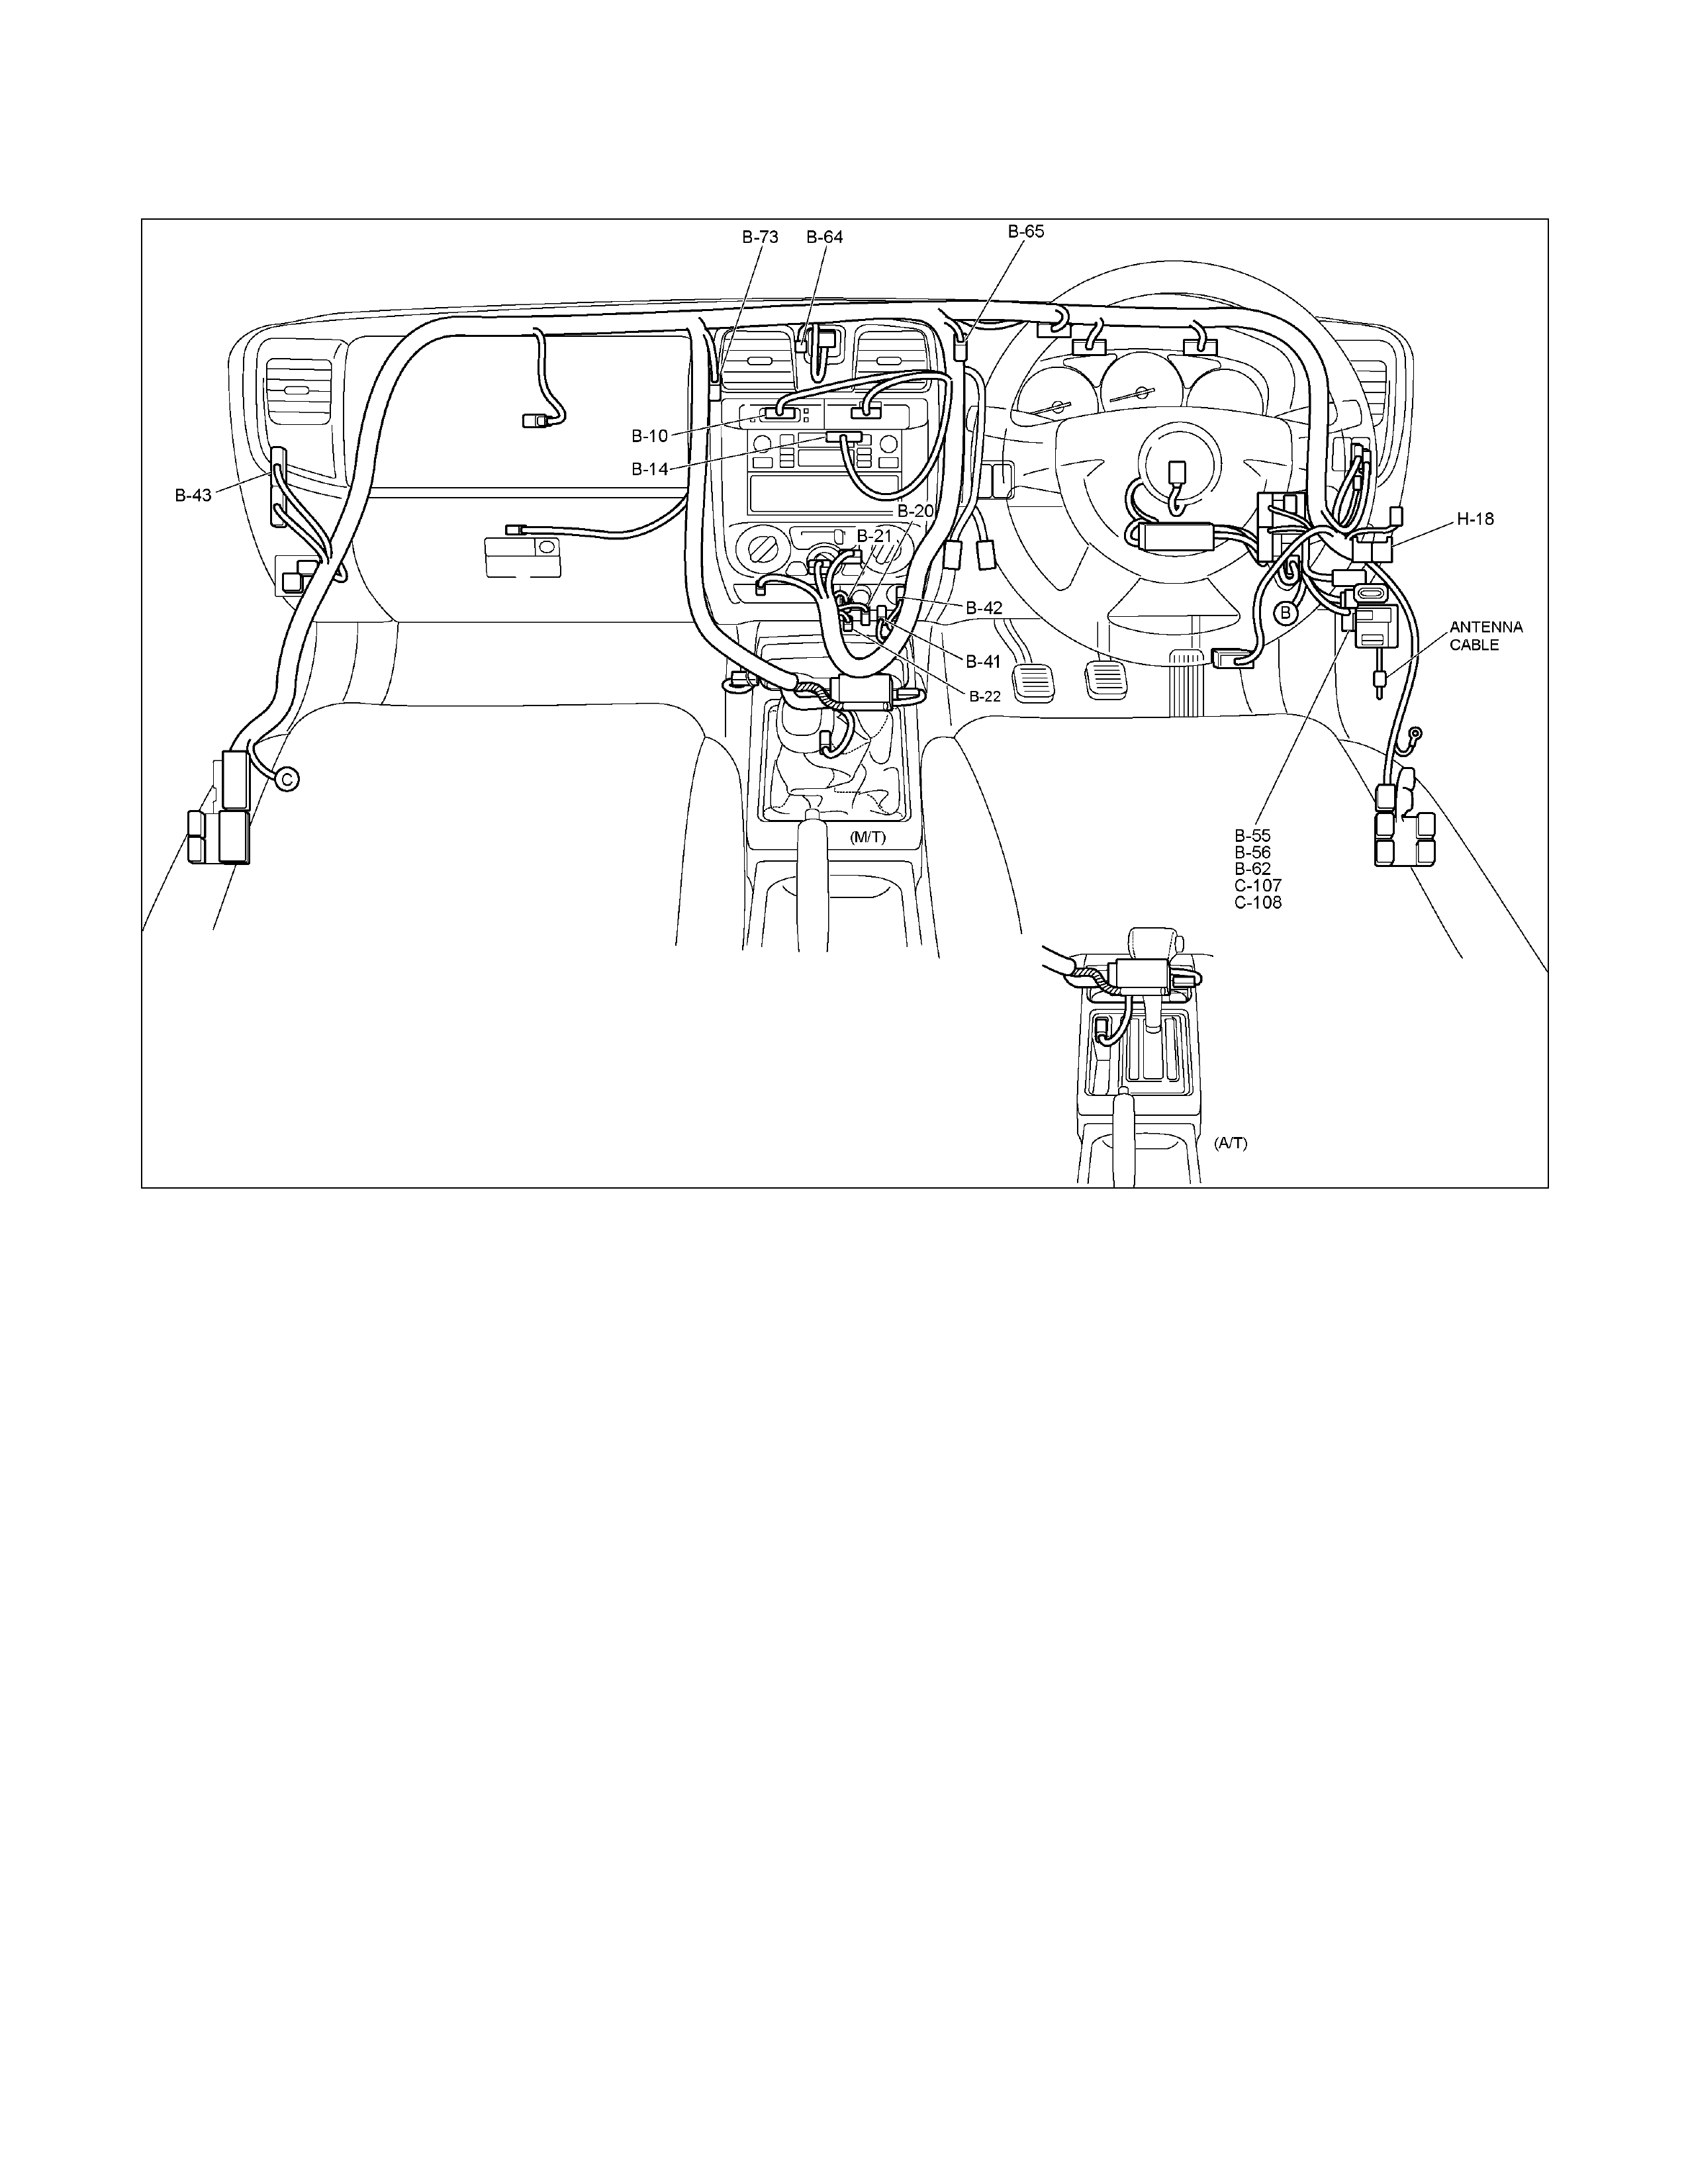
RTW48AXF020101A
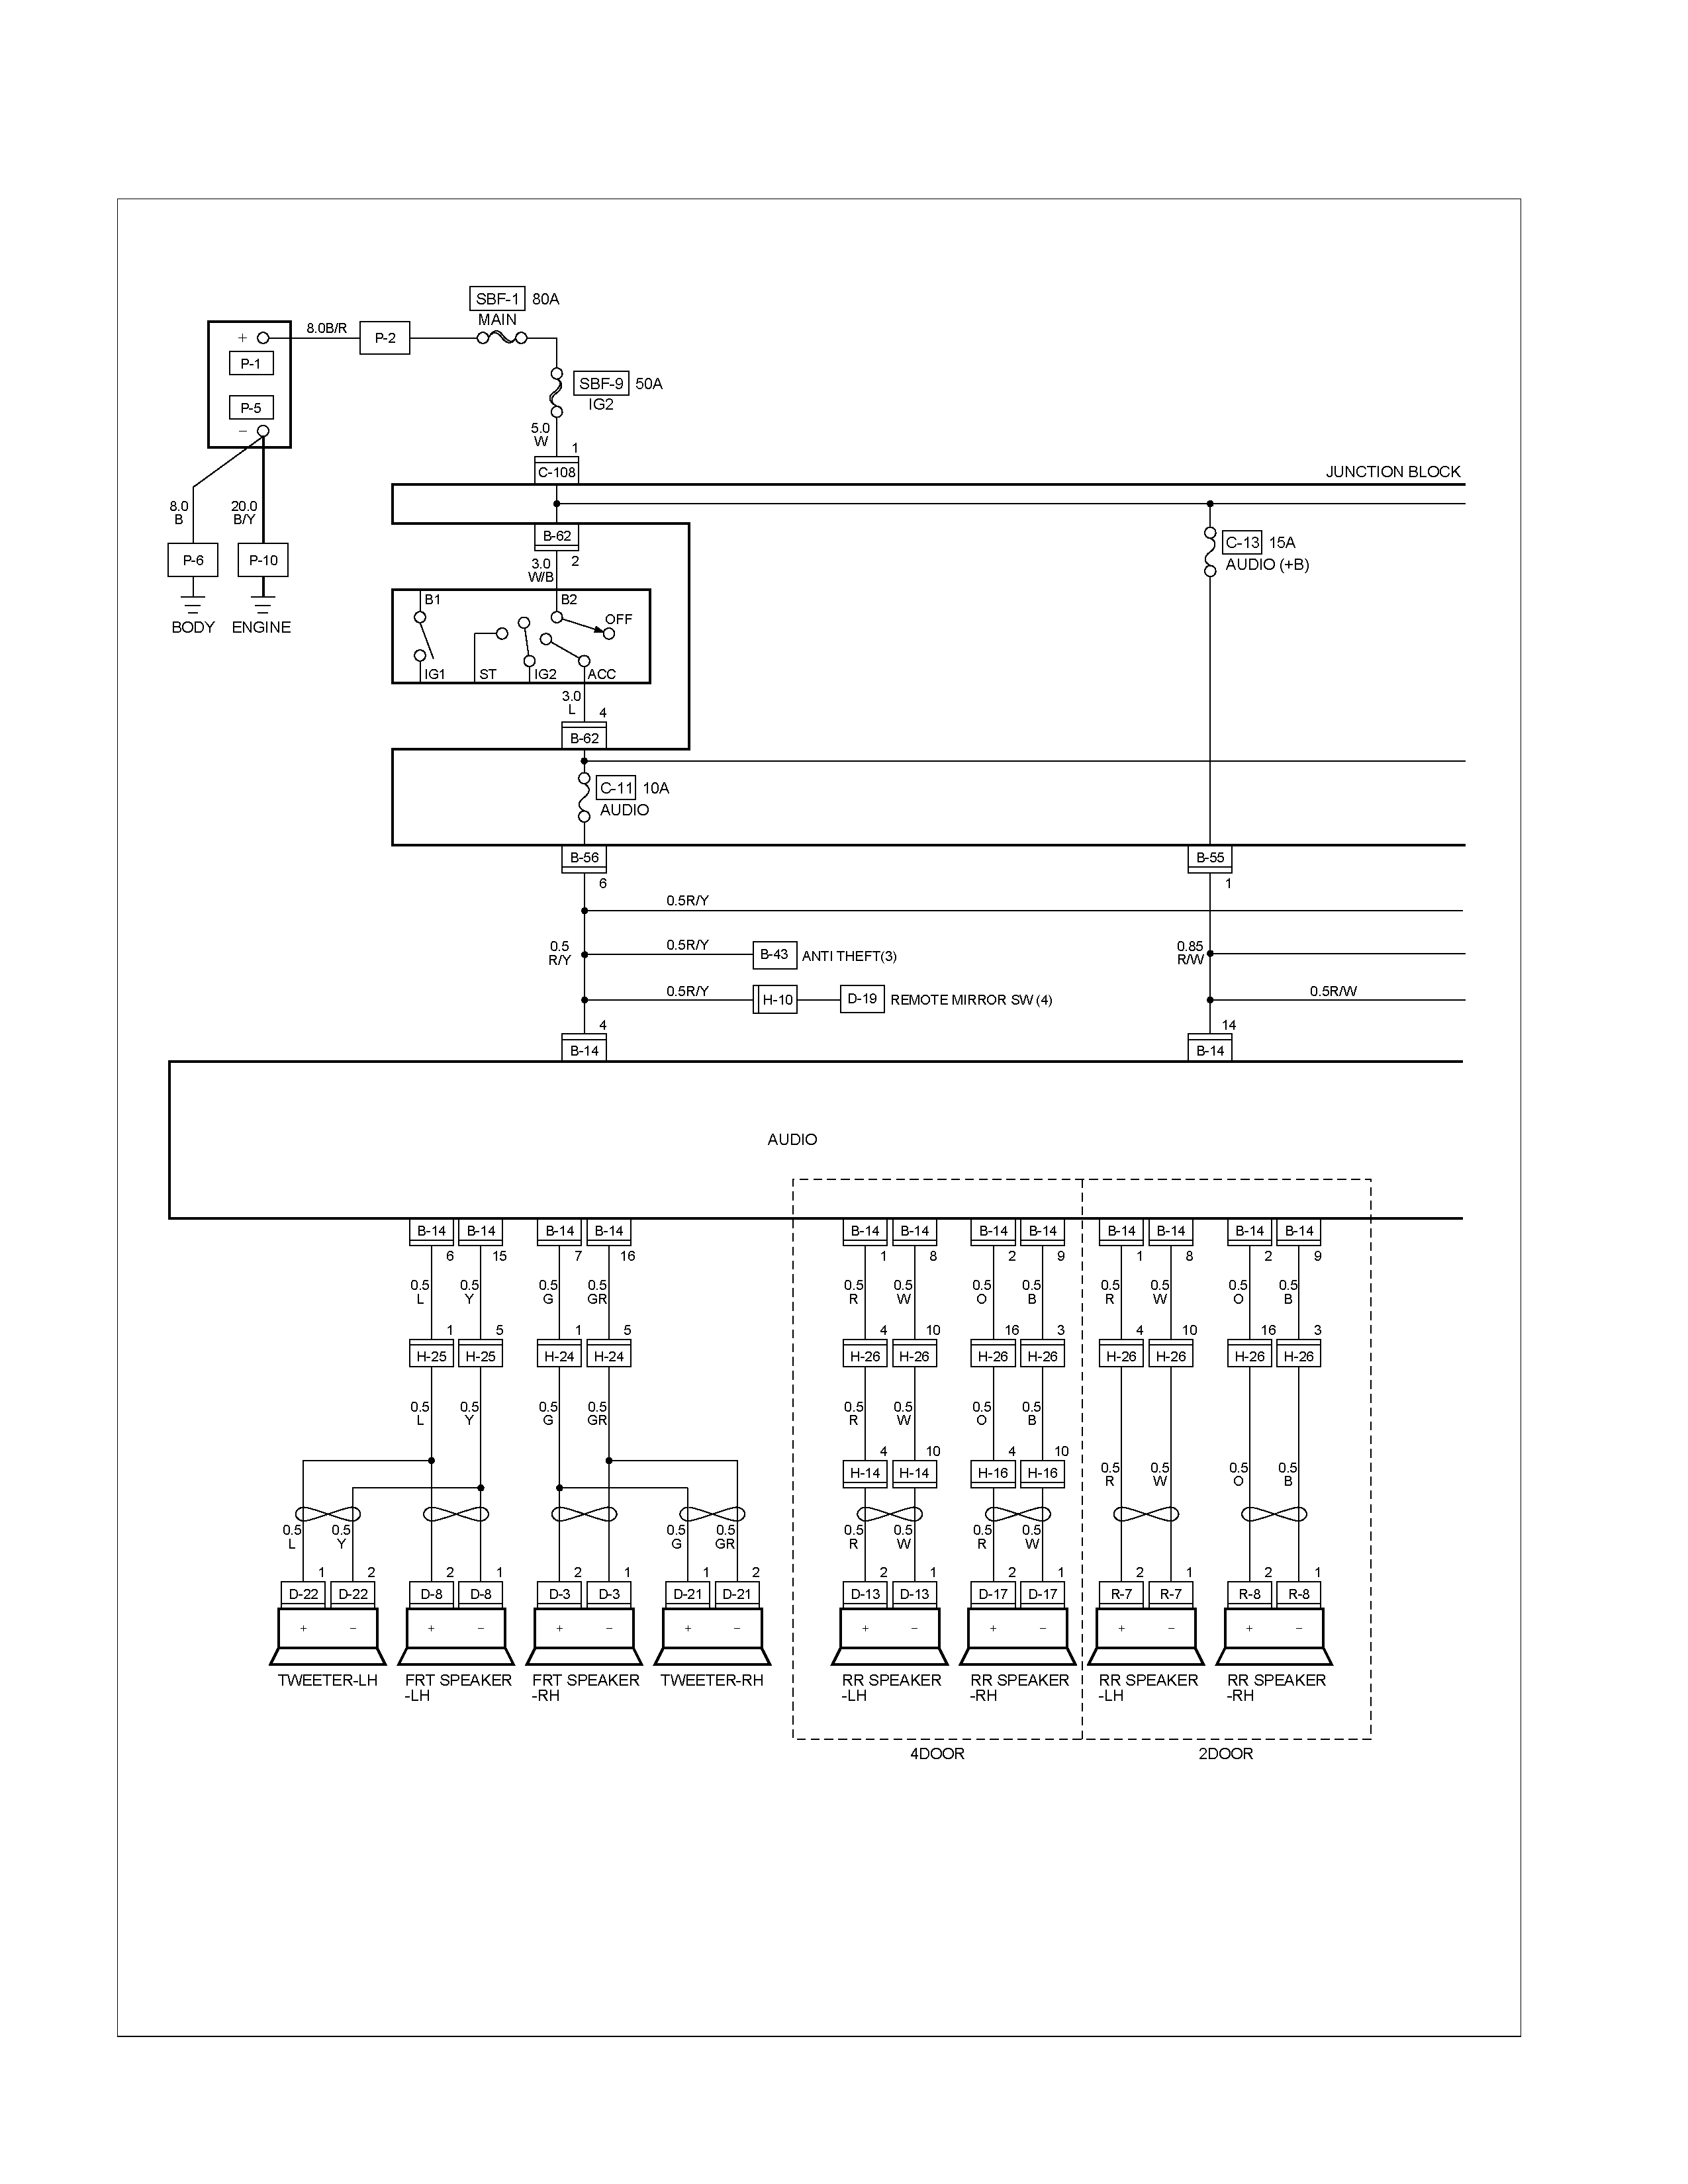
CIRCUIT DIAGRAM
RTW48AXF029801
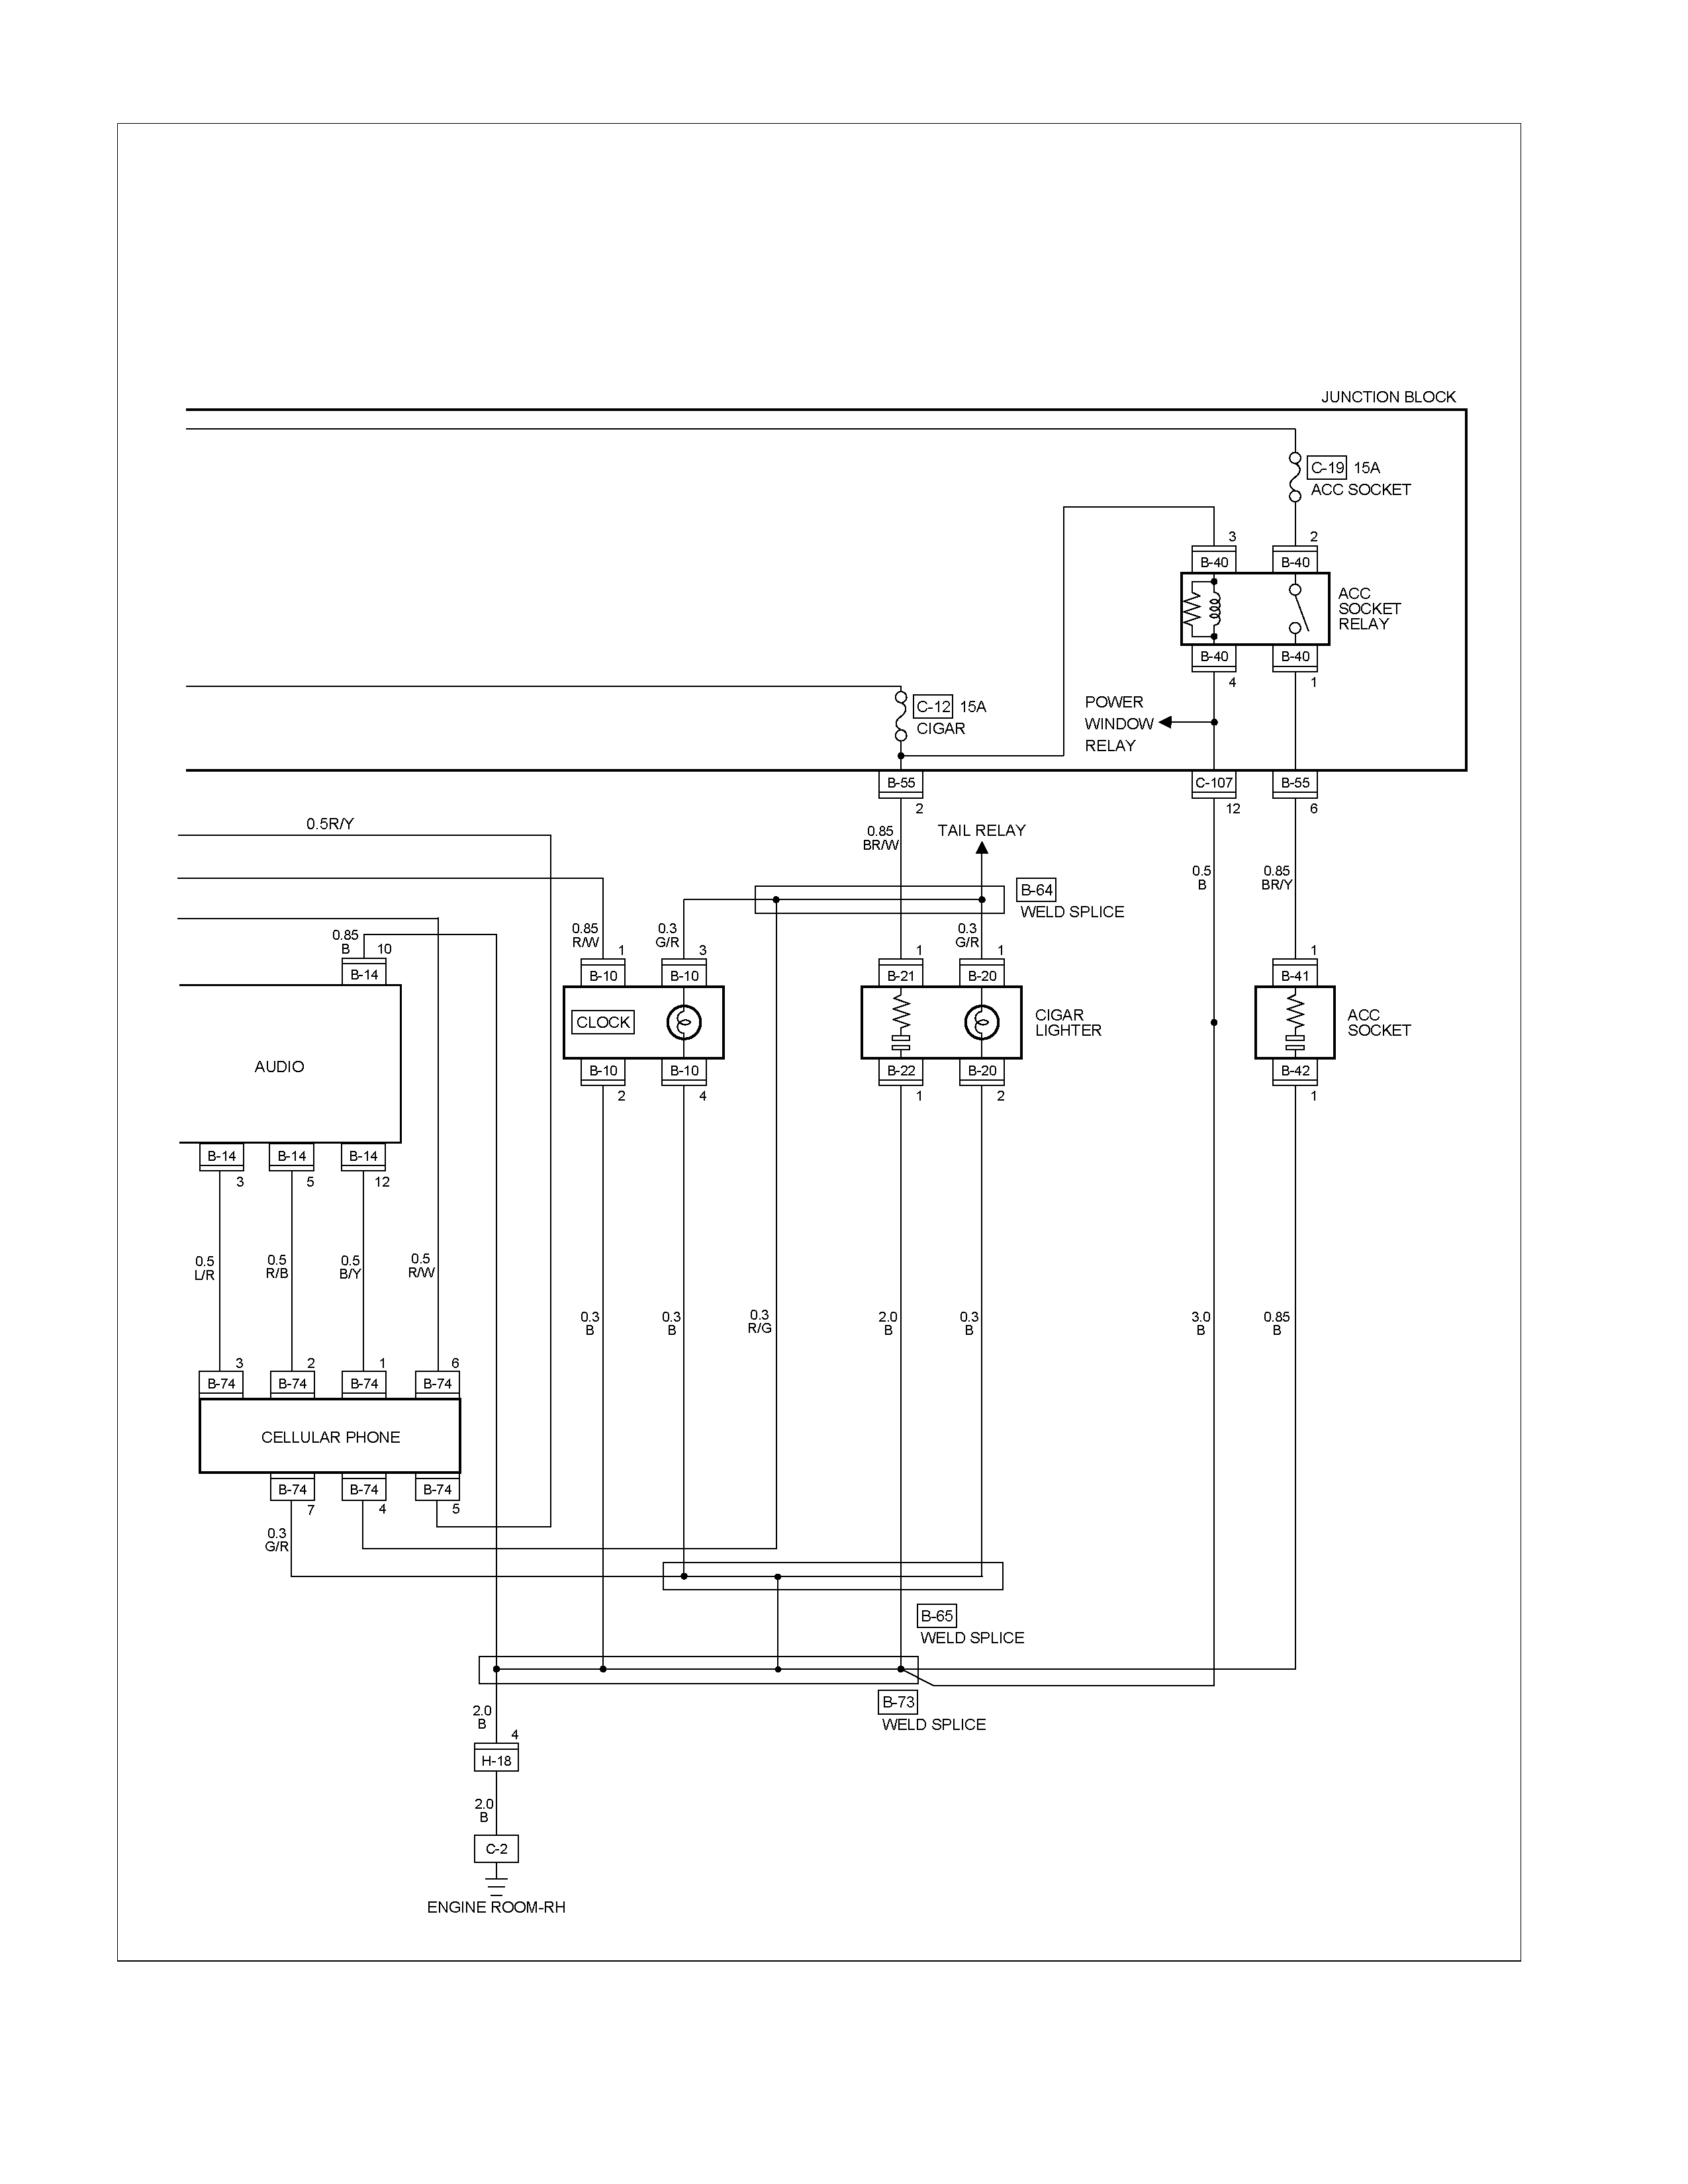
RTW38DXF003401
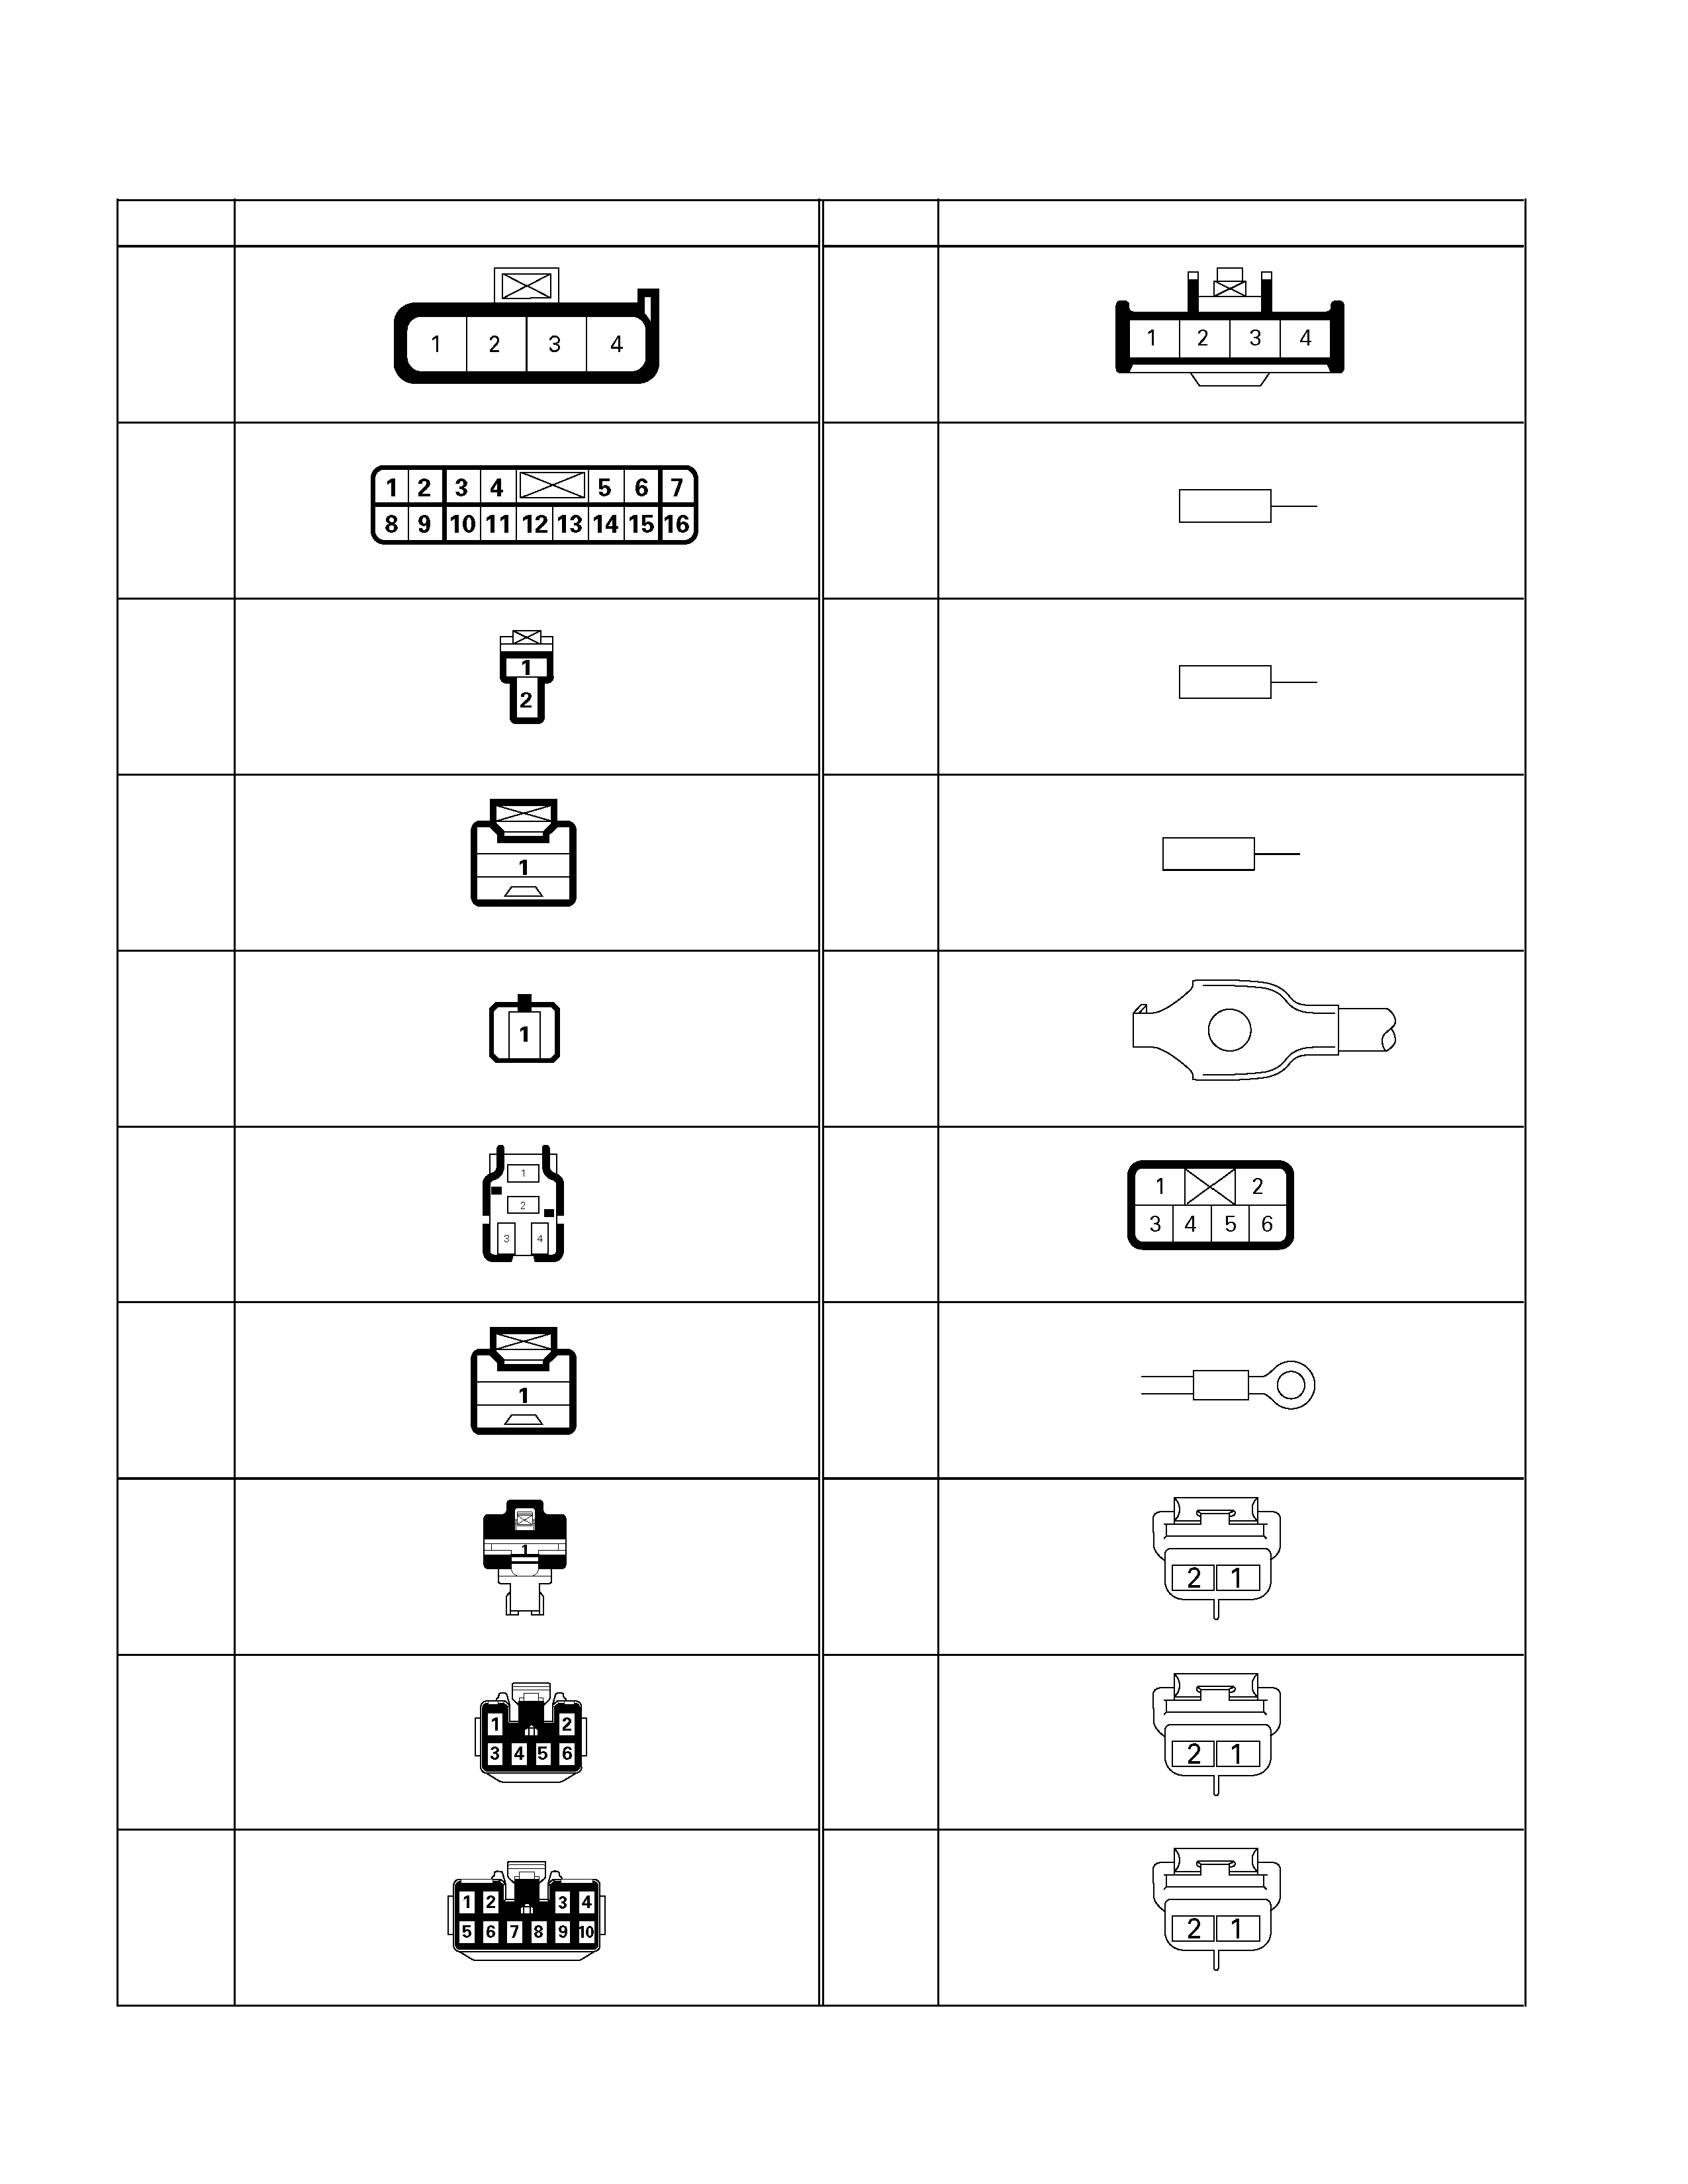
CONNECTOR LIST
No. Connector face No. Connector face
B-10
White
Clock
B-62
White
Ignition switch
B-14
Gray
Audio
B-64
Silver
Weld splice 1
B-20
White
Cigar lighter illumination
B-65
Silver
Weld splice 2
B-21
White
Cigar lighter
B-73
Silver
Weld splice 3
B-22
Black
Cigar lighter
C-2
Black
Engine room –RH ground
B-40
Black
Acc socket relay
C-108
White
J/B E1
B-41
Natural
Acc socket
C-109
Black
Body –LH ground
B-42
White
Acc socket
D-3
Black
Front speaker -RH
B-55
White
J/B I3
D-8
Black
Front speaker -LH
B-56
White
J/B I4
D-13
Black
Rear speaker -LH
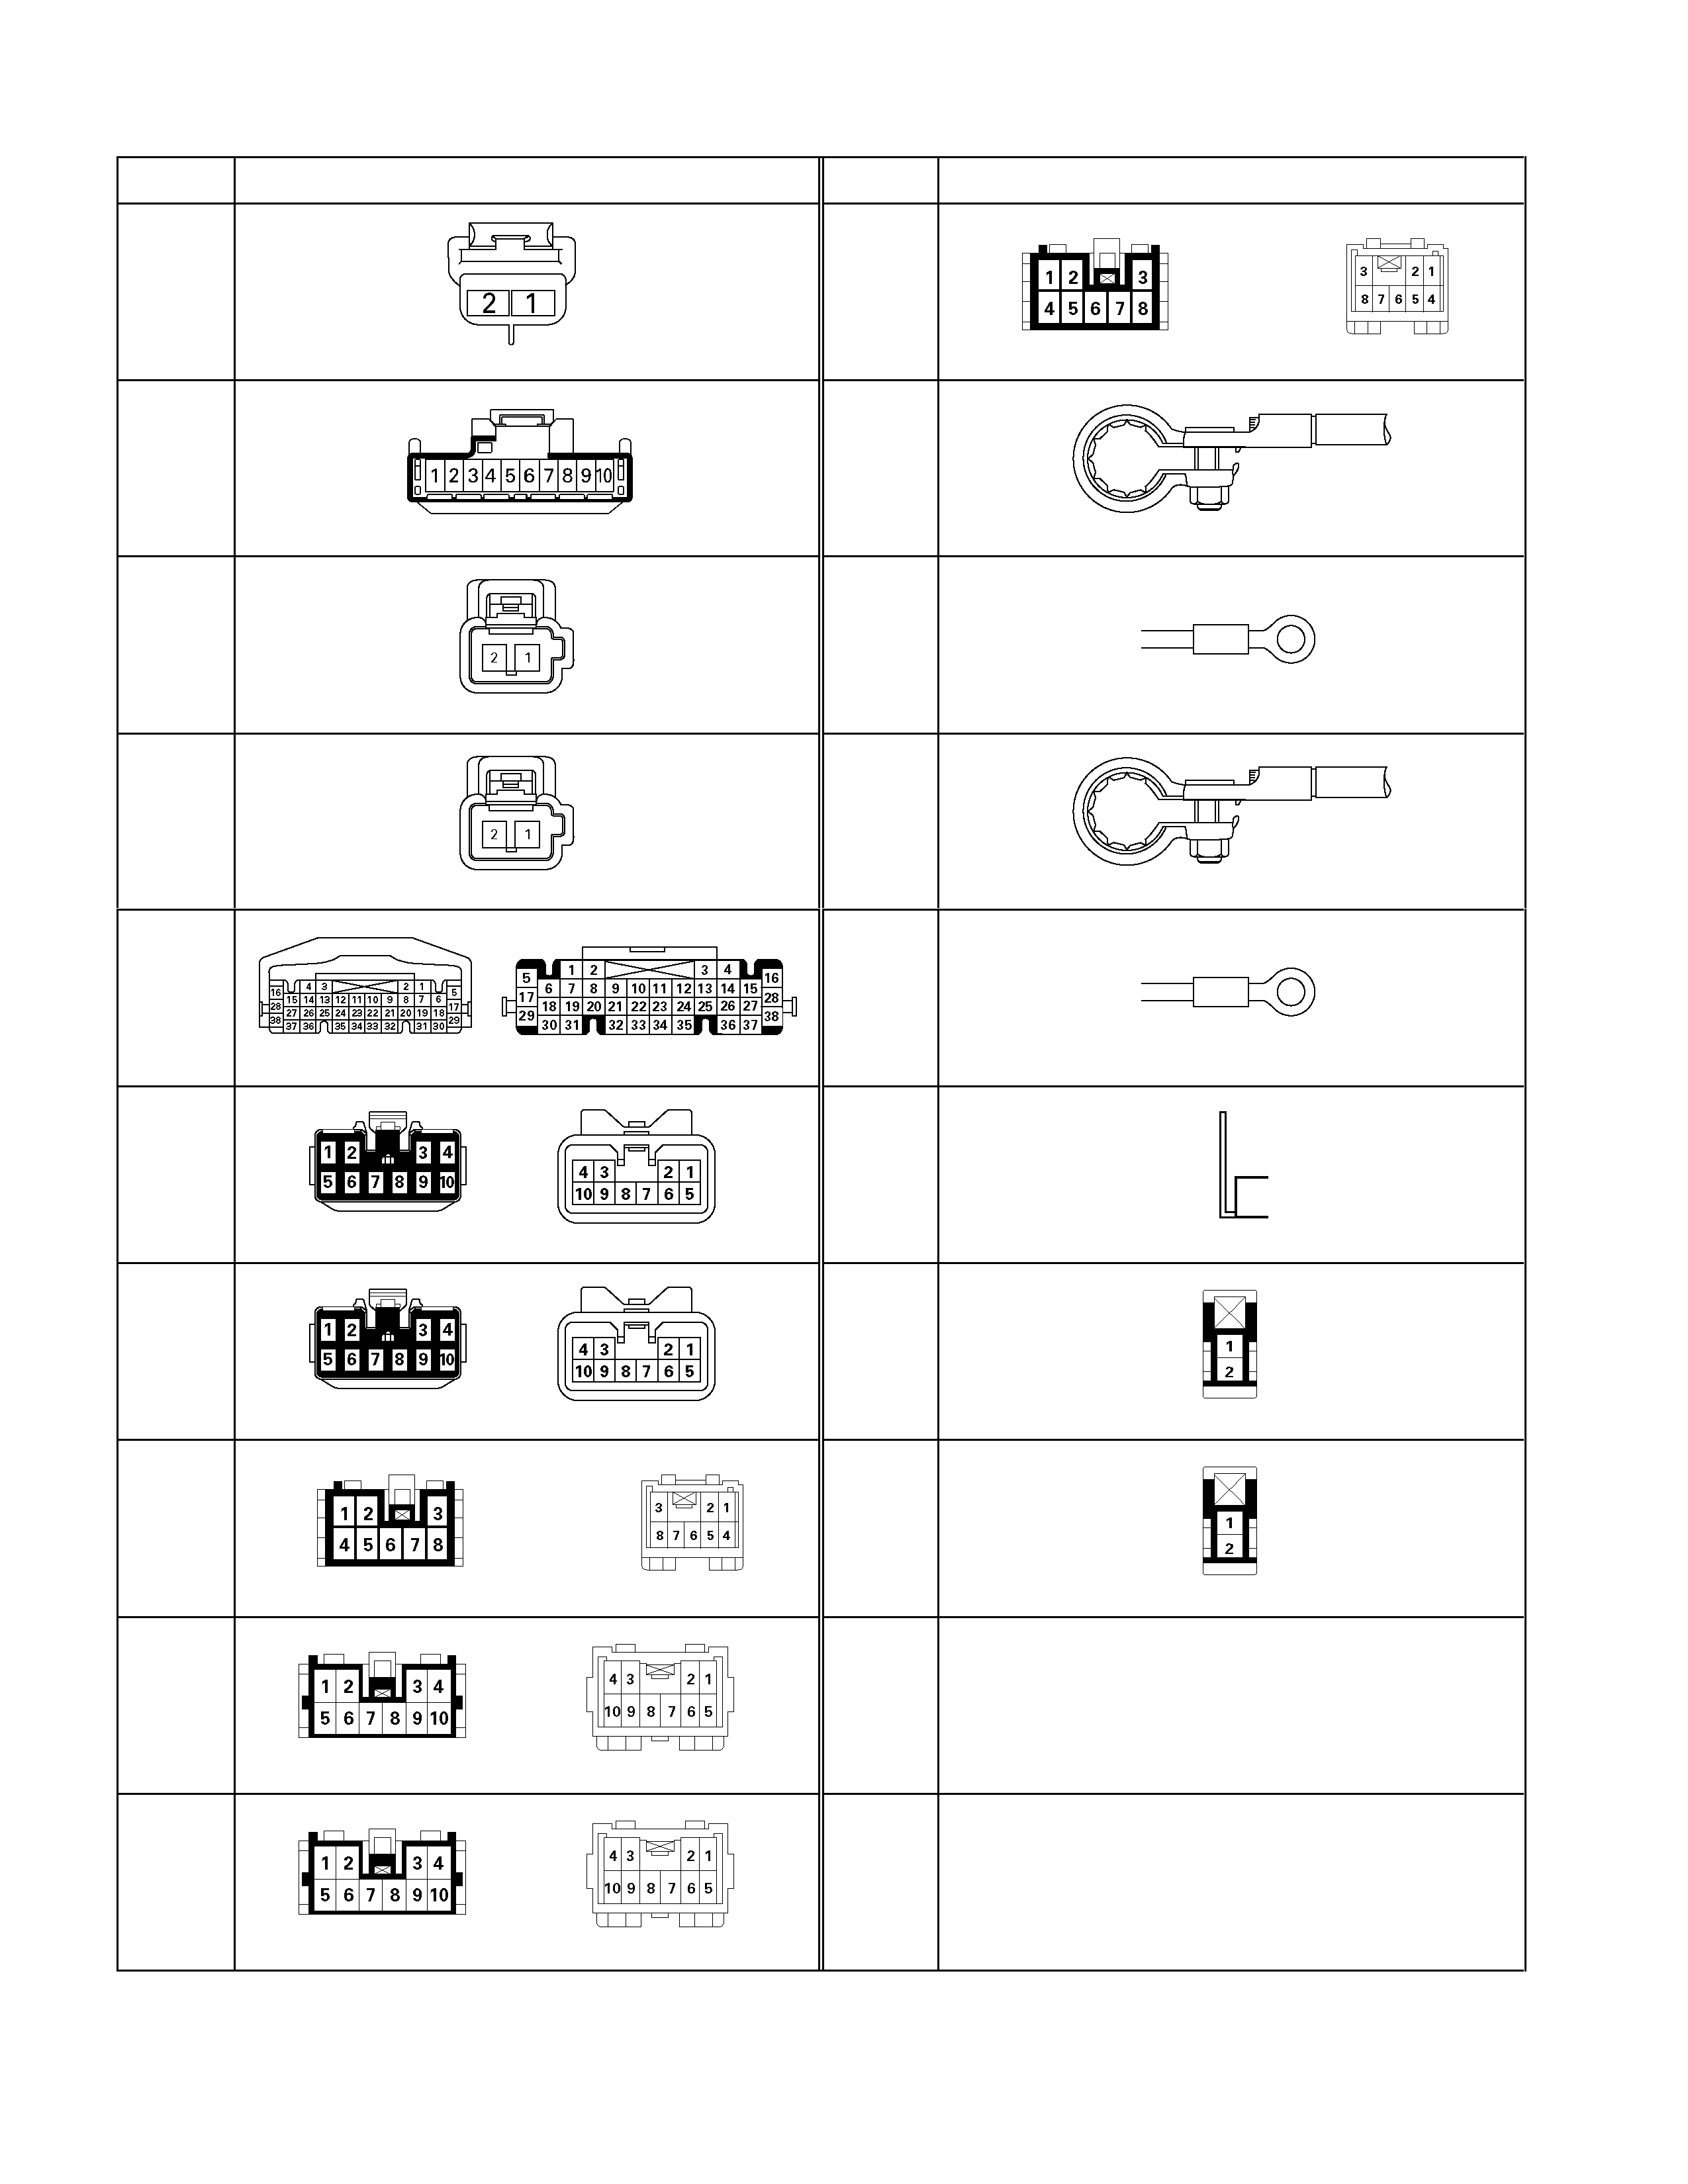
No. Connector face No. Connector face
D-17
Black
Rear speaker -RH
H-27
Black
INST ∼ Rear body
D-19
White
Remote mirror switch drive side
P-1
Silver
Battery (+)
D-21
White
Tweeter -RH
P-2
Silver
Relay & Fuse box
D-22
White
Tweeter -LH
P-5
Silver
Battery (-)
H-6
White
Engine room ∼ INST
P-6
Silver
Body earth
H-14
White
Rear body ∼ Rear door -LH
P-10
Silver
Engine ground
H-16
White
Rear body ∼ Rear door -RH
R-7
Black
Rear speaker -LH
H-18
White
Engine room ∼ INST
R-8
Black
Rear speaker -RH
H-24
Black
INST ∼ Front door -RH
H-25
Black
INST ∼ Front door -LH
FRONT SPEAKER
REMOVAL AND INSTALLATION
Removal
1. Remove the Door Trim Panel
• Refer to Section 2C “FRONT DOOR ASSEMBLY” fo
r
door trim panel removal steps.
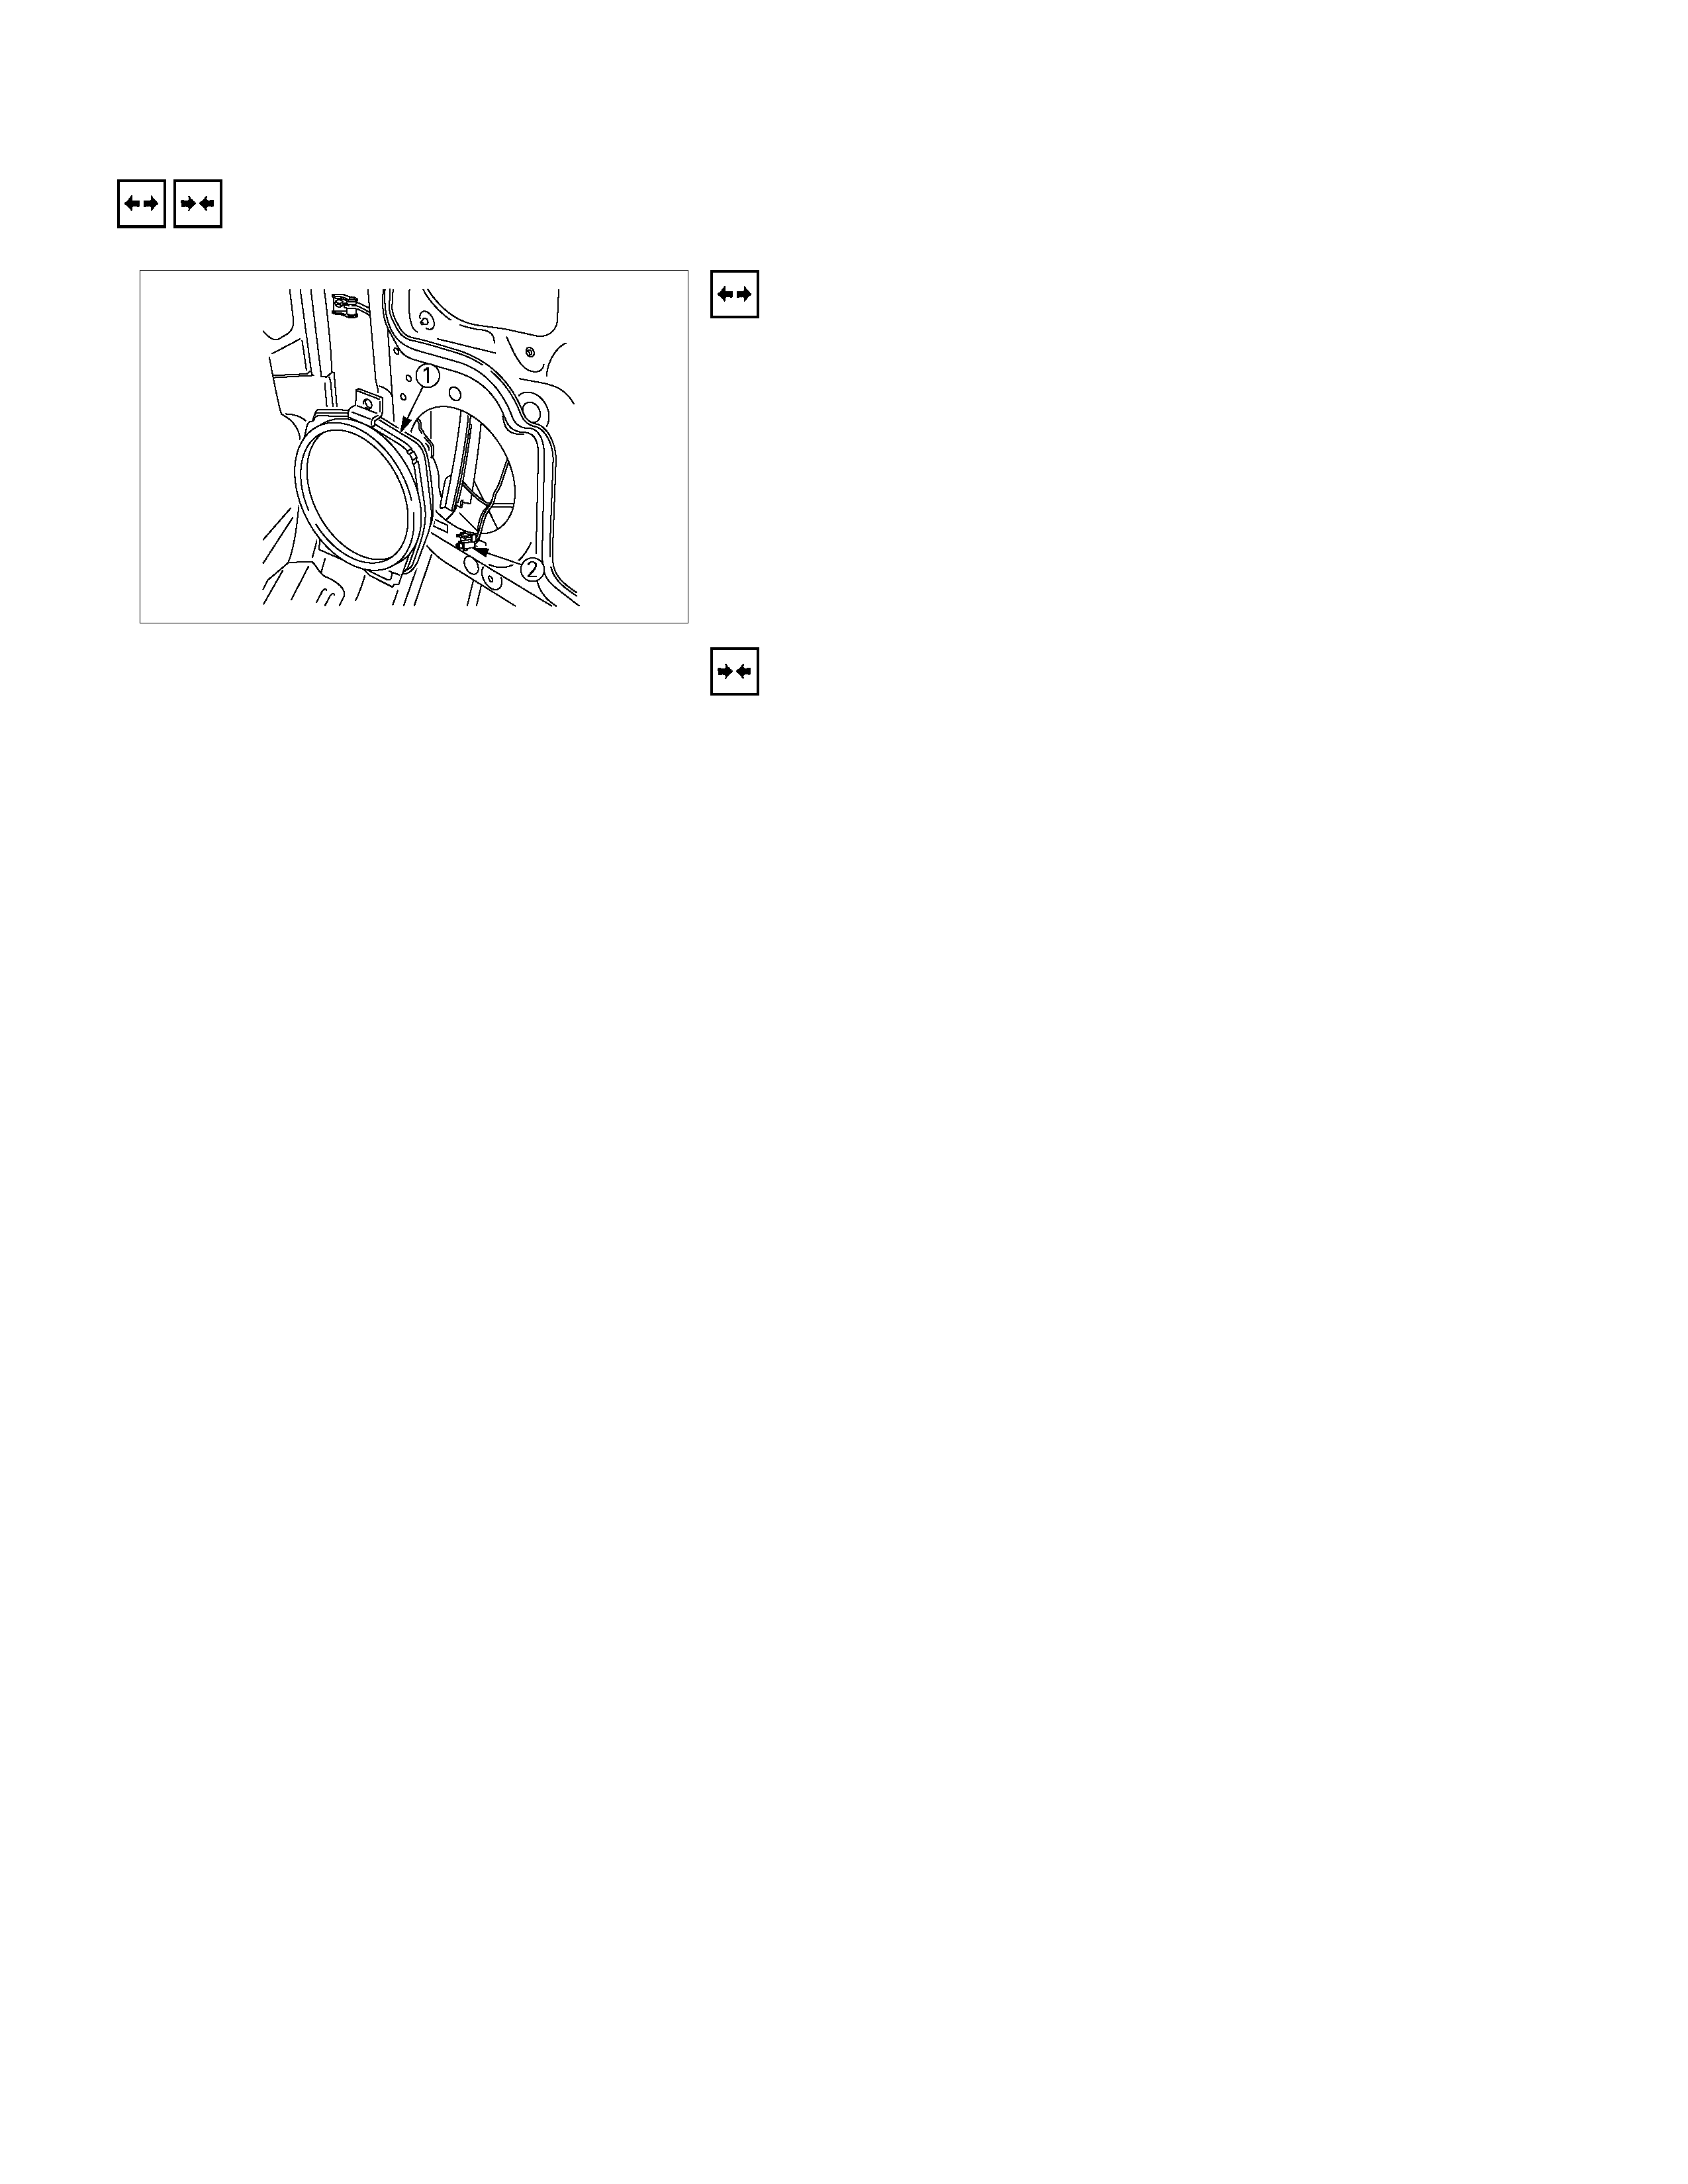
2. Remove the Front Speaker
• Remove the screw.
• Disconnect the connector.
Installation
To install, follow the removal steps in the reverse order.
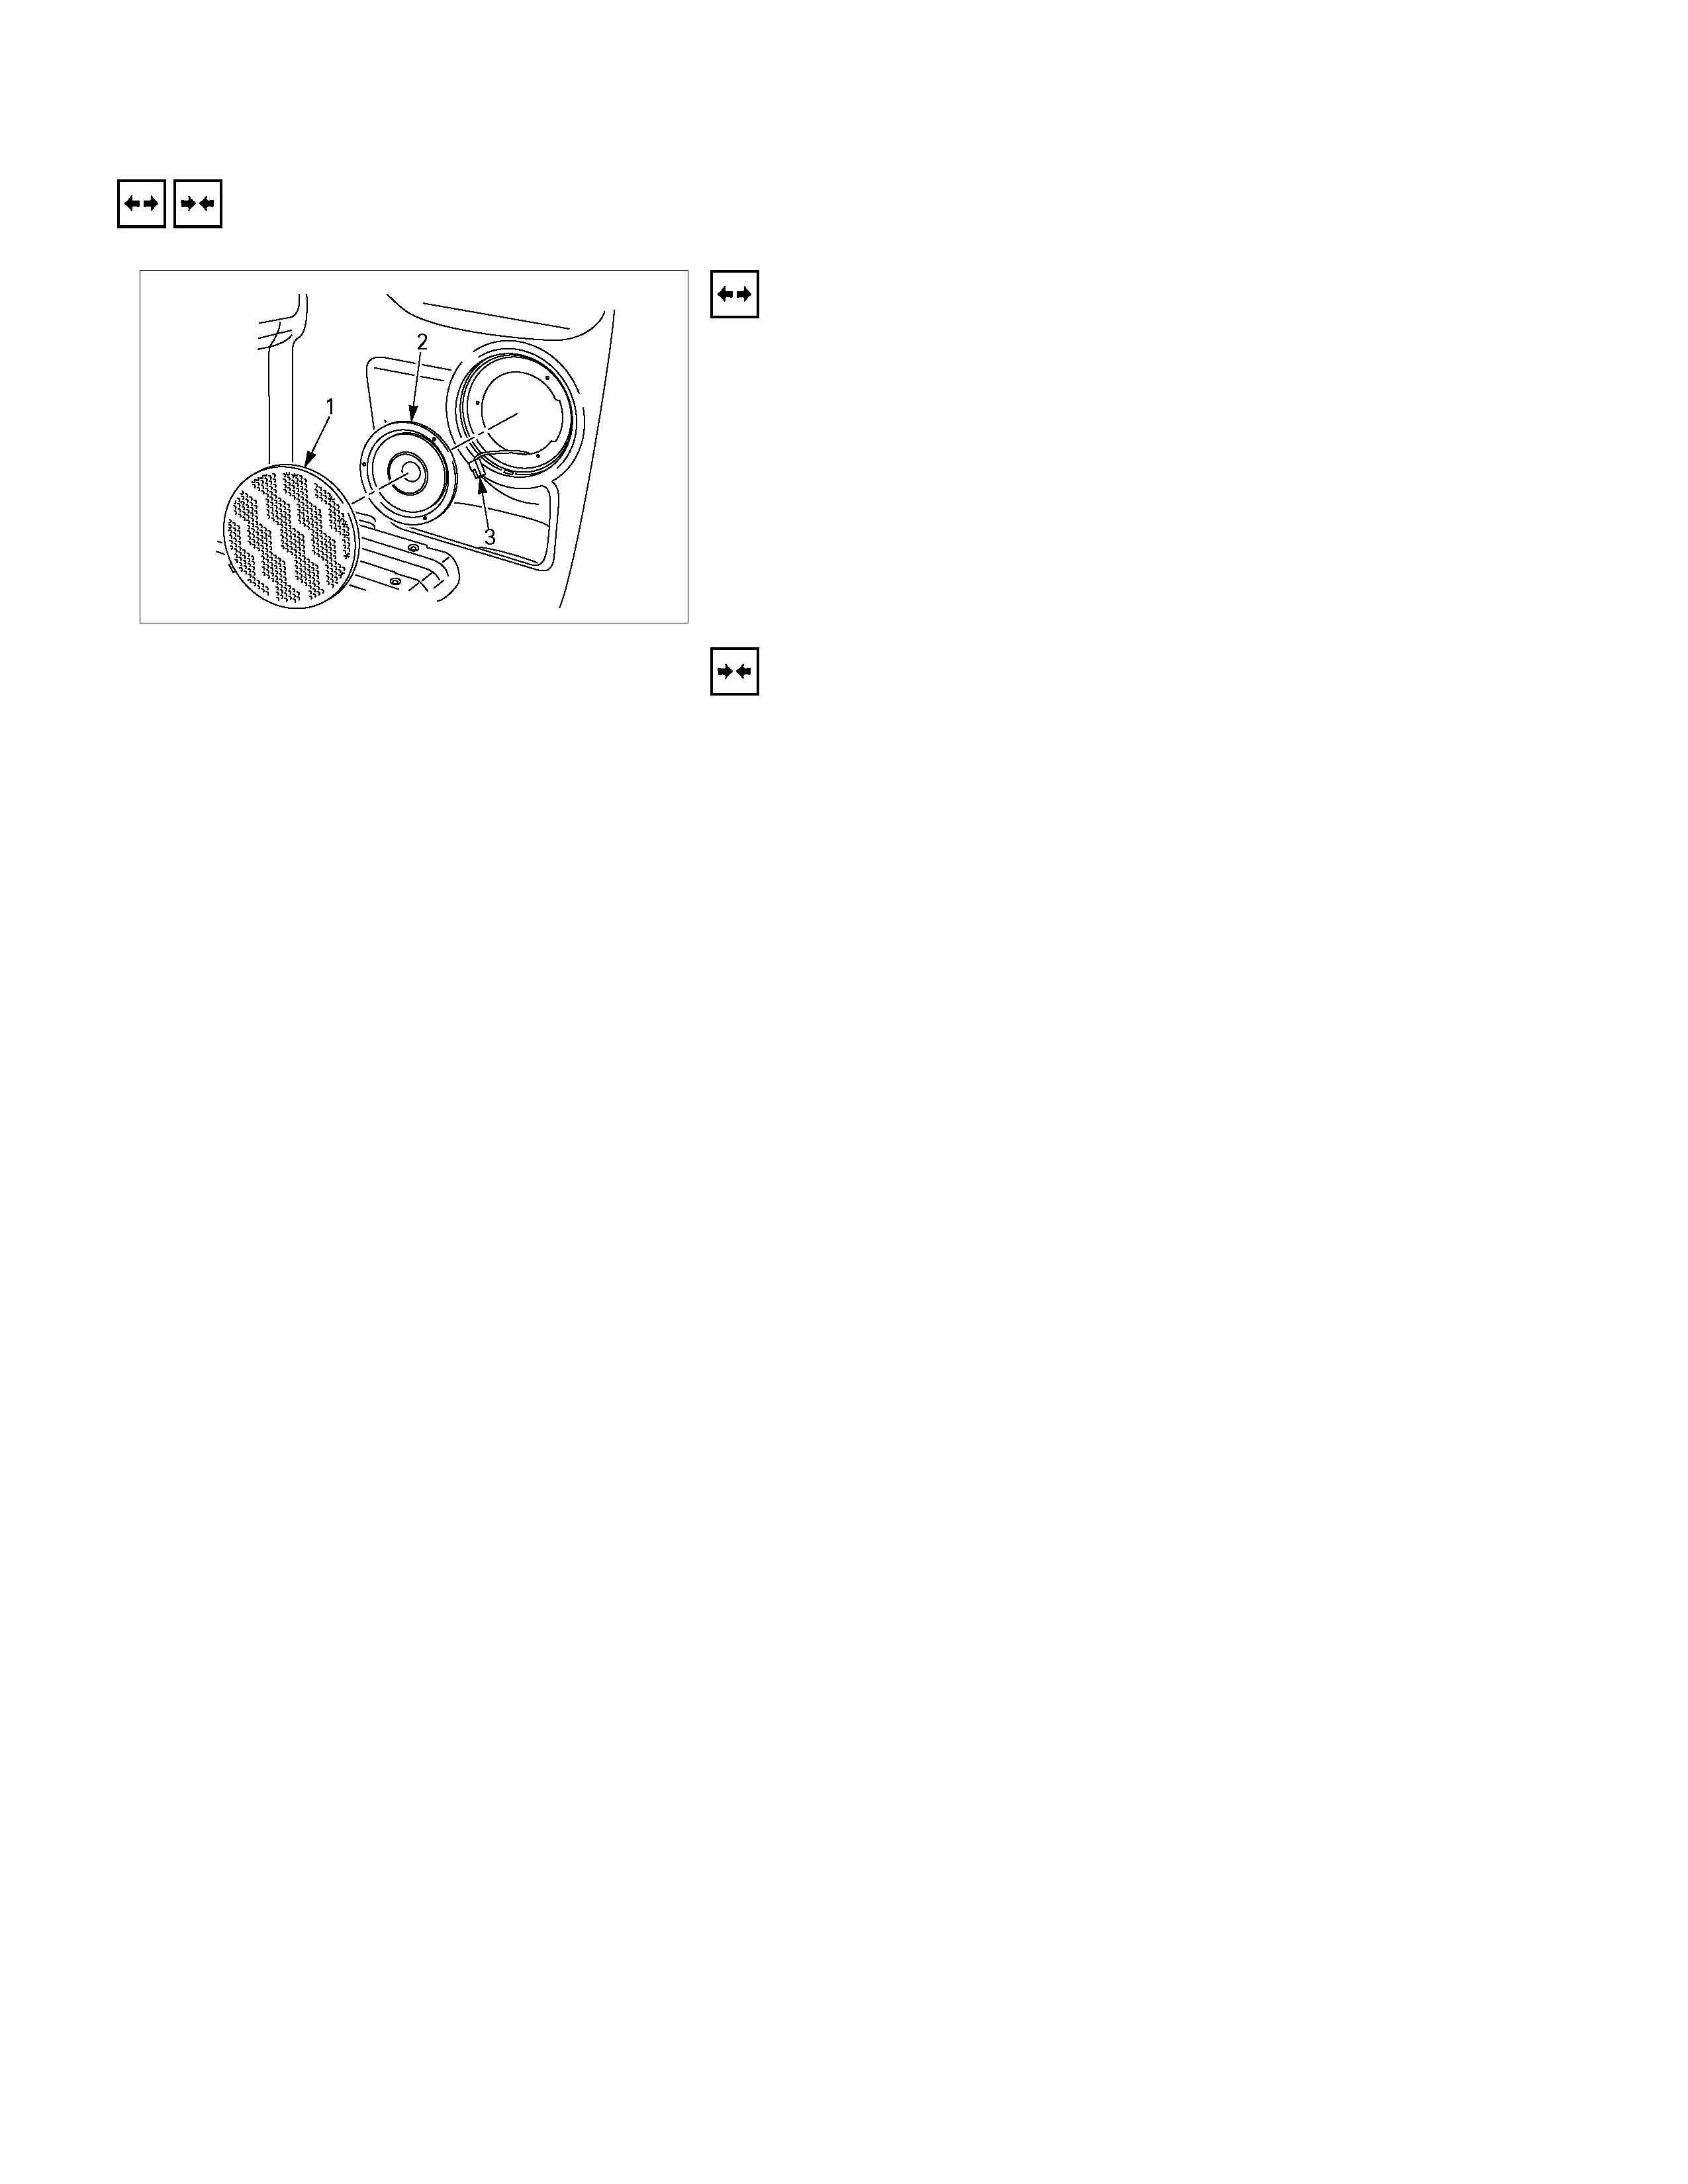
TWEETER
REMOVAL AND INSTALLATION
RTW390SH000101
Removal
1. Remove the Door Trim Panel
• Refer to Section 2C “FRONT DOOR ASSEMBLY” fo
r
door trim panel removal steps.
2. Remove the Tweeter
• Remove the three screws.
• Disconnect the connector.
Installation
To install, follow the removal steps in the reverse order.
REAR SPEAKER (EXTEND CAB)
REMOVAL AND INSTALLATION
Removal
1. Remove the Speaker Grille
• Pull the grille to release the locks.
2. Remove the Rear Speaker
• Remove the three screws.
• Disconnect the connector.
Installation
To install, follow the removal steps in the reverse order.
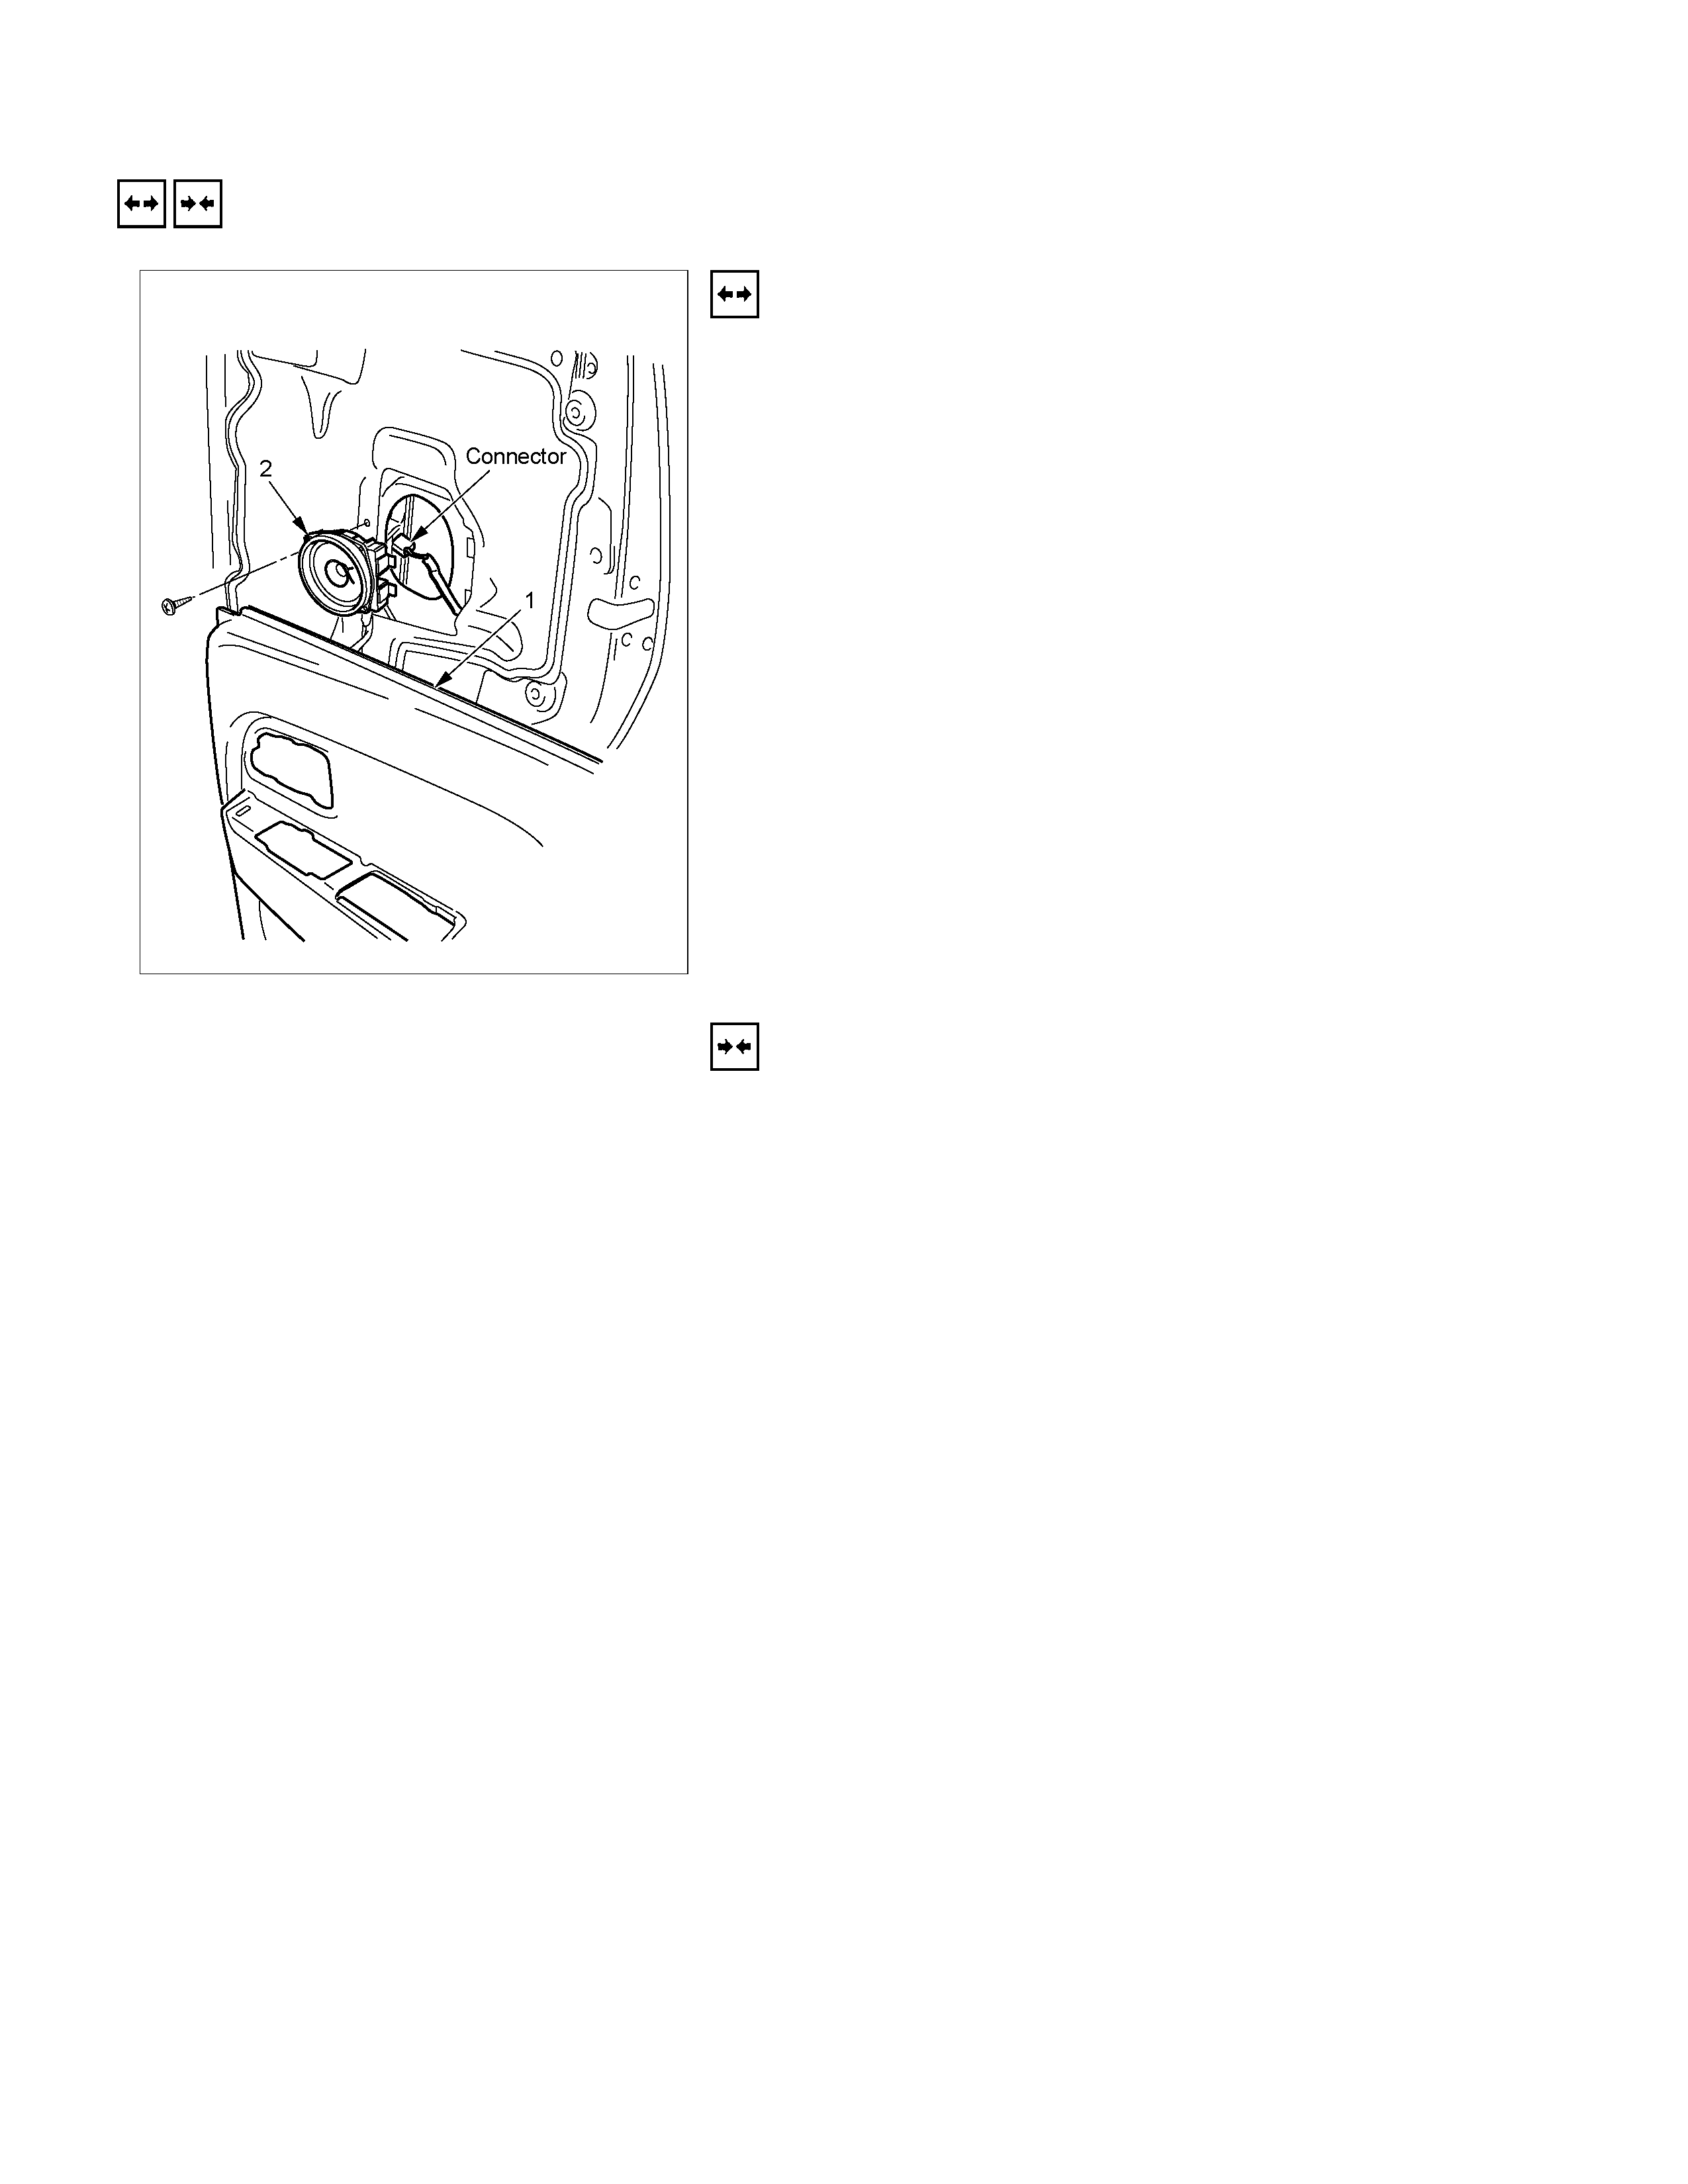
REAR SPEAKER (CREW CAB)
REMOVAL AND INSTALLATION
RTW390MH000101
Removal
1. Remove the Rear Door Trim Panel
• Refer to Section 2C “REAR DOOR ASSEMBLY” for doo
r
trim panel removal steps.
2. Remove the Rear Speaker
• Remove the screw.
• Disconnect the connector.
Installation
To install, follow the removal steps in the reverse order.
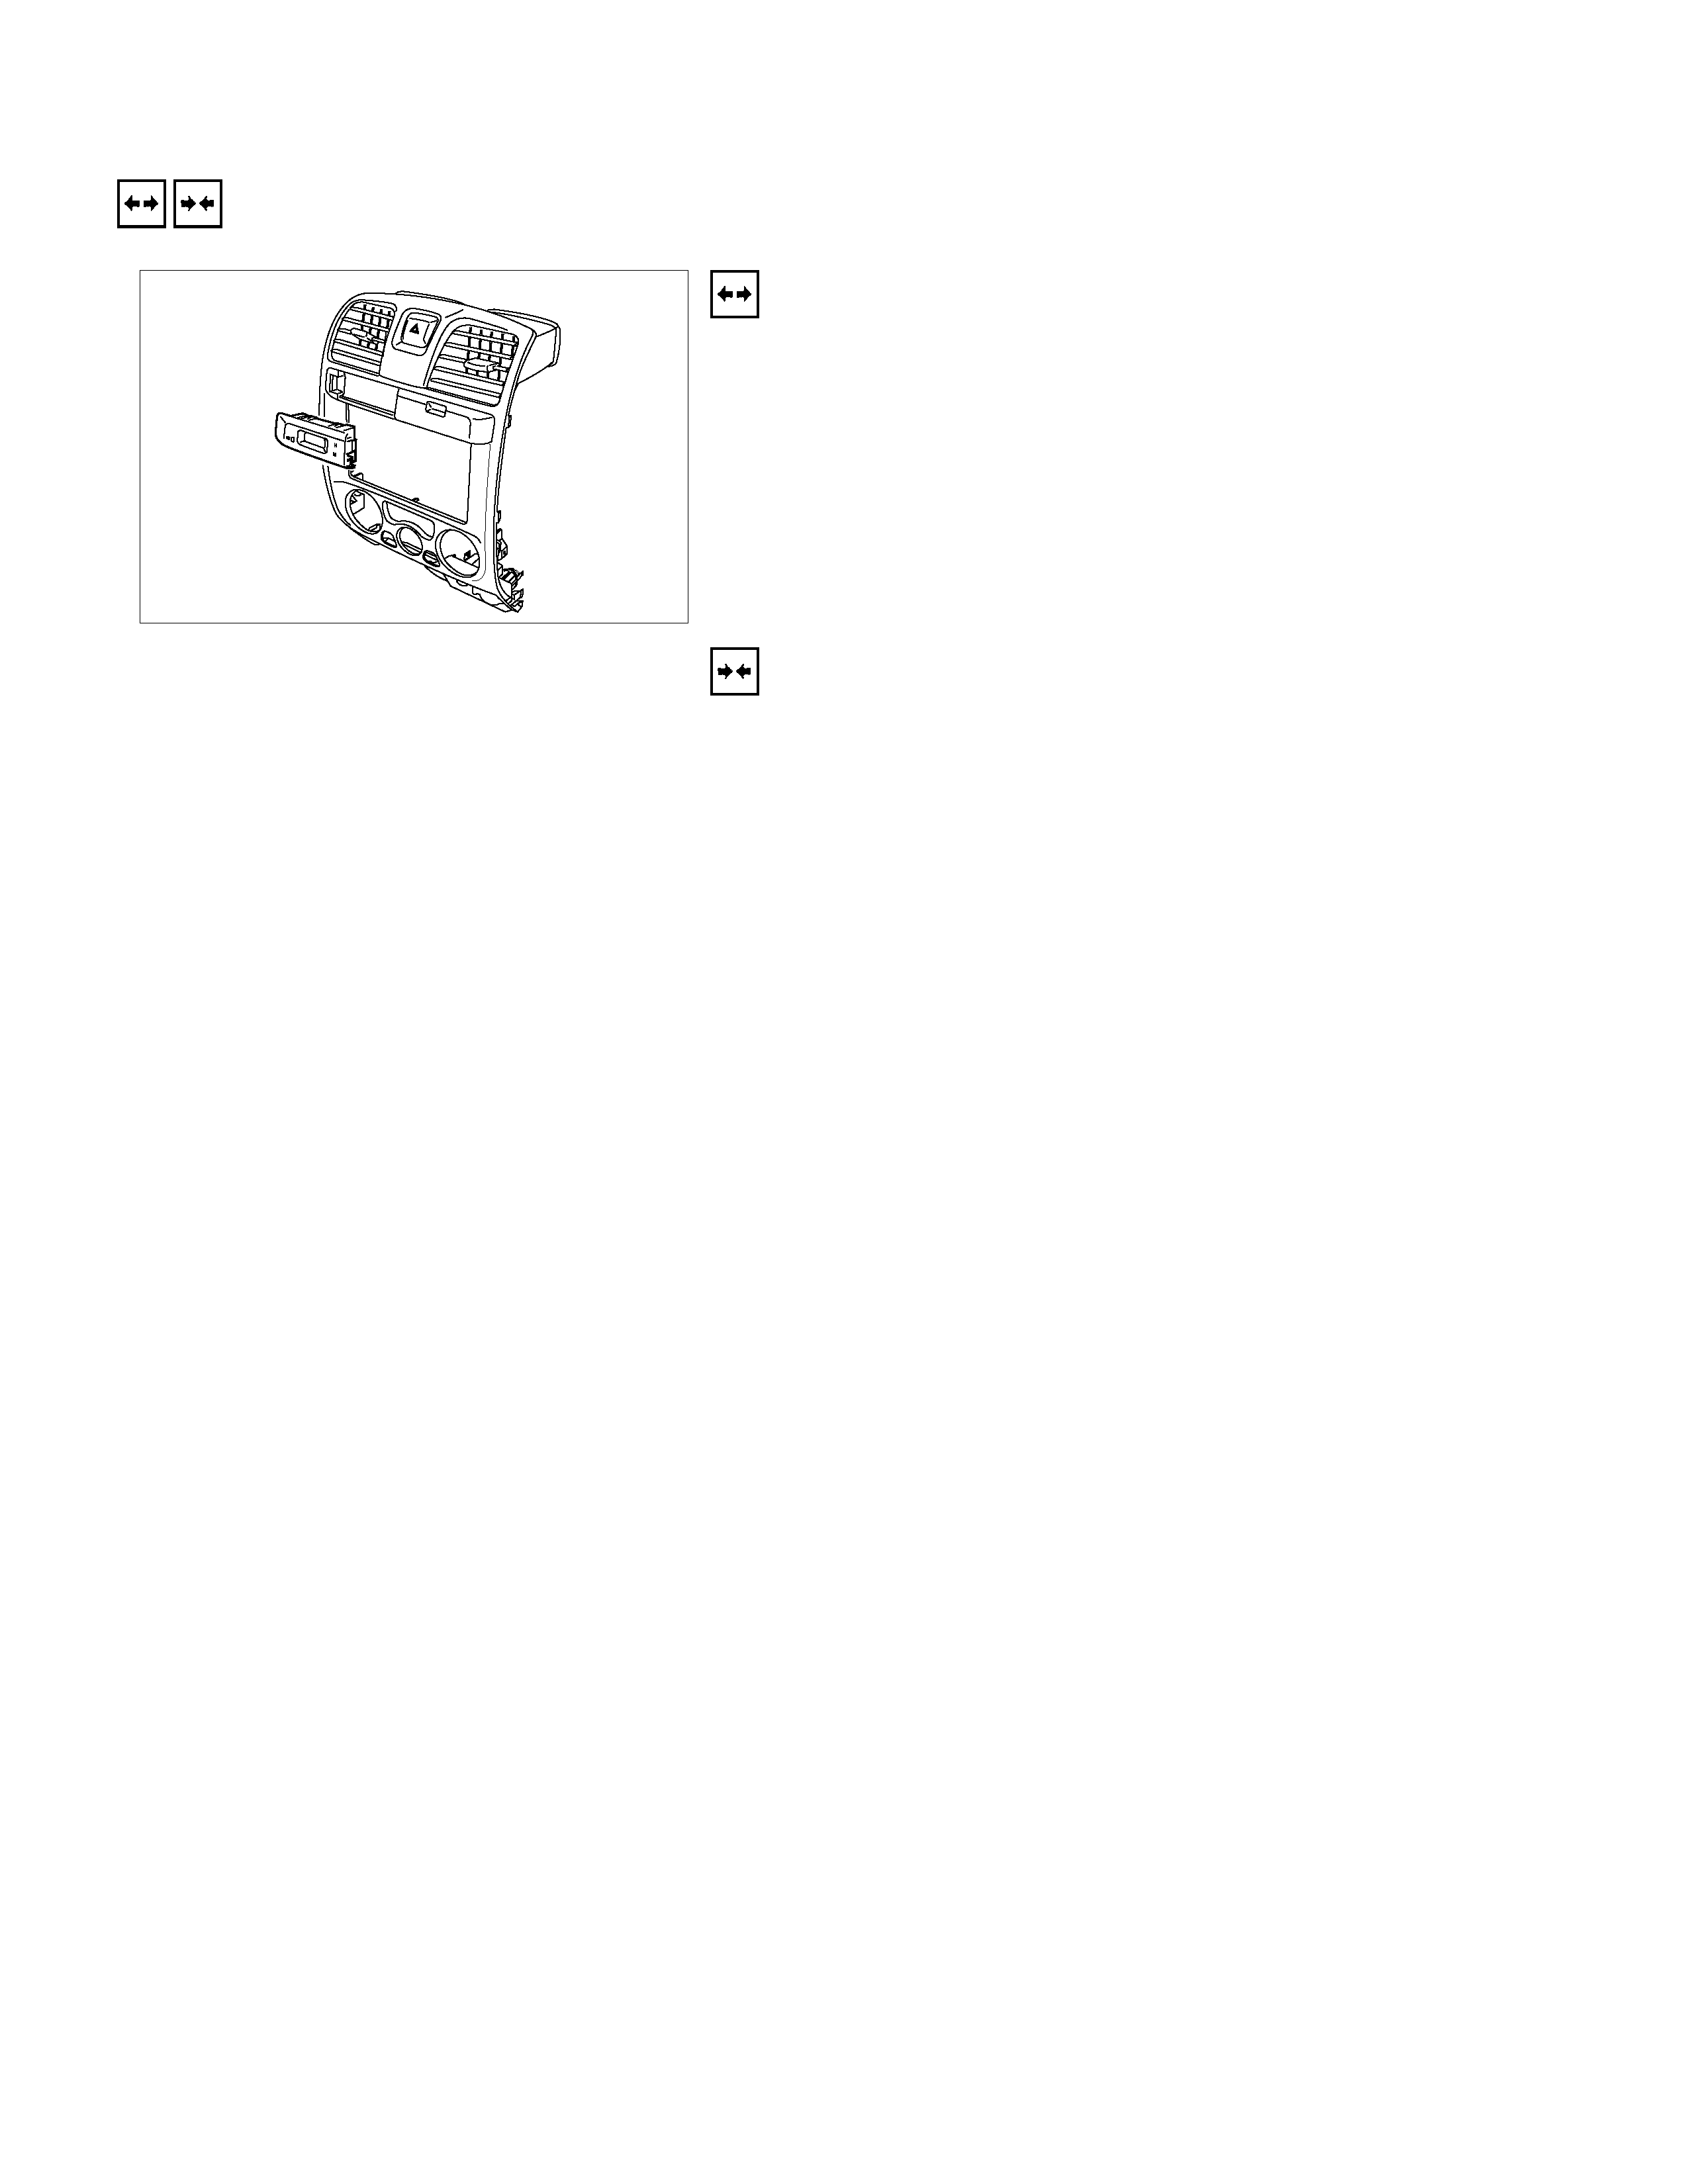
CLOCK
REMOVAL AND INSTALLATION
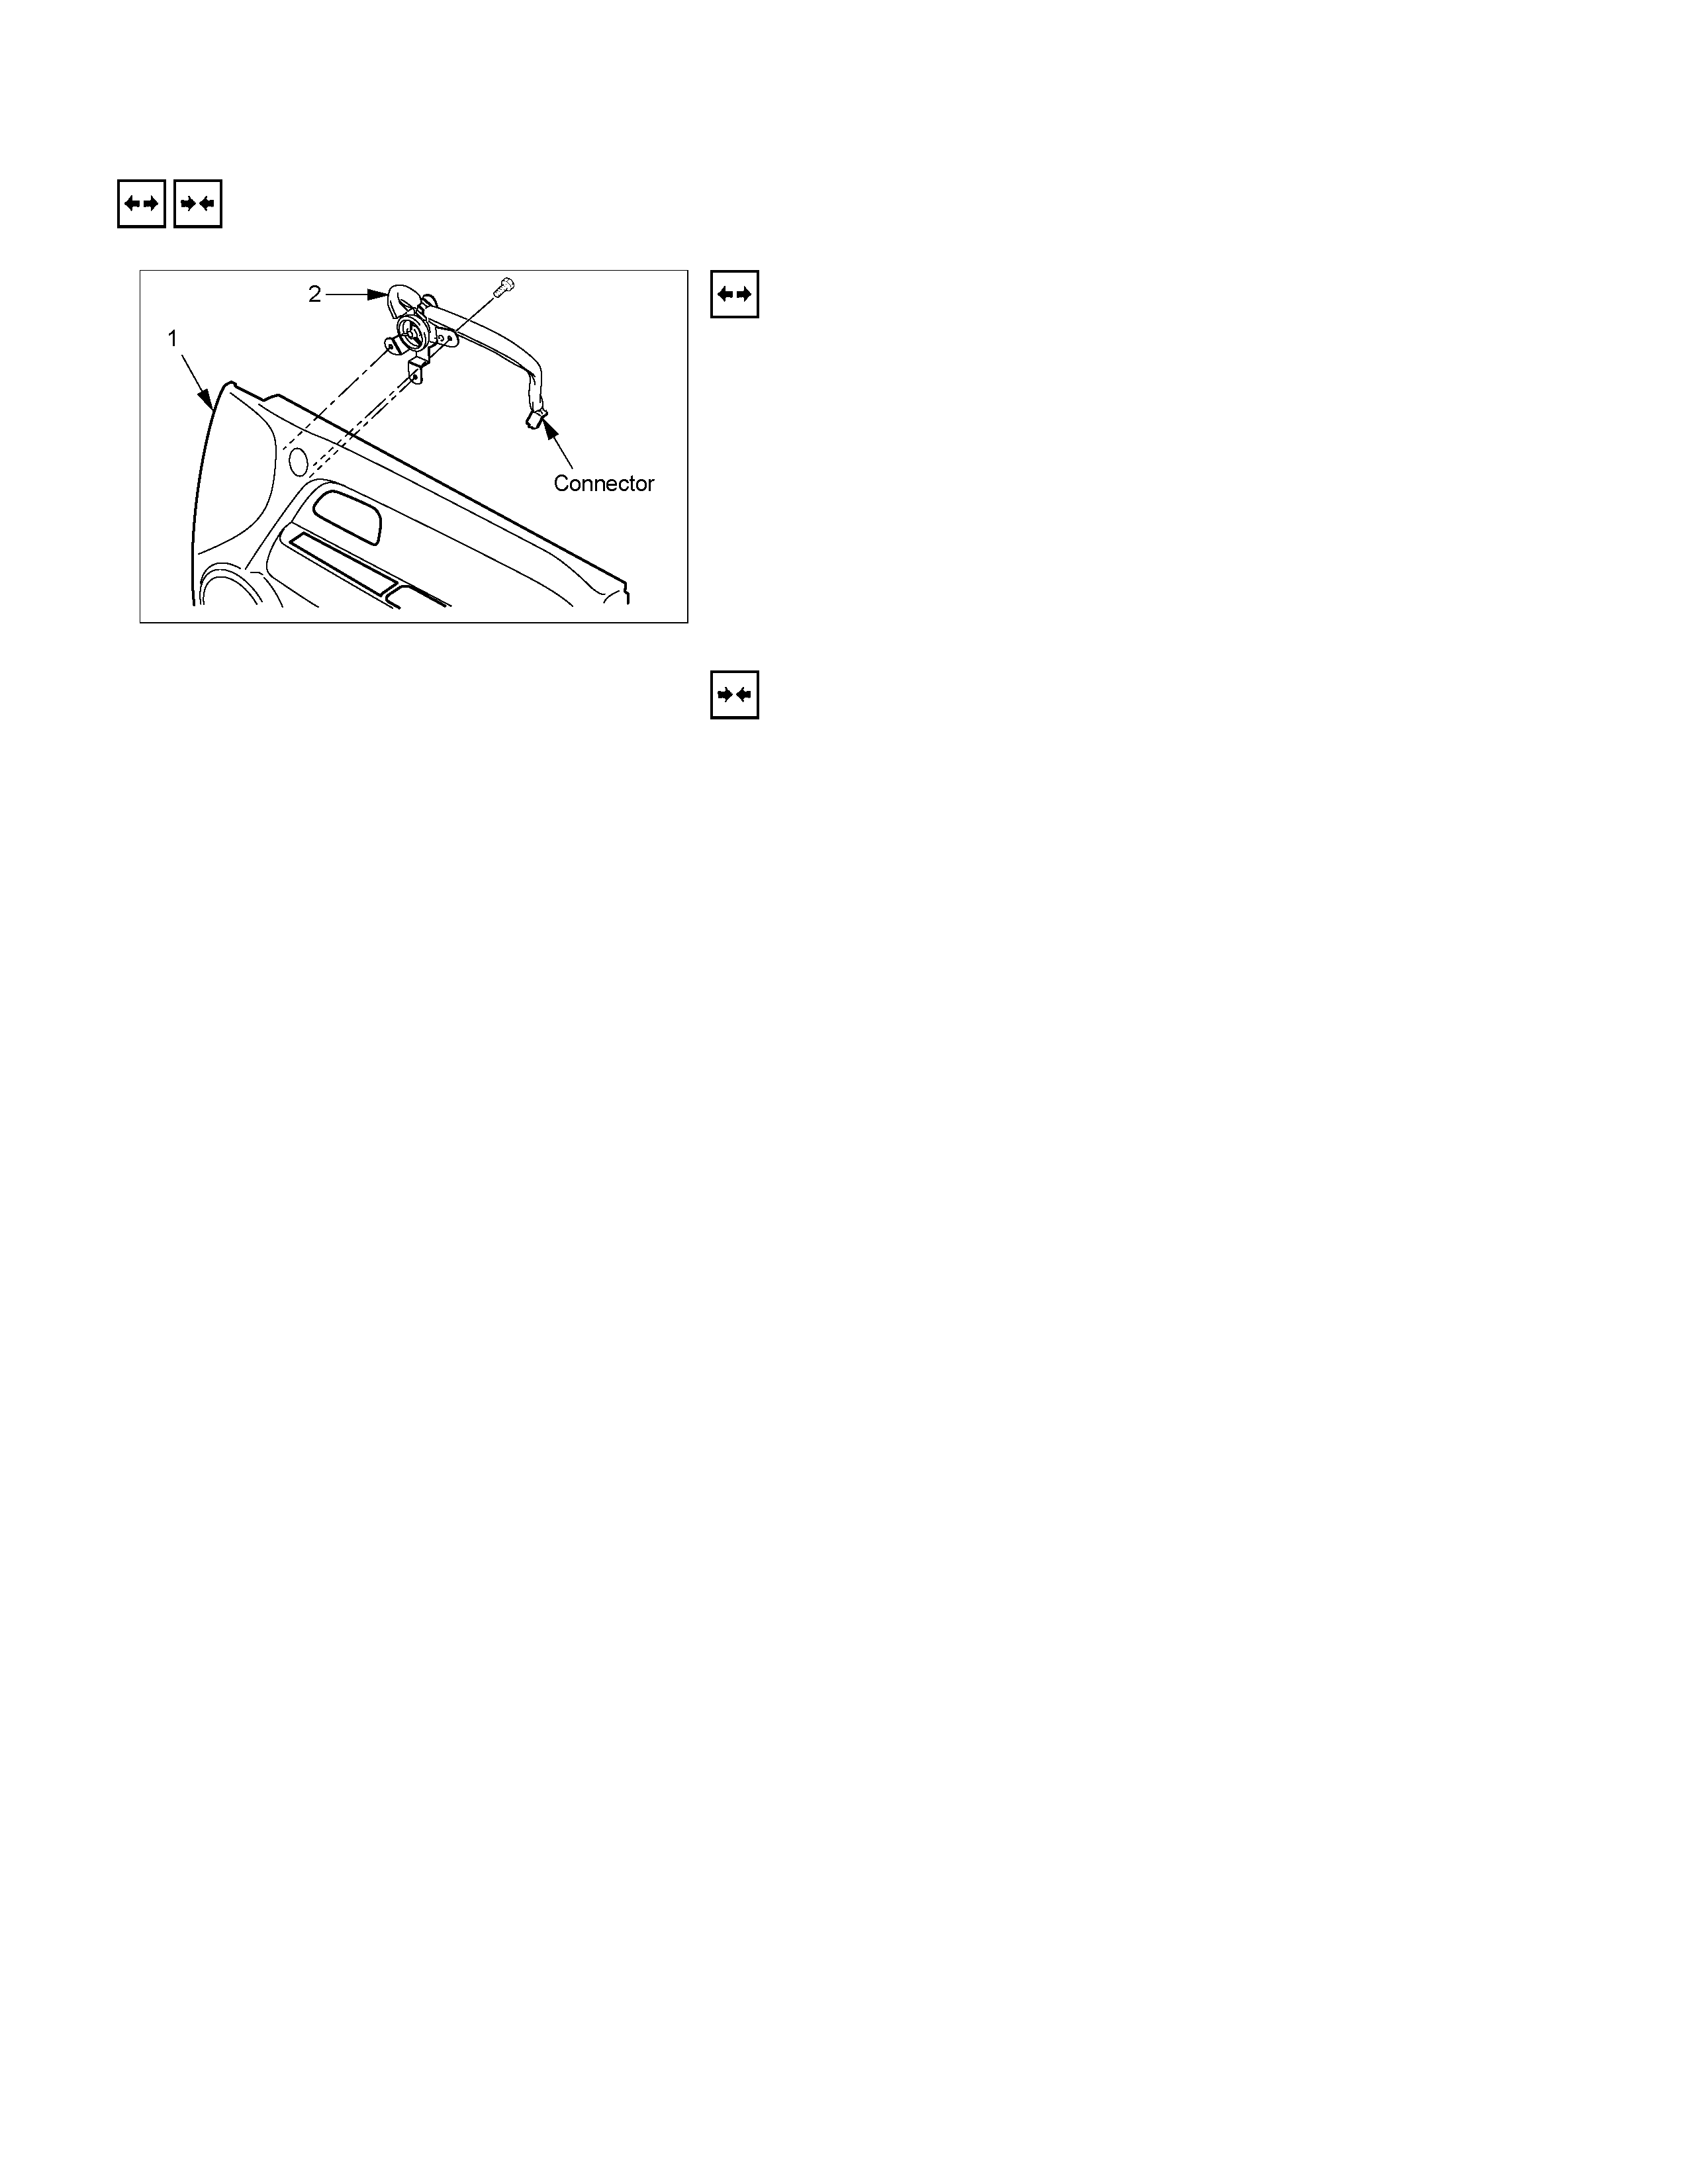
Removal
1. Remove the center cluster ASM
2. Disconnect the connector.
3. Remove the clock.
Installation
To install, follow the removal steps in the reverse order.
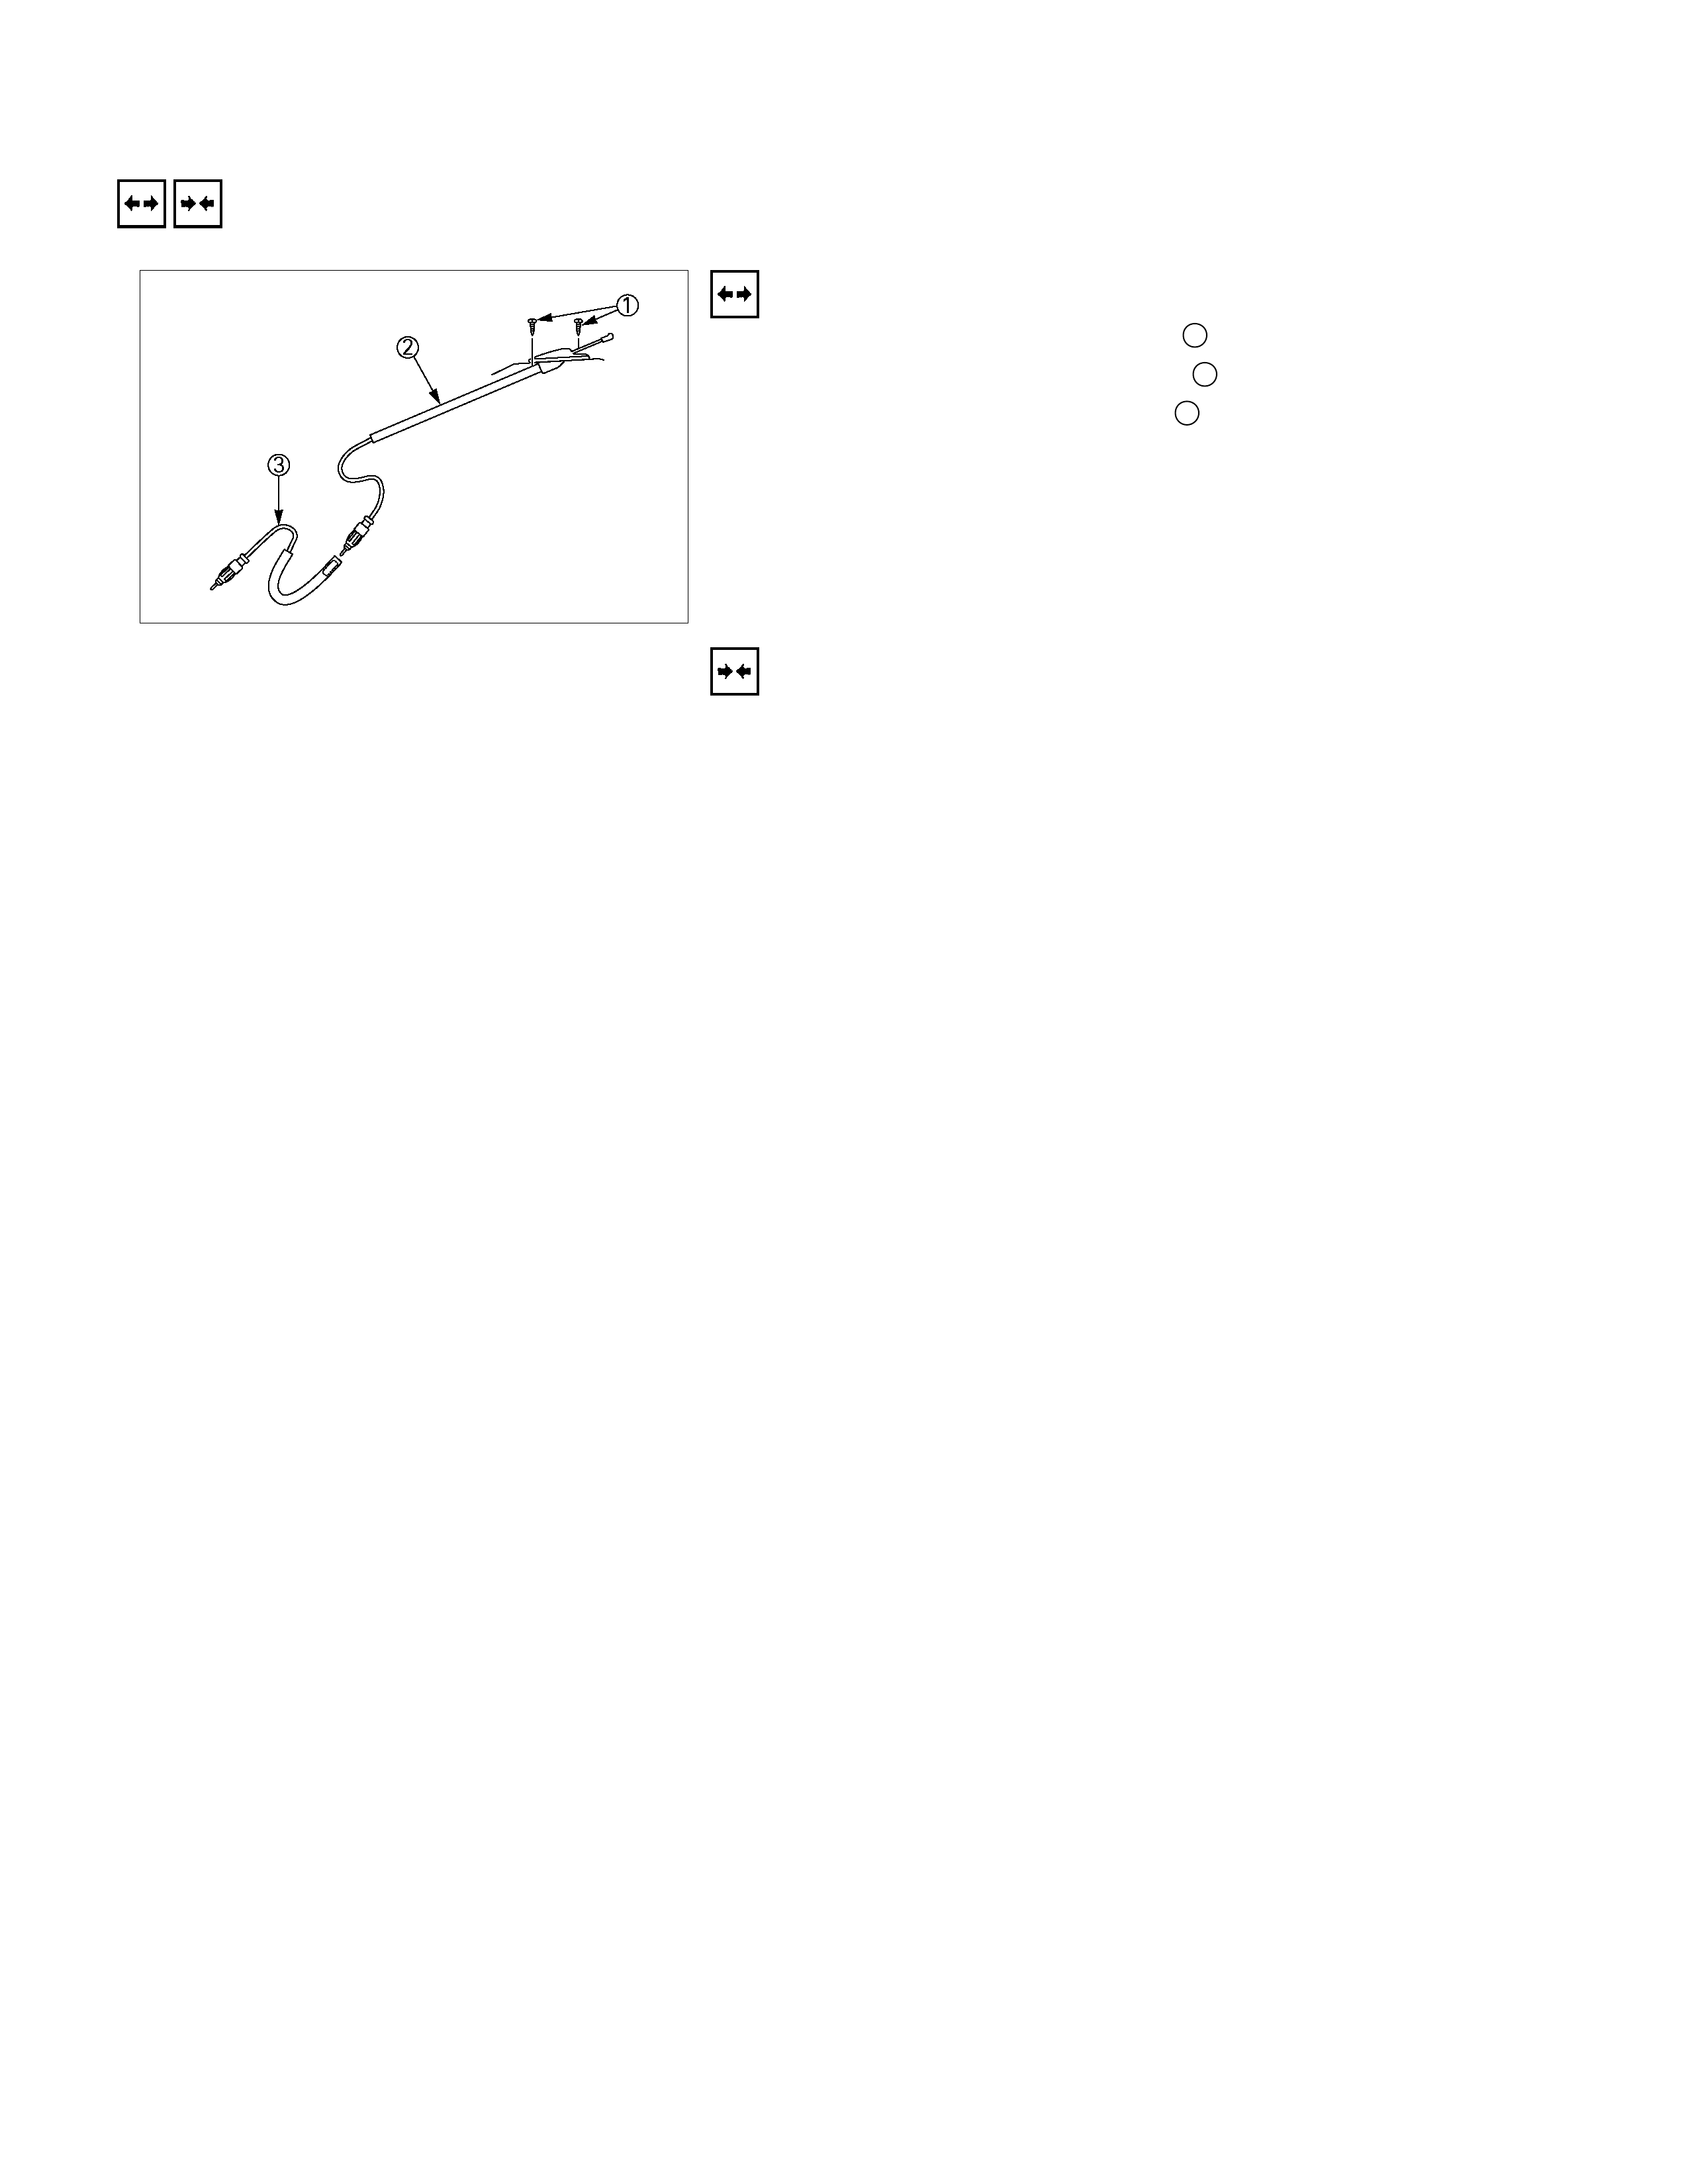
ANTENNA
REMOVAL AND INSTALLATION
Removal
1. Remove the antenna screw 1.
2. Disconnect the feeder cable 3 connector.
3. Remove the antenna cable 2.
4. Pull out antenna downward.
Remove and install the antenna as illustrated.
Antenna unit is located on the roof panel driver side.
To install, follow the removal steps in the reverse order.
Installation
To install, follow the removal steps in the reverse order.