
SECTION 1A6 - STATIONARY GLASS
IMPORTANT
Before performing any Service Operation or other procedure described in this Section, refer to Section
00 CAUTIONS AND NOTES for correct workshop practices with regard to safety and/or property damage.
1. GENERAL DESCRIPTI ON
Stationary glass on V2 Series Models is bonded to the body openings with the exception of the quarter window,
which is secured with plastic nuts.
The windshield, which is laminated and f eatur es a tinted upper band, is bonded in the body opening with urethane and
has been revised to accommodate the increased A-pillar rake angle in V2 Series Models.
The rear window, which includes an electric ally heated demist fac ility and diversity antenna, is also bonded in the body
opening with urethane and has been revised to suit the coupe body sty le.
Toughened safety glass is used for all the windows except the windshield.
For replacement of urethane bonded glasses, urethane service kits have been developed and must be used to
ma intain original installation requirements . Glass installed with urethane requir es either partial or com plete rem oval of
the urethane when replacing the glass.
Two diff e rent ins tallation methods ar e us ed when replacing the windshield or r ear window, a ‘short m ethod’ and a ‘long
method’. Partial removal of the urethane is referred to as the ‘short method’. Complete removal of the urethane is
known as the ‘long method’.
The short method is used where original urethane left on body opening pinch weld flanges after glass removal can
serve as a base for the new glass.
This method would be used in cases of replacement of cracked windshields or removal of glass that is intact. The
amount of urethane left in the glass opening can be controlled during glass rem oval, leaving the maxim um amount of
original urethane intact on the body opening flange.
The long method is to be used when the original urethane left in the window opening, after glass removal, cannot
serve as a base for replacement glass. This method would be used in cases needing metal work or where paint
refinishing is required in the body opening, or in cases where the glass has been previously replaced using the short
method. In such instances, the build up of urethane could pos ition the glass too high in the body opening. In these
cases, the original urethane is completely removed and replaced with new urethane during glass installation.
Techline
Techline

2. SERVICE NOTES
CAUTION: Safety glasses and work gloves must be worn at all times when operating with glass.
Skinning ( partial curing) of the urethane c omm ences after ex posure to the atmos phere. At 23 degrees Celsius and
50 percent relative humidity, skinning commences after 30 minutes. Complete curing of the urethane at this
temperature and humidity takes 72 hours.
Urethane service kits are available from most windshield agents. Manufacturer’s instructions should always be
followed.
Window glass should be installed in the window opening within 5 minutes of the application of urethane.

3. SERVICE OPERATIONS
3.1 WINDSHIELD GLASS
All service information for the windshield glass fitted to V2 Series Models carries over from VT Series II Models.
For information relating to service operations for the windshield glass, refer to 3.1 WINDSHIELD GLASS – ALL
MODELS, in Section 1A6 STATIONARY GLASS of the VT Series II Service Information.

3.2 BACK WINDOW
All service information for the back window fitted to V2 Series Models carries over from VT Series II Models.
For information relating to service operations for the back window, refer to 3.4 BACK WINDOW – SEDANS, in
Section 1A6 STATIONARY GLASS of the VT Series II Service Information.
3.3 REAR QUARTER WINDOW
REMOVE
1. Remove the B-pillar moulding. Refer to
Section 1A9 EXTERIOR ORNAMENTATION in
this Service Information.
2. Remove the rear quarter trim, refer to
2.4 REAR QUARTER TRIM in Section 1A8
HEADLINING AND REAR END TRIM of this
Service Information.
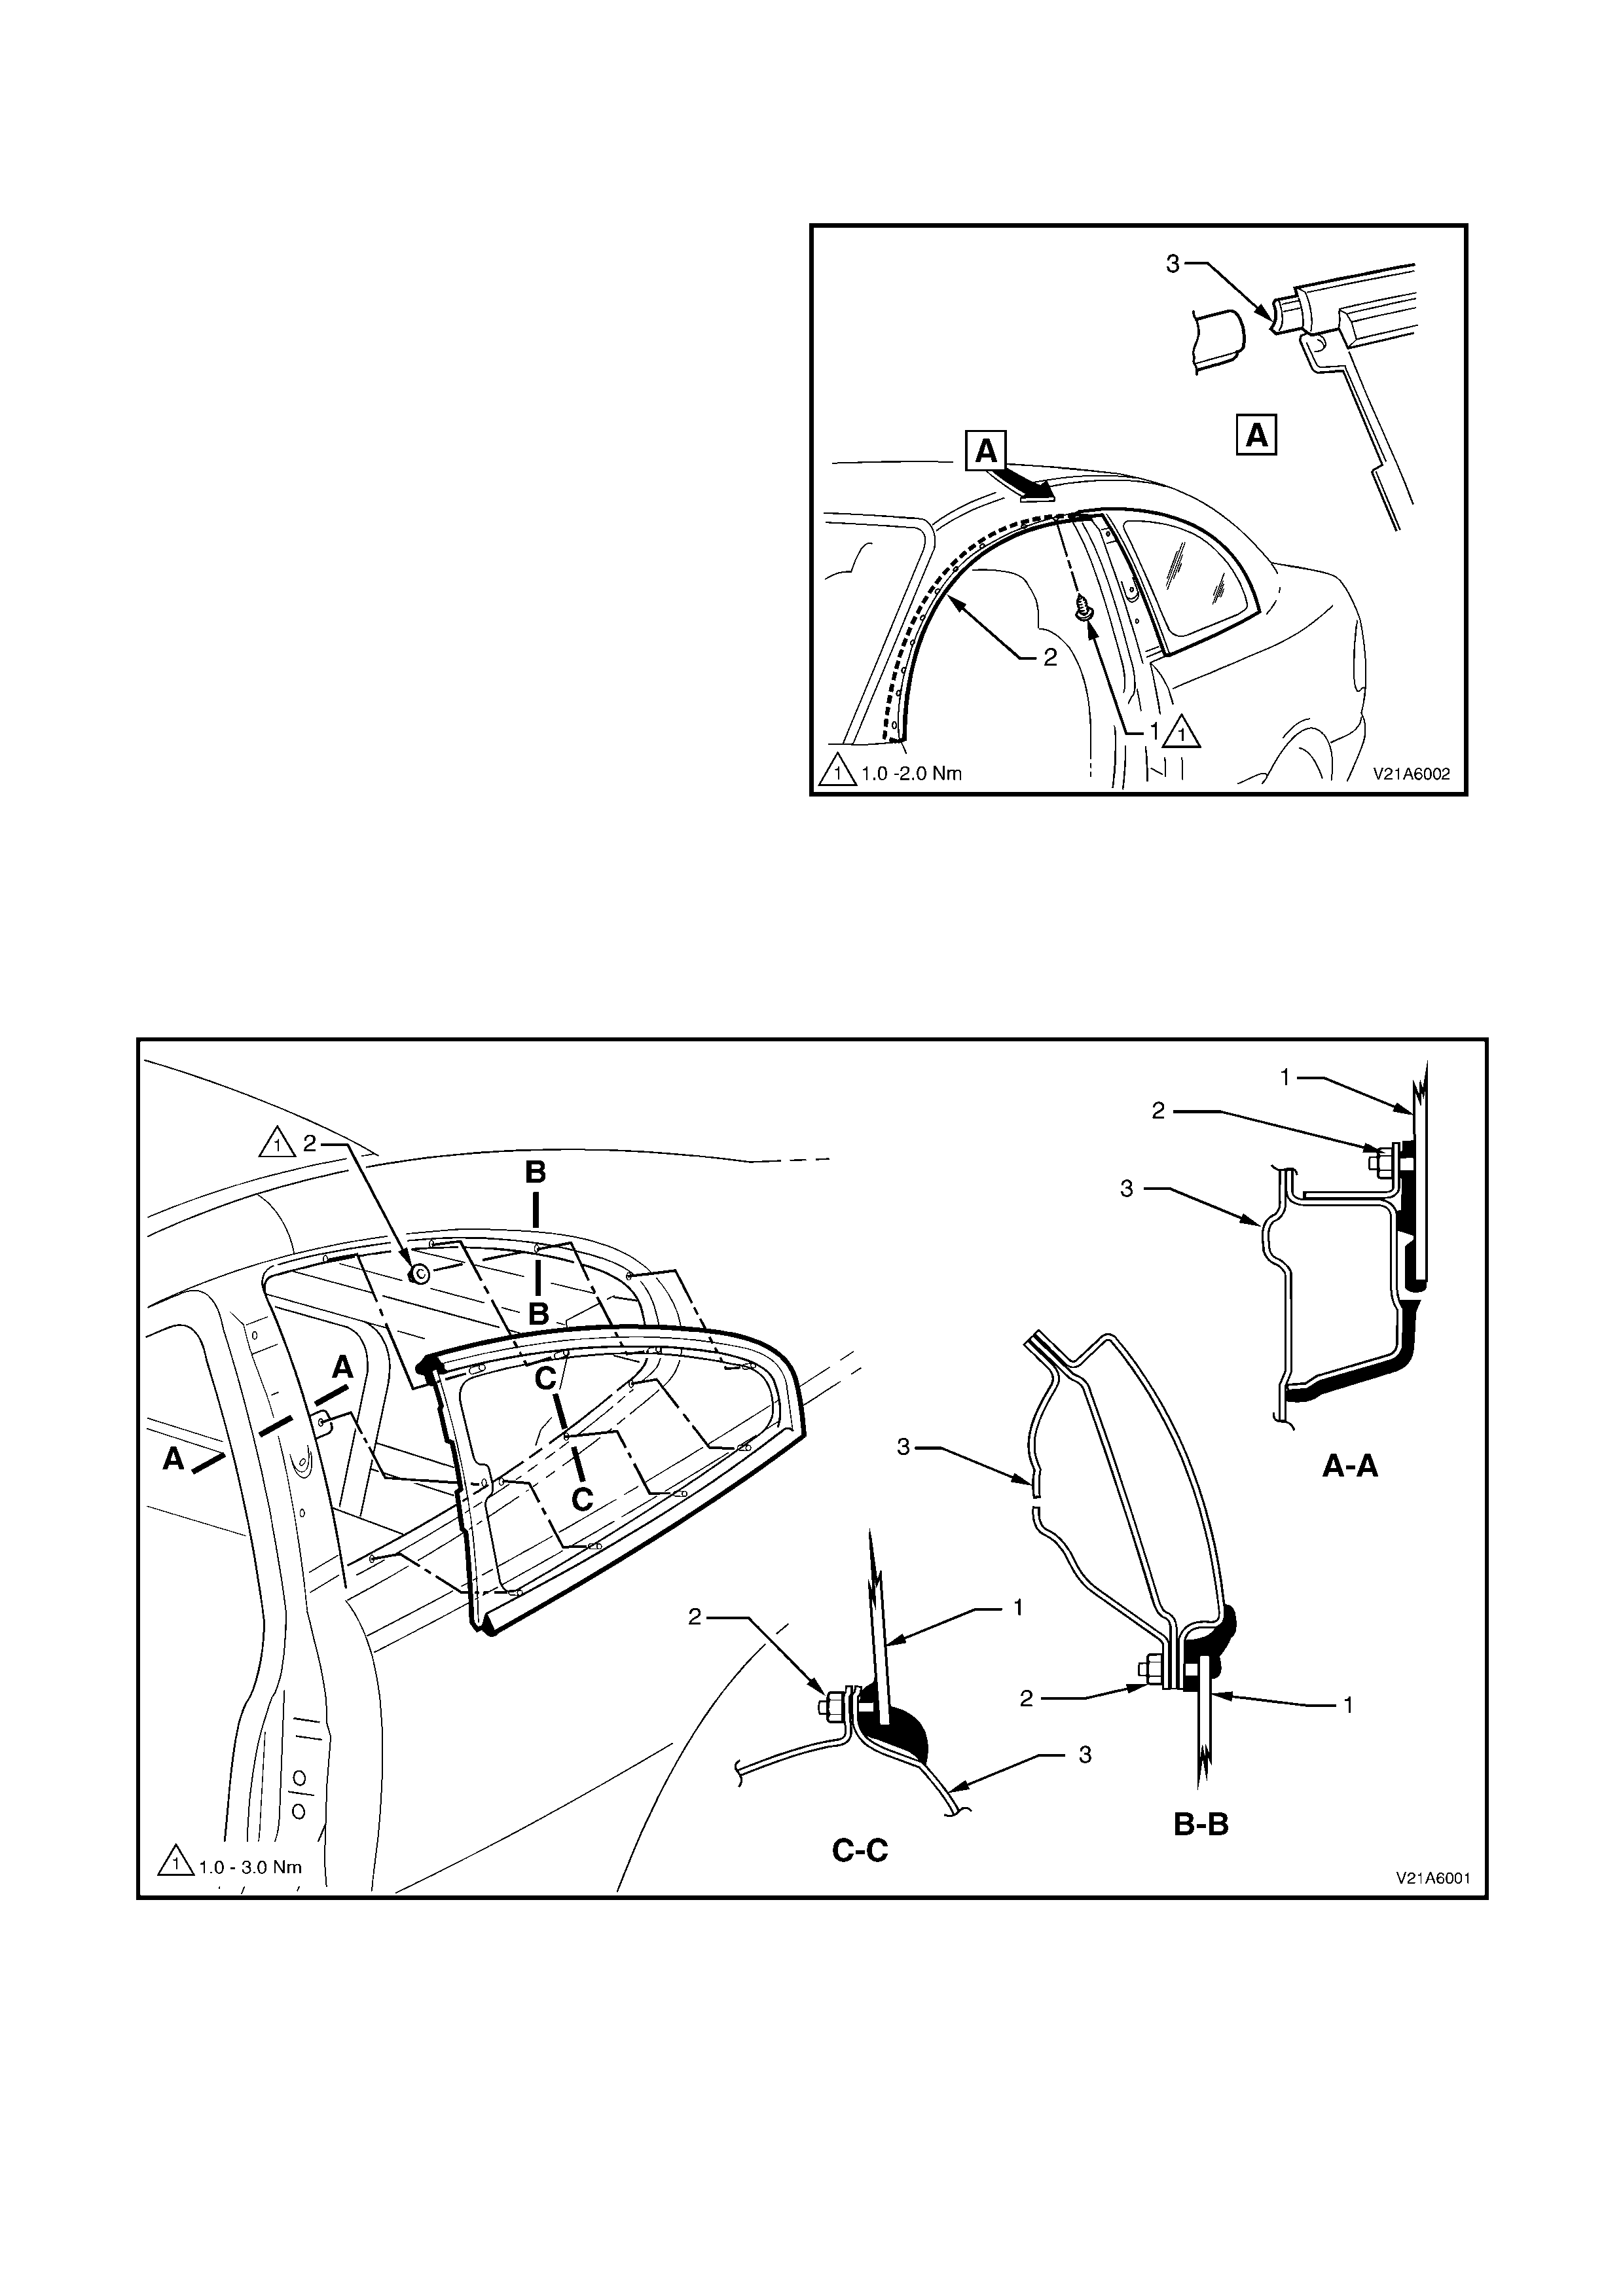
3. Remove the rear screw (1) of the door frame
opening moulding (2) and pry the moulding away
from the door frame slightly.
4. Remove the B-pillar trim assembly, refer to
2.5 B-PILLAR TRIM in Section 1A8 HEADLINING
AND REAR END TRIM of this Service Information.
5. Remove the C-pillar trim assembly. Refer to
2.7 C-PILLAR TRIM in Section 1A8 HEADLINING
AND REAR END TRIM of this Service Information.
6. Remove the nine metal nuts securing the window
to the opening in the rear quarter sheetmetal and
caref ully lift the rear quarter glas s f rom the vehicle,
taking care not to damage the rubber tab (3) that
engages into the rear of the door frame opening
moulding.
CAUTION: Take care when removing the rear quarter
window from the body opening, that the attaching
studs are clear of the outer body.
Figure 1A6-1
Figure 1A6-2
Legend
1. Rear quarter window 3. Rear quarter panel
2. Rear window to body attaching nut (9 places) NOTE: Sections A-A, B-B and C-C show installed condition

REINSTALL
The reinstallation pr ocedure f or the rear quarter window as fitted to V2 Ser ies Models is the rever se of the rem oval
procedure, ensuring to tighten all fasteners to the correct torque specification.
REAR QUARTER WINDOW
ATTCHING NUT 1 – 3 Nm
TORQUE SPECIFICATION
NOTE: The metal nuts securing the rear quarter window will be damaged during removal and must be discarded.
New nuts must be used whenever the rear quarter window is removed to ensure a water-tight seal.


4. TORQUE WRENCH SPECIFICATIONS
Nm
Rear Quarter Window Plastic Attaching Nuts.......................1 - 3