
SECTION 1A8 - HEADLINING AND REAR END TRIM
CAUTION:
This vehicle will be equipped with a Supplemental Restraint System (SRS). A SRS will
consist of either seat belt pre-tensio ners and a driver’s side air bag , or seat belt pre-
tensioners and a driver’s and front passenger’s side air bags. Refer to CAUTIONS,
Section 12M, before performing any service operation on or around SRS
components, the steering mechanism or wiring. Failure to follow the CAUTIONS
could result in SRS deplo yment, resulting in possible p ersonal injury or unnecessary
SRS system repairs.
CAUTION:
This vehicle may be equipped with LPG (Liquefied Petroleum Gas). In the interests of
safety, the LPG fuel system should be isolated by turning 'OFF' the manual service
valve and then draining the LPG serv ice lines, before any service w ork is carried out
on the vehicle. Refer to the LPG leaflet included with the Owner's Handbook for
details or LPG Section 2 for more specific servicing information.
1. GENERAL DESCRIPTI ON
The headlining is a one-piece moulded trim and is of the same design for all model levels.
NOTE:
Clean hands are essential when working on the body interior trim. figures 1A8-1 and 1A8-2 show the interior
trim components for vt series sedans and wagons.
Figure 1A8-1
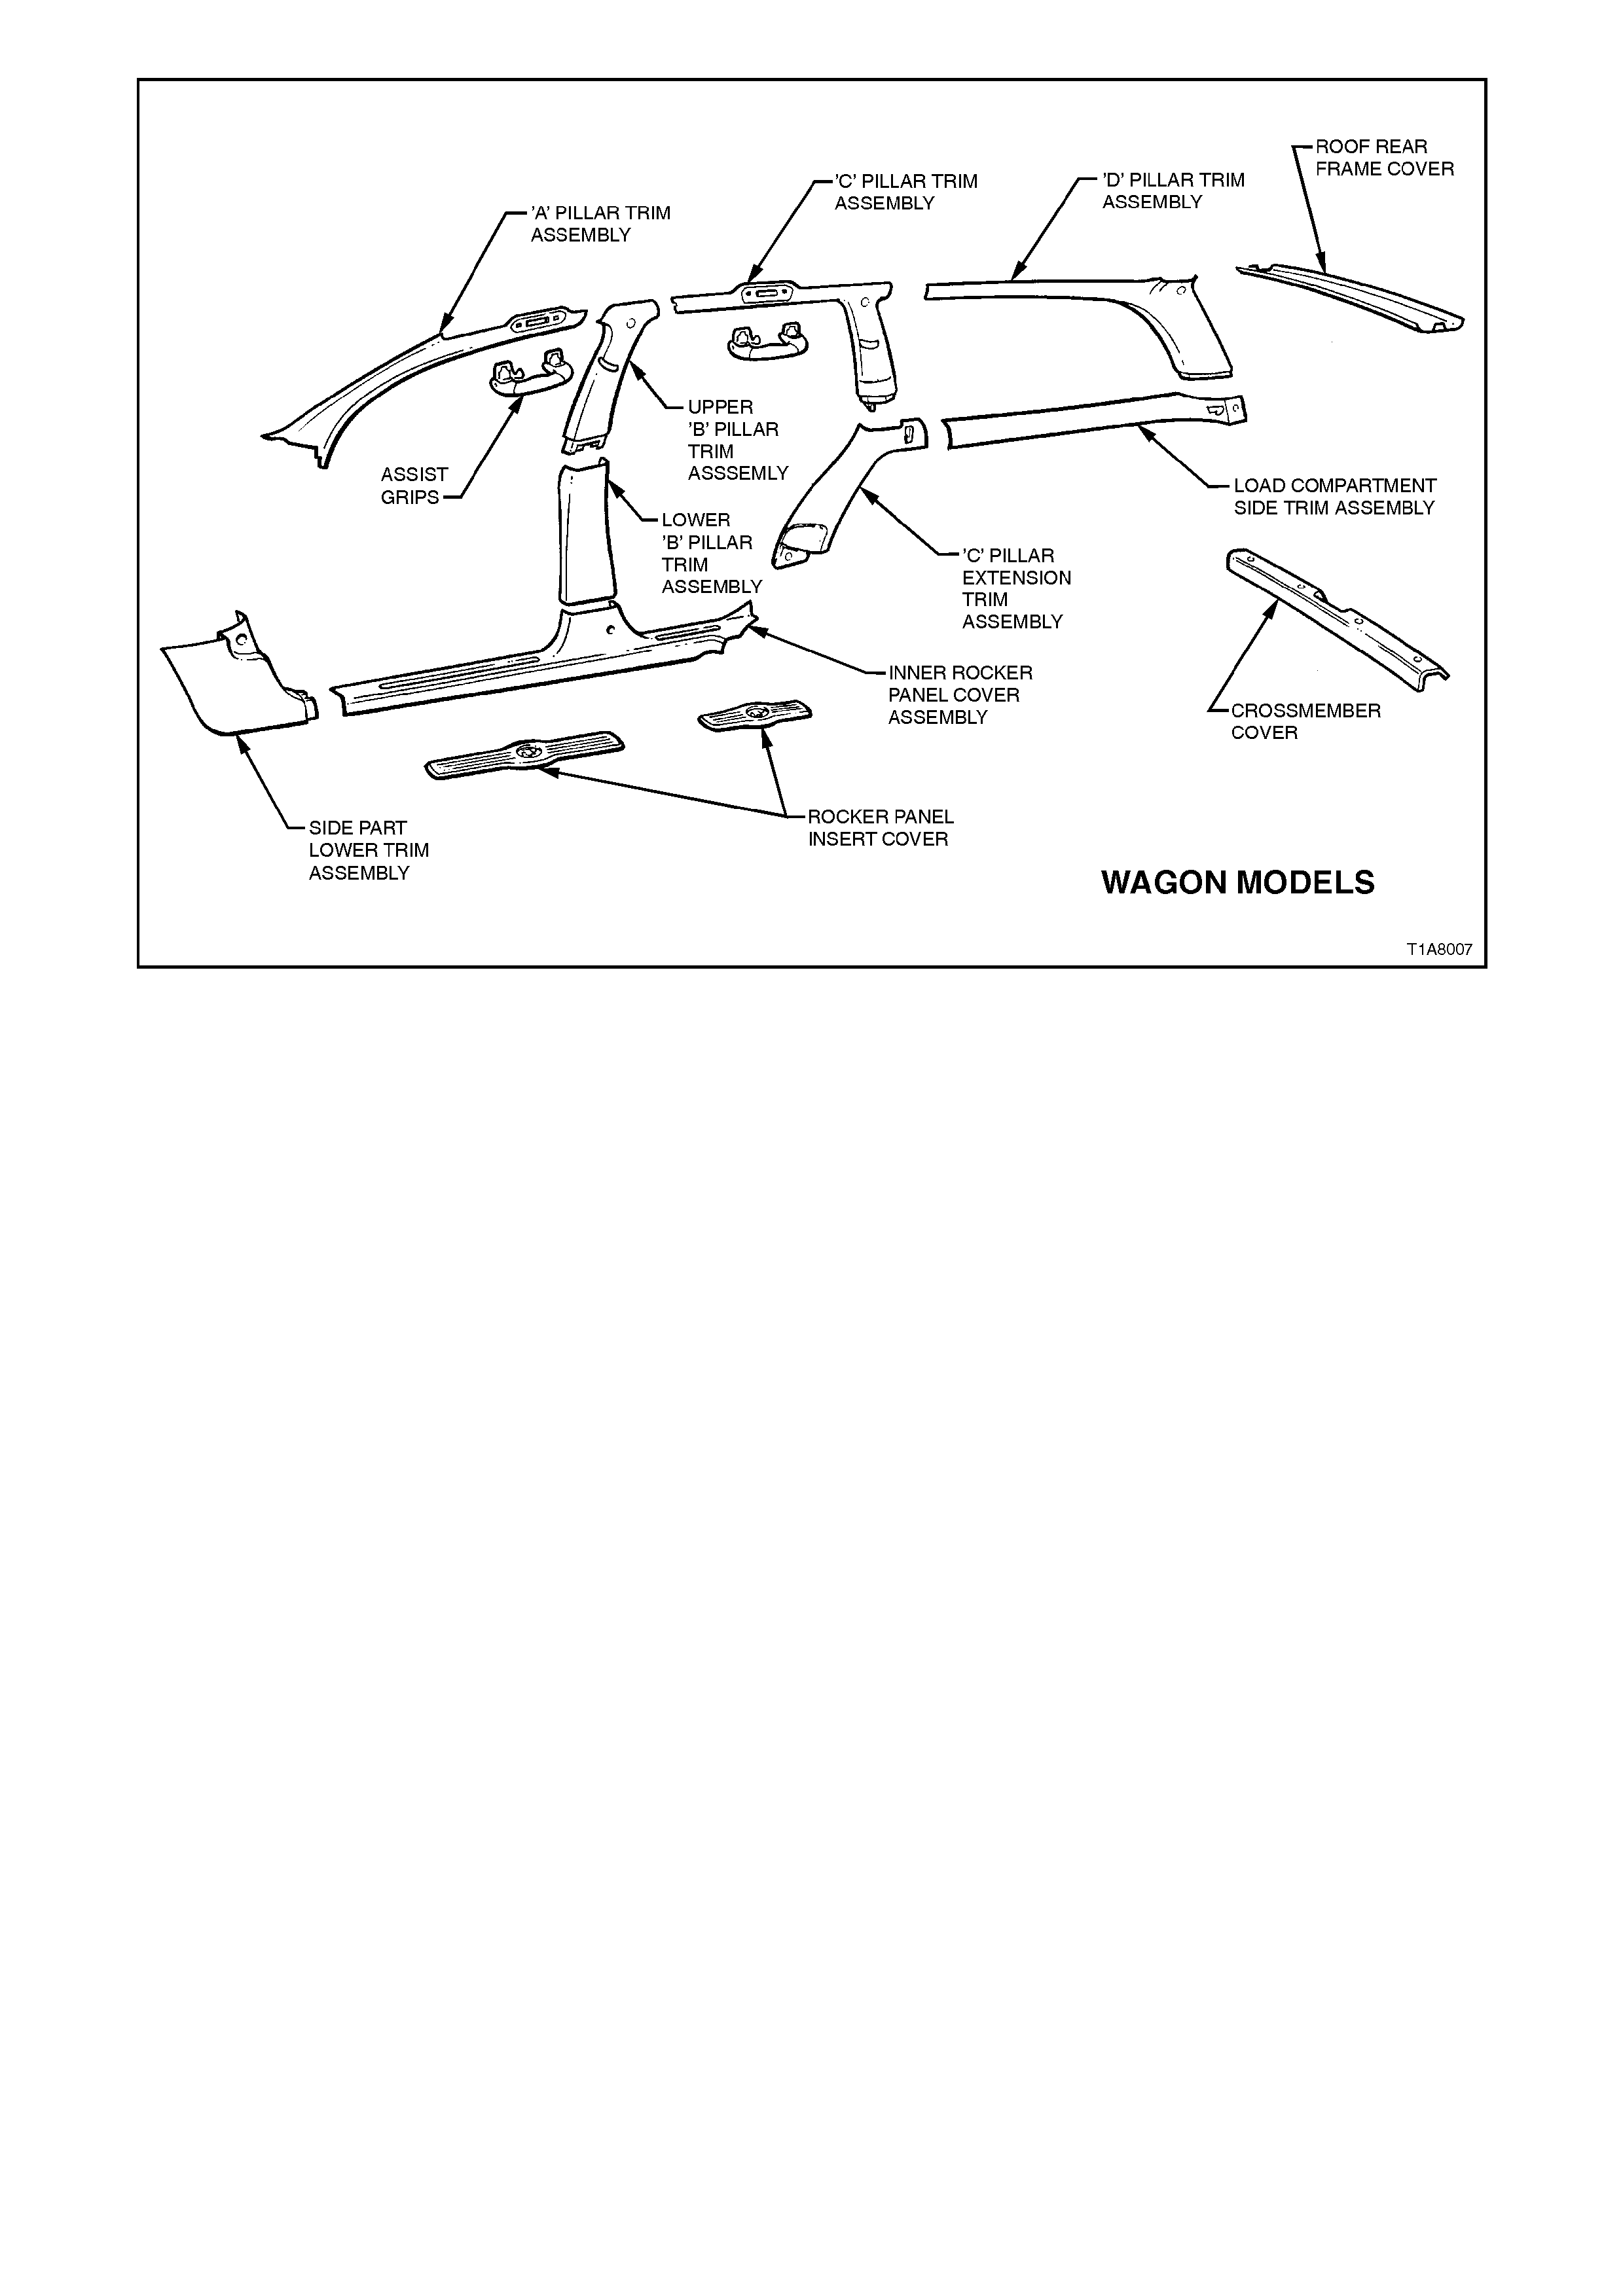
Figure 1A8-2

2. SERVICE OPERATIONS
2.1 HEADLINING ASSEMBLY - SEDAN AND STATION WAGON MODELS
REMOVE
1. Move both front seat backs to the reclined
position and place protective covering over
interior trim.
2. Disconnect battery ground cable.
3. Remove the interior sun visors and assist
grips.
Figure 1A8-3
NOTE:
Where fitted the illuminated vanity mirrors can be
assisted from their position in the sun visor by
exerting pressure on the rear of the visor.
4. Unclip wiring harness to illuminated vanity
mirrors if fitted.
Figure 1A8-4
Techline
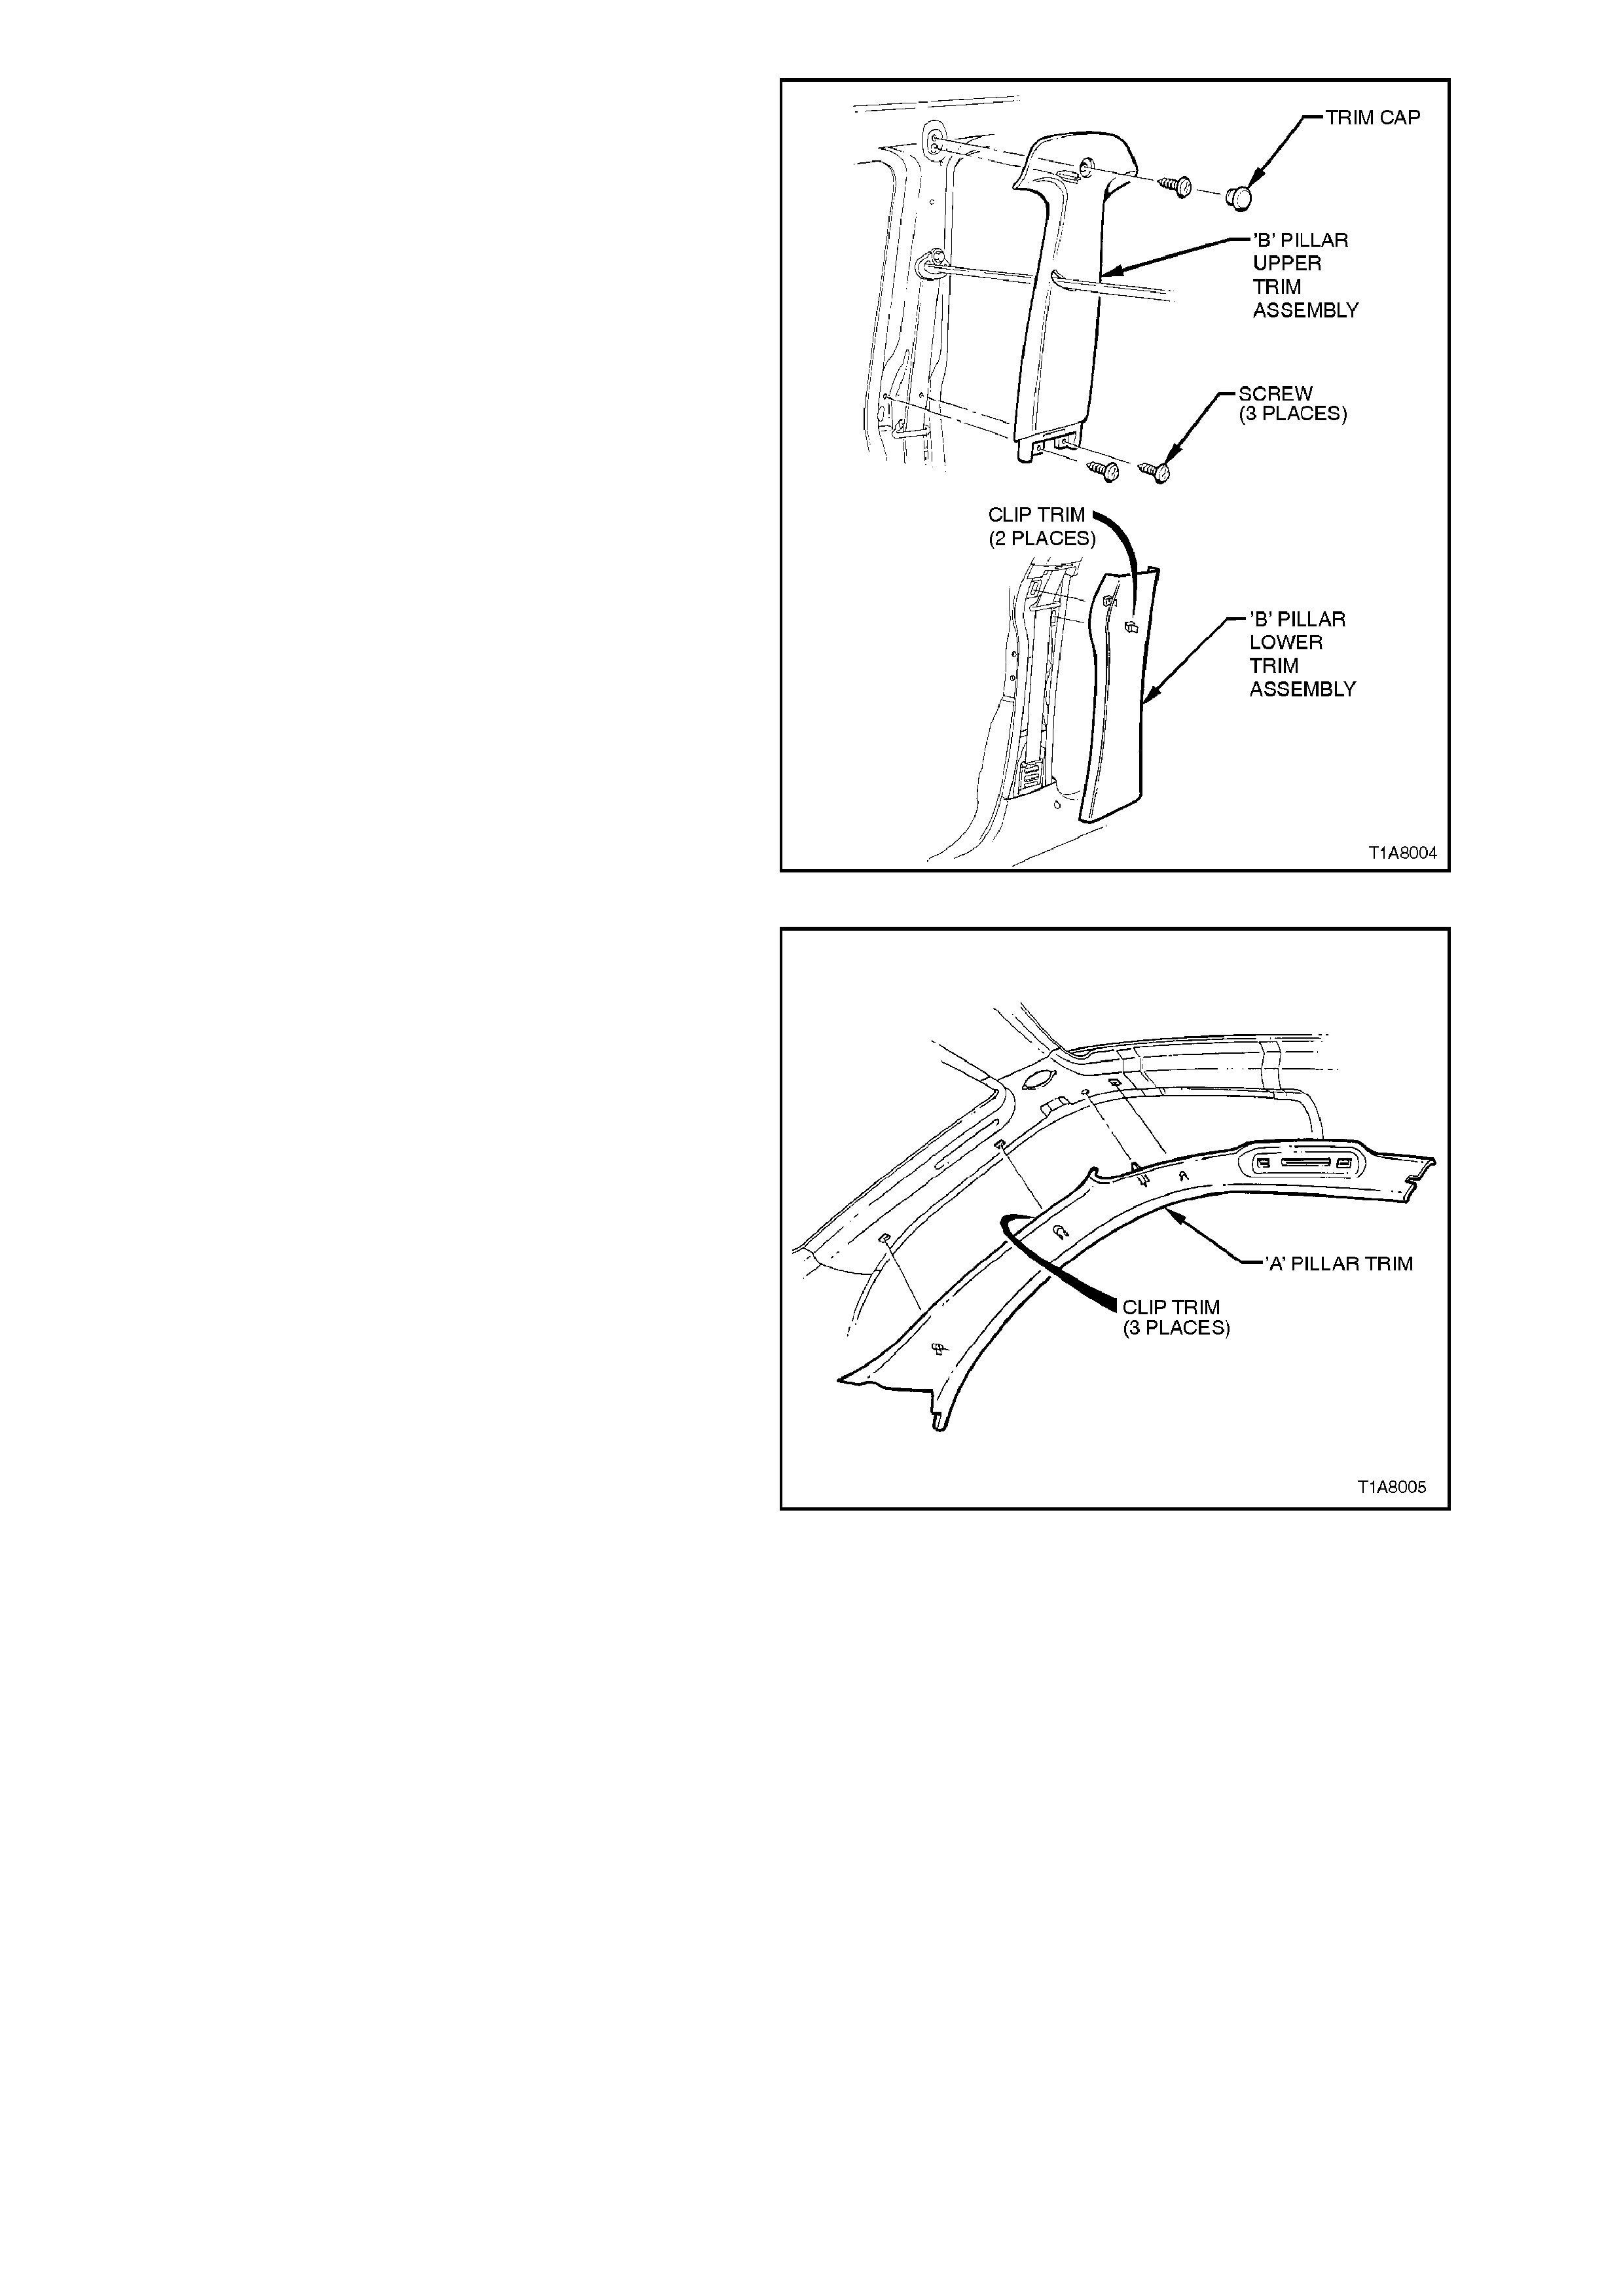
5. Unclip lower ‘B’ pillar trim and remove.
Remove screws securing upper ‘B’ pillar trim
and remove upper ‘B’ pillar trim.
Figure 1A8-5
6. Release three c lips attaching ‘A’ pillar tr im and
remove ‘A’ pillar trim.
Figure 1A8-6
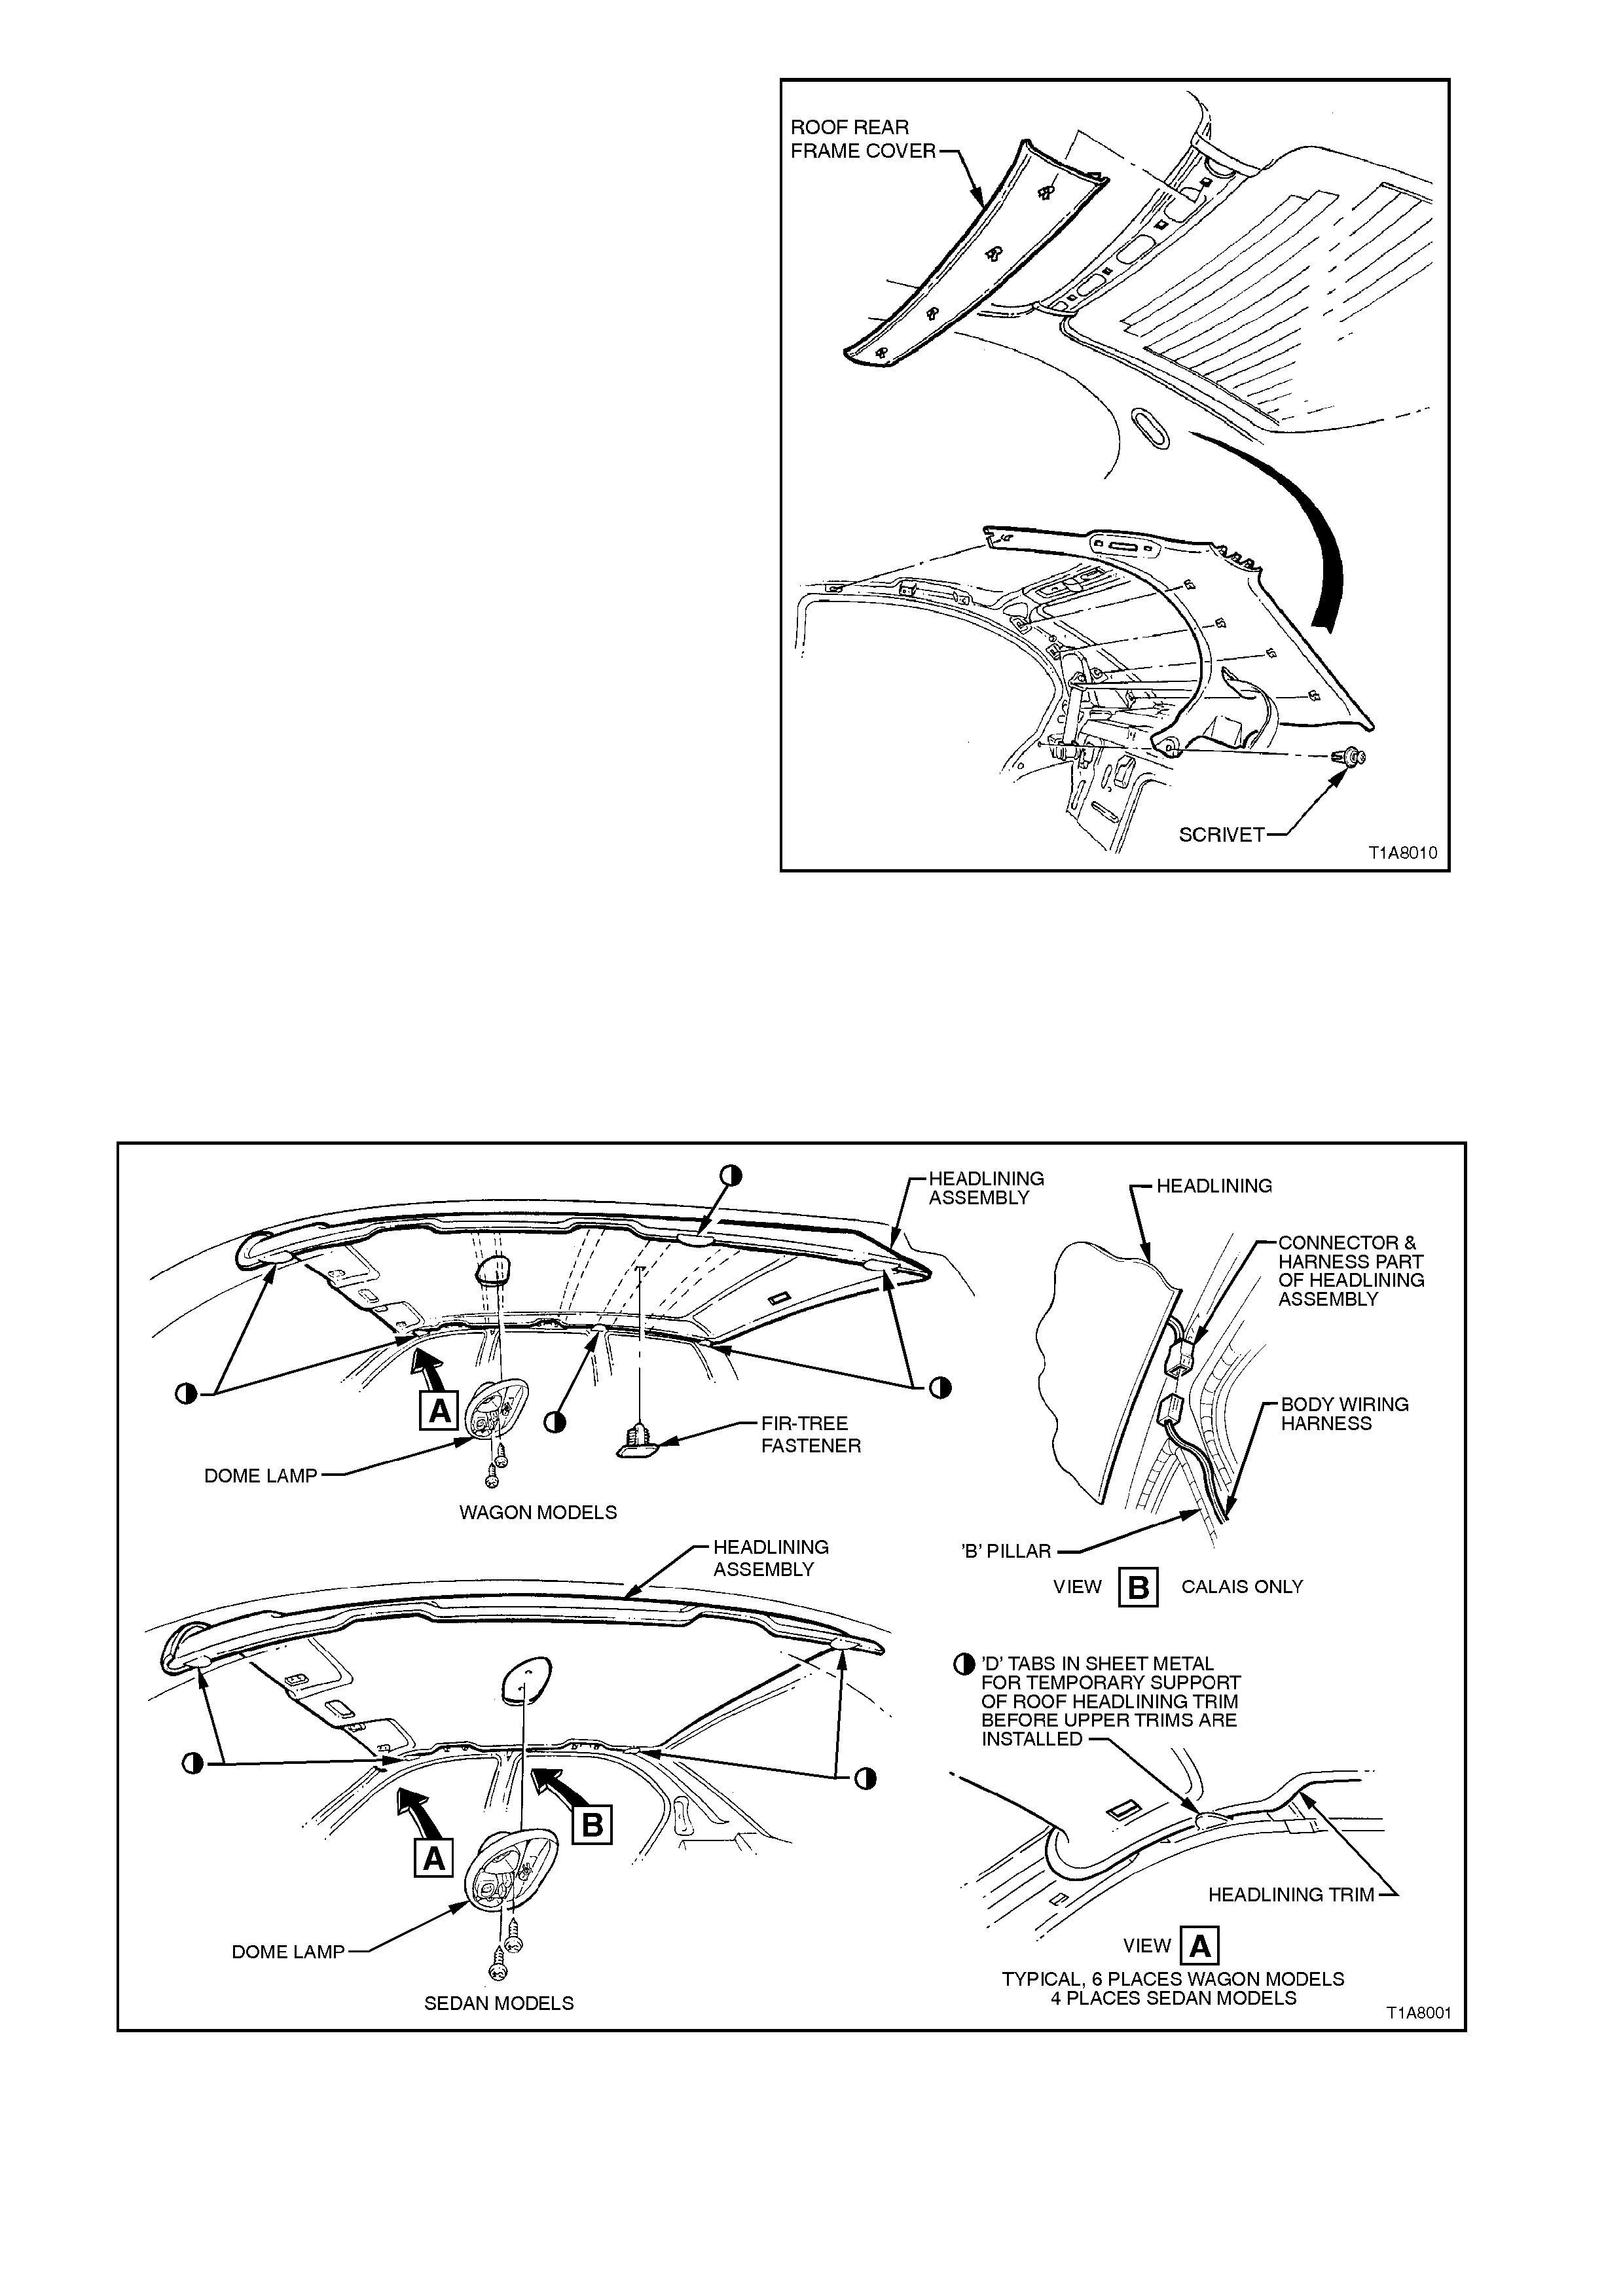
7. On sedan models, remove rear roof frame
cover (four retaining clips) and ‘C’ pillar trim
(five retaining clips, one scrivet).
8. Prise the lens from the roof lamp and r emove
the securing screws. Remove the roof lamp,
disconnect headlining harness connector.
Refer to Section 12B LIGHTING SYSTEM.
9. Open the passenger side front door and
driver’s side rear door.
10 Ease the headlining from its position in the
roof and turn the assembly so that it can be
passed through the passengers side front
door, rem oving the assem bly fr om the vehicle,
refer to Fig. 1A8-8.
Figure 1A8-7
11. On wagon models, remove rear quarter
window inner trim, refer to 2.3 MOULDING
ASSEMBLY, QUARTER WINDOW INNER
TRIM - STATION WAGON in this Section.
12. Remove fir-tree fasteners.
13. Open tailgate and ease headlining out.
Figure 1A8-8
REINSTALL
Reverse removal operations.
2.2 REAR PARCEL SHELF TRIM - SEDAN MODELS
REMOVE
1. Remove rear seat cushion and back
assemblies, refer to Section 1A7 SEAT &
SEAT BELT ASSEMBLIES.
2. Remove the centre seat belt lower attachment,
refer to Section 1A7 SEAT & SEAT BELT
ASSEMBLIES.
3. Open flap to child restraint fitting and unbolt
child restraint fitting.
4. From the rear compartment, carefully unscrew
the alterative child restraint fasteners securing
the trim to the rear parcel shelf.
5. Disassemble webbing guide (unclip from
parcel shelf).
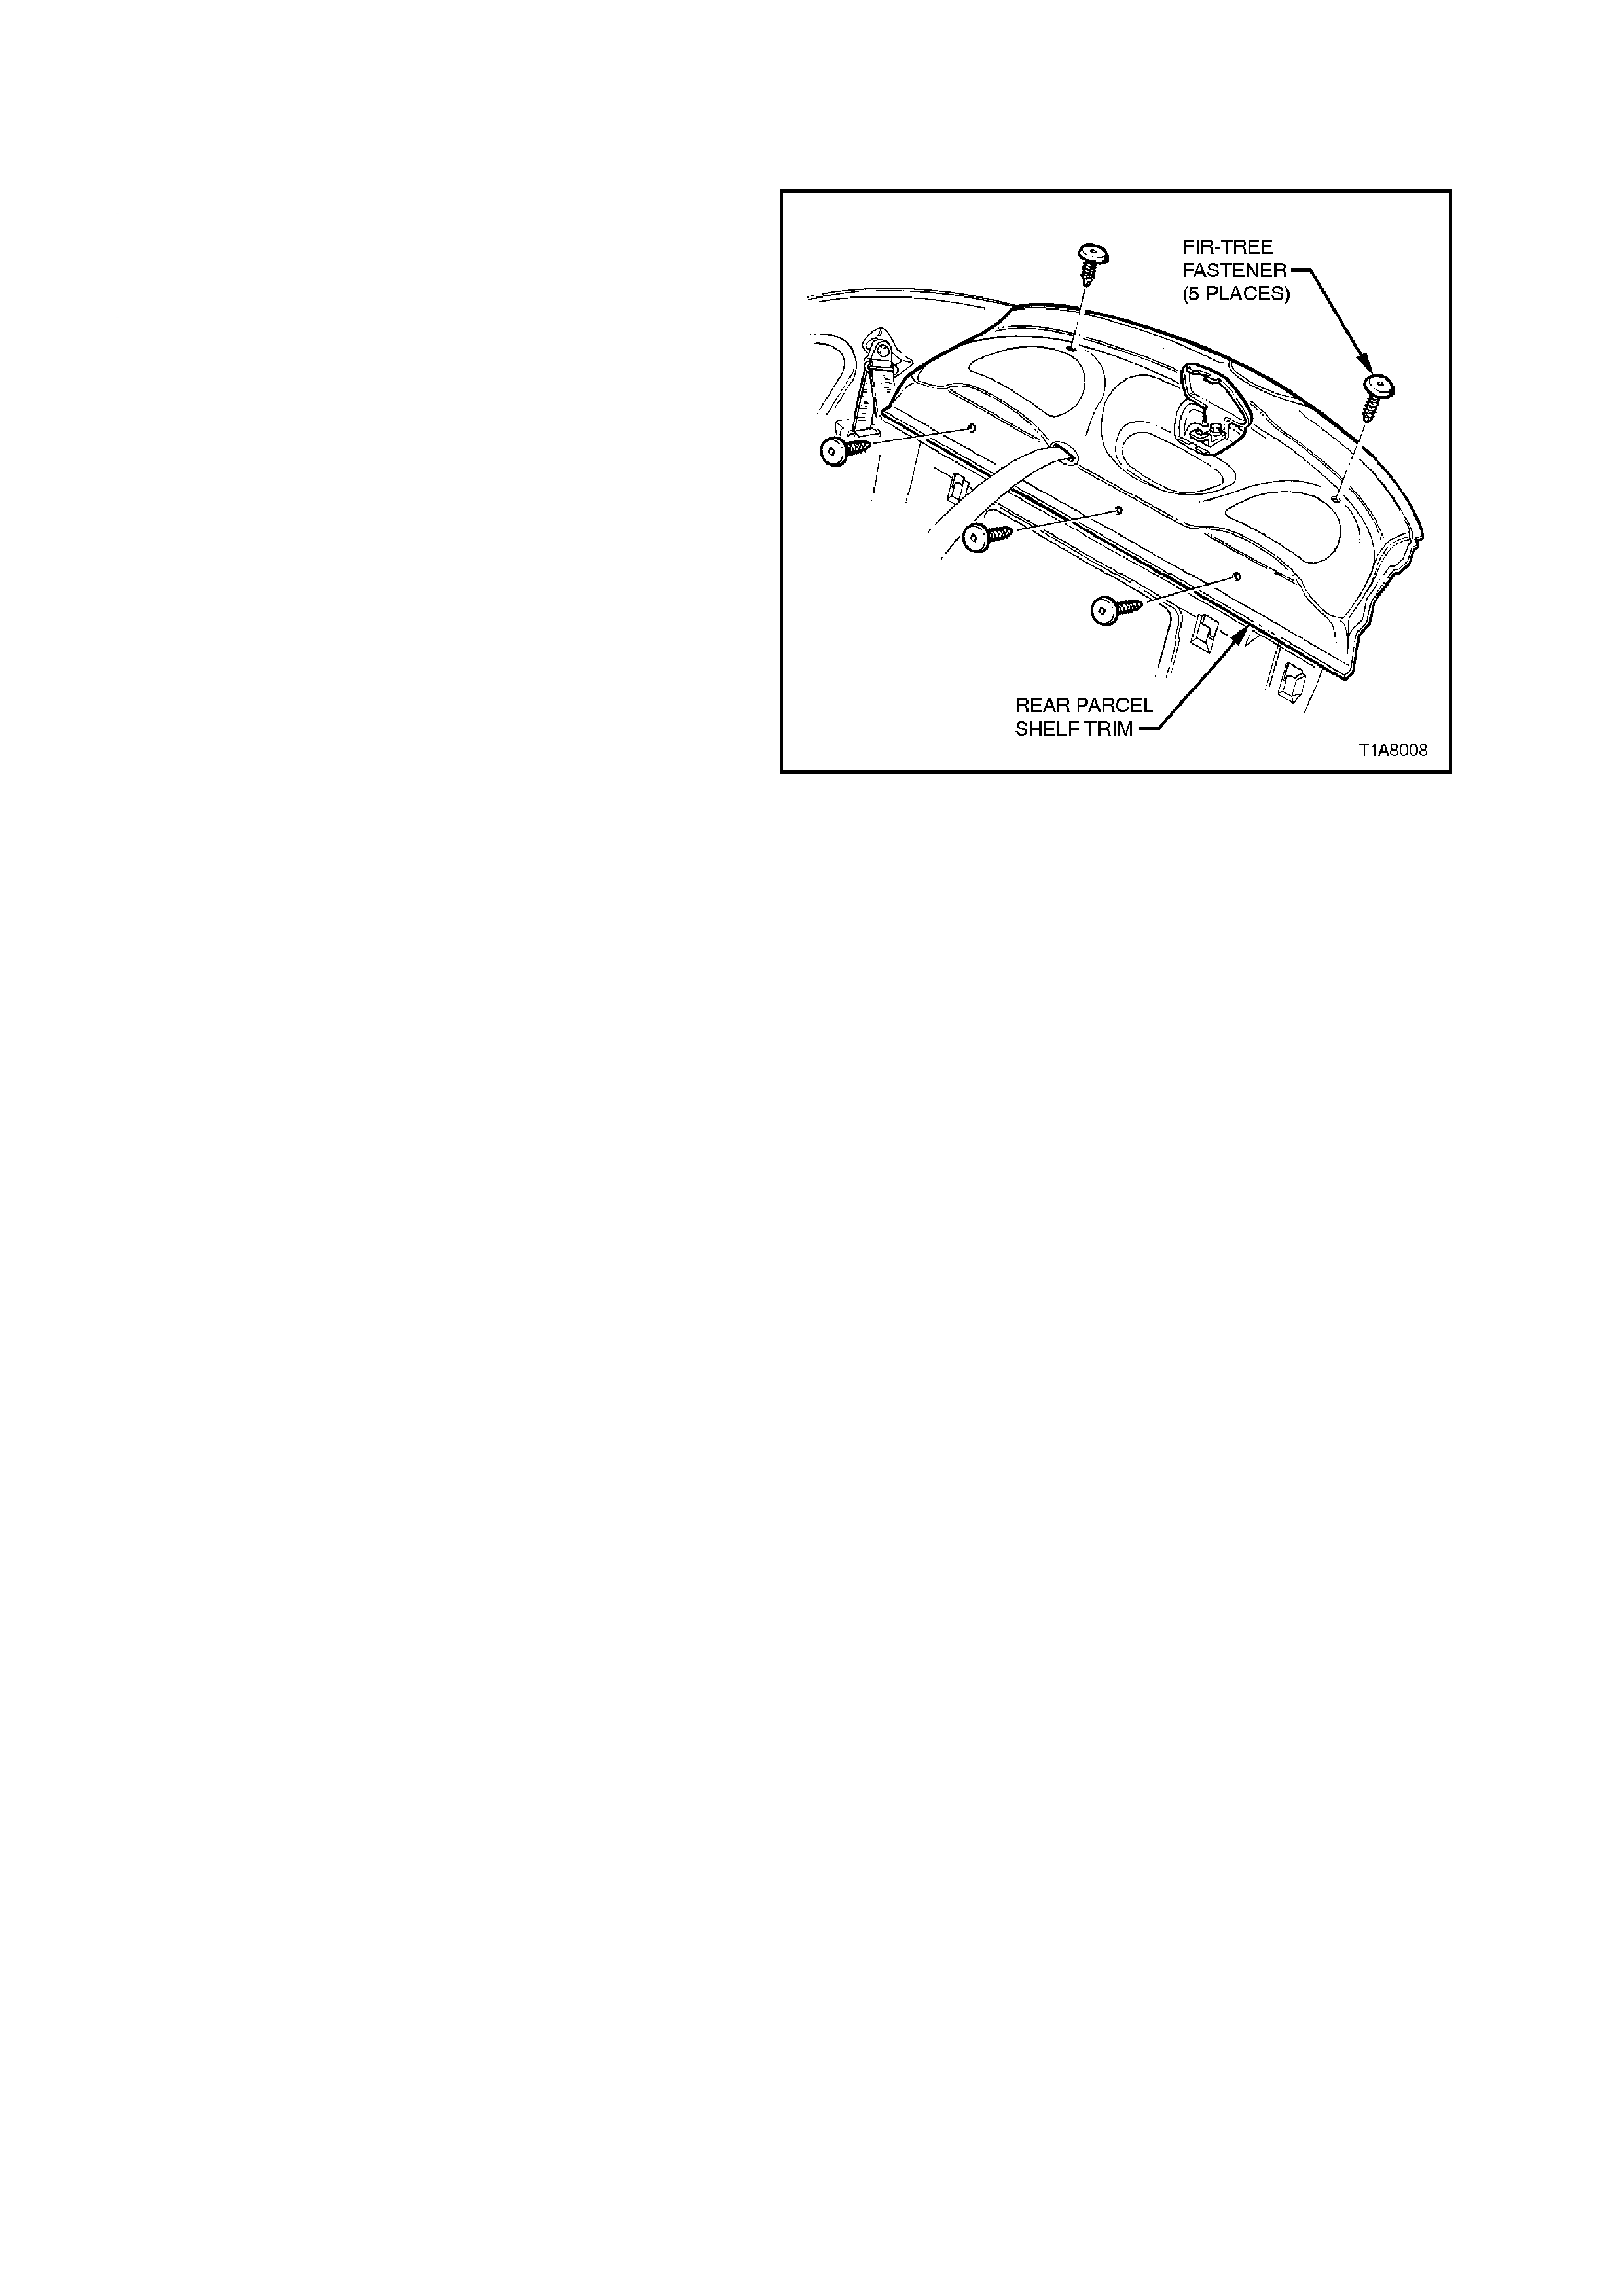
6. Pull flap in parcel shelf forward, removing
forward fir tree fasteners, f eed seatbelt tongue
and anchor through hole and remove parcel
shelf trim.
Figure 1A8-9
REINSTALL
Reverse rem oval operations, ens uring that the rear
edge of carpet is tucked under rear edge of trim
and high mounted stop lamp escutcheon.

2.3 MOULDING ASSEMBLY, QUARTER WINDOW INNER TRIM - STATION WAGON
REMOVE
1. Fold rear seats fully forward.
2. Remove rear frame roof cover (three clips).
3. Remove load compartment side trim (one
screw, four clips).
4. Remove rear seat bolsters, refer to
Section 1A7 SEAT & SEAT BELT
ASSEMBLIES.
5. Remove ‘C’ pillar trim extension assembly
(two screws).
6. If installed, remove rear assist grips. Remove
‘C’ pillar trim.
Figure 1A8-10
Figure 1A8-11
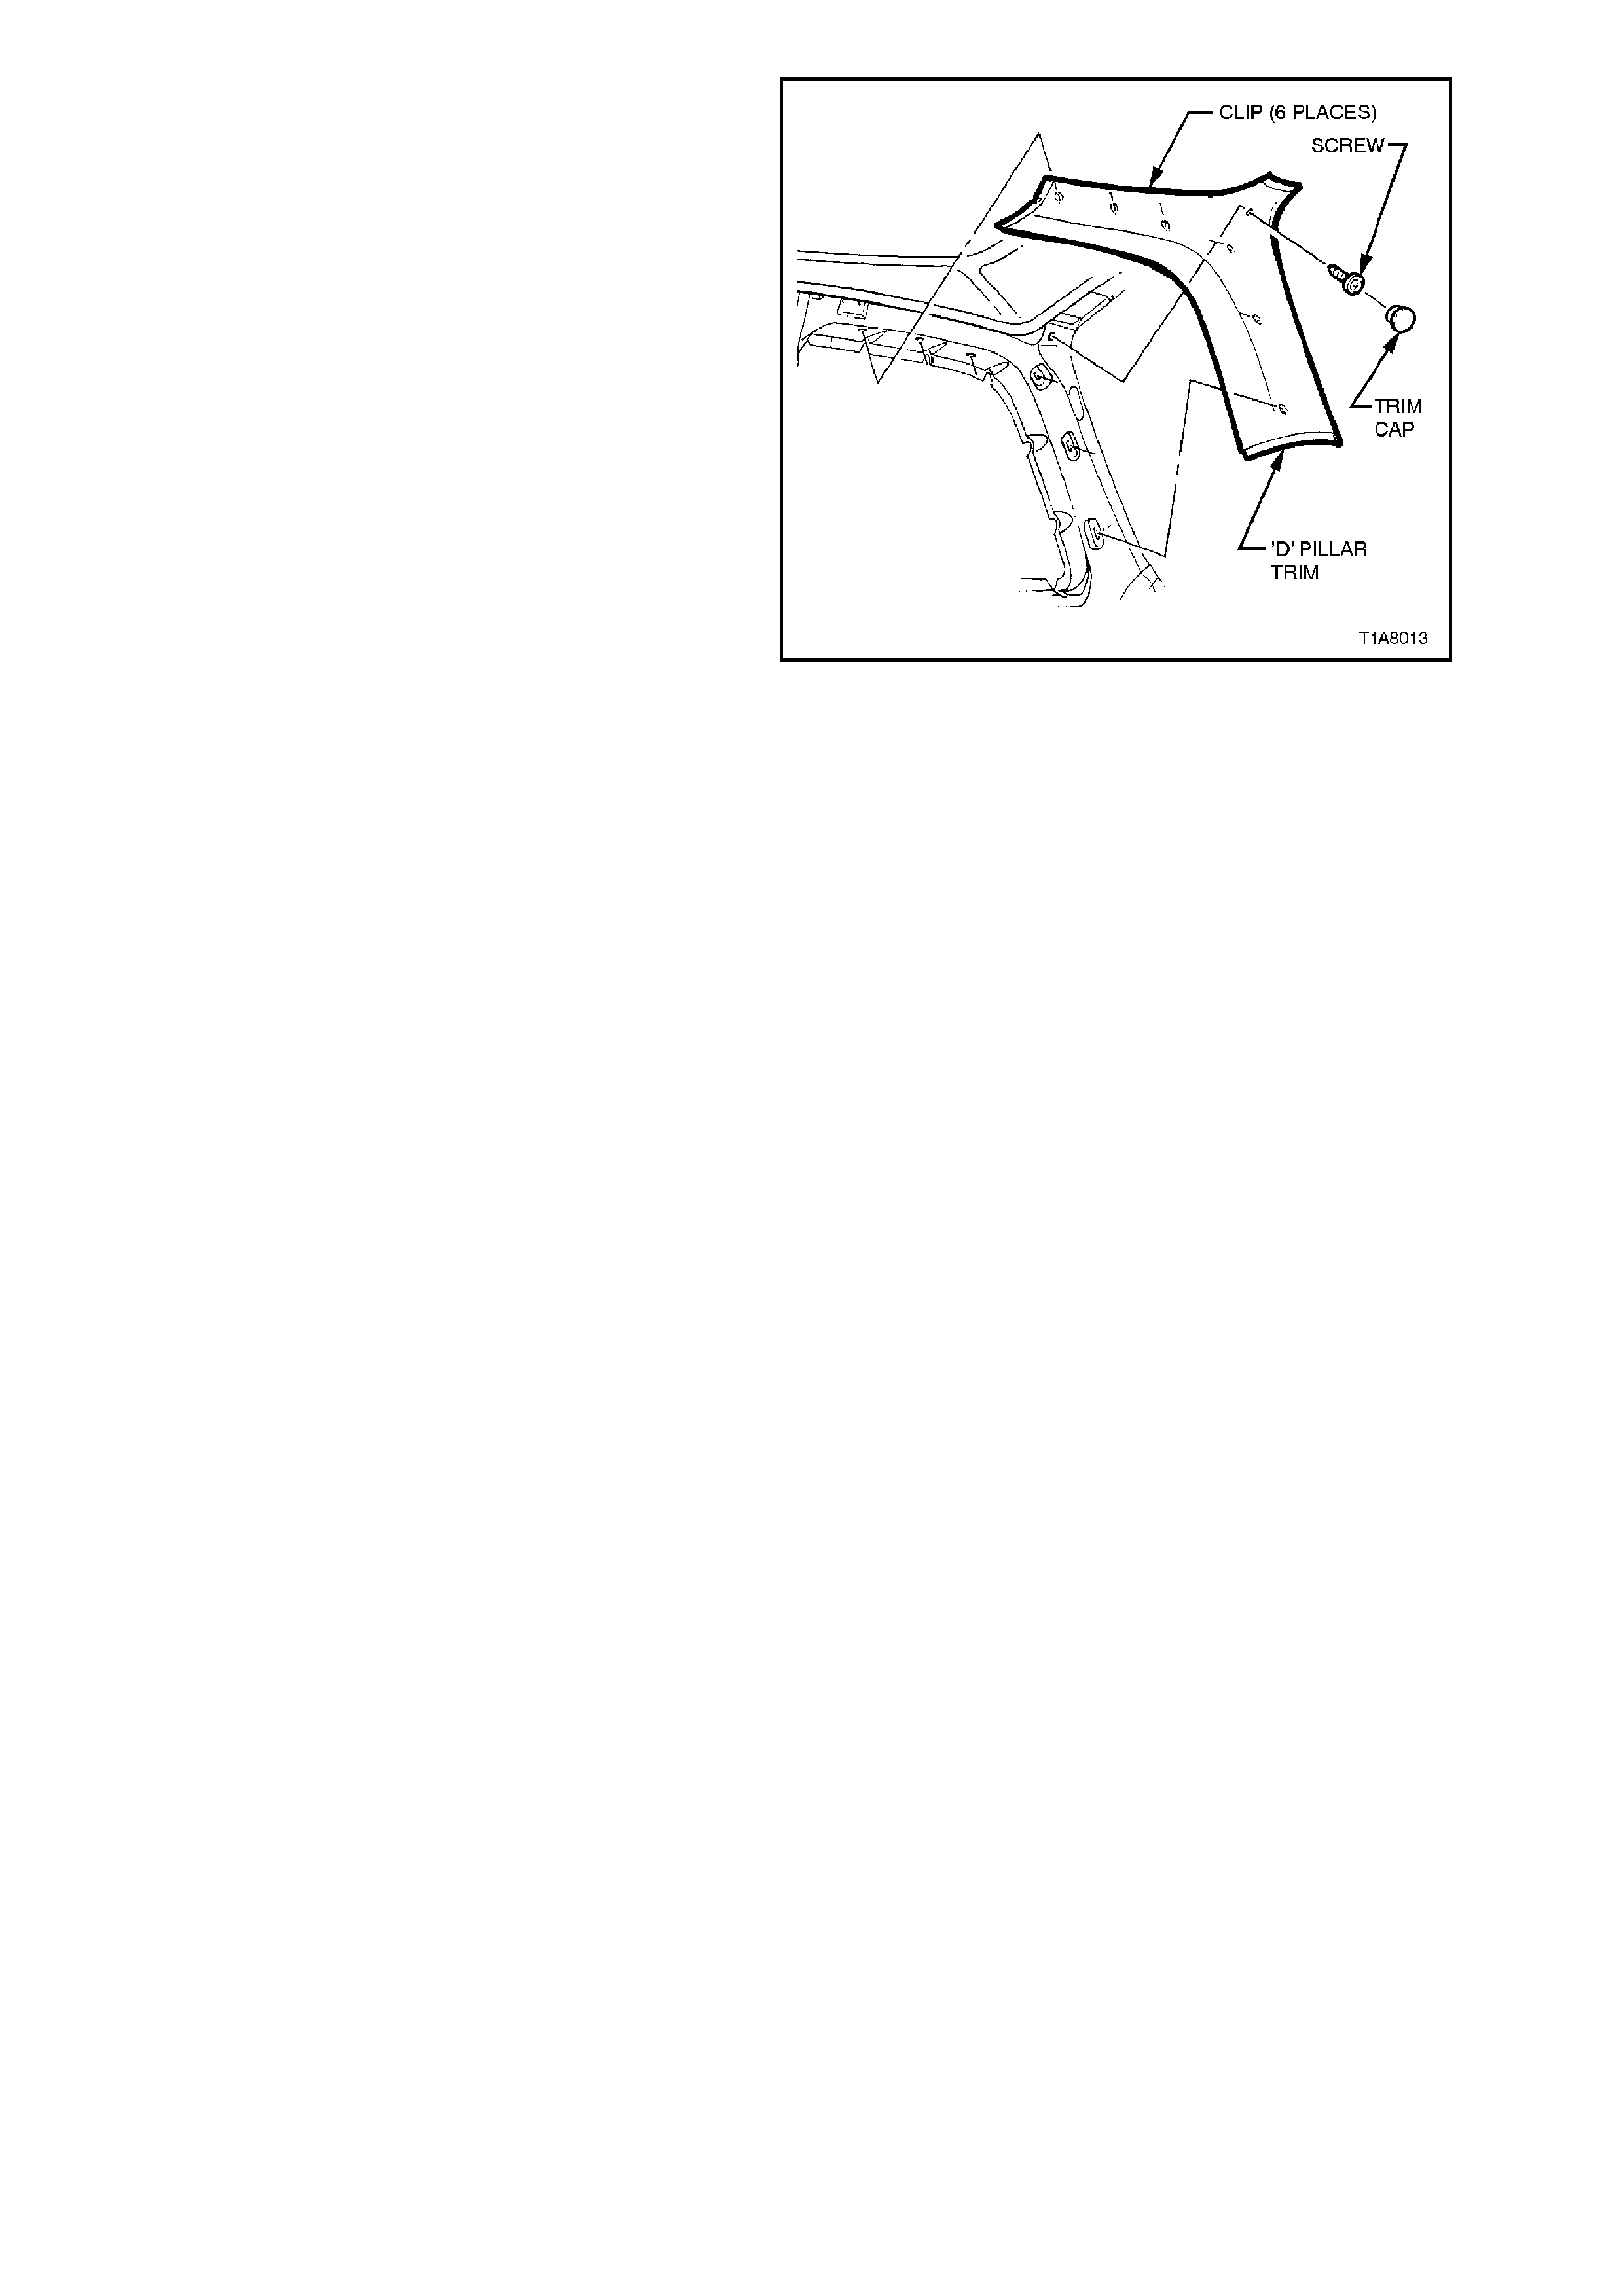
7. Remove ‘D’ pillar trim assembly (one screw,
six clips).
Figure 1A8-12
REINSTALL
Reverse removal operations.
2.4 REAR QUARTER TRIM PANEL - STATION WAGON
REMOVE
1. Remove carpet and spare wheel cover, refer
to Section 1A1 BODY.
2. Remove rear quarter window inner trim
moulding assembly, refer to
2.3 MOULDING ASSEMBLY, QUARTER
WINDOW INNER TRIM - STATION WAGON
in this Section.
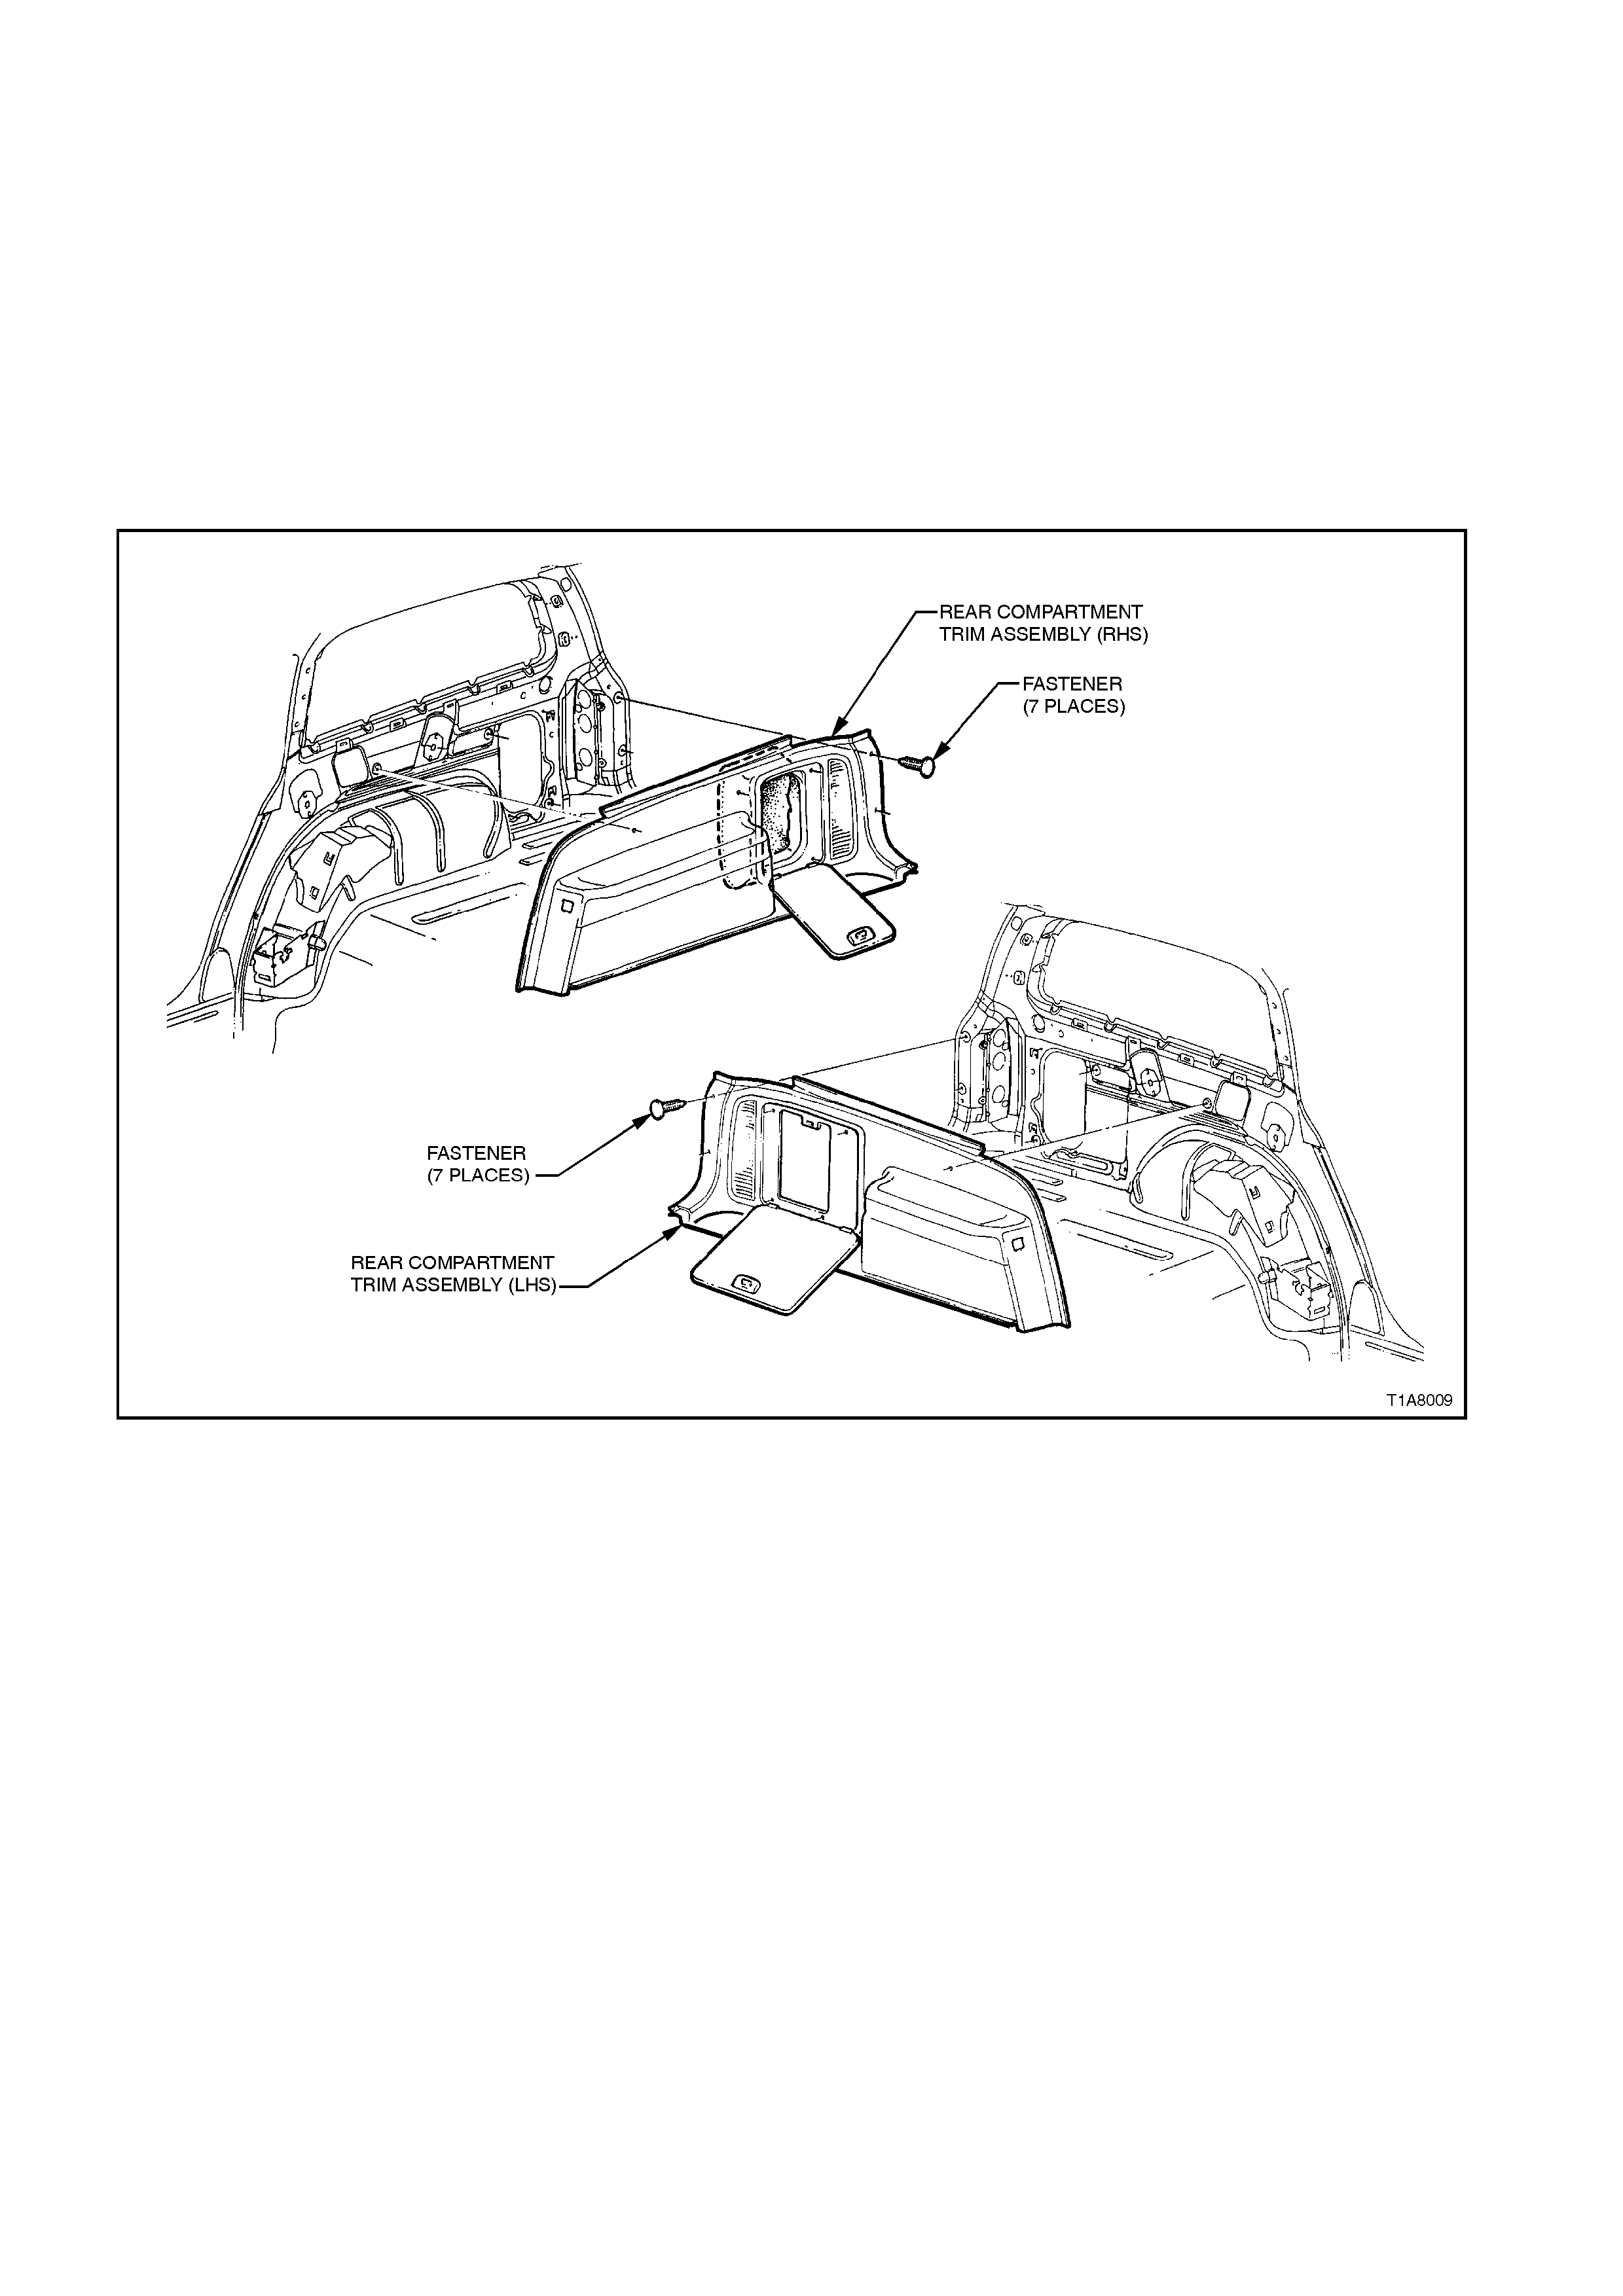
3 Remove rear compartment trim panel
fasteners (seven fasteners) and remove rear
compartment trim panel.
Figure 1A8-13
REINSTALL
Reverse removal operations, noting the following:
1. Ensure storage bag on right hand rear
compartment trim assembly is turned inside
out before refitting to prevent bag catching on
hole in body.
2.5 REAR COMPARTMENT CARGO BLIND - STATION WAGON
REMOVE
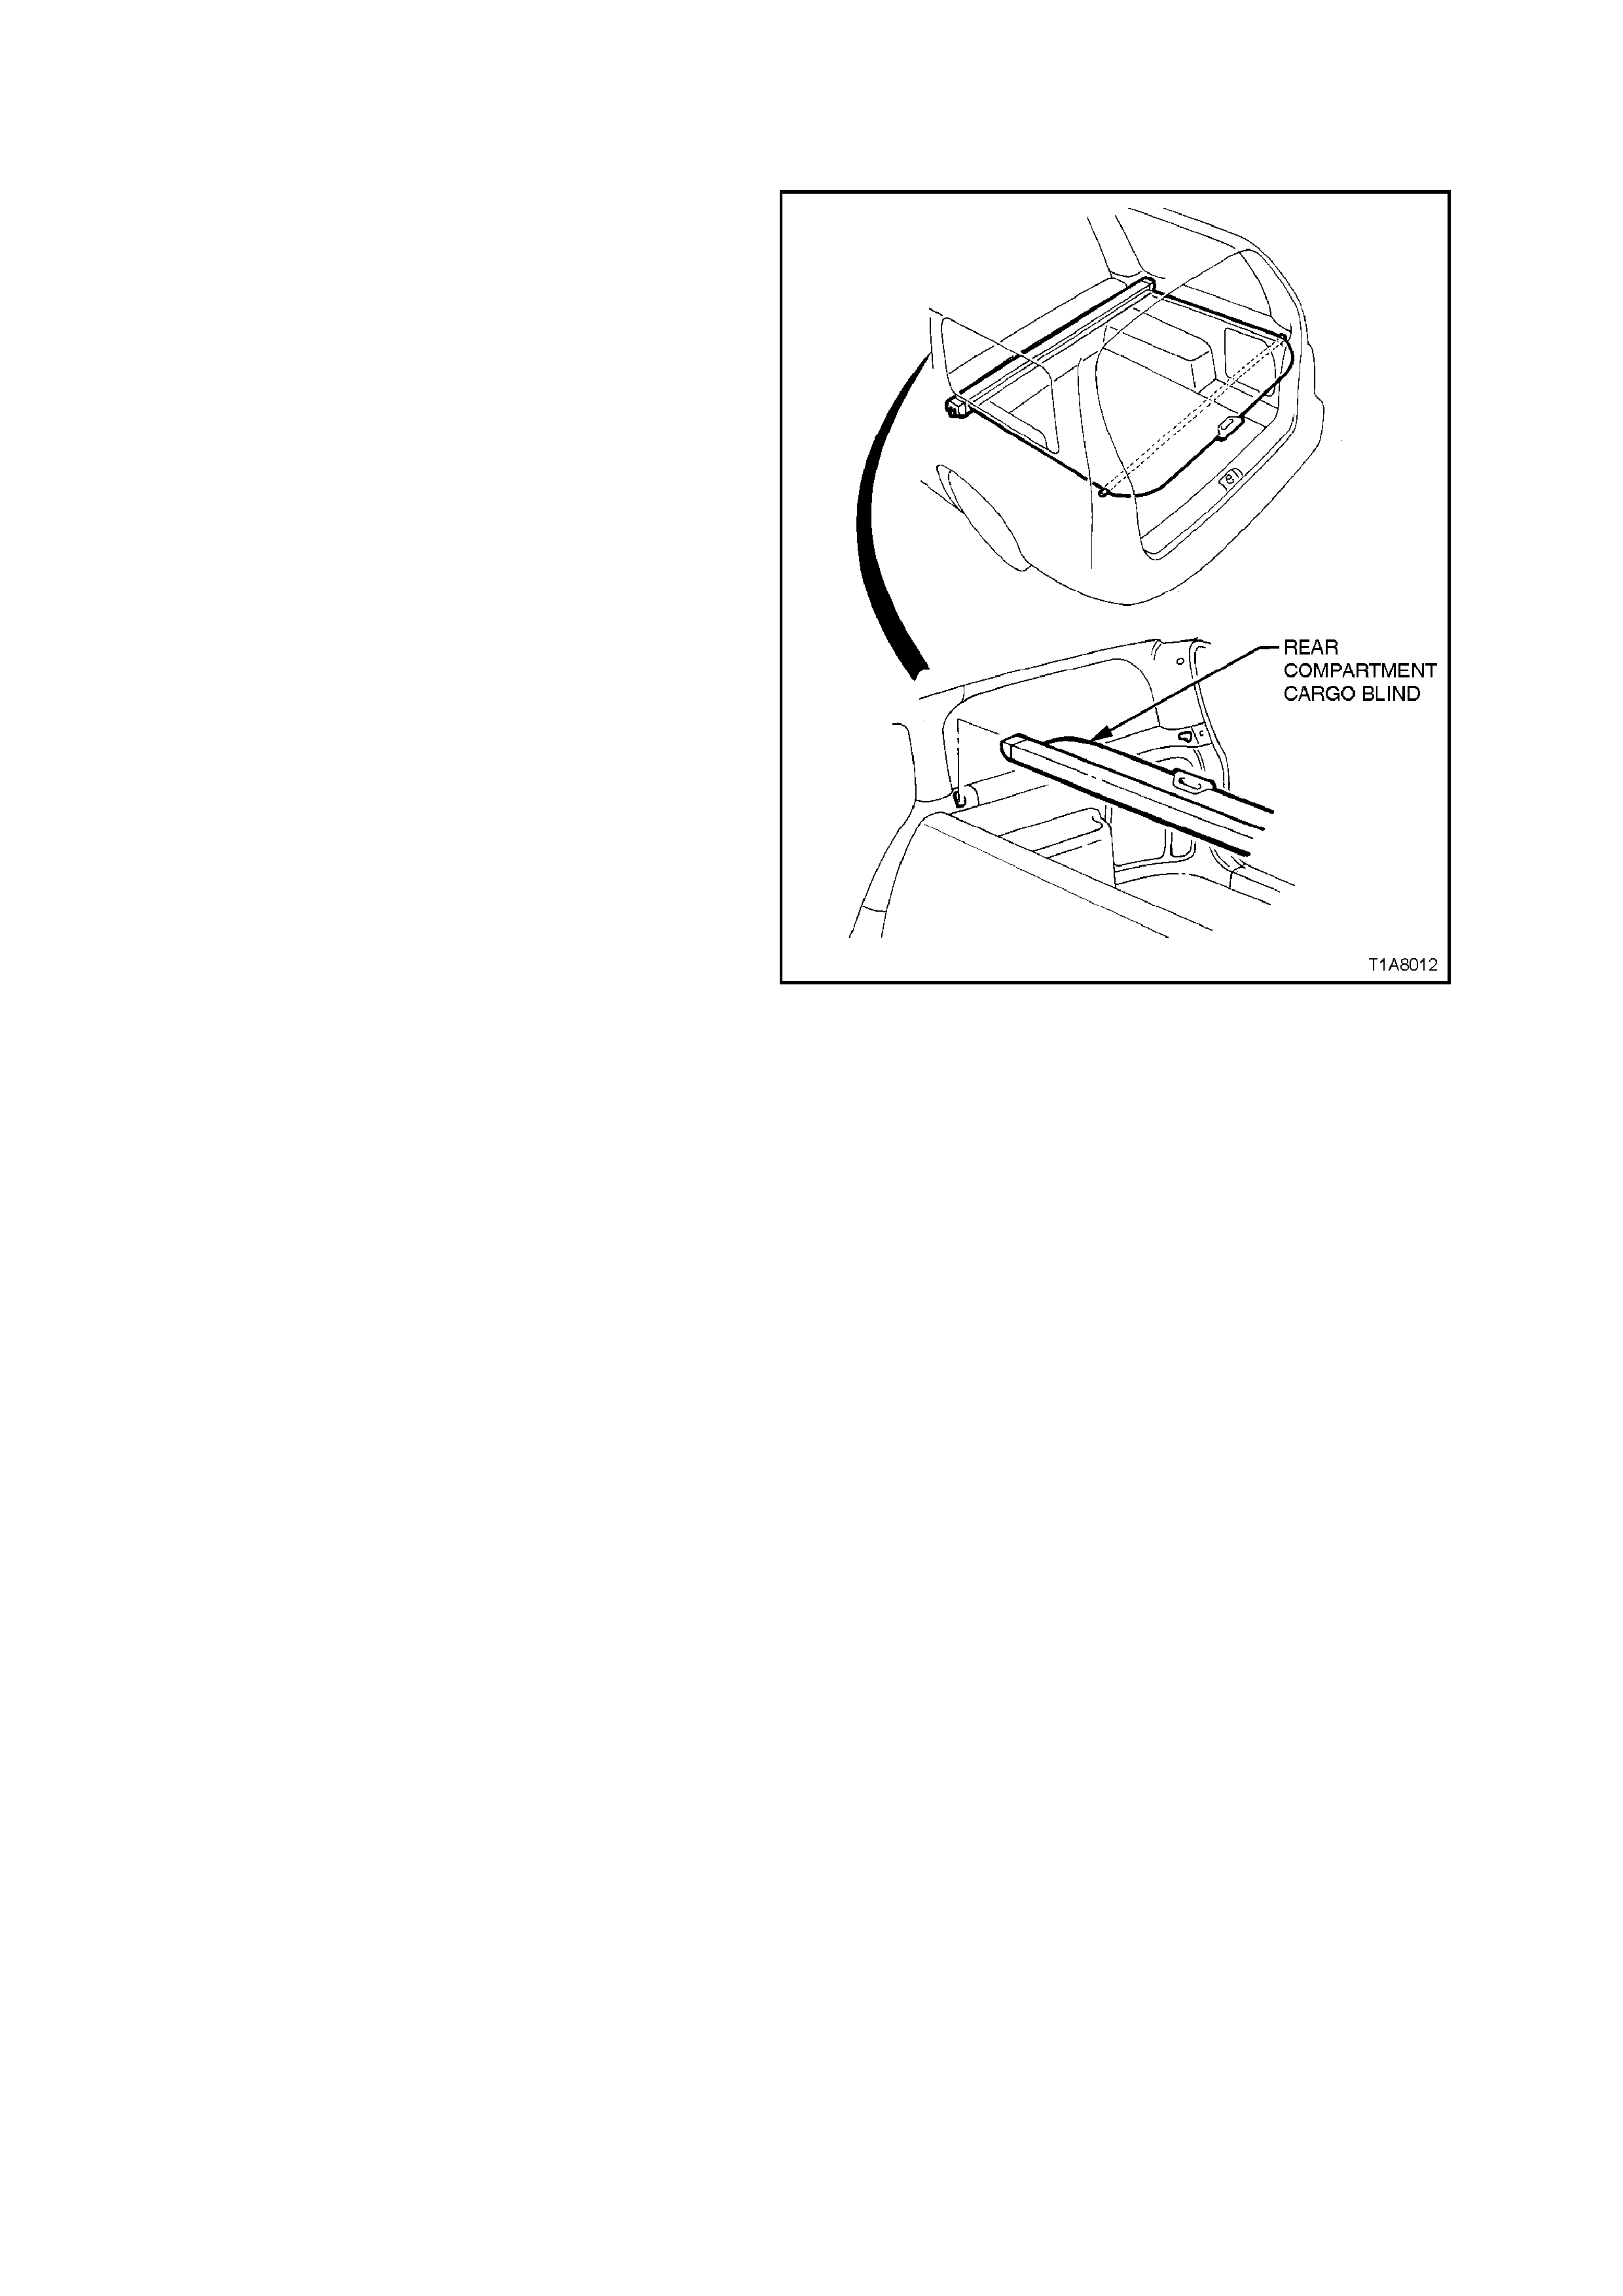
1. With cargo blind in the retracted position, unclip
cargo blind from ‘C’ pillar trim assembly by
lifting vertically and remove from vehicle.
Figure 1A8-14
REINSTALL
Reverse removal operations, ensuring cargo blind
is firmly in place.