
SECTION 1D - BUMPER BARS
IMPORTANT:
Before performing any Service Operation or other procedure described in this Section, refer to Section
00 CAUTIONS AND NOTES for correct workshop practices with regard to safety and/or property damage.
1. GENERAL I NFORMATI O N
1.1 VX SERIES II MODELS
Front and rear bumper f ac ia ass emblies f itted to VX Series II Models car ry over from VX Series I Models, noting the
following:
• The styling of the front grille as fitted to Executive and Acclaim has changed from the vertical bar design to a
cross hatch design.
For further information relating to bumper bars as fitted to VX Series II Models, refer to
Section 1D BUMPER BARS in the VX Series I Service Information.
Techline

1.2 VU SERIES II MODELS
Front bumper facia assemblies fitted to VU Series II Models carry over from VX Series I Models. The rear
bumperette assemblies fitted to VU Series II Models carry over from VU Series I Models, noting the following:
• The styling of the front grille as fitted to Utility has changed from the vertical bar design on to a cross hatch
design.
For information relating to front bumper bars as fitted to VU Series II Models, refer to Section 1D BUMPER BARS
in the VX Series I Service Information.
For further information relating to rear bumper bars as fitted to VU Series II Models, refer to
Section 1D BUMPER BARS in the VU Series I Service Information.

1.3 WH SERIES II MODELS
Front and rear bumper facia assemblies fitted to WH Series II Models carry over from WH Series I Models, noting
the following:
• A chrome rear licence plate surround has been added to the Caprice rear bumper bar facia.
For further information relating to bumper bars as fitted to WH Series II Models not covered in this Section, refer to
Section 1D BUMPER BARS in the WH Series I Service Information.
2. SERVICE OPERATIONS
2.1 REAR LICENCE PLATE SURROUND - CAPRICE
REMOVE
1. Remove the rear licence plate lamps, refer to
2.14 LICENCE PLATE LAMP/BULB in Section
12B LIGHTING SYSTEM in the WH Series I
Service Information.
2. Remove the rear bumper bar assembly, refer to
2.4 REAR BUMPER BAR ASSEMBLY in Section
1D BUMPER BARS in the WH Series I Service
Information.
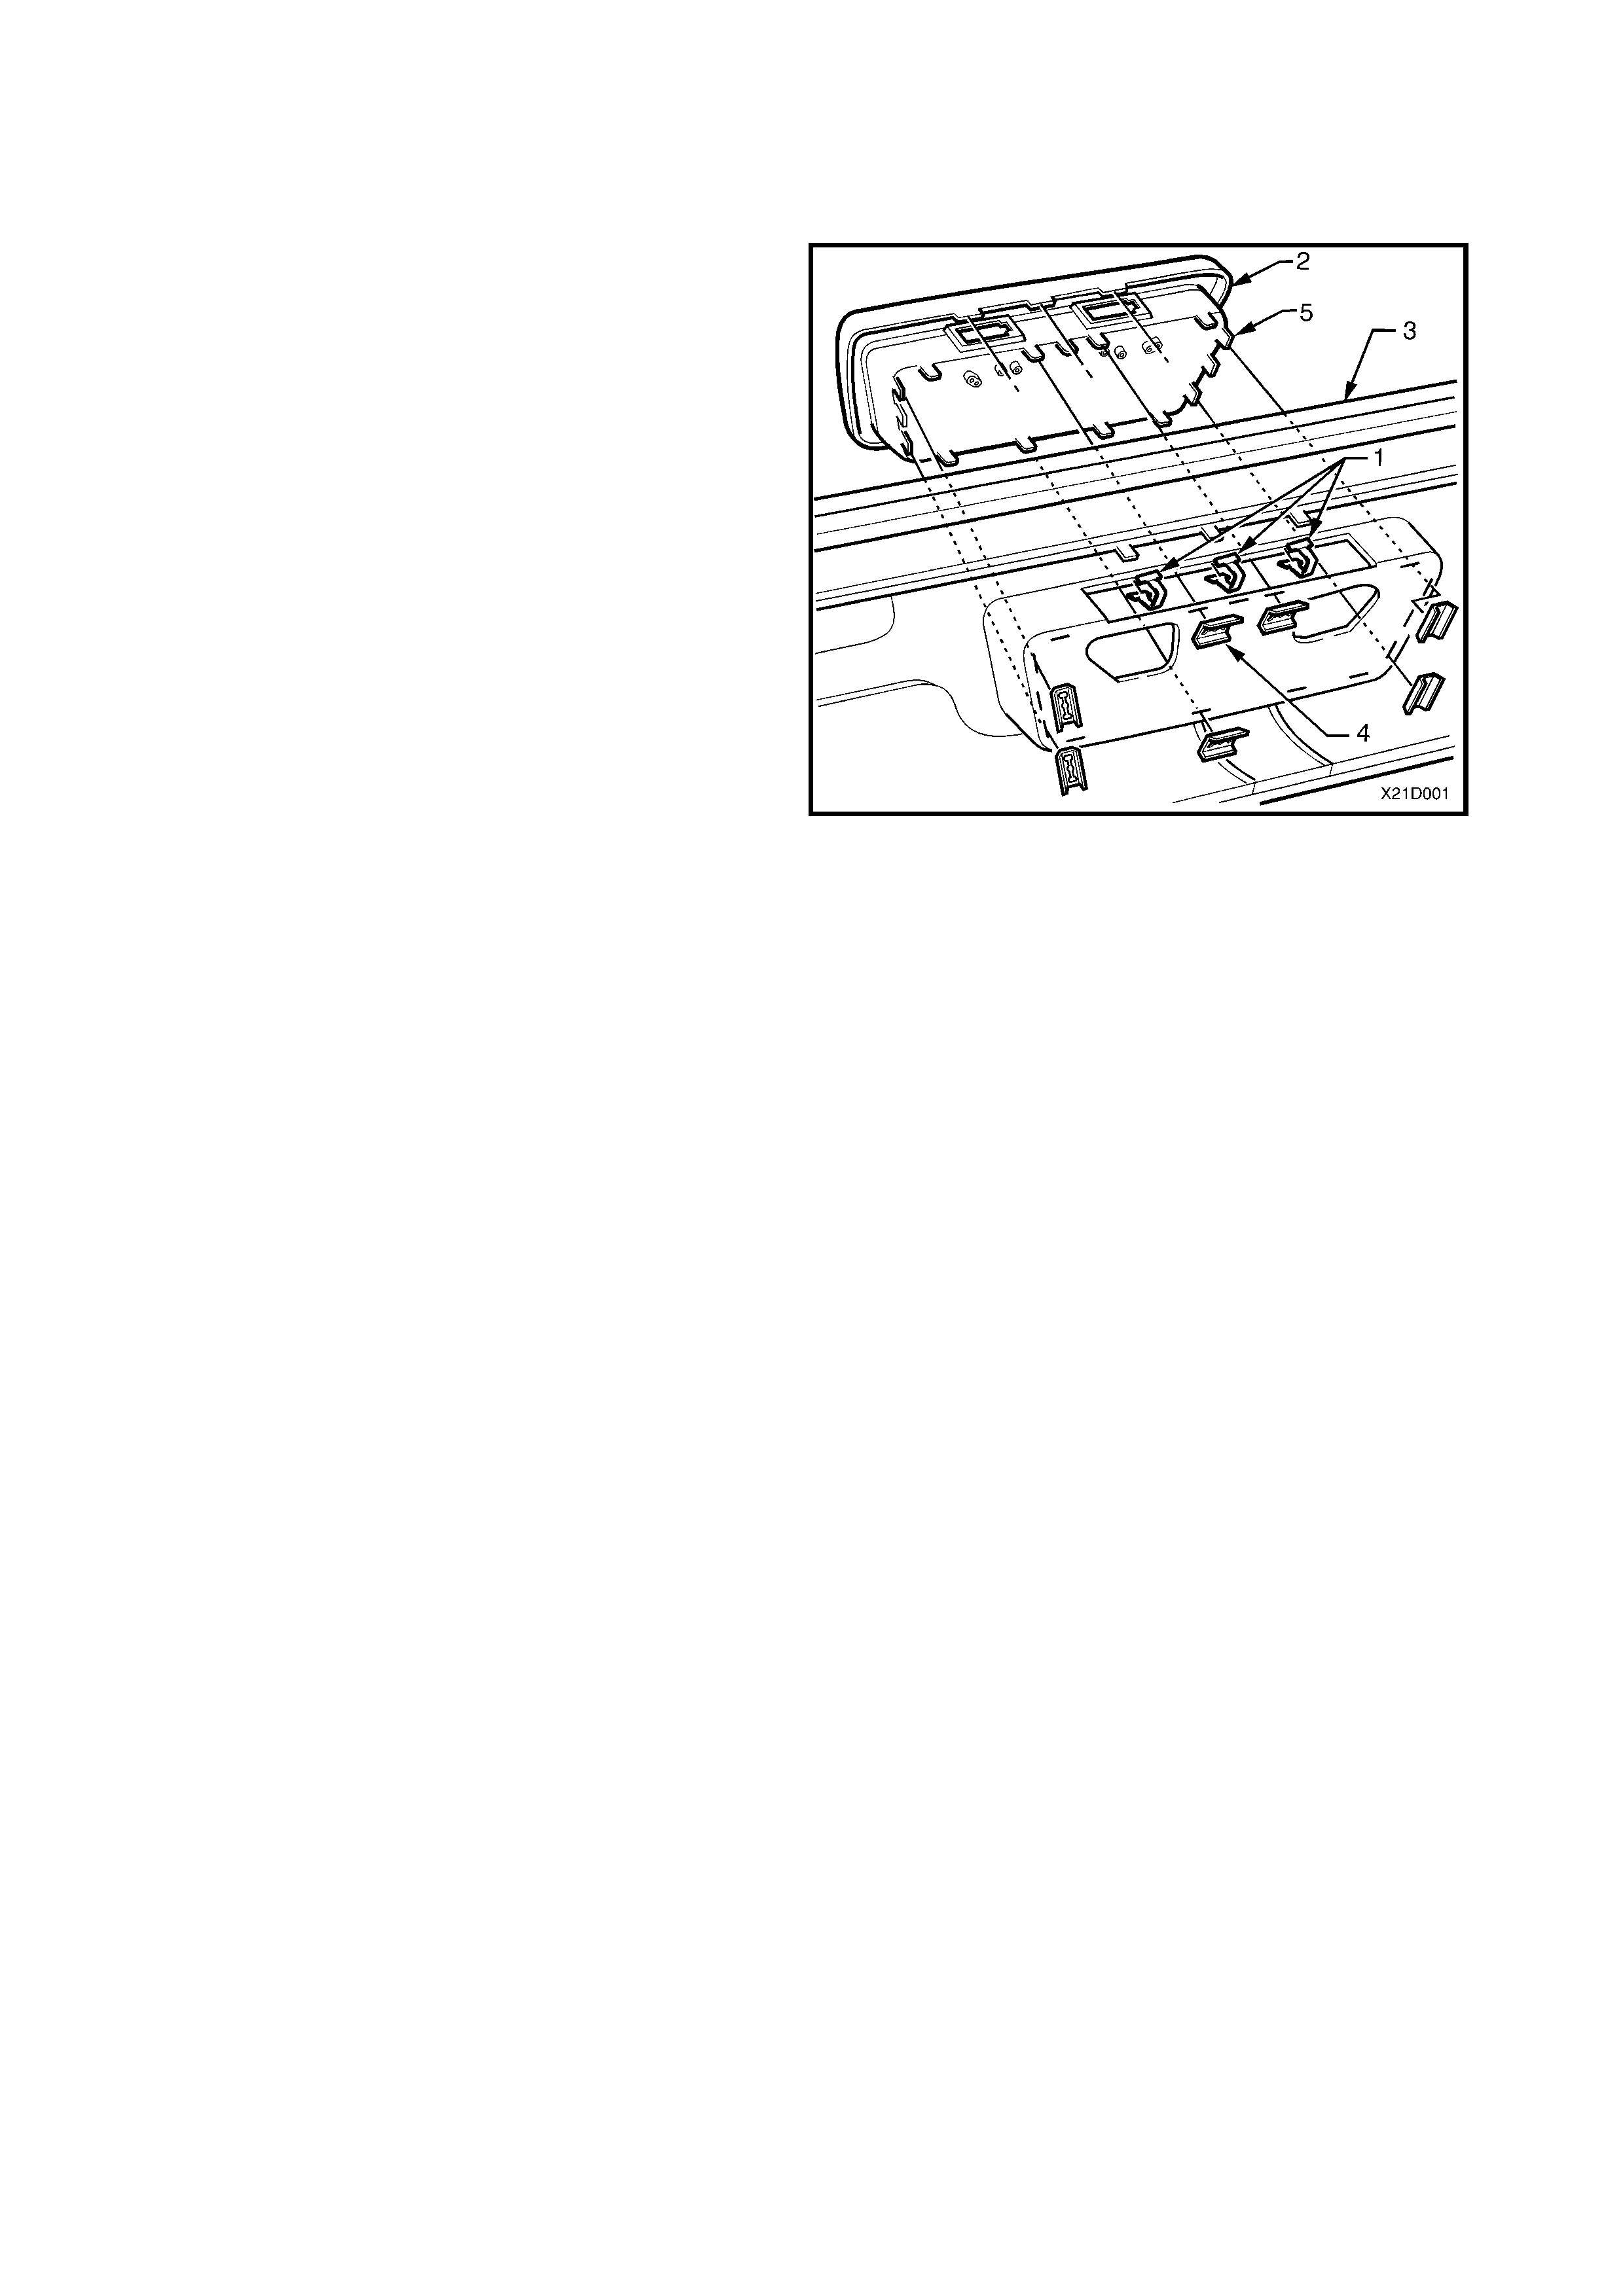
3. Using a thin flat tip screwdriver, carefully pry off the
three r etaining clips ( 1) retaining the upper edge of
the licence plate surround (2) to the rear bumper
bar facia (3).
4. Using a thin flat tip screwdriver, carefully pry the
seven razor type clips (4) off the retaining tabs (5)
located around the perimeter of the number plate
surround.
NOTE 1: There are numerous extra retaining tabs on
the rear licence plate surround. If one of the retaining
tabs is damaged during the removal procedure, the
nearest spare tab should be used on installation.
NOTE 2: The razor type clips used to secure the
licence plate surr ound to the rear bum per bar fac ia are
easily damaged during this procedure. Ensure
sufficient spare parts are available prior to attempting
to remove the rear licence plate surround.
Figure 1D-1
REINSTALL
The reinstallation procedure for the rear licence plate
surround is the reverse of the removal procedure.